
OBD-II Code B1290: Park Assist Sensor #3 Circuit Malfunction
What B1290 means, why it triggers, and how to fix it
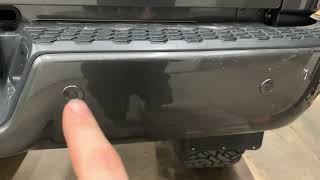
- Code B1290 on Ram and Dodge vehicles specifically identifies a signal failure in Park Assist Sensor #3, located on the inner passenger side of the front bumper.
- Thoroughly clean the face of Sensor #3 before buying parts, as dirt, ice, or heavy water spray causes over 50% of B1290-25 waveform failures.
- Swap Sensor #3 with Sensor #4 to diagnose the root cause; if the code changes to B1291, the sensor is dead, but if B1290 returns, the wiring is damaged.
- Owners of 2019-2020 Ram trucks should check TSB 08-082-20, as a known software glitch requires a dealer module update rather than physical repairs.
What Does B1290 Mean?
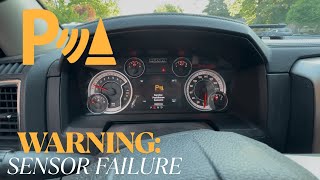
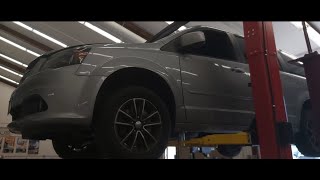
B1290 is a manufacturer-specific code. On Ram, Chrysler, and Dodge vehicles, it indicates a fault with 'Park Assist Sensor #3'. 🎬 Watch: How to locate the specific sensors on your Ram truck. The control module detects a distorted or illogical signal from this sensor and disables the park assist system as a safety precaution.
Technical definition: On FCA/Stellantis vehicles, B1290 is defined as 'PTS Sensor 3 - Signal Shape/Waveform Failure'. The Park Assist Module (PAM) receives a nonsensical signal from the third sensor, rather than a complete electrical open or short. Advanced scanners display suffixes to pinpoint the fault: B1290-25 (Waveform Failure), B1290-11 (Short to Ground), B1290-12 (Short to Battery), or B1290-13 (Open Circuit).
Can I Drive With B1290?
Yes. This code only disables the parking assistance system. Main driving functions—engine, brakes, and steering—remain unaffected. On vehicles with reverse automatic braking, a faulty sensor rarely triggers unexpected low-speed braking, as the system usually disables itself first.
Common Causes
- Obstruction on Sensor Face (Very Common) — Dirt, mud, snow, ice, or heavy water spray blocks the sensor face. This interferes with ultrasonic waves, creating a distorted signal. A Ram TSB confirms this is the primary cause for a 'Waveform Failure'.
- Failed Park Assist Sensor (Common) — The sensor fails internally from age, moisture intrusion, or physical impact. Bumper-mounted sensors endure harsh conditions, making internal failure common.
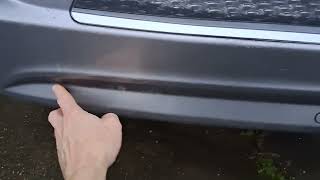
- Wiring or Connector Issue (Less Common) — The wiring harness or connector for Sensor #3 is damaged, corroded, or disconnected. Wires chafe against the bumper, and connector pins corrode from road salt, degrading the signal. 🎬 See this guide on troubleshooting and fixing common parking sensor issues.
- Park Assist Module (PAM) Software Glitch (Less Common) — On 2019-2020 Ram trucks, a PAM software glitch falsely reports sensor failures. TSB 08-082-20 requires a dealer to reprogram the module to fix this.
- Improper Installation or Paint Thickness (Rare) — A poorly seated sensor angles incorrectly or grounds against the bumper. Additionally, applying metallic paint too thickly on a replacement sensor dampens ultrasonic waves, triggering the code.
- Failed Park Assist Module (PAM) (Rare) — The main Park Assist Module fails completely. Consider this only after thoroughly testing all sensors and wiring.
Symptoms
- 'Service Park Assist System' Message — A warning message appears on the instrument cluster or infotainment screen.
- Park Assist System Disabled (No Beeping) — The system automatically shuts off, disabling audible warning chimes when approaching obstacles. The activation button light indicates a disabled status.
- Continuous Beep in Reverse — The system emits a solid, continuous tone immediately upon engaging reverse, indicating a hard fault or blocked sensor.
- Unexpected Braking (Rare) — The system falsely detects an object and applies the brakes unexpectedly while reversing.
Diagnostic Flowchart
Tap your situation to follow the diagnostic path that matches what you're seeing on this code.
Common Fixes & Costs
- Clean the Park Assist Sensor — Parts: $0, Labor: $0, ~0.1 hr book time (DIY)
- Replace Failed Park Assist Sensor
— Parts: $20-$80, Labor: $0-$150, ~0.8 hr book time
(DIY)
Ram 1500 (2013-2018), Ram 2500/3500 (2014-2018), Dodge Charger (2011-2014): OEM Mopar #1EW63TZZAA (Alt: Dorman #684-007, Bosch #0263043552)
Ram 1500 (2019+): OEM Mopar #6YD83TRMAB, Mopar #5YV69TZZAA (Alt: Autopart Premium #APPAS101) - Repair Wiring Harness or Connector — Parts: $5-$30, Labor: $150-$300, ~2.0 hr book time (Intermediate)
- Reprogram Park Assist Module (TSB) — Parts: $0, Labor: $150-$200, ~1.0 hr book time (Professional)
DIY vs Professional
- Clean the Park Assist Sensor — Beginner: Yes
Tools: Soap, water, soft cloth. - Replace Failed Park Assist Sensor — Beginner: Yes
Tools: Small flat-blade screwdriver or trim removal tool. - Repair Wiring Harness or Connector — Beginner: No
Tools: Digital Multimeter, wire cutters/strippers, soldering iron, heat shrink tubing. - Reprogram Park Assist Module (TSB) — Beginner: No
Tools: Proprietary dealership scan tool (wiTECH).
Used vs. New Parts: Buying Guide
When a used part is worth it: Buy new. Aftermarket sensors cost under $40, making the labor risk of a used part unjustifiable unless you need an expensive, factory color-matched OEM sensor.
Donor-vehicle mileage cap: roughly under 50000 miles for the part to have meaningful remaining life.
Donor quality checklist:
- Verify the part number matches exactly, including color-code suffixes.
- Inspect for physical damage, cracks, or moisture intrusion.
- Avoid parts from rust-belt regions due to corrosion exposure.
Decision logic:
- If The cost of a new aftermarket sensor is under $50 → buy new. The small savings aren't worth the risk of premature failure.
- If The part is an expensive, color-matched OEM sensor → a used part in the correct color saves the cost and hassle of painting.
Warranty tradeoff: Used parts have a 30-90 day warranty. New aftermarket parts offer 1-year to lifetime warranties. New OEM parts carry a 1-2 year warranty.
Worst-case if a used part fails: $100-$250 if a used sensor fails, requiring repeat labor and another replacement part.
What Happens If You Wait — Timeline
- Immediate: The system disables itself, and the 'Service Park Assist' message appears. Audible warnings cease. (MPG impact: 0%% · Added cost: $0)
- 0-3 months: Increased risk of a low-speed parking incident due to reliance on manual parking skills. (MPG impact: 0%% · Added cost: $150-$600 (Cost of repairing a minor bumper scuff).)
- 3-12 months: Higher probability of a parking collision. A minor impact damages the bumper cover or paint. (MPG impact: 0%% · Added cost: $300-$800 (Cost for bumper repair or repaint).)
- 12+ months: A worst-case parking error damages the bumper cover, underlying brackets, foam absorber, and adjacent working sensors. (MPG impact: 0%% · Added cost: $700-$1500+ (Full bumper replacement and painting).)
Cost of Not Fixing It
- Immediate: Loss of parking assistance, increasing the risk of low-speed collisions. (Added cost: Negligible, unless a collision occurs.)
- 1-6 months: Continued inconvenience and a persistent, distracting dashboard warning message. (Added cost: $0)
- 6+ months: Increased risk of bumper damage from parking incidents. (Added cost: Variable ($300-$1500+ for potential bumper repair))
Diagnosis Steps
- Read Code and Identify Sensor #3
Use a Body Code capable scanner to confirm B1290 and note any suffix (-25, -11). On FCA front bumpers, sensors number 1 to 6 from driver to passenger side. Sensor #3 is the inner passenger-side sensor.
Tools: OBD-II Scanner (Body Code Capable) (Beginner) - Visually Inspect and Clean
Inspect Sensor #3 for physical damage or obstructions. Clean the surface with soap, water, and a soft cloth. Clear the code and test the system.
Tools: Soft cloth, soap, water (Beginner) - Listen for Sensor Activity ('Click Test')
Turn the ignition on and engage reverse. Place your ear close to Sensor #3. A healthy sensor emits a faint, rapid clicking and vibrates slightly. No sound indicates a dead sensor or lack of power.
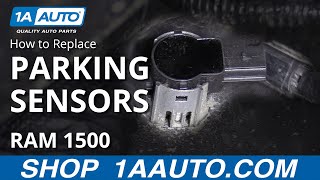
Tools: None (Beginner) - Perform a Sensor Swap
Disconnect and swap Sensor #3 with Sensor #4. Clear codes and operate the system. If the code changes to B1291, the original Sensor #3 is faulty. If B1290 returns, the wiring or module is the issue.
Tools: OBD-II Scanner, trim removal tools (optional) (Intermediate) - Inspect Wiring and Connector
Unplug the connector for Sensor #3. Inspect for green/white corrosion, bent pins, or pushed-out terminals. Trace the harness back, looking for chafed or broken wires near sharp bumper edges.
Tools: Flashlight, electrical contact cleaner (Intermediate) - Check for Technical Service Bulletins (TSBs)
For 2019-2020 Ram 1500/2500 models, check TSB 08-082-20. A dealership software update to the Park Assist Module resolves erroneous B1290 codes without replacing parts.
Tools: Phone or computer (Advanced) - [ADVANCED] Test Circuit with a Multimeter
Disconnect the sensor. Turn ignition on. Probe the connector for 8.0V+ on the supply wire and less than 5.0 ohms on the ground wire. Turn ignition off and measure resistance between the signal wire and chassis ground; a reading below 10k Ohms indicates a short to ground.
Tools: Digital Multimeter (Advanced)
When This Code Triggers (Freeze-Frame Conditions)
- Ignition Status: ON (The ignition must be on for the Park Assist Module to be active.)
- Vehicle Speed: < 7 mph (The code sets when the system is active at low speeds during parking maneuvers.)
- Gear Selector: Reverse or Drive (The system is active in Reverse (rear sensors) and at low speeds in Drive (front sensors).)
- System Voltage: 11-14 Volts (Normal battery voltage is required for the PAM and sensors to operate.)
Related Codes
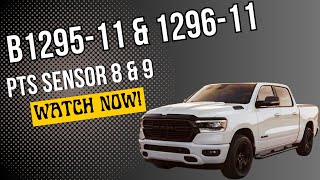
- B128F — Code for adjacent Sensor #2. Seeing B128F and B1290 together points to a shared wiring harness issue on that side of the bumper.
- B1291 — Code for adjacent Sensor #4. If you move Sensor #3 to position #4 and B1291 appears, the original sensor is definitively bad.
- U0159 — Indicates 'Lost Communication With Park Assist Control Module'. This is a network code, not a sensor circuit code. Address module power and ground issues first.
- B1290-11 / B1290-12 / B1290-13 — Sub-types indicating 'Short to Ground', 'Short to Battery', or 'Circuit Open'. These point directly to wiring problems rather than sensor performance issues.
Climate & Environmental Factors
- Snow, Ice, and Cold: Ice blocks ultrasonic waves. Extreme cold shrinks plastic bumpers, squeezing sensors and triggering false codes.
- Moisture and Road Salt: High-pressure car washes force water into seals. Salt spray corrodes connector pins, causing shorts and high resistance.
How to Talk to a Mechanic About This Code
Say this: "I have code B1290 for Park Assist Sensor #3. I cleaned the sensor. I need a 1-hour diagnostic to perform a sensor swap and check the wiring harness for that specific location."
This guides the shop directly to the problem area, setting a clear scope for the diagnostic and preventing an expensive, wide-ranging search.
Avoid saying:
- 'My parking sensors don't work.'
- 'The beeper is broken when I back up.'
- 'Just fix the Service Park Assist light.'
Questions to ask before authorizing the repair:
- Did you perform a sensor swap to confirm the sensor is the point of failure?
- If recommending a wiring repair, can you show me the damaged section or the multimeter reading?
- If a software update is recommended, what is the TSB number?
- What is the warranty on the new sensor and labor?
Where to Take It: Dealer vs Independent vs Chain
- Dealer:
Recommended only if a software TSB applies or the vehicle is under warranty.
Best for: Vehicles under warranty., Known software issues requiring a TSB module flash., Complex wiring issues requiring factory diagrams.
Downsides: Highest labor rates., May recommend replacing the entire wiring harness instead of a simple wire repair. (Typical cost: +50% vs. baseline) - Independent Shop:
Best fit for most B1290 repairs, especially for out-of-warranty vehicles.
Best for: Out-of-warranty vehicles., Straightforward sensor replacement or diagnosing wiring breaks., Cost-conscious owners.
Downsides: Ensure the shop has modern diagnostic tools for body codes., May lack access to the latest manufacturer software updates. (Typical cost: +0% vs. baseline) - Chain Shop:
Acceptable only if you diagnosed the problem yourself and simply need a new sensor installed. Avoid for diagnostic work.
Best for: Very simple, visible issues.
Downsides: Technician skill varies dramatically., May lack advanced diagnostic tools to read B-codes., High pressure to replace parts rather than diagnose. (Typical cost: -10% vs. baseline)
When to Walk Away From the Repair
If the estimated repair cost for this non-essential feature exceeds 10-15% of your car's value, consider living with the fault.
- Car worth $4000, fix is $450: Borderline. For a non-safety feature, this is expensive relative to the car's value. Consider skipping the fix.
- Car worth $25000, fix is $350: Fix it. The cost is a small percentage of the vehicle's value and restores full functionality.
- Car worth $8000, fix is $1200: Walk away. If diagnosis points to an expensive module or full harness replacement, it's not economically sensible.
What Scan Tool You Need for This Code
Minimum: A scanner that reads manufacturer-specific Body Control Module (BCM) or 'B' codes. Basic engine code readers will not see B1290.
A $20 engine reader cannot communicate with the Park Assist Module. It reports 'No Codes Found' even when the warning message is on.
Budget: BlueDriver Pro Scan Tool (~$100) — Connects to a smartphone, reads/clears B-codes, and displays live sensor data to confirm sensor response.
Mid-range: Autel MaxiCOM MK808S (~$350) — Provides full-system diagnostics, reads B-code suffixes (-11, -25), and shows live data streams to pinpoint sensor vs. wiring faults.
Professional: Autel MaxiCOM MK900-BT (~$500) — Offers bi-directional control to command the PAM to run self-tests, alongside faster processing and wider vehicle coverage.
Rent vs buy: Auto parts stores offer free scanning, but their tools may not read B-codes. Buying a $100 capable scanner is a smart investment for future DIY diagnostics.
How to Clear the Code After You Fix It
- Use an OBD-II scan tool to clear codes from the Park Assist Module (PAM).
- Reconnect the battery if disconnected.
- Perform a functional test by driving slowly towards an object to verify sensor operation.
Drive cycle (~10 minutes): No emissions drive cycle is required. After clearing the code, start the vehicle, shift into Reverse, then shift to Drive and move forward at less than 7 mph. The 'Service Park Assist' message should not reappear.
Readiness monitors affected: None. This body control module code does not affect emissions readiness monitors.
Watch out for:
- Disconnecting the battery may not clear the code permanently; use a scan tool.
- The code returns immediately if the root cause was not fixed.
Will This Fail Emissions / State Inspection?
No — by itself this code doesn't fail OBD inspection (but it can keep readiness monitors from setting, which causes a separate fail).
- California: This code will NOT cause a smog check failure. California tests focus on powertrain (P-codes), not body (B-codes).
- New York: This code will NOT cause an emissions failure. It rarely fails safety inspections unless the inspector deems the dashboard warning a severe distraction.
- Texas: This code will NOT cause an emissions failure. The park assist system is not part of required inspection criteria.
Most Commonly Affected Vehicles
- Ram 1500 / 2500 / 3500 (2013-2020) — Extremely common issue. 4th Gen models use part #1EW63TZZAA. Known software glitches on 2019-2020 models are addressed by TSBs.
- Dodge Charger (2010-2014) — Shares the Park-Tronics System (PTS) and sensor numbering with other FCA vehicles. Common replacement is #1EW63TZZAA.
- Jeep Grand Cherokee (2010-2015) — B1290 indicates a performance or circuit fault with Sensor #3. Common replacement is #1EW63TZZAA.
- Chrysler / Dodge Town & Country / Grand Caravan (2008-2016) — Frequently experience this code due to wiring harness issues in the bumpers. Part #1EW63TZZAA is a common replacement.
Manufacturer-Specific Notes
- Ram/Dodge/Chrysler: Defines B1290 as 'PTS Sensor 3 - Signal Shape/Waveform Failure'. Front sensors number 1-6 from driver to passenger side. TSB 08-082-20 addresses false codes on 2019-2020 Rams.
- Jeep (Hybrid): On some hybrids, B1290-12 indicates an 'F-CAN Malfunction' between battery and motor modules, completely unrelated to park assist.
Real Owner Stories
2016 Ram 1500 at 85K miles - Easy Fix
The 'Service Park Assist' message appeared after driving through a muddy field. The system was completely unresponsive.
What they tried:
- Ignored the message for a week.
- Visually inspected the front bumper and noticed the passenger-side inner sensor was caked in dried mud.
Outcome: Cleaned all front sensors with a soft cloth and car wash soap. The warning message disappeared, and the system functioned normally. Total cost: $0.
Lesson: Always start with the simplest solution. Thoroughly clean all sensors before ordering parts. Obstructions are the most common cause of a B1290-25 failure.
2014 Dodge Charger at 110K miles - Misdiagnosis
B1290 appeared intermittently, then became permanent. The owner assumed the sensor failed due to age.
What they tried:
- Purchased a new OEM Mopar sensor and replaced Sensor #3.
- Cleared the codes, but B1290 returned immediately.
Outcome: A mechanic traced the wiring harness and found a chafed wire near the bumper support causing a short. The wiring was repaired, and the original sensor worked perfectly. The owner wasted $100 on an unneeded sensor.
Lesson: Swap the suspect sensor with an adjacent one before buying parts. If the code doesn't move with the sensor, the problem is in the wiring.
2019 Ram 2500 at 40K miles - Software Glitch
The B1290 code appeared randomly. Cleaning the sensor temporarily fixed it, but it always returned.
What they tried:
- Cleaned the sensor repeatedly.
- Swapped Sensor #3 with Sensor #4. B1290 remained.
- Inspected the wiring harness but found no damage.
Outcome: The owner found TSB 08-082-20 for 2019-2020 Ram trucks. The dealership reprogrammed the Park Assist Module under warranty, solving the problem permanently.
Lesson: For 2019-2020 Ram trucks, check for TSBs before replacing hardware. A software update is often the only fix.
How to Prevent This Code From Triggering
- Clean Sensor Faces Monthly (During every car wash or monthly) — Prevents grime buildup that obstructs ultrasonic waves and triggers 'waveform failure' codes.
- Apply Dielectric Grease to Connectors (Whenever a sensor is replaced or unplugged) — Protects metal pins from moisture and road salt, preventing corrosion and high-resistance faults.
- Inspect Wiring Harness Annually (Every 12 months) — Secure loose wires with zip ties to prevent chafing against the bumper or frame, avoiding shorts or open circuits.
- Apply Ceramic Coating or Wax (Annually) — A thin hydrophobic layer repels water and ice. Apply thinly to avoid impeding the sensor's ultrasonic signal.
Frequently Asked Questions
Can I fix a B1290 code myself?
Yes. Cleaning or replacing a sensor is beginner-friendly and requires basic tools. Sensor swaps often require no tools at all if you can reach behind the bumper.
How much does it cost to fix B1290?
Cleaning a dirty sensor is free. Replacing a sensor costs $20-$80 for parts and $0-$150 for labor. Shop diagnosis and wiring repair typically costs $150-$300.
I replaced Sensor #3 but the B1290 code came back. What's next?
The issue is in the wiring or connector for position #3. Inspect the harness for damage and use a multimeter to test for power, ground, and signal integrity.
What is the difference between B1290-25 and B1290-11?
B1290-25 indicates a distorted signal, usually from dirt or internal failure. B1290-11 indicates a short to ground, requiring wiring repair.
Can I paint a new park assist sensor?
Yes, but use thin, even coats. Thick metallic paint blocks ultrasonic waves and triggers a waveform failure code, even on a brand new sensor.
Will disconnecting the battery clear the B1290 code?
It temporarily resets the module, but the code returns immediately if the physical fault remains. Use a scan tool to clear it properly.
Where is park assist sensor #3 located?
On FCA vehicles, front sensors are numbered 1 to 6 from driver to passenger side. Sensor #3 is the inner passenger-side sensor.
Key Takeaways
- Code B1290 on Ram and Dodge vehicles specifically identifies a signal failure in Park Assist Sensor #3, located on the inner passenger side of the front bumper.
- Thoroughly clean the face of Sensor #3 before buying parts, as dirt, ice, or heavy water spray causes over 50% of B1290-25 waveform failures.
- Swap Sensor #3 with Sensor #4 to diagnose the root cause; if the code changes to B1291, the sensor is dead, but if B1290 returns, the wiring is damaged.
- Owners of 2019-2020 Ram trucks should check TSB 08-082-20, as a known software glitch requires a dealer module update rather than physical repairs.
Helpful Videos
Shop the Parts Behind B1290
Below are the parts most often responsible for code B1290, ranked by how frequently each one is the actual culprit (per the diagnosis above). Tap any to see what we have for your vehicle.


The information in this article is provided for general reference and educational purposes only. Vehicle specifications, procedures, and part compatibility can vary by production date, trim level, and region. Always consult your vehicle's factory service manual and verify part numbers before purchasing or performing repairs. Safety-critical components such as airbags, seat belts, and braking systems should be installed by a qualified professional.
- 🧭 Diagnostic Flowchart
- 🎬 Helpful Videos
- 🛍️ Shop This Part
- What Does B1290 Mean?
- Can I Drive With B1290?
- Common Causes
- Symptoms
- Common Fixes & Costs
- DIY vs Professional
- Used vs. New Parts: Buying Guide
- What Happens If You Wait — Timeline
- Cost of Not Fixing It
- Diagnosis Steps
- When This Code Triggers (Freeze-Frame Conditions)
- Related Codes
- Climate & Environmental Factors
- How to Talk to a Mechanic About This Code
- Where to Take It: Dealer vs Independent vs Chain
- When to Walk Away From the Repair
- What Scan Tool You Need for This Code
- How to Clear the Code After You Fix It
- Will This Fail Emissions / State Inspection?
- Most Commonly Affected Vehicles
- Manufacturer-Specific Notes
- Real Owner Stories
- 2016 Ram 1500 at 85K miles - Easy Fix
- 2014 Dodge Charger at 110K miles - Misdiagnosis
- 2019 Ram 2500 at 40K miles - Software Glitch
- How to Prevent This Code From Triggering
- Frequently Asked Questions
- Can I fix a B1290 code myself?
- How much does it cost to fix B1290?
- I replaced Sensor #3 but the B1290 code came back. What's next?
- What is the difference between B1290-25 and B1290-11?
- Can I paint a new park assist sensor?
- Will disconnecting the battery clear the B1290 code?
- Where is park assist sensor #3 located?
- Key Takeaways
- 🎟️ Get 5% Off