
OBD-II Code B1295: Parking Aid Sensor Circuit Fault
What B1295 means, why it triggers, and how to fix it
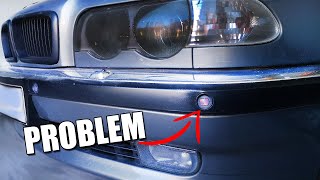
- Code B1295 specifically targets a circuit failure in sensor #8, which is the outermost rear passenger-side parking sensor on Chrysler, Dodge, and Ram vehicles.
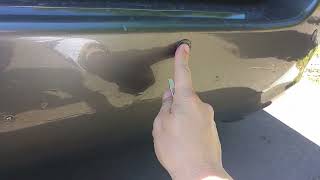
- Thoroughly clean the sensor face and remove any debris behind the bumper before buying parts, as dirt and ice cause 80% of false sensor faults.
- Swap the suspect #8 sensor with the adjacent #9 sensor; if the fault code changes to B1296, the sensor is dead, but if B1295 remains, the wiring is broken.
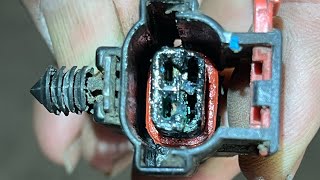
- Do not replace sensors if multiple rear sensor codes appear simultaneously; inspect the main rear wiring harness connector for water intrusion and green corrosion.
What Does B1295 Mean?
Trouble code B1295 is a manufacturer-specific code indicating the Park Assist Module (PAM) detects a circuit problem with parking sensor #8. Stellantis (Chrysler, Dodge, Ram, Jeep) and some Ford/GM vehicles predominantly use this code. Sensor #8 is typically the outermost sensor on the rear passenger-side bumper.
Technical definition: B1295 is defined by Chrysler, Dodge, and Ram as 'PTS (Park-Tronics System) Sensor 8 Circuit Fault'. Suffixes provide exact fault details: -11 (Short to Ground/Open), -12 (Short to Battery), -25 (Signal Shape Failure), or -92 (Performance). 🎬 Watch: A short explanation of the B1295-92 fault code. A '-25' suffix means the module receives a distorted signal from a dirty or failed sensor. A '-12' suffix triggers when the sensor ring-down time exceeds a specific threshold, such as 1450 microseconds.
Can I Drive With B1295?
Yes. Yes, the vehicle is safe to drive. The B1295 code indicates a fault in the parking assist system, which is a driver convenience feature. Primary braking and steering systems remain unaffected. However, the parking sensors are disabled, meaning you receive no audible or visual warnings when backing up. This increases the risk of low-speed collisions with objects or pedestrians. Delaying the repair causes no mechanical damage to the vehicle.
Common Causes
- Obstructed or Dirty Sensor (Very Common) — The sensor's face is covered with dirt, mud, snow, ice, or heavy wax. Debris lodged behind the bumper or aftermarket accessories (like bike racks or hitch steps) can also block the sensor's ultrasonic waves.
- Faulty Park Assist Sensor (Common) — The sensor fails internally due to age, moisture intrusion, or road vibrations. This is the most likely mechanical failure after ruling out physical obstructions.
- Corroded or Damaged Wiring Connector (Common) — The main wiring harness connector (e.g., connector XY630A behind the rear wheel well on Ram trucks) is exposed to road spray and suffers from severe pin corrosion and water intrusion. 🎬 See how corroded connectors can cause parking system failures.
- Damaged Wiring Harness (Less Common) — The wires leading to the sensor chafe, pinch, or break. This occurs from road debris, rubbing against the metal bumper frame, or stress at a pinch point in the harness loom.
- Incompatible Aftermarket Sensor (Less Common) — Cheap aftermarket sensors frequently fail to communicate correctly with the Park Assist Module, causing the code to persist or change to a performance (-92) fault immediately after installation.
- Software Glitch or Over-Sensitivity (Rare) — Certain 2014 Ram and Jeep vehicles require a PAM software update (TSB 08-071-14) to reduce over-sensitivity on rough surfaces like gravel, which triggers false sensor codes.
- Faulty Park Assist Module (PAM) (Rare) — The control module operating the parking assist system fails internally. This is the absolute last component to suspect after confirming all sensors and wiring are fully functional.
Symptoms
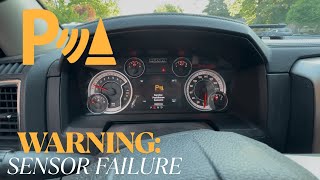
- "Service Park Assist" or "Check Park Aid" Message — A warning message appears on the instrument cluster display, indicating the system requires service and is currently unavailable.
- Parking Assist System is Inoperative — The system produces no beeps or visual warnings on the infotainment screen when approaching an object while backing up.
- Constant Tone When in Reverse — The system emits a long, steady beep for three seconds immediately after shifting into reverse before shutting down for that ignition cycle.
- Park Assist Switch Light Flashing — The LED on the manual park assist switch stays illuminated or flashes, confirming a fault is detected and the system is disabled.
- Intermittent or Erratic Operation — The system false-alarms and beeps when no obstacle is present, particularly in cold or wet weather, or fails after shifting from reverse to drive and back again.
Diagnostic Flowchart
Tap your situation to follow the diagnostic path that matches what you're seeing on this code.
Common Fixes & Costs
- Clean the Park Assist Sensor — Parts: $0, Labor: $0, ~0.1 hr book time (DIY)
- Replace the Faulty Park Assist Sensor — Parts: $25-$80, Labor: $50-$150, ~0.8 hr book time (DIY)
- Repair or Clean Main Wiring Harness Connector — Parts: $10-$70, Labor: $100-$200, ~1.2 hr book time (Intermediate)
- Replace Rear Bumper Wiring Harness Pigtail — Parts: $20-$50, Labor: $75-$150, ~1 hr book time (Intermediate)
- Replace Entire Rear Bumper Wiring Harness — Parts: $70-$200, Labor: $150-$300, ~2 hr book time (Professional)
DIY vs Professional
- Clean the Park Assist Sensor — Beginner: True
- Replace the Faulty Park Assist Sensor — Beginner: True
- Repair or Clean Main Wiring Harness Connector — Beginner: False
- Replace Rear Bumper Wiring Harness Pigtail — Beginner: False
Used vs. New Parts: Buying Guide
When a used part is worth it: Buying a used OEM sensor from a low-mileage donor vehicle is a cost-effective alternative to a new OEM part, especially for older vehicles where new parts are expensive.
Donor-vehicle mileage cap: roughly under 60000 miles for the part to have meaningful remaining life.
Donor quality checklist:
- Verify the donor vehicle was not scrapped for electrical or flood damage.
- Inspect the part for physical damage, cracks, or green corrosion on the electrical pins.
- Match the part number exactly, as visually identical sensors are often incompatible.
Decision logic:
- If The cost of a new OEM sensor is less than $100 → Buy new OEM for guaranteed compatibility and a longer warranty.
- If Budget is the primary concern and an aftermarket sensor is available from a reputable brand → A new aftermarket sensor is viable, but be prepared for potential compatibility issues.
- If The vehicle is over 10 years old and the OEM part is discontinued → A used OEM sensor is the best choice, accepting the shorter lifespan.
Warranty tradeoff: Used parts typically have a 30-90 day warranty. New aftermarket parts offer a 1-year warranty. New OEM parts carry a 1-2 year warranty honored nationwide by dealers.
Worst-case if a used part fails: $100-$300 if a used or incompatible aftermarket part fails, requiring repeat labor for diagnosis and replacement.
What Happens If You Wait — Timeline
- Immediate: Code B1295 is set. The 'Service Park Assist' message appears, and the entire parking aid system is disabled. (MPG impact: 0%% · Added cost: $0)
- 0-6 months: The driver, now without parking assistance, has a minor low-speed collision, such as backing into a parking bollard. (MPG impact: 0%% · Added cost: $300-$1,200 for repair of scuffs, scratches, or minor cracks on the plastic bumper cover.)
- 6-12 months: If caused by moisture intrusion, ongoing corrosion degrades adjacent pins in the main harness connector (e.g., XY630A on a Ram). (MPG impact: 0%% · Added cost: $150-$300, as the repair now requires replacing the connector or a harness pigtail instead of just cleaning it.)
- 12+ months: Severe corrosion spreads through the main harness, causing multiple sensor codes (B1296, B1297) to appear. (MPG impact: 0%% · Added cost: $220-$500, representing the cost of replacing the entire rear bumper wiring harness.)
Cost of Not Fixing It
- Immediate: Loss of audible and visual parking aids, increasing the risk of low-speed collisions with objects or pedestrians. (Added cost: $0)
- 0-6 months: A minor parking lot incident (backing into a post or another car) due to lack of sensor warning. (Added cost: $300-$1500 to repair bumper scuffs, cracks, or a damaged tailgate.)
- 6+ months: Moisture in a connector causes severe corrosion, destroying the main wiring harness and triggering multiple sensor codes. (Added cost: $250-$500)
Diagnosis Steps
- Read the Code and Note Specifics
Use an OBD-II scanner capable of reading Body (B) codes to confirm B1295 is active. Note any suffixes (like B1295-25 or B1295-11) that specify if the fault is a signal error or a hard wiring short.
Tools: OBD-II Scanner (capable of reading BCM codes) (Beginner) - Visually Inspect, Clean, and Retest
Locate sensor #8 (outer passenger-side rear). Thoroughly clean its surface with soap and water, and remove any mud or ice from behind the bumper. Clear the code with your scanner and shift into reverse to see if the fault returns.
Tools: Soap, water, soft cloth, OBD-II Scanner (Beginner) - Perform the 'Touch Test'
Turn the ignition on (engine off) and shift into reverse. Place your ear directly against each sensor. A healthy sensor emits a faint, rapid clicking or buzzing sound. If sensor #8 is silent while others click, it has failed internally.
Tools: None (Beginner) - Perform a Sensor Swap
Swap the suspect sensor (#8) with an adjacent working sensor (like #9). Clear the codes and re-scan. If the code changes to B1296 (sensor #9), the original sensor is dead. If code B1295 returns, the wiring to position #8 is broken.
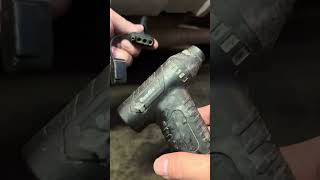
Tools: Trim removal tools, small flathead screwdriver (Intermediate) - Inspect and 'Wiggle Test' the Wiring Harness
Inspect the sensor's pigtail connector and trace the harness to the main connector (e.g., the gray 24-way XY630A connector behind the driver's rear wheel on Rams). Look for green corrosion. With the system active, gently wiggle the harness to see if the sensor intermittently functions.
Tools: Flashlight, electrical contact cleaner (Intermediate) - Review Live Data PIDs
Using a professional scan tool, monitor live data for 'Park Assist Sensor 8 Status'. A healthy sensor shows changing distance as you move an object toward it. A faulty sensor shows 'Fault', 'Unavailable', or a fixed, illogical distance.
Tools: Professional Scan Tool with Live Data capability (Advanced) - Test Circuit and Sensor with a Multimeter
Disconnect the sensor. Verify 8-12V supply voltage at the connector. Check for continuity (less than 5.0 Ohms) and shorts to ground along the signal wire back to the PAM. Measure the sensor's internal resistance to confirm it falls within manufacturer specifications.
Tools: Multimeter, vehicle-specific wiring diagram (Advanced) - Analyze Sensor Signal with an Oscilloscope
Connect an oscilloscope to the sensor's signal wire. A healthy sensor produces a distinct 8-volt square wave pattern. A flat line or heavily distorted waveform confirms a hard fault in the sensor or wiring circuit.
Tools: Oscilloscope, wiring diagram (Advanced)
When This Code Triggers (Freeze-Frame Conditions)
- System Status: Active (The Park Assist Module is powered and performing self-tests.)
- Ignition Status: ON / RUN (The vehicle's ignition is on, providing power to the modules.)
- Transmission Gear: Reverse (The code is set immediately when the system is activated by shifting into reverse.)
- Vehicle Speed: 0 - 25 mph (Faults are detected at a standstill in reverse, or during self-tests that run at low driving speeds.)
Related Codes
- B1296, B1297, B1298 — These codes represent the other rear parking sensors. If multiple sensor codes appear simultaneously, the diagnostic focus shifts from individual sensors to a common failure point like the main harness connector or a shared ground.
- B1295-11, B1295-25, B1295-92 — These suffixes specify the fault type. '-11' (Short to Ground) indicates a wiring problem. '-25' (Signal Shape Failure) points to a dirty or internally failed sensor. '-92' (Performance) suggests an internal sensor fault or data corruption.
- B2128-16 — This code for 'Sensor Supply Voltage Below Threshold' proves the problem is not the sensor itself, but the power supplied to it. Diagnostic priority shifts entirely to testing the supply circuit and main harness.
- Ford DTCs: B1B44, B1B46, B1B48, B1B50 — On Ford vehicles, these codes correspond to faults in the rear parking sensors. A code like B1B44:14 ('Circuit Short to Ground') on an F-150 is diagnosed using the exact same principles as B1295-11 on a Ram.
Climate & Environmental Factors
- Moisture (Rain, Car Washes): High-pressure water penetrates failing connector seals or cracks in the sensor housing, causing short circuits. Systems that work intermittently and fail in wet weather suffer from moisture intrusion.
- Cold Weather (Snow, Ice): Ice or snow physically blocking the sensor face is the primary cause of failure in winter. Thermal cycling also stresses internal electronics, causing intermittent open circuits.
- Road Salt (Rust Belt/Coastal Regions): Salt acts as a powerful electrolyte that dramatically accelerates corrosion on electrical pins. Main harness connectors located in wheel wells are highly susceptible to the green crust that causes high resistance.
How to Talk to a Mechanic About This Code
Say this: "I have a 'Service Park Assist' message and my scanner shows a B1295 code, pointing to the rear passenger-side outer sensor. I've already cleaned the sensor. I need a diagnosis to confirm if the sensor failed or if there is a wiring issue at the main harness connector."
This proves you performed basic troubleshooting and understand the common failure points. It focuses the technician's diagnostic time, preventing them from charging you to clean a sensor you already washed.
Avoid saying:
- 'My backup beeper is broken.'
- 'The 'Service Park Assist' light is on, can you fix it?'
- 'Just replace sensor #8.' (If the wiring is bad, you pay for a sensor you didn't need.)
Questions to ask before authorizing the repair:
- Did you confirm the sensor is bad by swapping it with an adjacent one to see if the code moved?
- If you believe it's a wiring issue, can you show me the corrosion or damage on the connector or harness?
- What is the warranty on the replacement sensor and your labor?
Where to Take It: Dealer vs Independent vs Chain
- Dealer:
Best for: Vehicles still under warranty, Cases where a known TSB (like a software update) applies, Complex electrical issues where manufacturer-specific tools are required for module resets
Downsides: Highest labor rates, typically $150-$220 per hour., May default to replacing an entire harness when a simpler connector repair is possible. (Typical cost: +50% vs. baseline) - Independent Shop:
Best fit for most out-of-warranty scenarios. An experienced independent technician diagnoses a bad sensor or corroded connector just as effectively as a dealer, but at a 30-50% lower cost.
Best for: Out-of-warranty vehicles where cost is a major factor., Straightforward sensor replacement or known wiring issues., Getting a second opinion on a costly dealer estimate.
Downsides: Quality varies greatly; look for shops specializing in electrical diagnostics., May not have access to the very latest manufacturer software updates. (Typical cost: +0% vs. baseline) - Chain Shop:
Avoid for initial diagnosis of the B1295 code. Chain shops often lack advanced diagnostic tools to differentiate between a sensor, wiring, or module fault, leading to expensive guesswork.
Best for: Simple, visible parts replacement if you have already diagnosed the problem yourself.
Downsides: Technician skill varies dramatically., Lacks advanced diagnostic tools to differentiate between a sensor, wiring, or module fault., High pressure to upsell additional services. (Typical cost: -10% vs. baseline)
When to Walk Away From the Repair
If the estimated repair cost for this non-essential feature exceeds 10% of your car's private-party value, do not fix it.
- Car worth $4000, fix is $450: Walk away. On a $4000 car, a $450 convenience feature repair is a luxury. Sell as-is, fully disclosing the issue.
- Car worth $18000, fix is $450: Fix it. The repair cost is a small fraction of the car's value and is recouped during resale.
- Car worth $2500, fix is $450: Walk away. Do not spend this much on a non-critical system for a car of this value.
What Scan Tool You Need for This Code
Minimum: A scanner capable of reading manufacturer-specific Body (B) codes.
A standard $20 OBD-II reader only reads Powertrain (P) codes and shows 'No Codes Found' for B1295. You need a tool that accesses the Body Control Module (BCM) to see this specific fault.
Budget: BlueDriver Pro (~$100) — Reads and clears enhanced codes (including B-codes) for major brands like Chrysler/Dodge/Ram. It confirms the B1295 code and allows you to clear it after a repair.
Mid-range: Innova 5610 (~$350) — Provides full system diagnostics, including reading B-codes and viewing live data from the Park Assist Module. This allows you to see what the module sees, differentiating a dead sensor from an intermittent wiring problem.
Professional: Autel MaxiCOM MK808 (~$450) — Offers bidirectional control and OEM-level diagnostics. For complex cases, this tool performs system resets on the Park Assist Module, which is necessary on Chrysler/Jeep vehicles after a battery disconnect.
Rent vs buy: Most auto parts stores offer free code scanning, but their loaner tools rarely read Body codes. Buying a tool like the BlueDriver is a worthwhile investment as it reads non-engine codes (ABS, Airbag) for future repairs.
How to Clear the Code After You Fix It
- Use an OBD-II scan tool to clear the code.
- Shift the vehicle into reverse to confirm the 'Service Park Assist' message is gone.
- Test the system by walking toward the rear bumper to ensure it beeps correctly.
Drive cycle (~5 minutes): A complex drive cycle is not required. Start the vehicle, shift into reverse, and wait 30 seconds. Shift to drive, then back to reverse. The system is operational if the fix was successful.
Readiness monitors affected: None
Watch out for:
- Clearing the code without fixing the bad sensor or wiring results in the code returning immediately upon shifting into reverse.
- Disconnecting the battery for a hard reset causes other modules to lose their memory settings.
- A persistent 'Park Assist Unavailable' message after a repair requires a dealer-level scan tool to perform a module reset.
Will This Fail Emissions / State Inspection?
No — by itself this code doesn't fail OBD inspection (but it can keep readiness monitors from setting, which causes a separate fail).
- California: A B1295 code does not fail a Smog Check. The inspection focuses strictly on powertrain (P-codes) and the Check Engine Light.
- New York: This code does not fail the NYS emissions or safety inspection. It is not a required safety item.
- Texas: A B1295 code passes the OBD portion of the state inspection, which only targets emissions-related faults.
Most Commonly Affected Vehicles
- Ram 1500 (2013-2020) — Extremely common issue. Well-documented problems with corrosion at the main harness connector (XY630A) and internal sensor failure.
- Ram 2500 / 3500 (2014-2018) — Prone to sensor and wiring issues. STAR Case S2108000060 REV A specifically targets the XY630A connector for circuit-related codes like B1295-11.
- Dodge Grand Caravan (2011-2020) — Service manuals detail specific diagnostic procedures for B1295. The Mopar sensor part number 1EW63TZZAA is the standard replacement.
- Dodge Journey (2011-2020) — Frequently sets B1295 with suffixes like -92 (Performance) and -12 (Short to Battery), pointing to a failed sensor accessible without bumper removal.
- Dodge Charger (2011-2014) — Shares electronics with the Chrysler 300; service manuals list B1295-92 as a defined code for a sensor performance fault related to data corruption.
- Chrysler 300 (2010-2014) — Diagnostic logic for B1295 is clearly defined in service manuals, pointing directly to a circuit fault with the #8 park assist sensor.
- Ford F-150 (2015-2020) — Ford uses different codes (e.g., B1B44) but experiences identical symptoms. Common failure points are the main harness connector above the spare tire.
- Jeep Grand Cherokee (2011-2021) — Disconnecting the battery causes the ParkSense module to lock up, displaying a 'ParkSense Unavailable' message requiring a module reset with a scan tool.
Manufacturer-Specific Notes
- Ram / Dodge / Chrysler: The 24-way main bumper harness connector (part number XY630A), located behind the driver's side rear wheel, is a notorious failure point. STAR Case S2108000060 REV A addresses corrosion and pushed-out terminals in this connector.
- Ram / Jeep: A software update (TSB 08-071-14) was issued for 2014 models to address over-sensitivity of the park assist system, which caused false alerts and logged sensor codes like B1295-25 on gravel surfaces.
- Ford: The rear harness wiring is highly susceptible to damage where it runs over the frame near the spare tire. The pigtail connectors for the outer sensors are vulnerable to corrosion from wheel spray, requiring frequent pigtail replacement.
- Jeep: On Grand Cherokee models, disconnecting the battery causes the ParkSense module to lock up. This displays a persistent 'ParkSense Unavailable' message that cannot be cleared without a bidirectional scan tool performing a system reset.
Real Owner Stories
2015 Ram 1500 with 'Service Park Assist' message
Owner received a 'Service Park Assist' message and codes for two rear sensors (#8 and #9).
What they tried:
- Swapped sensor #9 with sensor #10. The fault codes for #8 and #9 remained, proving the sensors were not the issue.
Outcome: A physical inspection of the wiring harness revealed a pinch point where the harness rubbed against the bumper support, breaking three wires. The owner soldered the wires and wrapped them in heat-shrink tubing, clearing all codes.
Lesson: If a sensor swap doesn't move the fault code, the problem is in the wiring. Physically trace the harness and look for hidden pinch points or chafing against the frame.
2014 Dodge Journey with B1295-92 and B1295-12
The park assist system was completely inoperative. A scan revealed codes B1295-92 (Performance) and B1295-12 (Short to Battery).
What they tried:
- Based on the code for sensor #8, the owner accessed the sensor from behind the rear bumper without removing it.
- The old sensor was disconnected and a new OEM sensor was plugged in.
Outcome: Replacing the single faulty sensor (#8) immediately restored system functionality. The visual guides appeared on the screen and the audible beeps returned.
Lesson: A specific sensor code, even with multiple suffixes like '-92' or '-12', often points directly to a failed sensor. This is a quick fix on vehicles where the sensor is accessible without bumper removal.
2019 Ram 1500 with multiple rear sensor codes (B1295-11)
The truck displayed a 'Service Park Assist' message and had active codes for multiple rear sensors, all with the '-11' (Circuit Short to Ground/Open) suffix.
What they tried:
- Following manufacturer guidance, the technician ignored the sensors and went directly to the main harness connector.
Outcome: The technician inspected the 24-way connector (XY630A) behind the left rear wheel liner and found severe corrosion. After cleaning the connector, the codes cleared. This repair is documented in STAR Case S2108000060.
Lesson: When multiple sensors fail at once with circuit-related codes, the problem is rarely the individual sensors. Suspect a common failure point like a main connector or a shared power wire first.
How to Prevent This Code From Triggering
- Periodically clean sensor faces (Monthly or after off-roading/snow) — Washing the sensor faces with soap and water removes dirt and road film that obstructs ultrasonic waves and causes false codes.
- Apply dielectric grease to connector seals (Whenever a connector is disconnected for service) — Applying dielectric grease to the rubber seals of electrical connectors keeps moisture and road salt out, preventing the corrosion that causes B1295.
- Inspect vulnerable harness sections (During tire rotations or underbody work) — Visually checking the wiring harness behind the wheel wells identifies rubbing against the frame, preventing chafed and broken wires.
- Avoid high-pressure washing directly on sensors (During every car wash) — Directly spraying high-pressure water forces moisture past the sensor's internal seals, leading to intermittent shorts or long-term corrosion.
Frequently Asked Questions
What are common misdiagnosis mistakes for B1295?
The most common mistake is replacing the sensor without swapping it with an adjacent one to confirm the failure. If the code does not move with the sensor, the wiring is broken. Replacing a single sensor when multiple sensor codes are active also wastes money, as this indicates a main harness failure.
Can I use cheaper aftermarket sensors to fix this?
Aftermarket sensors frequently fail to communicate correctly with the Park Assist Module. Owners often install aftermarket sensors only to have the B1295 code persist or change to a -12 or -92 suffix. Using OEM Mopar sensors guarantees compatibility.
Do I need to paint the new sensor?
Replacement sensors arrive in unpainted black plastic. You must paint the new sensor to match your bumper color for a perfect cosmetic match. Apply only a thin layer of paint, as thick coats impede the ultrasonic waves.
Why did my parking sensors stop working after a car wash or in the rain?
High-pressure water forces moisture into weak wiring connectors or cracked sensor housings, causing immediate short circuits. If the system fails in wet weather but works when dry, moisture intrusion is the root cause. Persistent faults after drying indicate water caused permanent corrosion.
What is the 'touch test' for parking sensors?
Turn the ignition on (engine off) and shift into reverse. Place your ear directly against each sensor to listen for a faint, rapid clicking or buzzing sound. A silent sensor confirms internal failure.
Will a B1295 code cause me to fail a vehicle inspection?
A faulty parking assist system does not cause a vehicle to fail a mandatory state safety or emissions inspection. It is classified as a non-critical driver convenience aid. However, repairing it prevents costly low-speed parking collisions.
How do I reset the park assist module?
Clearing the code with an OBD-II scanner resets the system for most simple faults. If a 'ParkSense Unavailable' message persists after a battery disconnect on Jeep/Chrysler vehicles, disconnect the negative battery terminal for 15 minutes. Persistent lockouts require a 'System Reset' command from a professional bidirectional scan tool.
Key Takeaways
- Code B1295 specifically targets a circuit failure in sensor #8, which is the outermost rear passenger-side parking sensor on Chrysler, Dodge, and Ram vehicles.
- Thoroughly clean the sensor face and remove any debris behind the bumper before buying parts, as dirt and ice cause 80% of false sensor faults.
- Swap the suspect #8 sensor with the adjacent #9 sensor; if the fault code changes to B1296, the sensor is dead, but if B1295 remains, the wiring is broken.
- Do not replace sensors if multiple rear sensor codes appear simultaneously; inspect the main rear wiring harness connector for water intrusion and green corrosion.
Helpful Videos
Shop the Parts Behind B1295
Below are the parts most often responsible for code B1295, ranked by how frequently each one is the actual culprit (per the diagnosis above). Tap any to see what we have for your vehicle.


The information in this article is provided for general reference and educational purposes only. Vehicle specifications, procedures, and part compatibility can vary by production date, trim level, and region. Always consult your vehicle's factory service manual and verify part numbers before purchasing or performing repairs. Safety-critical components such as airbags, seat belts, and braking systems should be installed by a qualified professional.
- 🧭 Diagnostic Flowchart
- 🎬 Helpful Videos
- 🛍️ Shop This Part
- What Does B1295 Mean?
- Can I Drive With B1295?
- Common Causes
- Symptoms
- Common Fixes & Costs
- DIY vs Professional
- Used vs. New Parts: Buying Guide
- What Happens If You Wait — Timeline
- Cost of Not Fixing It
- Diagnosis Steps
- When This Code Triggers (Freeze-Frame Conditions)
- Related Codes
- Climate & Environmental Factors
- How to Talk to a Mechanic About This Code
- Where to Take It: Dealer vs Independent vs Chain
- When to Walk Away From the Repair
- What Scan Tool You Need for This Code
- How to Clear the Code After You Fix It
- Will This Fail Emissions / State Inspection?
- Most Commonly Affected Vehicles
- Manufacturer-Specific Notes
- Real Owner Stories
- 2015 Ram 1500 with 'Service Park Assist' message
- 2014 Dodge Journey with B1295-92 and B1295-12
- 2019 Ram 1500 with multiple rear sensor codes (B1295-11)
- How to Prevent This Code From Triggering
- Frequently Asked Questions
- What are common misdiagnosis mistakes for B1295?
- Can I use cheaper aftermarket sensors to fix this?
- Do I need to paint the new sensor?
- Why did my parking sensors stop working after a car wash or in the rain?
- What is the 'touch test' for parking sensors?
- Will a B1295 code cause me to fail a vehicle inspection?
- How do I reset the park assist module?
- Key Takeaways
- 🎟️ Get 5% Off