
OBD-II Code B1370: Ignition Circuit Fault
What B1370 means, why it triggers, and how to fix it
What Does B1370 Mean?

B1370 is a manufacturer-specific code with different definitions depending on your vehicle's make. For General Motors (GM) vehicles, it indicates the Body Control Module (BCM) detects a fault in the 'Ignition 1' power circuit. The computers controlling the engine and accessories are not getting the 'power on' signal when the key turns. The BCM sets this code when the voltage on this hardwired circuit doesn't match the power mode status broadcast on the vehicle's data network.
Technical definition: The official SAE/OBD-II definition for code B1370 varies by manufacturer. For General Motors, it is 'Device Ignition 1 (ON and START) Circuit Fault'. For Ford, Lincoln, and Mercury, it relates to a 'Door Handle Ground Supply Signal' issue. For Toyota, it indicates an 'ECU Malfunction' within the windshield wiper motor assembly. For Hyundai, it means 'Pretensioner Front-Passenger Resistance Circuit Short to Battery', indicating an airbag system fault.
Can I Drive With B1370?
No — Do Not Drive. Do not drive. This code indicates a critical electrical problem that causes the engine to stall or fail to start, leaving you stranded. It also disables critical safety systems like airbags.
Common Causes

- Damaged or Corroded Floor Wiring Harness (Very Common) — The wiring harness running under the driver's side door sill plate or floor mat is a known weak point on GM trucks and vans. Moisture from wet shoes or clogged drains causes wires (specifically the pink wire for circuit 5199) to corrode and break, interrupting the ignition signal.
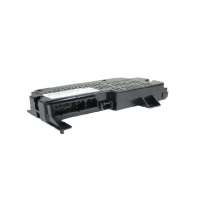
- Poor Terminal Connection at Fuse Blocks (X50A/X51L) (Very Common) — The pins inside the large electrical connectors on the underhood (X50A) or interior (X51L) fuse blocks become loose, corroded, or back out. This interrupts power distribution and is a primary cause identified in GM Technical Service Bulletins like PIT5391.
- Blown Fuse (Common) — A blown fuse in a circuit related to the BCM, ignition, or instrument panel triggers this code. This is an easy first check, though it is often a symptom of a larger short circuit.
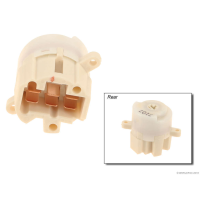
- Faulty Ignition Main Relay (KR73) (Less Common) — The KR73 Ignition Main Relay is a mechanical switch powering the Ignition 1 circuit. While it fails less frequently than wiring, a burnt-out relay completely cuts power to the ignition circuit.
- Aftermarket Remote Start Interference (Uncommon) — Improperly installed aftermarket remote start systems interfere with the ignition and power mode circuits. Poorly spliced wires cause voltage drops or send incorrect signals, leading to a B1370 code.
- Serial Data Gateway Module (SDGM) 'Logic Lock' (Uncommon) — The SDGM sometimes enters a frozen state due to a software glitch, causing widespread communication issues. A 'hard reset' by disconnecting the battery for 30 minutes resolves this.
- Failed Body Control Module (BCM) (Rare) — While the BCM is the brain of the system, it rarely fails. The BCM should only be replaced after all wiring, connector, and relay issues are completely ruled out.
Symptoms

- No-Crank or No-Start Condition — You turn the key or press the start button, and nothing happens, or the engine starts and immediately stalls.
- Inoperative HVAC and Radio — The heating, air conditioning, and radio displays are completely blank and unresponsive.
- Multiple Warning Lights — The instrument cluster lights up with numerous, seemingly unrelated warnings like 'Service 4WD' or 'Service Airbag'.
- No Turn Signal Sound — The exterior turn signals flash, but the typical clicking sound from the dashboard is absent.
- Relay Clicking Sound While Driving — An audible clicking sound comes from the fuse box area while driving, indicating a relay is struggling to maintain its state due to unstable voltage.
- Widespread Communication (U-prefix) Codes (scan-tool only — no driver-felt sign) — A scan tool shows multiple 'U' codes (U0140, U0155, U0164), indicating various modules are not communicating. This confirms a power supply issue.
Diagnostic Flowchart

Tap your situation to follow the diagnostic path that matches what you're seeing on this code.
Common Fixes & Costs
- Repair Wiring or Terminals — Parts: $10-$75, Labor: $250-$1000, ~2.5 hr book time (Professional)
- Replace Ignition Main Relay
— Parts: $10-$40, Labor: $0-$50, ~0.1 hr book time
(DIY)
2014-2019 GM Trucks/SUVs: OEM - Replace Underhood Fuse Block
— Parts: $350-$600, Labor: $150-$300, ~2.0 hr book time
(Intermediate)
2014-2019 Chevrolet Silverado / GMC Sierra: OEM - Replace Ignition Switch
— Parts: $50-$200, Labor: $100-$300, ~1.2 hr book time
(Intermediate)
2014-2015 GM Trucks/SUVs: OEM - Replace Body Control Module (BCM)
— Parts: $300-$700, Labor: $150-$350, ~1.5 hr book time
(Professional)
2014-2015 Chevrolet Silverado / GMC Sierra: OEM
DIY vs Professional
- Repair Wiring or Terminals 🟢 Beginner
Tools: Digital multimeter, wiring diagrams, terminal tools, wire strippers/crimpers, soldering iron, heat shrink. - Replace Ignition Main Relay 🟢 Beginner
Tools: None or small pliers to pull the relay. - Replace Underhood Fuse Block 🟢 Beginner
Tools: Socket set, trim removal tools, terminal tools. - Replace Ignition Switch 🟢 Beginner
Tools: Trim removal tools, socket set, Torx drivers. - Replace Body Control Module (BCM) 🟢 Beginner
Tools: Socket set, trim removal tools, professional scan tool for programming.
Used vs. New Parts: Buying Guide
When a used part is worth it: For an Underhood Fuse Block, a used part from a low-mileage vehicle in a dry climate is a good cost-saving option. For a Body Control Module (BCM), a used part only makes sense if you have a guaranteed way to program it.
Donor-vehicle mileage cap: roughly under 80000 miles for the part to have meaningful remaining life.
Donor quality checklist:
- For fuse blocks, avoid parts from 'Salt Belt' regions due to high risk of corrosion.
- Match the part number exactly. Superseded numbers require verification.
- For a BCM, confirm with the seller if the module is 'unlocked' or if they can provide the VIN of the donor vehicle.
Decision logic:
- If The failed part is the Underhood Fuse Block → A used part is a reasonable choice if a clean, corrosion-free unit can be found.
- If The failed part is the Body Control Module (BCM) → Buy new or remanufactured from a source that offers programming, or buy a used part ONLY if you have a confirmed cloning/programming service ready.
- If The vehicle is older (>10 years) and budget is the primary concern → A used part with a 90-day warranty is acceptable, but acknowledge the risk.
Warranty tradeoff: Used parts typically come with a 30-90 day warranty covering the part only. New aftermarket parts offer a 1-year to limited lifetime warranty. A new OEM part installed by a dealer has the best warranty.
Worst-case if a used part fails: $500-$1200 if a used BCM fails or cannot be programmed, requiring repeat labor and the purchase of another module.
What Happens If You Wait — Timeline
- 0-1 month: Intermittent failure. The vehicle fails to start or stalls once, but then works normally for days. The B1370 code is stored in history. (MPG impact: 0%% · Added cost: $0, but a potential $100-$300 tow bill if stranded.)
- 1-3 months: Increasing frequency. The no-start or stalling condition happens weekly. The risk of being stranded in an unsafe location increases significantly. (MPG impact: 0%% · Added cost: $150-$400 in diagnostic fees at a shop that struggles to find the intermittent fault.)
- 3-6 months: Near-constant failure. The vehicle is unreliable for daily use. The corroded wire or loose terminal makes such poor contact that any vibration causes a failure. (MPG impact: 0%% · Added cost: $700-$1200 if the BCM is wrongly replaced. The actual wiring repair is only $250-$500.)
- 6+ months: Hard fault / Total failure. The wire is completely broken or the terminal is destroyed. The vehicle is a 'brick' and will not start under any circumstances. (MPG impact: 0%% · Added cost: The cost of the final, correct repair ($250-$1000) plus any money wasted on prior misdiagnoses.)
Cost of Not Fixing It
- Immediate: Intermittent no-start or stalling conditions, leaving you stranded without warning. Inoperative HVAC, radio, and turn signal sounds. (Added cost: Potential towing fees ($100-$300) and emergency diagnostic charges.)
- 1-3 months: The risk of a permanent no-start condition increases significantly. The intermittent electrical connection degrades further, making the fault harder to trace. Safety systems like airbags are disabled. (Added cost: Higher diagnostic labor costs as the intermittent failure becomes a hard fault in an unpredictable location.)
- 3+ months: Guaranteed critical failure. The vehicle becomes completely inoperable. (Added cost: Full cost of diagnosis and repair, plus the high cost of inconvenience and being stranded.)
Diagnosis Steps
- Verify Vehicle Manufacturer and Code Definition
Confirm your vehicle's make. If it is a GM, proceed with these steps. If it is a Ford, Toyota, or Hyundai, refer to the 'Manufacturer Quirks' section, as the cause is completely different.
Tools: Owner's Manual (Beginner) - Inspect All Related Fuses
Check all fuses related to the BCM, ignition, instrument panel, and radio in both the underhood and interior fuse boxes. A blown fuse is a simple fix or a sign of a short circuit.
Tools: Fuse puller or needle-nose pliers, owner's manual (Beginner) - Scan for All Trouble Codes and Symptom Bytes
Use a professional OBD-II scanner to read Body (B), Network (U), and manufacturer-specific symptom bytes. Look for a flood of related U-prefix communication codes. Note the symptom byte (e.g., '04' for Open, '06' for Short to Ground) to direct your diagnosis.
Tools: Professional OBD-II Scanner (B, U, and symptom byte capable) (Beginner) - Inspect Driver's Sill Plate Wiring Harness
Remove the plastic door sill trim panel on the driver's side and pull back the carpet. Unwrap the electrical tape and inspect the wires (especially the pink wire for circuit 5199) for corrosion, breaks, or chafing.
Tools: Trim removal tool, utility knife (Intermediate) - Inspect Underhood Fuse Block (X50A) Connectors
Disconnect the battery. Unplug the large multi-wire connectors from the underhood fuse block. Look closely for pins that have backed out, are bent, or show signs of green or white corrosion.
Tools: Socket set, flashlight, small pick or terminal tool (Intermediate) - Test the KR73 Ignition Main Relay Circuit
Locate the KR73 Ignition Main Relays. Swap a suspect relay with an identical one from a non-critical circuit (like the horn) to see if the vehicle starts. Use a multimeter to check for power and ground at the relay socket terminals.
Tools: Digital multimeter, owner's manual/wiring diagram (Intermediate) - Perform a Voltage Drop Test on the Ignition 1 Circuit
With the circuit loaded (key ON), set a multimeter to DC Volts. Place the positive lead on the battery's positive terminal and the negative lead on the Ignition 1 circuit wire at the BCM connector. A reading above 0.1V indicates excessive resistance.
Tools: Digital multimeter, vehicle-specific wiring diagram, T-pins (Advanced) - Perform Resistance Check of Ignition 1 Circuit
With the battery disconnected, measure the resistance of the Ignition 1 circuit wire from the BCM connector to the corresponding pin at the fuse block connector. A reading higher than 1.0 ohm, or 'OL', confirms high resistance or a complete break.
Tools: Digital multimeter, wiring diagram, T-pins (Advanced) - Isolate the Fault with a Test Lamp
Connect a test lamp between the B+ circuit and ground at the ignition switch connector; it should illuminate brightly. If it doesn't, there is an open or high resistance in the power feed to the switch.
Tools: 12V Test Lamp, wiring diagram (Advanced) - Perform Bidirectional Scan Tool Relay Test
Navigate to the BCM control functions on a professional scan tool. Use the 'Ignition Main Relay Command' to manually toggle the KR73 relay. If the relay clicks, the BCM is functioning correctly, isolating the fault to the load side of the circuit.
Tools: Professional bidirectional scan tool (Advanced)
When This Code Triggers (Freeze-Frame Conditions)
- Ignition Switch Position: RUN or START (The fault is detected when the key is turned to the 'RUN' or 'START' position and the BCM does not see the correct voltage on the Ignition 1 circuit.)
- Ignition 1 Circuit Voltage: < 1.0V or > 15.0V (The code sets if the BCM detects an open circuit (low voltage) or a short to power (high voltage) when it expects to see normal battery voltage.)
- Power Mode Master Status: Mismatch (The BCM sets the code when its calculated power mode does not match the voltage it physically measures on the hardwired Ignition 1 circuit.)
- Symptom Byte: 01, 04, or 06 (A professional scan tool shows a symptom byte: '01' for Short to Battery, '04' for Open Circuit, or '06' for Short to Ground/Open, indicating the specific electrical failure mode.)
Related Codes
- U0140 — 'Lost Communication With Body Control Module'. B1370 indicates the power failure, while U0140 is the resulting symptom of the BCM being unable to communicate. Seeing them together strongly points to a power supply issue.
- U0155 — 'Lost Communication With Instrument Panel Cluster'. Triggered because the instrument panel loses its 'power on' signal from the faulty Ignition 1 circuit.
- B1325 — 'Device Power Circuit Malfunction.' B1370 is more specific, pointing to the 'Ignition 1' portion. Their combined presence reinforces that the problem is a widespread power distribution failure.
- U0164 — 'Lost Communication With HVAC Control Module'. Explains why the climate controls go completely dead when B1370 is active.
- P0513 — 'Invalid Immobilizer Key'. Sets concurrently because the BCM, managing the anti-theft system, suffers from the same power loss and fails to recognize a valid key.
Climate & Environmental Factors
- High Humidity and Road Salt ('Salt Belt' Regions): Corroded wiring under the driver's sill plate is significantly accelerated by exposure to moisture and road salt. Water wicks into the harness, and salt creates a highly corrosive electrolyte that destroys the copper wire. Vehicles operated in 'Salt Belt' states are far more likely to experience this failure.
How to Talk to a Mechanic About This Code
Say this: "I have a GM vehicle with a no-start condition and a B1370 code. I've read about TSB PIT5391 and common issues with wiring under the driver's sill plate and terminals at the underhood fuse block. I'd like to schedule a diagnostic appointment to confirm a wiring fault before considering any module replacement."
This signals you are an informed consumer. It directs the technician to the most probable cause, saving diagnostic time and preventing them from immediately suggesting an expensive and likely unnecessary BCM replacement.
Avoid saying:
- 'My car won't start, can you fix it?' (Too vague, invites a lengthy, expensive diagnostic process)
- 'I think I need a new computer.' (Incorrectly suggests a solution, leading to misdiagnosis)
- 'Just replace the BCM.' (Authorizing the wrong repair from the start)
Questions to ask before authorizing the repair:
- Did you perform a voltage drop test on the Ignition 1 circuit, and what were the results?
- Can you confirm you inspected the wiring harness under the driver's sill plate and the X50A connectors at the fuse block?
- Is the proposed repair to fix a wire or terminal, or are you recommending replacing a module?
- What is the warranty on the parts and labor for this specific repair?
Where to Take It: Dealer vs Independent vs Chain
- Dealer:
A strong, but expensive, choice. They have direct access to all TSBs and exact diagnostic tools, but favor more costly replacement-based repairs.
Best for: Vehicles under warranty, Confirming TSBs and using GM-specific tools like the MDI and GDS2 software.
Downsides: Higher labor rates and potential pressure to replace whole assemblies (like the fuse block) instead of repairing a single wire or terminal. (Typical cost: +50% vs. baseline) - Independent Shop:
The best fit, IF you find the right shop. An independent specialist in electrical systems is more willing to perform a targeted, cost-effective wiring repair.
Best for: Out-of-warranty vehicles where cost is a factor., Shops that specialize in automotive electrical diagnostics.
Downsides: Skill varies greatly; a general mechanic lacks the specific experience with this GM issue or the advanced diagnostic tools. You must find an electrical specialist. (Typical cost: +0% vs. baseline) - Chain Shop:
AVOID. This is a complex electrical fault far outside the scope of most chain shop technicians. Taking your vehicle here results in wasted time and money.
Best for: Simple, unrelated maintenance like oil changes or tires.
Downsides: Technicians lack the training or time for complex electrical diagnosis. High probability of misdiagnosis and recommending unnecessary part replacements. (Typical cost: -10% vs. baseline)
When to Walk Away From the Repair
If the estimated repair cost exceeds 50% of the car's private-party value, consider your options. For a no-start condition, the value of the car 'as-is' is significantly lower.
- Car worth $15000, fix is $800: Fix it. This is a common wiring repair and well below the threshold for a valuable truck.
- Car worth $4000, fix is $1200: Borderline. A $1200 quote likely means a misdiagnosis (BCM replacement). Get a second opinion focusing on wiring repair. If the wiring repair is still over $1000, consider selling.
- Car worth $2500, fix is $1500: Walk away. The repair cost is too high relative to the vehicle's value. The money is better put toward a replacement vehicle.
What Scan Tool You Need for This Code
Minimum: A scanner that reads manufacturer-specific Body (B-prefix) and Network (U-prefix) codes for GM vehicles. A basic engine code reader will NOT see B1370.
A $20 code reader only checks for generic 'P' (Powertrain) codes. B1370 is a 'B' (Body) code stored in the Body Control Module. Without the ability to read B and U codes, you won't even know this fault exists.
Budget: BlueDriver Pro (~$99) — Reads and clears enhanced codes (ABS, Airbag, BCM) for GM vehicles. It shows the B1370 and related U-codes, and provides live data. It lacks bidirectional control.
Mid-range: Foxwell NT510 Elite for GM / XTOOL IP500 for GM (~$150) — Offers full system diagnosis plus bidirectional controls. This allows you to command the KR73 Ignition Main Relay directly from the tool to confirm if the BCM is working.
Professional: Autel MaxiCOM MK808 / Launch X431 Series (~$500-1200) — Provides full OE-level diagnostics, extensive bidirectional controls, and advanced data graphing. For a DIYer, this is overkill, but for a professional, it's the gold standard.
Rent vs buy: Rent for free from an auto parts store to confirm the B1370 code exists. To properly diagnose the intermittent nature of this electrical fault, you must buy a capable scanner to test wiring and view live data.
How to Clear the Code After You Fix It
- Reconnect the negative battery terminal.
- Use a professional OBD-II scan tool to clear the B1370 and all related U-prefix codes from all modules.
- Start the vehicle and verify that the original symptoms are gone and the code does not immediately return.
Drive cycle (~15 minutes): Perform a short test drive that includes starting the vehicle, idling for a few minutes, and driving at various speeds to ensure the electrical system is stable. The primary goal is to confirm the fix, not to set emissions monitors.
Readiness monitors affected: Comprehensive Component Monitor, Misfire Monitor
Before emissions retest: drive at least 50 miles to fully set monitors.
Watch out for:
- Simply clearing the code without fixing the underlying wiring issue causes the code to return instantly.
- If a BCM was replaced, it must be programmed before the vehicle will start.
- Forgetting to clear codes from all modules (ECM, TCM, IPC) leaves lingering communication errors.
Will This Fail Emissions / State Inspection?
Yes — this code typically fails an OBD-II emissions inspection.
- California: An illuminated Check Engine Light results in an automatic smog check failure. Clearing the code just before the test causes a failure due to 'Not Ready' readiness monitors.
- New York: A vehicle fails the NYS inspection if the 'check engine' light is on. The OBD-II system scan is a required part of the inspection.
- Texas: In counties where emissions testing is required, an active B1370 code that illuminates the Malfunction Indicator Lamp (MIL) causes the vehicle to fail the OBD portion of the inspection.
Most Commonly Affected Vehicles
- Chevrolet Silverado, Tahoe, Suburban (2014-2019) — These K2XX platform vehicles are known for wiring corrosion under the driver's sill plate (Circuit 5199) and terminal issues at the fuse block, documented in GM TSBs PIT5391 and 20-NA-212.
- GMC Sierra, Yukon, Yukon XL (2014-2019) — Platform mates to the Chevrolet models, sharing the identical electrical architecture and prone to the same Ignition 1 circuit failures.
- Cadillac Escalade (2015-2018) — Built on the K2XX platform and explicitly mentioned in TSB PIT5391 as susceptible to this no-start/stalling condition.
- Ford Fusion, Focus (2013-2019) — On these models, B1370 indicates a fault with the exterior door handle's ground circuit, completely unrelated to the ignition system.
- Toyota Camry, other models (2012-2017) — B1370 points to an internal ECU malfunction within the front windshield wiper motor assembly, requiring replacement of the motor.
- Hyundai i20, Elantra, Veracruz (2005-2015) — B1370 is an airbag system code for a short in the passenger-side seat belt pretensioner circuit.
- Chevrolet Express (2003-2023) — Caused by a broken wire in the harness running under the floor mat near the brake pedal, worn out from foot traffic.
- Chevrolet Impala (2007-2008) — Points to a fault in the ignition 1 signal monitored by the inflatable restraint sensing and diagnostic module (SDM).
Manufacturer-Specific Notes
- General Motors (Chevrolet, GMC, Cadillac): This code almost always points to a wiring or connector issue, not a failed module. GM TSBs (PIT5391, 20-NA-212) guide technicians directly to check for corroded wires under the driver's sill plate and bad terminals at the fuse blocks.
- Ford, Lincoln, Mercury: B1370 indicates the Remote Function Actuator (RFA) detects a short to ground or voltage problem in the exterior door handle's ground circuit, affecting keyless entry.
- Toyota: B1370 indicates an internal malfunction in the front windshield wiper motor's control unit. The fix is replacing the entire wiper motor assembly.
- Hyundai: B1370 is a safety system code indicating a short to power in the passenger-side seat belt pretensioner circuit. Owners should check for active safety recalls.
Real Owner Stories
2016 Chevy Silverado 1500 at 110K miles - The Misdiagnosis
Truck intermittently failed to start. Sometimes it started then immediately stalled. All dash lights and radio were dead during the failure.
What they tried:
- Replaced the battery, no change.
- Replaced the starter, no change.
- A shop recommended replacing the Body Control Module (BCM) for $900.
Outcome: Owner found GM TSB PIT5391 online. He removed the driver's side sill plate and found a corroded and broken pink wire (Circuit 5199). He repaired the wire with a butt connector and heat shrink for under $10. The truck started perfectly and the problem never returned.
Lesson: For GM trucks, always suspect the known wiring failure points mentioned in TSBs before replacing expensive modules like the BCM.
2008 Chevy Express Van at 165K miles - The Unusual Cause
Complete no-crank, no-start condition. Security light was on in the dash. Codes B1370 and B1380 were stored.
What they tried:
- Owner suspected a bad key or theft-deterrent module.
- A mechanic replaced the fuse box with no success.
- Applying power directly from the fuse to the circuit allowed the van to start, proving the modules were okay.
Outcome: A technician traced the red/white power wire from the fuse box. They discovered the wiring harness running under the driver's side floor mat near the brake pedal had been worn through by foot traffic. Splicing the broken wire permanently fixed the no-start condition.
Lesson: On work vans or vehicles with high foot traffic, don't overlook physical damage to harnesses running under the floor carpet or mats.
2017 GMC Sierra 2500HD - The Easy Fix
While driving, the radio and HVAC went dead, and multiple warnings appeared on the dash. After shutting it off, it was completely dead. No crank, no lights.
What they tried:
- Owner first suspected a dead battery, but it tested good.
- Checked all the fuses in the interior and underhood fuse boxes.
Outcome: Found one of the KR73 Ignition Main Relays in the underhood fuse block was not working. He swapped it with the identical horn relay. The truck immediately powered up and started. He purchased a new relay for $25 and solved the problem.
Lesson: Always start with the simplest and cheapest solutions. Try swapping identical relays to quickly rule out a common and inexpensive failure point.
How to Prevent This Code From Triggering
- Keep Driver's Sill Plate Area Dry (Every 6 months) — The most common failure is corrosion of wires under the driver's door sill. Periodically lift the plastic trim to ensure the area and the wiring harness beneath are dry.
- Apply Dielectric Grease to Fuse Block Connectors (Once, or if connectors are serviced) — Applying a thin layer of dielectric grease to the weather seals of the large underhood fuse block connectors helps prevent moisture intrusion.
- Inspect and Clean Main Ground Connections (Every 2 years or 30K miles) — A poor ground connection from the battery to the frame or the engine block to the firewall causes widespread, intermittent electrical issues that mimic module failures.
- Ensure Professional Installation of Accessories (During any accessory installation) — Improperly tapping into critical ignition circuits for accessories introduces faults. Ensure aftermarket electronics are installed using their own relayed power sources.
Frequently Asked Questions
What is the most common misdiagnosis for a B1370 on a GM vehicle?
The most common and expensive mistake is replacing the Body Control Module (BCM) or ignition switch without performing a thorough wiring diagnosis. The vast majority of B1370 faults on GM trucks are caused by inexpensive but hard-to-find wiring or terminal connection issues.
My truck has remote start and the B1370 code is only in 'History.' What does that mean?
If the code is only in history and the vehicle operates normally, it is a non-critical glitch. Some remote start systems cause a momentary voltage fluctuation during startup that the BCM flags as a fault. Clear the code and monitor to see if it returns as an active fault.
Can I fix B1370 myself?
You can easily fix simple causes like a blown fuse or a bad relay. However, the most common causes involve complex wiring diagnostics, tracing circuits, and repairing multi-pin connectors. Stop DIY and take the vehicle to an electrical specialist if the fuses and relays test good.
If I get a B1370 code, should I replace the BCM?
No, do not replace the Body Control Module (BCM) as a first step. BCM failure is a rare cause of this code. The problem is almost always a wiring or connection issue.
Why do so many other codes appear with B1370?
The 'Ignition 1' circuit provides the 'wake-up call' for many different computers in the vehicle. When that power signal is lost, all of those modules stop communicating on the vehicle's network. This triggers a cascade of 'Lost Communication' (U-prefix) codes.
The battery is new, so why am I getting this code?
While a weak battery causes many electrical problems, B1370 points to a failure in the distribution of power after the battery. The power isn't reaching the modules correctly due to a broken wire or bad connection.
What is a TSB and why is it important for this code?
A Technical Service Bulletin (TSB) is a document issued by the manufacturer to help technicians diagnose known common problems. For B1370 on GM vehicles, TSBs like PIT5391 point directly to known wiring failure points, saving hours of diagnostic time.
What is Circuit 5199 on a GM truck?
Circuit 5199 is the GM designation for a specific pink wire in the Ignition 1 circuit. It is notorious for corroding and breaking under the driver's side sill plate on many 2014-2019 GM trucks and SUVs.
Shop the Parts Behind B1370
Below are the parts most often responsible for code B1370, ranked by how frequently each one is the actual culprit (per the diagnosis above). Tap any to see what we have for your vehicle.


The information in this article is provided for general reference and educational purposes only. Vehicle specifications, procedures, and part compatibility can vary by production date, trim level, and region. Always consult your vehicle's factory service manual and verify part numbers before purchasing or performing repairs. Safety-critical components such as airbags, seat belts, and braking systems should be installed by a qualified professional.
- 🧭 Diagnostic Flowchart
- 🛍️ Shop This Part
- What Does B1370 Mean?
- Can I Drive With B1370?
- Common Causes
- Symptoms
- Common Fixes & Costs
- DIY vs Professional
- Used vs. New Parts: Buying Guide
- What Happens If You Wait — Timeline
- Cost of Not Fixing It
- Diagnosis Steps
- When This Code Triggers (Freeze-Frame Conditions)
- Related Codes
- Climate & Environmental Factors
- How to Talk to a Mechanic About This Code
- Where to Take It: Dealer vs Independent vs Chain
- When to Walk Away From the Repair
- What Scan Tool You Need for This Code
- How to Clear the Code After You Fix It
- Will This Fail Emissions / State Inspection?
- Most Commonly Affected Vehicles
- Manufacturer-Specific Notes
- Real Owner Stories
- 2016 Chevy Silverado 1500 at 110K miles - The Misdiagnosis
- 2008 Chevy Express Van at 165K miles - The Unusual Cause
- 2017 GMC Sierra 2500HD - The Easy Fix
- How to Prevent This Code From Triggering
- Frequently Asked Questions
- What is the most common misdiagnosis for a B1370 on a GM vehicle?
- My truck has remote start and the B1370 code is only in 'History.' What does that mean?
- Can I fix B1370 myself?
- If I get a B1370 code, should I replace the BCM?
- Why do so many other codes appear with B1370?
- The battery is new, so why am I getting this code?
- What is a TSB and why is it important for this code?
- What is Circuit 5199 on a GM truck?
- 🎟️ Get 5% Off