
B1370 on 2015-2020 Chevrolet Tahoe: Ignition Circuit Fault Causes and Fixes
Code B1370 on a 2015-2020 Tahoe indicates a fault in the ignition's power-on circuit. This often causes widespread electrical issues like a no-start condition, dead HVAC controls, or no turn signal audio. The most common causes are poor wiring connections at a fuse block or the Serial Data Gateway Module (SDGM), or a failing Body Control Module (BCM).
- B1370 is a serious code on a 2015-2020 Tahoe that signals a major electrical fault, not a simple sensor failure.
- Symptoms are often widespread and chaotic, including a no-start, dead gauges, and loss of HVAC and radio functions.
- Before replacing expensive modules like the BCM, thoroughly inspect wiring and connectors as detailed in GM's Technical Service Bulletins, particularly at the fuse blocks, under the driver's sill plate, and at the SDGM.
- Diagnosis and repair should be performed by a professional, as it involves complex electrical troubleshooting and potential module programming.
What's Unique About the 2015-2020 Chevrolet TAHOE
On this generation of Tahoe (K2XX platform), code B1370 is rarely an isolated issue. It's frequently a key indicator of a larger electrical problem documented in GM Technical Service Bulletins (TSBs). Instead of a simple component failure, this code often points to specific weak points in the vehicle's complex electrical network, such as poor terminal connections at central modules or known wiring corrosion spots under the driver's sill plate.
Diagnostic Flowchart
Tap your situation to follow the diagnostic path that matches what you're seeing on this vehicle.
Symptoms You May Notice
- No-crank or start-and-immediately-stall condition.
- Instrument panel gauges inoperative or fluctuating wildly.
- Radio/infotainment display is blank.
- HVAC (climate) controls are inoperative.
- No audible 'click' from turn signals (though they may still flash on the outside).
- Multiple warning lights illuminated, such as Check Engine, Service 4WD, or Service Airbag.
- A noticeable clicking sound from relays while driving.
- Engine continues to run after turning the ignition off, until a door is opened.
- Rearview camera inoperative when shifting to reverse. 🎬 Watch: Troubleshooting a Tahoe that won't crank or start.
- Heated steering wheel inoperative.
- Replacing the battery. While a weak battery can cause many electrical issues, the specific symptoms associated with B1370 (like no turn signal audio or dead HVAC with the engine running) point more toward a module or wiring fault.
- Replacing the alternator. A charging system fault will typically set different codes and present with a battery light and dimming headlights, which are different from the specific, chaotic failures seen with B1370.
- Replacing the radio/head unit. While the radio may be dead and the turn signal clicks gone, these are symptoms, not the cause. The audio system is simply one of the many victims of the lost communication or power from the core electrical fault.
Most Likely Causes
- Poor Connection at Fuse Block(s) 🔴 High Probability TSB #PIT5391A and its later revisions point to poor terminal connections at the Underhood Fuse Block (X50A) or the Left Instrument Panel Fuse Block (X51L). Vibration and time can cause these critical power distribution terminals to lose contact. Specific problem spots mentioned are connector X4, pin M5 (Circuit 5199) and connector X2, pin M7 (Circuit 439) at the underhood block.
How to confirm: Visually inspect the connectors on the back of the fuse blocks for any terminals that have backed out, are bent, or show signs of corrosion or heat. A technician will check for voltage drop across these specific pins.
Typical fix: Repairing the specific terminal and reseating the connector. In severe cases, the fuse block and connector pigtail may need replacement.
Est. part cost: $5-$250 - Damaged/Corroded Wiring Under Driver's Sill Plate 🔴 High Probability TSB #PIT5391A and the original PIT5391 specifically call out 'Circuit 5199' under the driver's door sill plate as a common point of failure. This area is prone to moisture intrusion and damage from foot traffic, causing the wire to corrode (turning green) or break entirely.
How to confirm: Remove the driver's side sill plate and peel back the carpet to inspect the wiring harness for visible corrosion (green crust), breaks, or previous poor repairs. A YouTube video on a similar platform shows a wire in this area that had rotted out from wear and moisture.
Typical fix: Cut out the damaged section of wire and splice in a new piece using sealed, weatherproof connectors to prevent a recurrence.
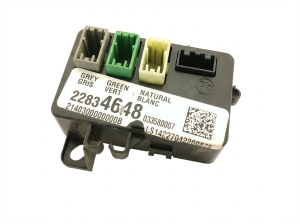
Est. part cost: $1-$20 - Poor Connection at Serial Data Gateway Module (SDGM) 🟡 Medium Probability → Shop Telematics Interface Module TSB #PIT5586G identifies bent, backed-out, or loose terminals at the SDGM's X1 or X2 connectors as a primary cause for widespread electrical issues, including code B1370. The SDGM, located under the driver's side dash above the pedals, is a central hub for all vehicle network communication.
How to confirm: A technician will disconnect the SDGM connectors (often a gray and a black one) and physically inspect each terminal for damage, corrosion, or a loose fit.
Typical fix: Repairing or replacing the affected wiring terminal and ensuring the connector is fully seated. This is a delicate wiring repair.
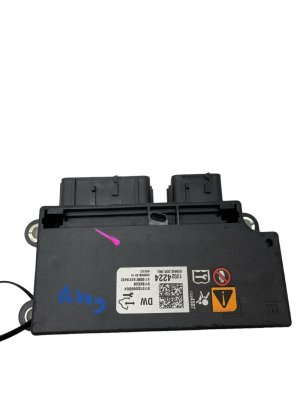
Est. part cost: $5-$50 - Failing Body Control Module (BCM) 🟡 Medium Probability → Shop Body Control Module The BCM is the 'power mode master' and is responsible for the Ignition 1 signal. Internal failure of the BCM is a known issue that can cause B1370 and a host of other random electrical problems. Forum users have discussed needing to replace the BCM to solve persistent, untraceable electrical gremlins.
How to confirm: This is typically a diagnosis of exclusion. If all wiring (especially at fuse blocks and the driver's sill), grounds, and connections test good, the BCM itself is the likely culprit. A professional scan tool can also check for internal BCM faults.
Typical fix: Replacement of the BCM, which MUST be followed by programming by a dealer or qualified shop to match the vehicle's VIN and options. Some companies offer pre-programmed BCMs.
Est. part cost: $250-$600
Rare But Worth Checking
- Serial Data Gateway Module (SDGM) Logic Lock: → Shop Telematics Interface Module Mentioned in TSB #PIT5586G, this is a software 'freeze' rather than a hardware failure. A simple 'hard reset' by disconnecting the battery for 30 minutes can sometimes resolve the issue temporarily or permanently, making it an easy first step in diagnosis.
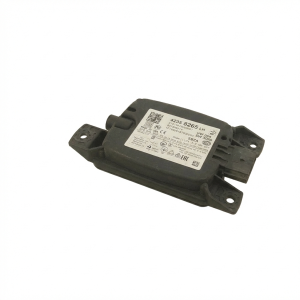
- Faulty KR73 Ignition Main Relay: → Shop Wiring Relay TSB #PIT5391A mentions that the loss of Ignition 1 voltage can be caused by the KR73 Ignition Main Relays failing to activate. There are two of these relays: one in the Underhood Fuse Block (X50A) and another in the Left I/P Fuse Block (X51L). While less common than wiring issues, a faulty relay is a possible and relatively simple part to replace.
- Blown Fuse: In some cases, a simple blown 2-amp fuse related to the ignition circuit can be the root cause. A diagnostic video on a related GM van with code B1370 found the entire no-start issue was resolved by replacing a single blown fuse.
Diagnosis Steps
- Scan for all DTCs in all modules. Note the presence of multiple 'U' (communication) codes, which strongly suggests a network-wide problem.
- Perform a battery and charging system test to rule out a basic power supply issue.
- As per TSB #PIT5586G, attempt a hard reset by disconnecting the battery for 30 minutes to see if the issue is a module 'logic lock'.
- If the issue persists, follow TSB #PIT5391A: Inspect the wiring harness under the driver's sill plate for corrosion or damage, especially Circuit 5199.
- Inspect the main connectors (especially X4 and X2) at the Underhood Fuse Block and the connectors at the Left I/P Fuse Block for any backed-out, bent, or corroded terminals.
- Inspect the X1 and X2 connectors at the Serial Data Gateway Module (SDGM), located above the pedals, for any terminal issues.
- Check fuses related to the ignition and BCM circuits in all fuse panels (engine bay, driver's side dash, passenger's side dash).
- If all wiring and connections are confirmed to be good, further diagnostics on the Body Control Module (BCM) are required, likely leading to its replacement and programming.
Parts You'll Likely Need
- Body Control Module (BCM) — If wiring and connections are good, the BCM itself is the next logical point of failure, as it is the source of the power mode signals. The exact part number is VIN-specific and has been superseded multiple times. Ordering requires VIN verification.
Trusted brands: ACDelco (GM Genuine)
OEM price range: $300-$600
Aftermarket price range: $200-$400 - Wiring Connector Terminals — TSBs point to loose, bent, or corroded terminals at the fuse blocks and SDGM as a primary cause. These small metal pins are often the true point of failure.
Trusted brands: ACDelco
OEM price range: $5-$20
Aftermarket price range: $2-$10
Related Codes That Often Appear With This One
- U0140 — Lost Communication With Body Control Module. This code frequently appears with B1370 as they both point to a BCM or network wiring problem.
- U0155 — Lost Communication With Instrument Panel Cluster (IPC) Control Module. The dead gauges and warning lights are a direct result of the IPC losing communication, often due to the same root cause as B1370.
- U0164 — Lost Communication With HVAC Control Module. This explains why the climate controls go dead. It's another module not receiving the proper power or data signals.
- B1325 — Device Power 3 Circuit Malfunction. Often set alongside B1370 in TSB #PIT5391A, indicating a widespread power distribution problem.
Technical Service Bulletins (TSBs) & Recalls
- PIT5586B / PIT5586G: Links B1370 to inoperative gauges, no turn signal audio, and dead HVAC controls, pointing to issues with the Serial Data Gateway Module (SDGM).
- PIT5391A: Links B1370 to no-crank/stall conditions, pointing to a loss of Ignition 1 voltage from bad fuse block terminals or corroded wiring under the driver's sill plate.
Platform-Specific Known Issues
- Owner Experience: Intermittent No-Start Solved by Sill Plate Wire Repair: Multiple owners on forums and in diagnostic videos report chasing intermittent no-start and random electrical faults for weeks. One detailed video shows a technician tracing the fault on a similar GM vehicle directly to a corroded wire under the driver's side floor trim, exactly where TSB PIT5391A indicates. The repair involved cutting out the rotted section of wire and splicing in a new piece, which completely resolved the problem.
- Owner Experience: BCM Replacement Required: A video for a 2015 Suburban (platform mate) with no ignition power despite the key being on demonstrates a successful fix by replacing and reprogramming the Body Control Module (BCM). This is often the final step after all wiring and connection checks fail to find a fault.
- Dealer Service: Fuse Block Connector Terminal Repair: → Shop Fuse Box TSB PIT5391F, an update to the original bulletin, gives very specific instructions for technicians to inspect terminals at the underhood fuse block (X50A), specifically pin M5 on connector X4 and pin M7 on connector X2. This indicates that dealers are frequently finding the problem right at the fuse block connectors, rather than a more expensive component failure.
Mechanic-Grade Diagnostic Values
- Voltage on 'Device Ignition 1' circuit (e.g., Circuit 5199) — expected: Battery Voltage (~12.6V) with Key ON, Engine OFF. 0V with Key OFF.. Failure: 0V or significantly less than battery voltage with Key ON indicates an open or short to ground. Any voltage greater than 0V with Key OFF indicates a short to power.
Hidden / Shadow Codes Worth Checking
- B1370 with subtype (e.g., -01, -06): Professional scan tools may show a two-digit subtype. For example, B1370-01 indicates 'Short to Ground', while B1370-06 indicates an 'Algorithm Based Failure'. This provides a more specific starting point for diagnosis than the code alone. (see via A professional-grade scan tool like the GM GDS2 is required to view these subtypes.)
Scan Tool Commands That Help
- GM GDS2 (Global Diagnostic System 2): Module Diagnostics > BCM > Control Functions — To verify if the BCM is capable of commanding ignition-related outputs. A technician can command the KR73 Ignition Main Relay on and off to see if the relay clicks and if voltage appears on the output side. This helps isolate a faulty BCM from a faulty relay or wiring.
- GM GDS2 (Global Diagnostic System 2): Data Bus Diagnostic Tool — When multiple 'U' codes are present, this tool can be used to poll the vehicle's data buses (like the CAN bus) and report which modules are communicating and which are not. This helps create a map of the communication failure, pointing technicians to the area between the last-known-good module and the first non-responsive one.
Wiring & Ground Locations
- X50A — Underhood Fuse Block, located in the engine compartment.. This is a central power distribution point. TSBs specifically call out checking connector X4, pin M5 (Circuit 5199) and connector X2, pin M7 (Circuit 439) for poor connections.
- X51L — Left Instrument Panel Fuse Block, located on the driver's side of the instrument panel, behind a cover.. This is the second key power distribution point. TSBs point to checking connector X1, pin 42 (Circuit 5199) and connector X2, pin 44 (Circuit 1850) for issues.
- Driver's Sill Plate Harness — Under the plastic driver's side door sill plate, within the main wiring harness running along the floor.. This is the most notorious location for corrosion or damage to Circuit 5199, a critical Ignition 1 voltage wire. Moisture and foot traffic can cause the wire to break or corrode here.
- G103 / G218 (BCM Ground) — A key BCM ground is located on the cowl, above the brake booster (G103). Another important interior ground is inside the cab beside the front left speaker, requiring removal of the A-pillar trim to access.. A poor ground connection for the Body Control Module can cause it to malfunction, leading to incorrect power mode signals and setting codes like B1370.
- Frame Grounds — Behind both front wheels on the frame, and a main ground cable from the battery to the frame rail near the driver's side door.. These locations are exposed to road spray and are prone to corrosion. A high-resistance ground can cause widespread, intermittent electrical issues that mimic module failures.
Real Owner Repair Stories
- Reddit user on r/ChevyTahoe (2015 Tahoe LTZ) — Intermittent cascade of errors: Stabilitrak, suspension, trailer brake, power steering, park assist, adaptive cruise. Sometimes the car would start fine, other times with all errors present.
❌ Tried (didn't work) New battery replacement., Cleaning corroded connectors and wires., Replacing a wiring "harness" and the trailer brake module., Replacing the negative battery cable after a dealer said it was drawing too much power.
✅ What actually fixed it The user's post is a chronicle of failed repair attempts and does not have a final confirmed fix. It serves as a valuable cautionary tale about how intermittent wiring/ground issues on this platform can lead to expensive and ineffective parts replacement. The symptoms strongly align with the known TSB issues.
OEM Part Supersession History
Varies by VIN→Varies by VIN— GM frequently updates part numbers to reflect hardware or software revisions.
Heads up: The BCM for this platform is a 'Global A' architecture part, typically made by Bosch or Continental with a white label. Do not confuse with later 'Global B' parts made by Denso. Ordering requires VIN verification to get the correct, most current part number and programming.
Model Year Variations Within This Range
- 2017-2020: Vehicles from 2017 onwards equipped with IO5/IO6 radio systems have a different wiring configuration at the Serial Data Gateway Module (SDGM). Aftermarket device installations often require a specific bypass harness or manually moving a pin in the gray SDGM connector, which is not necessary on 2015-2016 models. This indicates a change in the data bus architecture that could be relevant to complex diagnostics.
Helpful Videos


We Have This Part in Stock

The information in this article is provided for general reference and educational purposes only. Vehicle specifications, procedures, and part compatibility can vary by production date, trim level, and region. Always consult your vehicle's factory service manual and verify part numbers before purchasing or performing repairs. Safety-critical components such as airbags, seat belts, and braking systems should be installed by a qualified professional.
- Chevrolet TAHOE:
- 🧭 Diagnostic Flowchart
- 🎬 Helpful Videos
- 🛍️ Shop This Part
- What's Unique About the 2015-2020 Chevrolet TAHOE
- Symptoms You May Notice
- Most Likely Causes
- Rare But Worth Checking
- Diagnosis Steps
- Parts You'll Likely Need
- Related Codes That Often Appear With This One
- Technical Service Bulletins (TSBs) & Recalls
- Platform-Specific Known Issues
- Mechanic-Grade Diagnostic Values
- Hidden / Shadow Codes Worth Checking
- Scan Tool Commands That Help
- Wiring & Ground Locations
- Real Owner Repair Stories
- OEM Part Supersession History
- Model Year Variations Within This Range
- 🎟️ Get 5% Off