
B1446 on 2016-2019 Lexus IS 300: Driver's Side Air Mix Servo Failure Explained
This code means the small motor controlling the driver's side air temperature has failed. The most common symptom is hot air blowing from the driver's vents when the A/C is on. The fix is to replace the faulty servo motor (Part No. 87106-30570), which is a known issue across many Lexus models and can be difficult to access. Check for eligibility under Lexus Customer Support Program 20LE01 before paying for repairs.
- B1446 on a 2016-2019 IS 300 almost always means the driver's side air mix servo has failed.
- Symptoms are typically hot air from the driver's vents and clicking noises from the dash.
- The correct replacement part is OEM number 87106-30570.
- The repair is labor-intensive due to the part's location deep inside the dashboard.
- Before paying for repairs, check with a Lexus dealer for eligibility under Customer Support Program 20LE01, which may cover the cost.
What's Unique About the 2016-2019 Lexus IS 300
This is a very common and well-documented failure across many modern Lexus models, including the third-generation IS and its platform mates like the GS and RC. The servo motors used in the HVAC system are a known weak point due to internal electrical failures. Lexus has issued multiple Technical Service Bulletins (TSBs) and a specific Customer Support Program (20LE01) for this issue on various models due to the high failure rate, indicating a design or manufacturing flaw in the servo units themselves.
Diagnostic Flowchart
Tap your situation to follow the diagnostic path that matches what you're seeing on this vehicle.
Symptoms You May Notice
- Incorrect air temperature from the driver's side vents (often stuck on full heat or full cold).
- Uneven temperature between driver and passenger side vents.
- Clicking, buzzing, or grinding noises from behind the driver's side dashboard as the faulty servo attempts to move.
- Inability to adjust the driver's side temperature.
- Vents on back seats may blow hot air regardless of setting.
- Replacing the entire HVAC control panel on the dashboard when the issue is a mechanical servo motor behind the dash.
- Adding refrigerant to the A/C system, which will not solve a temperature blending issue.
Most Likely Causes
- Failed Driver's Side Lower Air Mix Servo Motor 🔴 High Probability The servo motors are a known high-failure item across many Lexus models of this era, as acknowledged by multiple TSBs and a Customer Support Program (20LE01). The failure is often due to wear on the internal electrical contacts and circuit board, not just the motor or gears.
How to confirm: Use a capable scan tool (like Toyota's Techstream) to monitor the live data. Compare the 'Air Mix Servo Targ Pulse (D)' with the 'Air Mix Servo Actual Pulse (D)' while changing the temperature setting. If the 'Actual Pulse' value does not change or is stuck, the servo has failed. A persistent clicking sound from the dash is also a strong indicator.
Typical fix: Replace the faulty servo motor. The part is officially called 'Damper Servo Sub-Assembly, Air Conditioner Radiator, No. 5'. After replacement, an initialization procedure must be performed using a scan tool to calibrate the new motor.
Est. part cost: $170-$250 - Wiring Harness or Connector Issue ⚪ Low Probability
How to confirm: Visually inspect the wiring and connector at the servo motor for damage or corrosion. Use a multimeter to test for continuity and proper voltage at the connector according to the factory service manual.
Typical fix: Repair the damaged section of the harness or clean/replace the connector.
Est. part cost: $5-$50 - Faulty A/C Amplifier (HVAC Control Module) ⚪ Low Probability → Shop HVAC Control
How to confirm: This is diagnosed by exclusion. If the servo motor and wiring are confirmed to be good, but the servo still does not operate correctly, the A/C amplifier may be at fault. This is a last resort.
Typical fix: Replace the A/C amplifier module.
Est. part cost: $400-$700
Rare But Worth Checking
- Mechanically Jammed Blend Door: A foreign object could have fallen into the HVAC vents and jammed the blend door linkage, preventing the servo from moving. The service manual notes to check for mechanical binding before replacing parts.
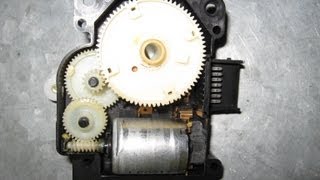
- Dirty Internal Servo Contacts: On older models, some owners have had success by disassembling the servo motor and cleaning the internal copper contact paths, which can become contaminated with grease and wear particles. This is a complex DIY repair but can sometimes restore function without replacing the part. 🎬 See a detailed dissection of the air mix servo internals.
Diagnosis Steps
- Confirm the symptom: Verify that the driver's side vents are blowing air at an incorrect temperature compared to the setting and the passenger side.
- Scan for codes: Use an OBD-II scanner capable of reading Body (B) codes to confirm B1446 is present.
- Listen for noise: With the engine on but radio off, cycle the driver's temperature from LO to HI. Listen for a faint clicking or grinding from the lower driver's side dashboard.
- Use an advanced scan tool: Access the HVAC live data with a tool like Toyota Techstream. Monitor the 'Air Mix Servo (D)' parameters. Compare 'Target Pulse' with 'Actual Pulse'. If the actual pulse does not change or is wildly different from the target as you adjust the temperature, the servo or its circuit has failed.
- Inspect the servo and wiring: If accessible, visually inspect the servo motor and its connector for any obvious damage. Test the wiring for power, ground, and signal per the service manual.
- Test the servo motor (if removed): An advanced test involves applying battery voltage directly to the motor terminals (pins 4 and 5) to see if it rotates in both directions.
- Replace the faulty component: Based on the tests, replace the servo motor, which is the most common failure. Perform servo initialization after replacement.
Parts You'll Likely Need
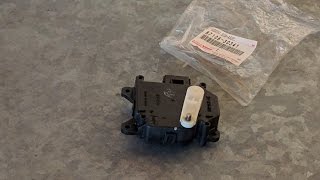
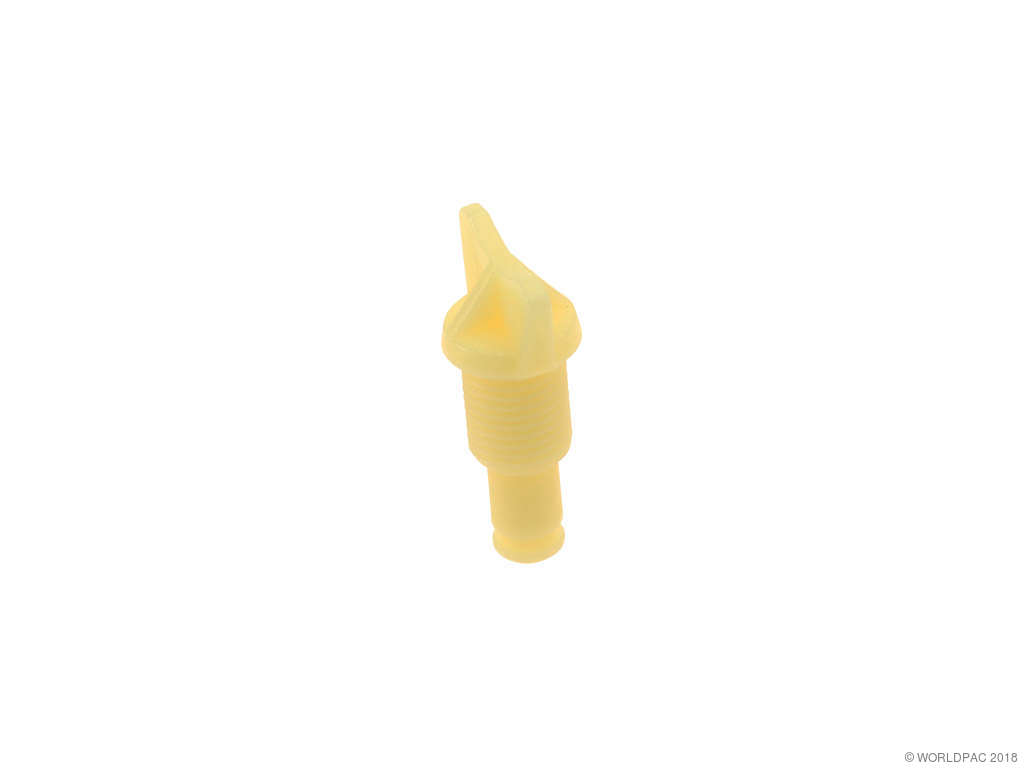
- Damper Servo Sub-Assembly, Air Conditioner Radiator, No. 5
(OEM #87106-30570)— This is the specific servo motor that controls the driver's side lower air temperature blend door and is the direct cause of code B1446.
Trusted brands: Lexus (Genuine OEM), Denso
OEM price range: $170-$250
Aftermarket price range: $50-$120
Related Codes That Often Appear With This One
- B1441 — This is the code for the passenger side air mix servo. It's common for these servos to fail around the same time due to similar age and construction.
- B1443 — This code relates to the Air Outlet Damper Control Servo. A fault in the HVAC control system or multiple failing servos can cause several related codes to appear together.
- B1448 — This is the code for the Passenger Side Face Servo Motor. A user on ClubLexus reported having B1446 and B1448 appear simultaneously on their vehicle.
Technical Service Bulletins (TSBs) & Recalls
- L-SB-0019-20: HVAC Servo Motor Malfunction (covers 2017-2019 models)
- L-SB-0001-21 Rev: HVAC Servo Motor Malfunction (covers 2016 models)
- Customer Support Program 20LE01: A/C Servo Motor Malfunction Coverage Extension
Platform-Specific Known Issues
- Lexus issued Technical Service Bulletin L-SB-0019-20 for 2017-2019 models and L-SB-0001-21 for earlier models, both addressing HVAC servo motor malfunctions, including the one causing B1446.
- Due to the high failure rate, Lexus initiated Customer Support Program 20LE01. This program extends the warranty coverage for A/C servo motor failures. Owners should contact a Lexus dealer with their VIN to check for eligibility, as the repair may be covered free of charge.
Mechanic-Grade Diagnostic Values
- Techstream Live Data: 'Air Mix Servo Targ Pulse (D)' vs 'Air Mix Servo Actual Pulse (D)' — expected: For LHD vehicles, the 'Targ Pulse' should be 92 at MAX COOL and 5 at MAX HOT. The 'Actual Pulse' value should closely follow the 'Targ Pulse' value as the temperature is changed.. Failure: The 'Actual Pulse' value does not change or is stuck at a fixed number (e.g., 255) when the 'Targ Pulse' is commanded to change.
- Servo Motor Bench Test (Motor Operation) — expected: Connect 12V positive to terminal 5 and negative to terminal 4; the servo lever should move smoothly to the 'MAX HOT' position. Reverse polarity (positive to 4, negative to 5) and the lever should move to 'MAX COOL'.. Failure: The servo lever does not move, moves erratically, or makes grinding noises. 🎬 Watch how to take apart and repair a faulty servo.
- Servo Motor Connector Pin Voltages/Resistance — expected: Pins are: 1(VZ), 2(GND), 3(PT) for the position sensor, and 4(MCOOL), 5(MHOT) for the motor. These correspond to A/C Amplifier connector A17 pins 9, 20, 23, 14, and 15 respectively. Voltage and resistance should be checked against a service manual diagram.. Failure: Open or short circuits, or incorrect voltage readings at the connector pins when commanded by the A/C amplifier.
- Servo Motor Insulation Resistance — expected: Using a megohmmeter, the insulation resistance should not be less than 5 MΩ.. Failure: A resistance value below 5 MΩ indicates an internal short or insulation breakdown.
Scan Tool Commands That Help
- Toyota Techstream: Data List: 'Air Mix Servo Targ Pulse (D)' vs 'Air Mix Servo Actual Pulse (D)' — This is the primary diagnostic step to confirm the fault. It allows you to see if the servo's actual position is matching the commanded position in real-time without disassembling the dash.
- Toyota Techstream: Active Test: 'Cool A/M Servo Pulse(D)' — To manually command the servo motor to move to a specific position (e.g., MAX HOT or MAX COOL) to verify its physical operation and listen for noises.
- Toyota Techstream: Utility: 'Servomotor Initialization' — This is a mandatory calibration step after replacing a servo motor. It can also be used as a first diagnostic step, as it sometimes temporarily restores function to a sticking servo, confirming the issue is with the servo itself.
- Toyota Techstream: Utility: 'AC Damper Servo Operation Check Tool (Servo Cleaning Utility)' — Referenced in TSB L-SB-0001-21, this function is used after reprogramming the A/C amplifier. It cycles the servos for 8-14 minutes to clean the internal contacts. If DTCs return after this procedure, the servo must be replaced.
Wiring & Ground Locations
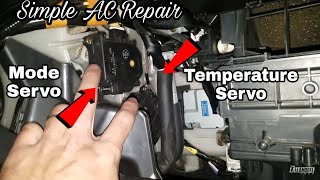
- Driver's Side Lower Air Mix Servo — Located on the driver's side of the central HVAC unit, approximately a foot above the accelerator pedal, to the left of the radio/center stack.. This is the physical location of the component that needs to be tested and replaced. Access requires removing the driver's side lower dash panel.
- Servo Motor Connector — A 5-pin connector attached directly to the servo motor body.. This is the point for electrical testing. Pins 4 (MCOOL) and 5 (MHOT) control the motor, while pins 1 (VZ), 2 (GND), and 3 (PT) are for the position sensor feedback to the A/C amplifier.
- Ground Point J1 — Located in the driver's side kick panel area.. This is a primary ground point for the instrument panel wire harness, which includes the A/C system. A poor ground here could cause erratic behavior in the A/C amplifier that controls the servo.
Real Owner Repair Stories
- ClubLexus Forum User (Lexus IS (year not specified, but covered by service campaign)) — HVAC codes B1446, B1454, B1455 present.
❌ Tried (didn't work) The dealer initially cleared the codes and performed a servo re-initialization, but the codes came back.
✅ What actually fixed it The dealer determined another servo had failed after the re-initialization. They replaced four separate servo motors under the Lexus Customer Support Program to resolve the issue. - YouTube channel 'froggy' (Lexus IS300 (1st Gen, but principle is identical)) — Incorrect temperature blend (hot/cold).
❌ Tried (didn't work) A previous DIY repair of the servo's internal contacts worked for a couple of years but eventually failed again.
✅ What actually fixed it The user decided to replace the entire servo motor unit (part #87106-30570) rather than attempting another internal repair, which permanently fixed the problem.
OEM Part Supersession History
87106-30570→87106-30570— This part number appears to be stable but is cross-referenced with other servo part numbers (e.g., 87106-30540, 87106-30610) due to its use across multiple Lexus platforms (IS, GS, RC).
Heads up: While multiple part numbers may be listed as compatible in catalogs, Lexus TSBs advise confirming the exact correct part number for the specific servo function using the vehicle's VIN in the official parts catalog.
Model Year Variations Within This Range
- 2016 vs 2017-2019: Lexus issued separate Technical Service Bulletins for this issue based on the model year refresh. TSB L-SB-0001-21 Rev applies to the 2016 model, while TSB L-SB-0019-20 applies to the 2017-2019 models. While the fault and part are the same, this indicates a potential difference in the diagnostic procedure or associated software recognized by the manufacturer.
Helpful Videos
Used OEM Parts in Stock
New Aftermarket Parts Available


The information in this article is provided for general reference and educational purposes only. Vehicle specifications, procedures, and part compatibility can vary by production date, trim level, and region. Always consult your vehicle's factory service manual and verify part numbers before purchasing or performing repairs. Safety-critical components such as airbags, seat belts, and braking systems should be installed by a qualified professional.
- Lexus IS 300:
- 🧭 Diagnostic Flowchart
- 🎬 Helpful Videos
- 🛍️ Shop This Part
- What's Unique About the 2016-2019 Lexus IS 300
- Symptoms You May Notice
- Most Likely Causes
- Rare But Worth Checking
- Diagnosis Steps
- Parts You'll Likely Need
- Related Codes That Often Appear With This One
- Technical Service Bulletins (TSBs) & Recalls
- Platform-Specific Known Issues
- Mechanic-Grade Diagnostic Values
- Scan Tool Commands That Help
- Wiring & Ground Locations
- Real Owner Repair Stories
- OEM Part Supersession History
- Model Year Variations Within This Range
- 🎟️ Get 5% Off