
B1632 on 2011-2018 Chrysler 300: Left High Beam Circuit Fault Causes and Fixes
This code indicates a circuit problem with the left high beam. It is most often caused by a faulty wiring connection between the main fuse box (PDC) and the headlamp. A specific Technical Service Bulletin (TSB) outlines a fix involving installing a wiring kit, which is the most probable solution, especially for flickering or inoperative high beams in cold weather.
- B1632 on a Chrysler 300 means there's an electrical problem with the left high beam, not necessarily a bad bulb.
- The most common cause is a known wiring issue between the fuse box (PDC) and the headlamp, which is addressed by a manufacturer TSB.
- Before replacing expensive parts like the headlamp assembly, thoroughly inspect the wiring, connectors, and fuses for damage or poor contact.
- For persistent issues, especially on 2011 models, a Body Control Module software update might be required.
What's Unique About the 2011-2018 Chrysler 300
For the second-generation Chrysler 300 (and its platform mate, the Dodge Charger), this code is well-documented by the manufacturer. Chrysler has issued Technical Service Bulletins (TSBs) that directly address this issue, particularly noting that high beam flickering or failure can occur in cold weather. The problem is often not the headlamp bulb or ballast itself, but the wiring integrity between the Power Distribution Center (PDC) and the headlamp assembly, which can develop high resistance or an open circuit. This issue affects both Halogen (sales code LMC) and HID (sales code LMQ) equipped vehicles.
Diagnostic Flowchart
Tap your situation to follow the diagnostic path that matches what you're seeing on this vehicle.
Symptoms You May Notice
- Left high beam does not turn on
- High beams flicker, especially in cold weather.
- High beam shutter on HID models opens and then closes.
- Check Engine Light or other warning lamps illuminated.
- Melted plastic around the headlight fuse in the engine bay fuse box.
- Replacing the headlamp bulb when the actual issue is the wiring harness or a poor connection at the fuse box.
Most Likely Causes
- Faulty Wiring or Connectors 🔴 High Probability As identified in TSB 08-054-21, the wiring from the Power Distribution Center (PDC) to the headlamp connector is a known failure point, causing an open circuit or short. This can be due to wire chafing or corrosion. Additionally, poor contact at the fuse terminals in the PDC can cause high resistance, leading to melted fuses and intermittent contact, a common complaint on owner forums.
How to confirm: Inspect the wiring harness for visible damage, chafing, or corrosion. Use a multimeter to check for continuity and proper voltage at the headlamp connector when the high beams are activated. Wiggling the fuses (F15 for left HID) or connectors while observing the light can also reveal an intermittent connection. Check for melted plastic around the base of the fuse.
Typical fix: Repairing the damaged section of wire or installing the official Mopar wiring kit (Part No. 68540265AA) as outlined in TSB 08-054-21 is the definitive fix. This kit contains a jumper harness that overlays the faulty circuit. In cases of a melted fuse box connection, some owners have had success cleaning the terminals and replacing the fuse, sometimes with a larger blade style fuse for better contact, though this is not an official repair.
Est. part cost: $5-$75 - Faulty Headlamp Assembly 🟡 Medium Probability → Shop Headlight Assembly For models with HID headlamps, the internal shutter mechanism that controls the high beam function can fail, sometimes sticking in cold weather. For halogen models, the high beam filament can burn out.
How to confirm: First, swap the left and right headlamp bulbs (if halogen) to see if the problem moves. For HID models, listen for the click of the shutter when activating the high beams. If no other cause is found, testing with a known good headlamp assembly is the final confirmation.
Typical fix: Replace the headlamp bulb or the entire headlamp assembly if the internal shutter mechanism is faulty. Replacement of the assembly requires removal of the front bumper cover.
Est. part cost: $20-$800 - Faulty Body Control Module (BCM) ⚪ Low Probability → Shop Body Control Module While less common, the BCM is responsible for controlling the headlamp circuits. An internal failure of the driver circuit for the left high beam can cause this code. General electrical issues on Chrysler vehicles can sometimes be traced to a weak battery or failing alternator causing low voltage conditions that confuse control modules.
How to confirm: This is typically a diagnosis of exclusion. If the bulb, wiring, and all connections are confirmed to be good, the BCM is the likely culprit. A high-end scan tool may be needed to actuate the circuit and monitor BCM data. An early TSB (08-016-11) also noted that a software flash for the BCM could resolve this fault code on 2011 models.
Typical fix: Reprogramming or replacing the Body Control Module. This usually requires a trip to a dealer or a qualified shop with programming capabilities.
Est. part cost: $200-$700
Diagnosis Steps
- Read the code with an OBD-II scanner to confirm B1632 and note the suffix (-11 for short to ground, or -15 for short to battery/open).
- Visually inspect the left high beam bulb. If it's a halogen bulb, check if the filament is broken.
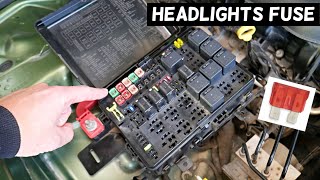
- Check the fuses for the headlights. On this vehicle, they are located in the Power Distribution Center (fuse box) in the engine bay. Look for fuse F15 (Left HID Headlamp) and F16 (Right HID Headlamp). Pay close attention to signs of melting or poor contact at the fuse terminals, as this is a known issue.
- Inspect the wiring and connector at the back of the left headlamp assembly for any signs of damage, corrosion, or loose pins.
- Following the guidance of TSB 08-054-21, inspect the wiring harness between the PDC and the headlamp. This is the most likely point of failure.
- Using a multimeter, check for battery voltage at the appropriate pin on the headlamp connector (circuit L33) when the high beams are switched on.
- If voltage is absent, check for continuity on the ground wire and the power wire back to the PDC to find the open or short in the circuit.
- If all wiring and the bulb/assembly check out, the issue may be with the Body Control Module (BCM). A diagnostic scan tool can help confirm by attempting to actuate the circuit directly.
Parts You'll Likely Need
- Headlamp Wiring Jumper Kit
(OEM #68540265AA)— This is the official Mopar repair kit specified in TSB 08-054-21 to fix the known wiring issue between the PDC and headlamp. It includes an overlay harness and instructions.
Trusted brands: Mopar
OEM price range: $50-$75
Aftermarket price range: $20-$40 - Headlamp Assembly — If the internal high-beam shutter (on HID models) or other internal components have failed, the entire assembly must be replaced. Bumper removal is required for this job.
Trusted brands: Mopar, TYC, Depo
OEM price range: $600-$900
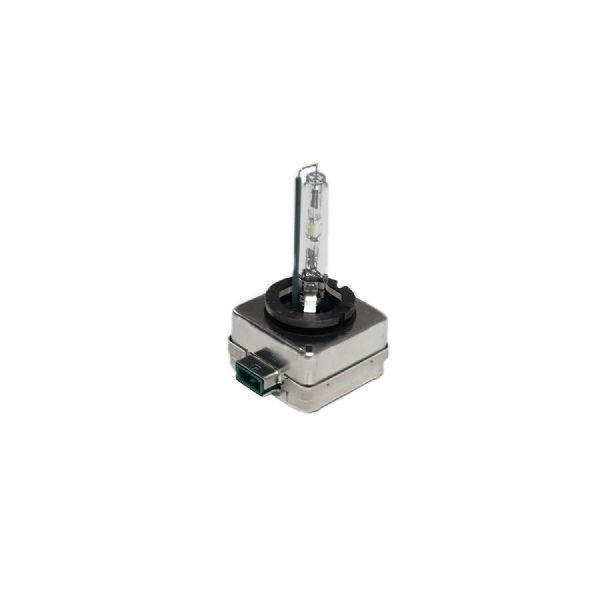
Aftermarket price range: $250-$500 - Headlight Bulb — If the vehicle uses halogen bulbs, the high beam filament may have simply burned out. This is a less common cause for this specific code but is a simple first check. For HID models, the bulb is typically a D1S or similar.
Trusted brands: Sylvania, Philips
OEM price range: $20-$40
Aftermarket price range: $15-$30
Related Codes That Often Appear With This One
- B1636 — This is the corresponding code for the Right High Beam Control Circuit. TSBs often list both codes together, as the underlying wiring or module issue can affect both sides.
Technical Service Bulletins (TSBs) & Recalls
- 08-054-21: High Beam Headlamps Flicker. Recommends installing a wiring kit.
- S1908000212: High Beams Are Inop, Shutter Door On High Beams Open And Then Close In Cold Ambient Temperatures.
- 08-016-11: Flash update for the Body Control Module on 2011 models to correct several issues, including false lighting codes like B1632-15.
Platform-Specific Known Issues
- TSB 08-054-21 was issued for high beam flickering or inoperation, recommending the installation of a jumper wire kit from the PDC to the headlamp connectors. This applies to both Halogen and HID equipped vehicles.
- TSB S1908000212 specifically mentions high beams being inoperative in cold temperatures due to the shutter door cycling, setting codes B1632-11 and B1636-11.
- TSB 08-016-11 for early 2011 models indicates that a BCM software update could resolve a false B1632-15 code.
- Owners on forums frequently report that the mini-fuses for the headlights (F15/F16) can melt at the base, causing a poor connection even if the fuse itself is not blown.
Mechanic-Grade Diagnostic Values
- Resistance between the (L33) Left High Beam Driver circuit at the BCM connector and a known good ground. — expected: Above 10,000 Ohms (10k Ohms). Failure: A resistance reading below 10k Ohms indicates a short to ground in the circuit.
Scan Tool Commands That Help
- wiTECH: Body Verification Test — This function is used after a repair (like fixing a short or replacing the BCM) to clear DTCs and verify that the fault condition is no longer present.
- wiTECH: Restore Vehicle Configuration — This procedure, found under the 'Diagnostic Procedures' tab, is used to reconfigure the BCM. It can be necessary after BCM replacement or if certain settings are incorrect, as noted in TSBs for related lighting issues.
- wiTECH: Read DTCs (while actuating high beams) — A key diagnostic step is to disconnect the left headlamp assembly, activate the high beams, and see if the DTC changes from B1632-11 (short to ground) to B1632-15 (open circuit). This helps isolate the fault to the headlamp assembly itself versus the wiring.
Wiring & Ground Locations
- L33 — The (L33) Left High Beam Driver circuit runs from a connector at the Body Control Module (BCM) to the left front lamp assembly connector.. This is the specific circuit that has the fault. All voltage and resistance tests for B1632 are performed on this wire.
- G102 — Located in the left headlamp area.. This is a primary ground point for the front lighting on the left side of the vehicle. A poor connection at G102 could cause various lighting faults, although this code points to a control circuit issue rather than a ground failure.
- G911 — Located on the left side of the dash.. This is a major interior ground point. While less likely to be the direct cause, it serves various modules and could contribute to erratic BCM behavior if the ground is compromised.
- Left Front Lamp Assembly Connector — The connector plugs directly into the back of the left headlamp housing.. This is a critical point for testing. Technicians check for voltage on the L33 circuit pin at this connector. Disconnecting it helps isolate whether the fault is in the wiring harness or internal to the headlamp assembly.
Real Owner Repair Stories
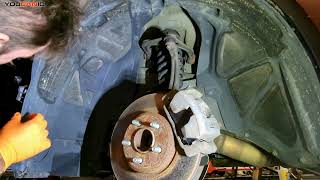
- YouTube video 'Fixing my melting fuse box issue' (Audi TT (VAG platform), but demonstrates the identical failure mechanism.) — A primary power cable leading to the fuse box was getting extremely hot, indicating high resistance.
❌ Tried (didn't work) Initially suspected the wire gauge was insufficient.
✅ What actually fixed it The problem was not the fuse blowing, but the connection point under the fuse melting due to a poor, high-resistance connection (arcing and charring) at the terminal in the fuse box. The fix was to disassemble the connection, thoroughly clean the charred/corroded contact surfaces, and reassemble securely. This eliminated the high resistance and heat.
Model Year Variations Within This Range
- 2011: An early Technical Service Bulletin (08-016-11) specifically for 2011 models noted that a Body Control Module (BCM) software update could resolve a falsely reported B1632-15 code. This suggests early production BCM software was overly sensitive or had bugs that were later corrected.
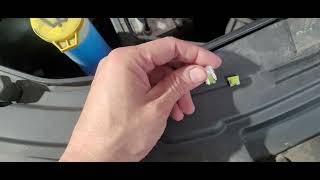
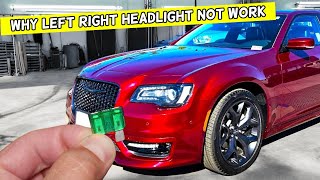
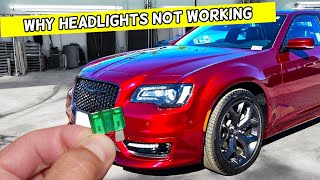
Helpful Videos


We Have This Part in Stock


The information in this article is provided for general reference and educational purposes only. Vehicle specifications, procedures, and part compatibility can vary by production date, trim level, and region. Always consult your vehicle's factory service manual and verify part numbers before purchasing or performing repairs. Safety-critical components such as airbags, seat belts, and braking systems should be installed by a qualified professional.
- Chrysler 300:
- 🧭 Diagnostic Flowchart
- 🎬 Helpful Videos
- 🛍️ Shop This Part
- What's Unique About the 2011-2018 Chrysler 300
- Symptoms You May Notice
- Most Likely Causes
- Diagnosis Steps
- Parts You'll Likely Need
- Related Codes That Often Appear With This One
- Technical Service Bulletins (TSBs) & Recalls
- Platform-Specific Known Issues
- Mechanic-Grade Diagnostic Values
- Scan Tool Commands That Help
- Wiring & Ground Locations
- Real Owner Repair Stories
- Model Year Variations Within This Range
- 🎟️ Get 5% Off