
OBD-II Code B1634: Power Mirror Control Circuit Malfunction
What B1634 means, why it triggers, and how to fix it
- Code B1634 indicates a power mirror circuit failure on Ford and GM vehicles, typically caused by a faulty $40-$120 master switch or broken door jamb wiring.
- On Dodge, Chrysler, and Jeep vehicles, B1634 means a 'Left High Beam Circuit High' fault, often triggered by installing incompatible aftermarket LED bulbs.
- Always check the dedicated mirror or headlight fuse and perform a 15-minute battery disconnect reset before buying replacement parts.
- If both mirrors and power windows fail simultaneously, inspect the main door harness boot for severed wires rather than replacing individual switches.
What Does B1634 Mean?
Code B1634 means the vehicle's body control computer detected an electrical fault in the power mirror circuit (on Ford and GM vehicles) or the left high beam headlight circuit (on Dodge, Chrysler, and Jeep vehicles). The computer expected a specific voltage when the component was activated, but received a reading indicating a broken wire, a short circuit, or a burned-out component.
Technical definition: The SAE definition for B1634 varies by manufacturer. For General Motors and Ford, it indicates an open or shorted circuit in the driver or passenger power mirror motors. For Dodge, Chrysler, Ram, and Jeep, it is defined as 'Left Hi Beam Control Circuit High', indicating excessive voltage or resistance in the left high beam circuit.
Can I Drive With B1634?
Yes, But With Caution. A misaligned mirror creates a blind spot that hides entire vehicles, dramatically increasing collision risk during lane changes. Nationally, blind-spot incidents cause over 840,000 accidents annually. While B1634 won't disable your engine, driving with an inoperable mirror or high beam is a severe safety liability and must be repaired immediately to ensure full visibility.
Common Causes
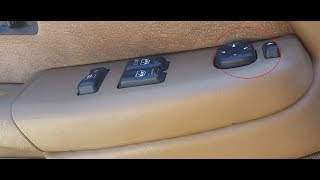
- Failed Power Mirror Switch (Very Common) — The driver's door master switch is highly susceptible to liquid spills, dirt, and mechanical wear. Internal contact corrosion 🎬 Watch: How to replace the mirror switch on a Silverado prevents the switch from sending power to the mirror motors.
- Blown Fuse (Very Common) — A power surge or a momentary short circuit blows the dedicated fuse for the mirror or headlight circuit, instantly cutting power to the system.
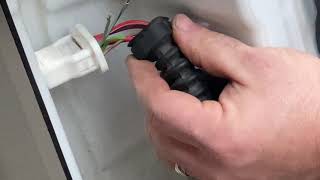
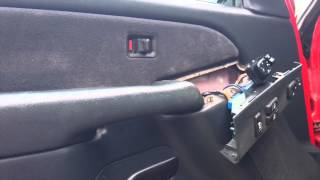
- Broken Wires in Door Jamb (Common) — Wires inside the rubber boot between the door and the vehicle body bend every time the door opens. Over years 🎬 See how to find and repair broken door jamb wires of flexing, the copper strands fatigue and snap, severing the circuit.
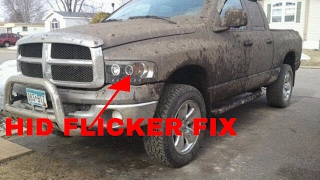
- Incompatible Aftermarket LED/HID Bulbs (Chrysler/Dodge) (Common) — The TIPM monitors headlight circuits for the specific power draw of factory halogen bulbs. Aftermarket LED bulbs draw significantly less power, causing the computer to misinterpret the drop as a 'Circuit High' fault and shut down the circuit.
- Corroded Wiring or Connectors (Less Common) — Water leaking past window seals pools inside the door panel, corroding the electrical connectors for the switch or mirror. This creates high electrical resistance that blocks current flow.
- Failed Mirror Motor (Less Common) — The small electric motors inside the mirror housing burn out from age or physical impact, preventing adjustment in one or more directions.
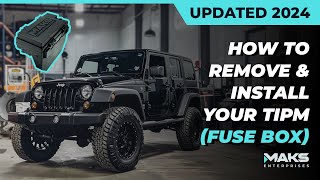
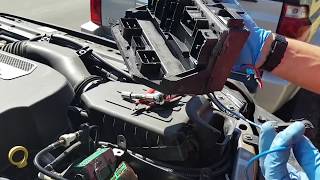
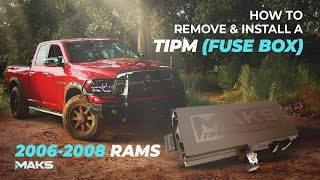
- Failed or Glitching BCM/TIPM (Rare) — The Body Control Module (BCM) or Totally Integrated Power Module (TIPM) suffers an internal relay failure or software logic freeze. 🎬 Watch: How to remove and reset your vehicle's TIPM This stops power delivery even when all external wiring and switches are perfectly intact.
Symptoms
- Power mirrors do not adjust — Neither the driver nor passenger side mirror moves when operating the master control switch.
- Mirror only moves in specific directions — The mirror adjusts up and down but not left and right. This isolates the failure to a specific internal motor or a single corroded switch contact.
- Left high beam headlight fails to illuminate (Dodge/Chrysler/Jeep) — The left high beam does not turn on, often accompanied by a 'Lamp Out' warning chime on the dashboard.
- Body Control Module (BCM) warning light is on (also visible on scanner) — The vehicle illuminates a generic warning light (often a wrench or vehicle outline) indicating a non-emissions body fault.
Diagnostic Flowchart
Tap your situation to follow the diagnostic path that matches what you're seeing on this code.
Common Fixes & Costs
- Replace Blown Fuse — Parts: $1-$5, Labor: $0, ~0.1 hr book time (DIY)
- Replace the Power Mirror Switch
— Parts: $30-$120, Labor: $60-$100, ~0.5 hr book time
(DIY)
Ford F-150 (1997-2014): OEM 4L3Z-17B676-AA (Alt: Dorman 901-319)
Chevrolet/GMC Silverado/Sierra (1999-2007): OEM 15045085 (Alt: Dorman 901-124) - Perform BCM/TIPM Soft Reset — Parts: $0, Labor: $0, ~0.2 hr book time (DIY)
- Repair Broken Wires in Door Jamb — Parts: $5-$20, Labor: $100-$250, ~1.5 hr book time (Intermediate)
- Replace Side View Mirror Assembly — Parts: $50-$1000, Labor: $75-$200, ~1.0 hr book time (Professional)
- Replace/Repair TIPM
— Parts: $500-$1500, Labor: $150-$300, ~1.2 hr book time
(Professional)
Dodge Ram 1500 (2012): OEM 68089322AG (Alt: Remanufactured via GoECM or MAKS)
DIY vs Professional
- Replace Blown Fuse 🟢 Beginner
Tools: Fuse puller or needle-nose pliers. - Perform BCM/TIPM Soft Reset 🟢 Beginner
Tools: 10mm or 13mm wrench. - Replace the Power Mirror Switch 🟢 Beginner
Tools: Plastic trim removal tools, small flathead screwdriver. - Repair Broken Wires in Door Jamb 🟢 Beginner
Tools: Wire strippers, crimpers, butt connectors, heat gun, multimeter. - Replace Side View Mirror Assembly 🟢 Beginner
Tools: Socket set, trim removal tools, screwdriver set. - Replace/Repair TIPM 🟢 Beginner
Tools: Socket set, screwdrivers, advanced scan tool for programming.
Used vs. New Parts: Buying Guide
When a used part is worth it: Buy a used power mirror switch from a reputable auto recycler if a new OEM part exceeds $100. Switches are low-wear items unless subjected to liquid damage. Never buy a used TIPM from a junkyard; always purchase a professionally remanufactured unit with a warranty, as used modules carry the same inherent factory flaws.
Donor-vehicle mileage cap: roughly under 100000 miles for the part to have meaningful remaining life.
Donor quality checklist:
- Match the part number exactly. Superseded numbers on electronic modules require dealership programming.
- Inspect switch photos for faded icons or heavy cosmetic wear, indicating high usage.
- For a TIPM, buy exclusively from specialized rebuilders who offer pre-programming to your specific VIN.
Decision logic:
- If The part is a simple switch and the new OEM or aftermarket part is under $100 → Buy new for peace of mind and a longer warranty.
- If The part is an expensive TIPM module ($500+) → Buy a remanufactured unit from a specialist; it is cheaper than new OEM and significantly more reliable than a junkyard pull.
- If The vehicle is older than 15 years and the budget is tight → A used switch is acceptable, but a used TIPM remains a high-risk gamble.
Warranty tradeoff: Used parts from a recycler typically carry a 30-90 day warranty. New aftermarket parts offer 1-year to limited lifetime warranties. Remanufactured TIPMs usually include a 1-year warranty with extended options available.
Worst-case if a used part fails: $200 - $500. A failed used TIPM requires repeat labor for diagnosis and installation, plus the cost of a second replacement part.
What Happens If You Wait — Timeline
- 0-1 month: An intermittent fault appears. The mirror or high beam fails occasionally, often resetting after a key cycle. The fault code is stored but may not trigger a warning light. (MPG impact: 0%% · Added cost: $0)
- 1-6 months: The failure becomes permanent. The fuse blows repeatedly or the component stops working entirely. A persistent parasitic drain of 50-100mA begins, slowly weakening the battery. (MPG impact: 0%% · Added cost: $5 - $50 (replacement fuses or minor battery degradation))
- 6-12 months: An unaddressed short circuit generates heat, melting wire insulation and damaging connector pins. The parasitic drain permanently kills the battery. (MPG impact: 0%% · Added cost: $150 - $300 (new battery and harness repair))
- 12+ months: The constant high current draw overheats and destroys the internal relay or driver circuit within the BCM or TIPM. The repair now requires replacing the entire expensive module. (MPG impact: 0%% · Added cost: $500 - $1500+)
Cost of Not Fixing It
- Short-Term (0-3 months): Immediate safety risk due to blind spots (mirror fault) or reduced nighttime visibility (high beam fault). High likelihood of a traffic citation for defective equipment. (Added cost: $100 - $250 (traffic citation))
- Medium-Term (3-12 months): A persistent 'short to ground' stresses the circuit, repeatedly blowing fuses. The constant high current draw overheats wiring and damages the internal relays of the Body Control Module (BCM) or TIPM. (Added cost: $500 - $1500 (if the BCM/TIPM requires replacement))
- Long-Term (1+ year): An unresolved electrical short creates a persistent parasitic drain, completely discharging and permanently damaging the vehicle's battery. (Added cost: $150 - $300 (premature battery replacement))
Diagnosis Steps
- Check the Dedicated Fuse
Locate the fuse box using your owner's manual. Find the specific fuse for the power mirrors or left high beam. Pull it out and inspect the metal strip inside. If broken, replace it with a fuse of the exact same amperage rating.
Tools: Fuse puller, Owner's manual (Beginner) - Inspect the Switch or Headlight Bulb
For mirror faults, pry up the power mirror switch panel with a plastic trim tool and check the connector for sticky residue or green corrosion. For Chrysler high beam faults, visually inspect the left high beam bulb filament to ensure it is not burned out.
Tools: Plastic trim removal tool, Flashlight (Beginner) - Perform a BCM/TIPM Soft Reset
Disconnect the negative battery terminal for 15 minutes to drain residual power from all modules. Reconnect the battery. This clears temporary software glitches and logic freezes that falsely trigger the code.
Tools: 10mm or 13mm wrench (Beginner) - Inspect the Door Jamb Wiring
Pull back the corrugated rubber boot running between the driver's door and the vehicle body. Shine a flashlight inside and look for wires with cracked insulation or completely severed copper strands.
Tools: Flashlight (Intermediate) - Perform a 'Wiggle Test'
Turn the ignition on and hold the mirror switch in an active position. Vigorously wiggle the rubber door jamb boot and the main wiring harness under the dash. If the mirror briefly moves, you have pinpointed an intermittent broken wire.
Tools: None (Intermediate) - Test for Power at the Switch
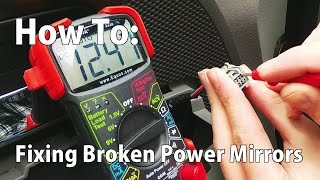
Unplug the mirror switch. Set a multimeter to DC volts. Probe the main power feed pin (consult a wiring diagram) while grounding the black probe to the chassis. If you read 12V, the wiring from the battery is good; the fault is the switch or downstream.
Tools: Multimeter, Vehicle-specific wiring diagram (Intermediate) - Check for a Bad Ground
Set the multimeter to Ohms (Ω). Probe the ground pin on the switch connector and touch the other probe to a clean, unpainted metal bolt on the chassis. A reading above 5.0 ohms indicates a corroded or loose ground connection that must be cleaned.
Tools: Multimeter, Socket set, Wire brush (Intermediate) - Test Switch Continuity (Ford/GM)
With the switch unplugged, use the multimeter's continuity setting across the switch's internal pins while pressing the directional buttons. If the multimeter does not beep when a button is pressed, the internal switch contacts are dead.
Tools: Multimeter, Vehicle-specific wiring diagram (Advanced) - Test High Beam Circuit Resistance (Chrysler/Dodge)
Disconnect the left headlamp connector and the corresponding TIPM connector. Measure the resistance of the Left High Beam Driver circuit wire between the two plugs. A reading above 5.0 ohms confirms an open circuit (broken wire) in the harness.
Tools: Multimeter, Vehicle-specific wiring diagram (Advanced) - Directly Test the Mirror Motor
Remove the door panel to access the mirror assembly connector. Apply 12V power and ground directly to the motor pins using a power probe or fused jumper wires. If the mirror moves, the motor is perfect; the fault lies in the switch or wiring.
Tools: Multimeter, Power probe or jumper wires, Door panel removal tools, Wiring diagram (Advanced)
When This Code Triggers (Freeze-Frame Conditions)
- Ignition Status: On/Run (The code monitors and sets when the ignition is in the ON position.)
- Component Command: Active (The code triggers the moment the mirror switch is pressed or the high beams are activated.)
- System Voltage: 11-14 Volts (The fault is detected during normal vehicle operation with stable battery voltage.)
- Fault Type: Circuit High / Open / Short to Ground (The control module (BCM/TIPM) commands the circuit on and detects an unexpected voltage or resistance reading.)
Related Codes
- B1638 — On Dodge/Chrysler vehicles, B1638 is the corresponding code for 'Right High Beam Circuit High'. If both B1634 and B1638 are present, it points to a systemic issue like a faulty TIPM or incompatible aftermarket headlights rather than a single broken wire.
- B163C — Indicates a 'Front Left Turn Lamp Control Circuit High' on Chrysler vehicles. Its presence alongside B1634 strongly suggests a shared wiring harness failure or a localized TIPM fault affecting the entire left front corner.
- B1867 — A Ford-specific code for 'Driver Power Mirror Motor Circuit Failure'. It is more specific than B1634; if B1867 is present, the issue is almost certainly the motor itself rather than the switch.
- U0141 — Indicates 'Lost Communication With Body Control Module A'. If seen with B1634, the issue is a major network failure or a dead BCM, not a simple mirror or headlight circuit fault.
Climate & Environmental Factors
- High Humidity / Rain: Moisture penetrates aging door seals and switch housings, causing rapid corrosion on circuit boards and connector pins. This increases electrical resistance and triggers short circuits.
- Cold Weather / Winter: Freezing temperatures make plastic wire insulation brittle. Wires in high-flex areas like the door jamb are significantly more likely to snap during winter months.
- Road Salt: Salt spray accelerates the corrosion of chassis ground points and exposed electrical connections, leading to high resistance and intermittent circuit failures.
How to Talk to a Mechanic About This Code
Say this: "I have a B1634 code. On my [Ford/GM], the power mirrors aren't working; please start by checking the driver's door switch and the door jamb wiring. For my [Dodge/Chrysler], I know this code is for the left high beam; please test the wiring for a short before quoting a new TIPM."
This proves you understand the code's dual meanings based on manufacturer. It directs the mechanic to the most likely, cheapest causes first and prevents them from immediately recommending an expensive module replacement without testing the wiring.
Avoid saying:
- 'My check engine light is on, can you look at it?' (This is a Body code, not an engine code)
- 'Just fix whatever's wrong.'
- 'The internet said it's the TIPM, so just replace that.'
Questions to ask before authorizing the repair:
- Did you test for power and ground at the switch or component connector?
- Did you perform a 'wiggle test' on the door jamb harness to check for intermittent breaks?
- For a TIPM replacement quote, can you show me the test results proving the wiring harness is good and the module is bad?
- What is the warranty on the recommended repair, including both parts and labor?
Where to Take It: Dealer vs Independent vs Chain
- Dealer:
Recommended only for confirmed TIPM replacement; otherwise, an unnecessarily expensive option for simple wiring or switch faults.
Best for: Vehicles under warranty., Confirmed TIPM failures on Chrysler/Dodge/Jeep requiring specific programming tools., Complex electrical issues that an independent shop failed to diagnose.
Downsides: Significantly higher labor rates ($150-$250/hr) and OEM parts costs., More inclined to replace a full $800 door harness rather than repair a single broken wire. (Typical cost: +50% vs. baseline) - Independent Shop:
Best fit for most B1634 scenarios. An experienced independent technician handles 90% of the causes (fuse, switch, wiring) more cost-effectively than a dealer.
Best for: Out-of-warranty vehicles where the issue is likely a switch or wiring problem., Owners looking for cost-effective, targeted repairs (like wire splicing).
Downsides: Electrical expertise varies; look for ASE-certified technicians., May lack manufacturer-specific tools for module programming if a TIPM is needed. (Typical cost: +0% vs. baseline) - Chain Shop:
AVOID for diagnosis. They cannot properly trace the underlying short that caused the fuse to blow.
Best for: Simple, unambiguous parts replacement like a battery or fuse.
Downsides: Technicians lack the deep electrical diagnostic training needed for intermittent faults., High pressure to sell parts leads to replacing a switch when the real problem is a broken wire. (Typical cost: -10% vs. baseline)
When to Walk Away From the Repair
If the estimated repair cost for the worst-case scenario (e.g., a TIPM replacement) exceeds 40-50% of your car's private-party value, reconsider the repair.
- Car worth $3500, fix is $1500: Walk Away. A $1500 TIPM repair on a $3500 car is a poor investment. Sell the car 'as-is' with disclosure.
- Car worth $15000, fix is $1500: Fix It. The repair cost is only 10% of the vehicle's value, well below the threshold.
- Car worth $8000, fix is $250: Fix It. A simple switch or wire repair is an easy decision that maintains the safety and value of the vehicle.
What Scan Tool You Need for This Code
Minimum: A scanner capable of reading and clearing 'B' (Body) codes. For Chrysler/Dodge/Jeep, it must read TIPM/BCM codes.
A standard $20 engine code reader only reads 'P' (Powertrain) codes. It will not see or clear the B1634 code, leaving you completely blind during diagnosis.
Budget: Autel MaxiAP AP200 or BlueDriver Pro (~$70) — These Bluetooth dongles pair with your smartphone to read and clear Body codes (like B1634), giving you the essential information needed to confirm the fault.
Mid-range: Foxwell NT510 Elite (~$250) — Adds bidirectional control. This allows you to command the mirror motors to move or the high beams to turn on directly from the scanner, instantly confirming if the motor/bulb is working.
Professional: Autel MaxiCOM MK900-series (~$600-1200) — Provides full dealership-level bidirectional control, advanced ECU coding, and performs programming/relearning functions if a new TIPM or BCM is installed.
Rent vs buy: Auto parts store loaner tools are basic engine code readers and will NOT work for this code. Buying a budget pick like the Autel AP200 is a mandatory investment for DIY electrical diagnosis.
How to Clear the Code After You Fix It
- Reconnect the battery if disconnected during repair.
- Use an OBD-II scan tool capable of reading 'B' (Body) codes to clear the fault from the BCM/TIPM.
- Turn the ignition on and operate the repaired component (adjust the mirror in all directions or cycle the high beams) to confirm functionality.
- Turn the ignition off and on again, then re-scan for codes to ensure B1634 does not return.
Drive cycle (~5 minutes): Body codes like B1634 do not require a complex emissions drive cycle. A simple key-on, function test, and key-off cycle confirms the repair. A short 5-minute drive helps verify that vibrations do not trigger an intermittent wiring fault.
Readiness monitors affected: None
Watch out for:
- Using a basic $20 code reader that only reads 'P' (Powertrain) codes; these cannot see or clear 'B' (Body) codes.
- Clearing the code without fixing the underlying hardware fault (e.g., broken wire, faulty switch), causing the code to return instantly.
- Assuming a battery disconnect permanently clears the code; it only resets temporary module glitches.
Will This Fail Emissions / State Inspection?
No — by itself this code doesn't fail OBD inspection (but it can keep readiness monitors from setting, which causes a separate fail).
- General: A 'B' (Body) code like B1634 does not cause a vehicle to fail an OBD-II emissions inspection, as these tests strictly monitor powertrain ('P') codes and the Check Engine Light.
- New York: New York's annual safety inspection mandates functional mirrors and high beams. An inoperable high beam or a mirror that cannot be adjusted from the driver's seat results in an immediate safety failure.
- Texas: While non-commercial vehicles are exempt from annual safety inspections as of 2025, law enforcement actively issues citations for defective equipment like inoperable high beams or broken mirrors.
- Virginia: Virginia safety inspections require the left outside mirror to be fully adjustable and all factory lighting to function. B1634 causes a safety inspection failure.
Most Commonly Affected Vehicles
- Dodge Ram 1500/2500/3500 (2006-2012) — B1634 indicates a 'Left High Beam Control Circuit High' fault. Models from 2006-2012 suffer from exceptionally high rates of TIPM failure, which is the primary cause of this code.
- Ford F-150 (1997-2014) — Highly prone to broken wires in the driver's door jamb and failing master mirror switches. Diagnosis must start here.
- Chevrolet / GMC Silverado / Sierra (1999-2007) — The power mirror switch is a frequent failure point due to liquid damage and mechanical wear. It is easily replaceable without removing the door panel.
- Dodge Magnum / Grand Caravan (2006-2011) — Uses B1634 to report a fault in the left high beam circuit. Diagnosis points toward the bulb, wiring harness, or the Front Control Module (FCM)/TIPM.
- Ford Focus (2018-2024) — B1634 is specifically defined as 'Mirror Driver Left Circuit Short To Ground', pointing directly to a wiring issue on the driver's side.
- Lincoln Town Car (1998-2011) — Common issues include switch failure and leakage of the auto-dimming fluid inside the mirror glass, requiring full mirror replacement.
- Chevrolet Corvette (2008-2013) — The underhood fuse box housing expands with engine heat, fracturing the headlamp control wire and causing intermittent lighting failures.
- Hyundai Elantra (2006-2010) — The power mirror switch is a documented high-failure part for these model years.
Manufacturer-Specific Notes
- Dodge / Chrysler / Ram / Jeep: B1634 almost exclusively means 'Left Hi Beam Control Circuit High'. The problem is the left headlight, not the mirror. Common causes are burned-out bulbs, wiring shorts, failed TIPMs, or incompatible aftermarket LED/HID headlights. Diagnosis requires testing the circuit for shorts to voltage before replacing the expensive TIPM.
- General Motors: GM defines this code as 'RF mirror motor #1 circuit open', pointing to an open circuit in the passenger side mirror's vertical adjustment motor. GM service bulletins note that shaking mirrors can often be fixed by a simple power cycle reset.
- Ford: Ford provides a highly specific definition: 'Mirror Driver Left Circuit Short To Ground'. This directs diagnosis immediately to a wiring fault between the master switch and the driver's side mirror motor.
- Mazda: Mazda often uses four separate fuses for the headlight system (low left, low right, high left, high right). A single failed fuse is the most common cause of a localized lighting failure and must be checked before suspecting modules.
Real Owner Stories
2007 Ford F-150 with ~150K miles
Power windows and mirrors suddenly stopped working. The owner initially suspected the master window switch.
What they tried:
- Replaced the master window switch for $60, but the problem persisted.
- Checked the 30-amp circuit breaker (F401), which was functioning correctly.
- Inspected the wiring harness in the driver's door jamb and found a broken wire.
Outcome: Spliced the broken wire in the door jamb, restoring function to the windows and mirrors. The total cost was minimal, but required several hours of troubleshooting.
Lesson: Always inspect the door jamb wiring for breaks before spending money on replacement switches, especially if multiple components in the same door fail simultaneously.
2012 Dodge Ram 1500 with high beam issue
The left high beam was not working, and the truck was throwing a B1634 code.
What they tried:
- Initially assumed it was a simple bulb burnout, but a new bulb didn't fix it.
- A shop diagnosed a faulty TIPM and quoted over $1000 for replacement.
- The owner researched online and found that a 'short to voltage' in the high beam driver circuit was a common cause.
Outcome: Following a service manual procedure, the owner disconnected the TIPM and headlamp connectors and tested the circuit for a short. Finding the shorted wire, they repaired it, resolving the code and avoiding the costly TIPM replacement.
Lesson: On Dodge/Chrysler vehicles, B1634 is a headlight code. A 'Circuit High' fault is often caused by a short to voltage in the wiring harness, which must be tested before condemning the expensive TIPM.
2003 Chevy Silverado with intermittent mirror control
The power mirrors would only work in some directions or not at all. The driver's side was particularly problematic.
What they tried:
- The owner suspected a dirty master mirror switch, a very common failure on this model.
- Removed the switch from the door panel.
- Disassembled the switch and cleaned the internal contacts with electrical contact cleaner and a Q-tip.
Outcome: Cleaning the corroded contacts inside the switch restored full functionality. The cost was only a few dollars for contact cleaner, saving the owner from buying a $75 replacement switch.
Lesson: For intermittent mirror operation on older GM trucks, the cause is often dirt or liquid contamination inside the switch. Cleaning the contacts is a free fix to try before replacement.
How to Prevent This Code From Triggering
- Periodically clean and lubricate door jamb boots. (Every 1-2 years) — Applying a silicone-based rubber protectant keeps the boot flexible, reducing stress and chafing on the internal wires as the door opens and closes.
- Keep door panel drain holes clear. (Annually, especially before rainy seasons) — Debris clogs the drain holes at the bottom of the door, allowing water to pool inside. This submerges connectors and the back of the switch, causing rapid corrosion.
- Clean the TIPM and its connectors. (Every 3-5 years or if electrical issues appear) — Dust and moisture accumulate on the TIPM in the engine bay. Disconnecting the battery and cleaning the contacts with electronic cleaner prevents poor connections.
- Avoid spilling drinks on the driver's door panel. (Daily habit) — The master switch is directly exposed to spills. Sugary drinks leave a sticky, conductive residue that permanently corrodes the switch's circuit board.
- Use dielectric grease on critical connectors. (When replacing a component or during cleaning) — Applying dielectric grease to connector pins seals out moisture and prevents corrosion, ensuring a reliable long-term connection.
Frequently Asked Questions
Can I fix code B1634 myself?
Yes, replacing a blown fuse, swapping a power mirror switch, or performing a battery reset are simple DIY tasks. Diagnosing broken door jamb wires requires a multimeter and basic splicing skills. If the TIPM module is faulty, hire a professional for replacement and programming.
I installed LED headlights on my Dodge and now I have a B1634 code. What happened?
Your vehicle's TIPM expects the specific power draw of a factory halogen bulb. LED bulbs use significantly less power, causing the computer to misinterpret the drop as a 'Circuit High' fault. Install an in-line CANBUS decoder or resistor to mimic the original halogen power draw.
What is a TIPM reset and will it fix code B1634?
A TIPM soft reset involves disconnecting the negative battery terminal for 15 minutes to drain residual power and reboot the modules. This clears temporary software glitches and restores function if the code was triggered by a logic error. It will not fix hardware issues like broken wires or burned-out relays.
My mirror works sometimes but not others. What is the cause?
Intermittent operation is the classic symptom of a broken wire inside the door jamb boot. The wire makes and breaks contact as the door opens and closes. Perform a 'wiggle test' on the rubber boot while holding the mirror switch to pinpoint the break.
Why did my mirror stop working after it rained?
Water intrusion is highly destructive to door electronics. Heavy rain or car washes force water past aging window seals, dripping directly onto the back of the master switch or door connectors. This causes immediate short circuits or rapid pin corrosion.
My mechanic says I need a new TIPM. What is that?
The Totally Integrated Power Module (TIPM) is the central fuse box and computer controlling body electronics on Chrysler, Dodge, and Jeep vehicles. Internal relay failures within the TIPM frequently cause the B1634 high beam code. Replacement is expensive, typically costing $500 to $1,500 for a remanufactured and programmed unit.
Should I replace the mirror glass or the whole assembly?
Replace just the glass if the internal motors still hum and the plastic housing is intact, which costs $25 to $75. If the motors are dead or the housing is smashed, replace the entire assembly. Modern assemblies with blind-spot sensors or heating elements cost $150 to over $1,000.
Key Takeaways
- Code B1634 indicates a power mirror circuit failure on Ford and GM vehicles, typically caused by a faulty $40-$120 master switch or broken door jamb wiring.
- On Dodge, Chrysler, and Jeep vehicles, B1634 means a 'Left High Beam Circuit High' fault, often triggered by installing incompatible aftermarket LED bulbs.
- Always check the dedicated mirror or headlight fuse and perform a 15-minute battery disconnect reset before buying replacement parts.
- If both mirrors and power windows fail simultaneously, inspect the main door harness boot for severed wires rather than replacing individual switches.
Helpful Videos


Shop the Parts Behind B1634
Below are the parts most often responsible for code B1634, ranked by how frequently each one is the actual culprit (per the diagnosis above). Tap any to see what we have for your vehicle.


The information in this article is provided for general reference and educational purposes only. Vehicle specifications, procedures, and part compatibility can vary by production date, trim level, and region. Always consult your vehicle's factory service manual and verify part numbers before purchasing or performing repairs. Safety-critical components such as airbags, seat belts, and braking systems should be installed by a qualified professional.
- 🧭 Diagnostic Flowchart
- 🎬 Helpful Videos
- 🛍️ Shop This Part
- What Does B1634 Mean?
- Can I Drive With B1634?
- Common Causes
- Symptoms
- Common Fixes & Costs
- DIY vs Professional
- Used vs. New Parts: Buying Guide
- What Happens If You Wait — Timeline
- Cost of Not Fixing It
- Diagnosis Steps
- When This Code Triggers (Freeze-Frame Conditions)
- Related Codes
- Climate & Environmental Factors
- How to Talk to a Mechanic About This Code
- Where to Take It: Dealer vs Independent vs Chain
- When to Walk Away From the Repair
- What Scan Tool You Need for This Code
- How to Clear the Code After You Fix It
- Will This Fail Emissions / State Inspection?
- Most Commonly Affected Vehicles
- Manufacturer-Specific Notes
- Real Owner Stories
- 2007 Ford F-150 with ~150K miles
- 2012 Dodge Ram 1500 with high beam issue
- 2003 Chevy Silverado with intermittent mirror control
- How to Prevent This Code From Triggering
- Frequently Asked Questions
- Can I fix code B1634 myself?
- I installed LED headlights on my Dodge and now I have a B1634 code. What happened?
- What is a TIPM reset and will it fix code B1634?
- My mirror works sometimes but not others. What is the cause?
- Why did my mirror stop working after it rained?
- My mechanic says I need a new TIPM. What is that?
- Should I replace the mirror glass or the whole assembly?
- Key Takeaways
- 🎟️ Get 5% Off