
OBD-II Code B1877: Driver's Seatbelt Pretensioner Circuit Fault
The Ultimate Guide to What B1877 Means, Why It Triggers, and How to Fix It
- Code B1877 indicates an open circuit in the driver's seatbelt pretensioner, instantly disabling the entire airbag system and requiring immediate repair for occupant safety.
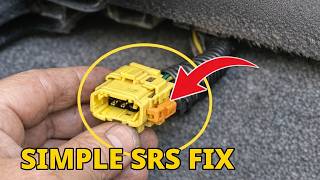
- Resolve 80% of B1877 codes for under $15 by disconnecting the battery, unplugging the yellow connector under the driver's seat, spraying it with electrical contact cleaner, and securing it tightly with a zip tie.
- Always disconnect the negative battery terminal and wait exactly 15 minutes before touching any yellow SRS wiring to prevent accidental, dangerous airbag deployment.
- Do not replace the pretensioner on 2015-2022 Subaru models; this code almost always misdiagnoses a failed occupant detection sensor embedded in the driver's seat cushion.
What Does B1877 Mean?

Code B1877 indicates the restraints control module (RCM) detects an open circuit or high resistance in the driver's side seatbelt pretensioner. The pretensioner uses a small explosive charge to instantly tighten the seatbelt during a crash. This electrical fault prevents the deployment signal from reaching the pretensioner, prompting the RCM to disable the entire SRS system as a fail-safe.
Technical definition: The SAE/ISO definition for B1877 is "Seatbelt Driver Pretensioner Circuit Open" or "Driver-side pre-tensioner seat belt circuit resistance high." The Restraints Control Module (RCM) measures resistance in the pretensioner circuit above the specified 2.0-3.0 ohm range, confirming a broken wire, disconnected plug, or internal component failure.
Can I Drive With B1877?
Yes, But With Caution. You can physically drive, but it is highly unsafe. Code B1877 signifies the entire Supplemental Restraint System (SRS) is disabled. In a crash, the driver's seatbelt pretensioner will not tighten, and the airbags will not deploy. Driving with this light on strips you of critical, life-saving protection and guarantees failure during state safety inspections.
Common Causes

- Loose or corroded connector under the driver's seat (Very Common) — The primary culprit is the main yellow pretensioner wiring connector under the driver's seat. Constant seat movement loosens the plug, and humidity corrodes the pins, interrupting the signal.
- Damaged under-seat wiring harness (Common) — Wires leading to the pretensioner stretch, pinch, or break from seat track movement, stored items, or rodent damage.
- Failed driver's seatbelt pretensioner (Common) — The pyrotechnic squib or internal wiring within the pretensioner unit fails, creating a permanent internal open circuit.
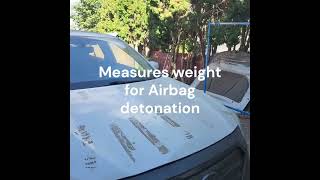
- Failed seat cushion sensor (Subaru specific) (Less Common) — On 2015-2022 Subaru models, code B1877 misdiagnoses a failure of the occupant detection system (ODS) sensor located within the driver's seat cushion.
- Water damage from interior spills (Less Common) — Liquid spilled on the seat seeps into the under-seat connectors or the pretensioner assembly, accelerating corrosion and causing high resistance.
- Faulty Restraints Control Module (RCM) (Very Rare) — The control module monitoring the airbag system fails internally. All wiring and components must be exhaustively ruled out before replacing the RCM.
Symptoms

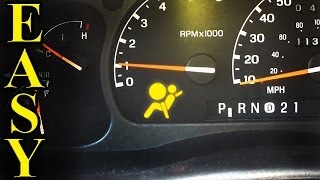
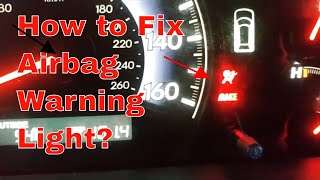
- Airbag warning light is on — The primary symptom. The light stays illuminated on the dashboard, indicating the SRS system is disabled.
- Flashing airbag light (LFC 46) — On Ford and Mazda vehicles, the airbag light flashes 4 times, pauses, then flashes 6 times before staying solid.
- Airbags and pretensioners disabled (scan-tool only — no driver-felt sign) — In the event of a collision, the driver's seatbelt will not tighten, and no airbags will deploy.
Diagnostic Flowchart
Tap your situation to follow the diagnostic path that matches what you're seeing on this code.
Common Fixes & Costs
- Clean and Secure Under-Seat Connector — Parts: $0-$15, Labor: $100-$180, ~1.0 hr book time (DIY)
- Repair Damaged Wiring Harness — Parts: $10-$30, Labor: $150-$300, ~1.5 hr book time (Intermediate)
- Replace Driver's Seatbelt Pretensioner Assembly
— Parts: $200-$450, Labor: $150-$300, ~1.5 hr book time
(Professional)
: OEM 33039305A - Replace Driver's Seat Cushion Sensor (Subaru)
— Parts: $250-$450, Labor: $200-$400, ~2.0 hr book time
(Professional)
: OEM 98251AL00A - Mail-in Pretensioner Rebuilding Service — Parts: $75-$120, Labor: $100-$200, ~1.0 hr book time (Intermediate)
Used vs. New Parts: Buying Guide
When a used part is worth it: Never buy used pyrotechnic SRS components from a junkyard due to unknown history. Use a professional mail-in rebuilding service for your existing pretensioner as a safe, cost-effective alternative to buying new.
Donor quality checklist:
- NEVER install a used, deployed (fired) unit.
- Verify the part number exactly, as SRS components are trim-specific.
Decision logic:
- If The component is a pyrotechnic device (pretensioner) → Buy new OEM or use a certified mail-in rebuilding service.
- If The component is a wiring harness pigtail → New OEM or quality aftermarket is strongly preferred.
Warranty tradeoff: Professional rebuilding services offer lifetime warranties. New OEM parts carry 1-year warranties. Junkyard parts offer zero safety guarantees.
Worst-case if a used part fails: $0. The worst-case failure is severe injury or death due to the safety system failing in a collision.
What Happens If You Wait — Timeline
- Instantaneous: The RCM detects the open circuit during its key-on self-test. The airbag light illuminates, and the entire SRS system is disabled. (MPG impact: 0%% · Added cost: $0)
- 0-12 months: The vehicle operates normally but carries a critical safety risk. The vehicle automatically fails state safety inspections. (MPG impact: 0%% · Added cost: $150-$300 (Cost of required repair to pass inspection))
- During any collision: The disabled SRS system fails to deploy airbags or fire pretensioners, drastically increasing the risk of severe injury or death. (MPG impact: 0%% · Added cost: Thousands in potential medical costs and denied personal injury insurance claims.)
Cost of Not Fixing It
- Immediate: The entire SRS system is disabled. No airbags or pretensioners will activate in a crash. (Added cost: N/A)
- During State Inspection: The vehicle automatically fails safety inspections in states that check airbag functionality. (Added cost: $150-$300 (Cost of the required repair))
- Post-Accident: Insurance companies deny personal injury claims, arguing the vehicle's safety systems were knowingly inoperative. (Added cost: Thousands in denied coverage.)
Diagnosis Steps

- Safety First: Depower the SRS
Disconnect the negative battery terminal and wait exactly 15 minutes. This discharges the system's backup capacitors, preventing accidental and dangerous airbag deployment.
Tools: 10mm wrench or socket (Beginner) - Visual Inspection Under the Driver's Seat
Locate the yellow SRS wiring harness under the driver's seat. Check for a loose connector, pinched wires in the seat track, or obvious physical damage.
Tools: Flashlight (Beginner) - Perform a 'Wiggle Test' with Live Data
Reconnect the battery. Connect an SRS-capable scanner and monitor the 'Driver Pretensioner Resistance' live data PID. Gently wiggle the under-seat connector. If resistance fluctuates wildly, the connector is the fault.
Tools: SRS-capable OBD-II scanner (Intermediate) - Clean, Secure, and Clear
Depower the SRS again. Unplug the yellow connector, spray both halves with electrical contact cleaner, and let dry. Reconnect firmly and wrap a zip tie tightly around the plug to prevent movement. Clear the code with your scanner.
Tools: Electrical contact cleaner, zip ties, SRS scanner (Intermediate) - Advanced Test: Measure Pretensioner Resistance
Depower the SRS. Disconnect the pretensioner. Use a multimeter set to a low ohms scale. A healthy pretensioner reads 2.0-3.0 ohms. An 'OL' (infinite) reading confirms the pretensioner has failed internally.
Tools: Multimeter, non-conductive pick (Advanced) - Advanced Test: Check Wiring Continuity
If the pretensioner tests good, disconnect the harness at both the pretensioner and the RCM. Test for continuity on both wires. An 'OL' reading indicates a broken wire in the harness.
Tools: Multimeter, vehicle-specific wiring diagram (Advanced) - Pro Tip: Using a Resistor for Diagnosis
Substitute a 2.2-ohm SRS test resistor into the vehicle-side harness connector. If clearing the codes keeps the B1877 code away, the vehicle wiring is perfect, and the pretensioner assembly must be replaced.
Tools: 2.2-ohm SRS test resistor, SRS scanner (Professional)
When This Code Triggers (Freeze-Frame Conditions)
- System Self-Test: Key-On (The RCM performs a diagnostic sweep of all SRS components every time the ignition turns to the 'ON' position.)
- Component Resistance: > 4.0 Ohms or 'OL' (Open Loop) (The RCM expects 2.0-3.0 ohms of resistance. Readings above this threshold instantly trigger the B1877 code.)
Related Codes
- B1881 — The direct equivalent of B1877 for the passenger's side pretensioner. Repair both driver and passenger connectors simultaneously.
- B1885 — Indicates 'Driver Pretensioner Circuit Resistance Low' (a short circuit). Multimeter tests show near 0 ohms, whereas B1877 shows infinite resistance.
- B1878 / B1879 — Indicate a short to battery (B1878) or short to ground (B1879) in the pretensioner circuit, rather than an open circuit.
- B2292 — A general Ford 'Restraint System - Seatbelt Pretensioner Fault' code requiring a professional scanner to read the specific sub-code.
Climate & Environmental Factors
- High Heat: High interior temperatures cause electrical connectors to expand, breaking marginal connections and triggering intermittent codes on hot days.
- High Humidity / Spills: Moisture seeps into under-seat connectors, accelerating pin corrosion and increasing circuit resistance.
- Cold Weather: Extreme cold causes metal contacts to contract, leading to open connections in already loose plugs.
How to Talk to a Mechanic About This Code
Say this: "I have an airbag light on and my scanner shows code B1877 for the driver's pretensioner circuit. Please start by inspecting the wiring and connector under the driver's seat for looseness or corrosion before quoting a full pretensioner replacement."
This directs the technician to the cheapest, most likely fix first, preventing them from immediately quoting a $400 pretensioner replacement.
Avoid saying:
- My airbag light is on, can you fix it?
- I think I need a new seatbelt.
- Just do whatever it takes to turn the light off.
Questions to ask before authorizing the repair:
- Did you perform a 'wiggle test' on the under-seat harness while watching live data?
- If recommending a pretensioner replacement, what resistance did you measure from the old part?
- Did you check for Technical Service Bulletins (TSBs) related to this code?
Where to Take It: Dealer vs Independent vs Chain
- Dealer:
Best if you suspect a manufacturer-specific issue (like Subaru) or if the car is under warranty.
Best for: Vehicles under warranty., Subaru models requiring ODS sensor replacement and calibration.
Downsides: Highest labor rates and parts costs., Defaults to replacing entire assemblies rather than repairing simple wires. (Typical cost: +50% vs. baseline) - Independent Shop:
Best fit for most cases. Experienced mechanics easily fix B1877 codes caused by bad connectors.
Best for: Out-of-warranty vehicles., Diagnosing common wiring and connector failures.
Downsides: Quality varies; must vet shops for ASE certifications in electrical systems. (Typical cost: +0% vs. baseline) - Chain Shop:
AVOID. Chain shops are not equipped for the nuanced diagnosis and safety-critical nature of SRS repairs.
Best for: Simple services like oil changes or tires.
Downsides: Technicians lack specialized SRS diagnostic training., High pressure to upsell incorrect parts. (Typical cost: -10% vs. baseline)
When to Walk Away From the Repair
If the estimated repair cost exceeds 50% of the car's current private-party value, consider selling the car as-is. An active airbag light reduces a car's value by 20-40%.
- Car worth $4000, fix is $2200: Walk away. The repair cost exceeds 50% of the car's value.
- Car worth $12000, fix is $400: Fix it. The repair cost is well below the threshold and restores critical safety functions.
- Car worth $3000, fix is $150: Fix it. A low-cost connector repair restores safety and makes the car sellable for its full value.
What Scan Tool You Need for This Code
Minimum: A scan tool capable of reading and clearing codes from the Supplemental Restraint System (SRS) module.
A $20 engine-only scanner cannot communicate with the SRS module. It cannot read B1877, view live resistance data, or clear the airbag light.
Budget: BlueDriver Pro OBDII Scan Tool (~$100) — Connects via Bluetooth to read and clear SRS codes and provides live data graphing for wiggle tests.
Mid-range: Autel AL619 or Foxwell NT630 Plus (~$120-200) — Dedicated handheld units offering broad vehicle compatibility for reading and clearing SRS codes without a smartphone.
Professional: Autel MaxiCOM MK808 (~$400-500) — Reads manufacturer-specific SRS sub-codes crucial for diagnosing Subaru ODS sensor quirks and provides detailed live data PIDs.
Rent vs buy: Auto parts store loaner tools are basic engine readers and will not work for SRS codes. Buying a budget SRS-capable scanner is required.
How to Clear the Code After You Fix It
- Perform the physical repair with the battery disconnected.
- Reconnect the battery.
- Use an SRS-compatible OBD-II scan tool to access the Restraints Control Module (RCM).
- Select 'Clear DTCs' within the SRS module.
- Cycle the ignition off, then on. Verify the airbag warning light illuminates for 6 seconds and turns off permanently.
Drive cycle (~1 minutes): No driving is required. The SRS system performs a complete self-test immediately upon key-on. If the repair is successful, the light stays off.
Watch out for:
- Using a basic engine code reader, which cannot communicate with the SRS module.
- Failing to fix the root cause; the code clears but returns instantly upon the next key-on.
- Assuming disconnecting the battery clears hard SRS codes (it does not).
Will This Fail Emissions / State Inspection?
No — by itself this code doesn't fail OBD inspection (but it can keep readiness monitors from setting, which causes a separate fail).
- California: Passes smog check. California inspects emissions systems only; an airbag light does not affect emissions.
- New York: Passes official DMV emissions, but many shops refuse to pass the vehicle during the comprehensive safety check.
- Texas: Passes inspection. Texas safety inspections do not check the SRS system.
- Virginia: Fails safety inspection automatically. Any illuminated airbag warning light is grounds for rejection.
Most Commonly Affected Vehicles
- Ford F-150, Ranger, Focus, Explorer (2001-2011) — Extremely prone to corrosion in the under-seat connector. Ford issued TSB 04-2-4 suggesting cleaning and securing the plug.
- Mazda Tribute, Mazda3, B-Series (2001-2008) — Shares platforms with Ford and suffers identical connector issues. Addressed in TSBs 08-001/07 and 08-003/04.
- Subaru Legacy, Outback (2015-2022) — B1877 frequently misdiagnoses a faulty driver's seat cushion ODS sensor rather than the pretensioner.
- Chevrolet / GMC Tahoe, Suburban, Silverado (2007-2014) — The wiring harness under the driver's seat breaks from fatigue due to frequent seat movement.
- Hyundai Sonata, Elantra (2006-2015) — Loose or damaged wiring connectors under the front seats frequently trigger SRS faults.
- Dodge / Ram Ram 1500/2500 (2009-2018) — Under-seat wiring is a common failure point. Wiggle tests effectively locate intermittent opens in the harness.
- Nissan Titan, Frontier, Altima (2004-2015) — Under-seat wiring snags cause open circuits, though passenger occupant sensors fail more frequently.
- Honda Accord, Civic, CR-V (2003-2012) — Known for under-seat wiring issues. If steering wheel controls also fail, suspect a clock spring shorting the SRS network.
Manufacturer-Specific Notes

- Ford / Mazda: TSBs acknowledge poor electrical continuity in the under-seat connector as the primary cause. Cleaning the contacts and securing the connector with a zip tie permanently resolves the issue for most owners.
- Subaru: On 2015-2022 models, B1877 misleads mechanics into replacing the pretensioner. The actual fault is almost always the driver's side seat cushion ODS sensor.
- General Motors (Chevrolet/GMC): The wiring harness under the driver's seat breaks from fatigue. A careful inspection of the entire harness, not just the main yellow connector, is required.
Real Owner Stories
2001 Ford Ranger with flashing airbag light (code 4-6)
The airbag light flashed a 4-6 pattern, corresponding to code B1877. The issue was intermittent, appearing mostly after adjusting the seat.
What they tried:
- Researched Ford TSBs pointing to high resistance in the under-seat connector.
- Disconnected the battery, unplugged the yellow connector under the driver's seat, and sprayed it with electrical contact cleaner.
- Reconnected the plug and secured both halves tightly with a zip tie.
Outcome: The airbag light turned off permanently. The root cause was a corroded connection in the under-seat harness, resolved for less than $10 in supplies.
Lesson: On Ford and Mazda vehicles, always clean and secure the yellow connector under the driver's seat before buying replacement parts.
2016 Subaru Legacy with misleading B1877 code
Airbag light illuminated after a minor fender bender. Scanning revealed code B1877.
What they tried:
- Replaced the driver's side seatbelt pretensioner based on the generic code definition, which failed to clear the light.
- Used a bidirectional Autel scanner to read manufacturer-specific sub-codes, which pointed to the 'seat cushion sensor'.
- Replaced the Occupant Detection System (ODS) sensor mat inside the driver's seat cushion.
Outcome: Replacing the ODS sensor mat fixed the issue. The generic B1877 definition is notoriously misleading on modern Subarus.
Lesson: On 2015+ Subarus, B1877 almost always indicates a failed seat cushion ODS sensor, not the pretensioner itself.
2017 Toyota Camry with chewed under-seat wiring
The airbag light triggered after the owner's puppy rode in the back seat. A visual inspection revealed dangling wires under the driver's seat.
What they tried:
- Removed the driver's seat to access the damaged harness.
- Soldered the chewed wires back together and sealed them with heat-shrink tubing.
- Cleared the code using an SRS-capable scanner.
Outcome: Repairing the physical wire break restored the circuit and cleared the B1877 code.
Lesson: Sudden SRS codes in vehicles with pets or rodent exposure require an immediate visual inspection of exposed under-seat wiring.
How to Prevent This Code From Triggering
- Keep the area under the front seats completely clear. (Always) — Water bottles or tools rolling under the seat snag wires and stress connectors during seat adjustments, causing open circuits.
- Apply dielectric grease to under-seat connector pins. (Once, during inspection.) — Dielectric grease seals out moisture and oxygen, preventing the terminal pins from corroding and creating high resistance.
- Secure the main yellow connector with a zip tie. (Once, proactively.) — Connector locking tabs weaken over time. A zip tie wrapped tightly around both halves prevents vibration from breaking the electrical connection.
Frequently Asked Questions
Is it safe to drive with code B1877?
No. The airbag warning light indicates the entire Supplemental Restraint System (SRS) is disabled. In an accident, airbags and seatbelt pretensioners will not activate.
Can I fix code B1877 myself?
Yes, if the cause is a loose connector under the seat. However, you must disconnect the battery and wait 15 minutes before starting work to prevent accidental airbag deployment.
Why won't the airbag light turn off after I fixed the connector?
Airbag faults are stored in the SRS module, not the engine computer. A basic $20 OBD-II scanner cannot clear SRS codes; you need an advanced bidirectional scan tool.
On my Subaru, I replaced the pretensioner but the code remains. Why?
On 2015+ Subarus, code B1877 misdiagnoses the pretensioner. The actual fault is a failed Occupant Detection System (ODS) sensor embedded in the driver's seat cushion.
My Ford airbag light flashes a 4-6 pattern. What does that mean?
This is Lamp Fault Code (LFC) 46. It corresponds directly to DTC B1877, indicating an open circuit in the driver's side pretensioner.
How much does it cost to diagnose an airbag light?
Repair shops charge a diagnostic fee ranging from $100 to $180. This covers the technician's time using a professional scan tool to retrieve the specific SRS code.
Can heat cause the B1877 code to appear?
Yes. High interior temperatures cause connector pins to expand and lose contact. If the light only appears on hot days, it points strongly to a loose under-seat connector.
Can a deployed pretensioner be repaired?
No, deployed pretensioners are one-time use and must be replaced. However, non-deployed units with electrical faults can be professionally rebuilt via mail-in services.
Key Takeaways
- Code B1877 indicates an open circuit in the driver's seatbelt pretensioner, instantly disabling the entire airbag system and requiring immediate repair for occupant safety.
- Resolve 80% of B1877 codes for under $15 by disconnecting the battery, unplugging the yellow connector under the driver's seat, spraying it with electrical contact cleaner, and securing it tightly with a zip tie.
- Always disconnect the negative battery terminal and wait exactly 15 minutes before touching any yellow SRS wiring to prevent accidental, dangerous airbag deployment.
- Do not replace the pretensioner on 2015-2022 Subaru models; this code almost always misdiagnoses a failed occupant detection sensor embedded in the driver's seat cushion.
Helpful Videos
Shop the Parts Behind B1877
Below are the parts most often responsible for code B1877, ranked by how frequently each one is the actual culprit (per the diagnosis above). Tap any to see what we have for your vehicle.


The information in this article is provided for general reference and educational purposes only. Vehicle specifications, procedures, and part compatibility can vary by production date, trim level, and region. Always consult your vehicle's factory service manual and verify part numbers before purchasing or performing repairs. Safety-critical components such as airbags, seat belts, and braking systems should be installed by a qualified professional.
- 🧭 Diagnostic Flowchart
- 🎬 Helpful Videos
- 🛍️ Shop This Part
- What Does B1877 Mean?
- Can I Drive With B1877?
- Common Causes
- Symptoms
- Common Fixes & Costs
- Used vs. New Parts: Buying Guide
- What Happens If You Wait — Timeline
- Cost of Not Fixing It
- Diagnosis Steps
- When This Code Triggers (Freeze-Frame Conditions)
- Related Codes
- Climate & Environmental Factors
- How to Talk to a Mechanic About This Code
- Where to Take It: Dealer vs Independent vs Chain
- When to Walk Away From the Repair
- What Scan Tool You Need for This Code
- How to Clear the Code After You Fix It
- Will This Fail Emissions / State Inspection?
- Most Commonly Affected Vehicles
- Manufacturer-Specific Notes
- Real Owner Stories
- 2001 Ford Ranger with flashing airbag light (code 4-6)
- 2016 Subaru Legacy with misleading B1877 code
- 2017 Toyota Camry with chewed under-seat wiring
- How to Prevent This Code From Triggering
- Frequently Asked Questions
- Is it safe to drive with code B1877?
- Can I fix code B1877 myself?
- Why won't the airbag light turn off after I fixed the connector?
- On my Subaru, I replaced the pretensioner but the code remains. Why?
- My Ford airbag light flashes a 4-6 pattern. What does that mean?
- How much does it cost to diagnose an airbag light?
- Can heat cause the B1877 code to appear?
- Can a deployed pretensioner be repaired?
- Key Takeaways
- 🎟️ Get 5% Off