
OBD-II Code B1898: Warning Chime Circuit Failure
What B1898 means, why it triggers, and how to fix it
- Code B1898 disables critical audible safety alerts, including the federally mandated 4-to-8-second seatbelt reminder, due to a short circuit.
- Over 80% of B1898 triggers stem from chafed wiring behind the dashboard or poorly installed aftermarket stereos, not a failed computer module.
- Diagnosis requires a digital multimeter to test the chime input circuit; a reading under 5 ohms confirms a direct short to the vehicle's chassis ground.
- Repairing a damaged wire costs between $130 and $270 at a shop, saving you upwards of $800 compared to unnecessarily replacing the Body Control Module.
What Does B1898 Mean?
B1898 means the Body Control Module (BCM) detects a short circuit in the wiring for a warning chime. This chime provides alerts like 'fasten seatbelt,' 'door ajar,' or 'lights on.' A 'short to ground' means the electrical circuit found an unintended path to the vehicle's metal frame, disabling the chime.
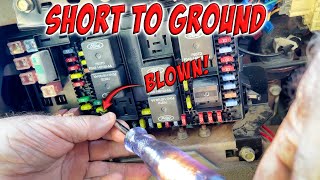
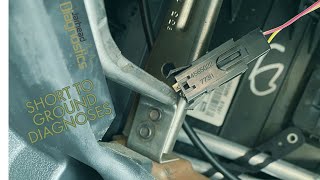
🎬 Watch: The easiest way to find an electrical short to ground.Technical definition: The SAE/OBD-II definition for B1898 is "Chime Input #2 Circuit Short to Ground." The Body Control Module (BCM) detects voltage on the chime input circuit near zero when it should be at a specific reference voltage, signaling a direct, unintended path to the chassis ground.
Can I Drive With B1898?
Yes, But With Caution. Yes, the vehicle is mechanically safe to drive, but you lose critical audible safety alerts. Driving with B1898 means missing the federally mandated seatbelt reminder. Failing to use a seatbelt significantly increases crash fatality risk. Additionally, the lack of a 'lights on' warning causes dead batteries, and missing 'door ajar' alerts pose a safety risk. Inspect and repair the issue promptly.
Common Causes
- Damaged, chafed, or pinched wiring harness (Very Common) — Wires rubbing against sharp metal edges behind the dashboard or under seats wear away insulation, causing a short to the metal chassis. This frequently occurs after recent repairs or aftermarket installations.
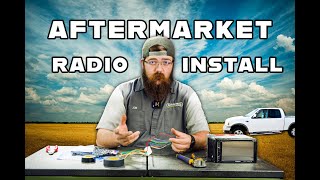
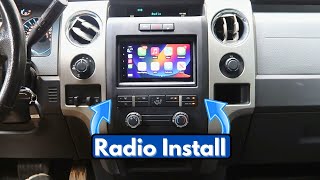
- Faulty aftermarket accessory installation (Very Common) — Poorly installed aftermarket stereos, alarms, or remote start systems are primary triggers. Installers incorrectly tapping into BCM or radio wiring create short circuits on chime-related wires. 🎬 See how to correctly install a radio to avoid wiring shorts.
- Corroded or loose electrical connector (Common) — Connectors for the BCM, instrument cluster, or chime module loosen or corrode from moisture. This creates a poor connection the system interprets as a short to ground.
- Liquid damage to interior components (Common) — Spilled drinks on the center console or seats seep into electrical connectors or modules underneath, causing corrosion and direct shorts.
- Faulty chime module or speaker (Less Common) — The module or speaker generating the chime fails internally, creating a short circuit. Modern vehicles integrate this function directly into the instrument cluster or radio.
- Internal Body Control Module (BCM) failure (Rare) — The BCM's internal circuitry monitoring the chime input shorts out, triggering B1898 even when external wiring and components are perfectly intact.
Symptoms
- No warning chimes — You will not hear chimes for seatbelt reminders, keys left in the ignition, open doors, or headlights left on.
- Dashboard warning light illuminated — A 'Check Engine' or 'Service' light illuminates on the instrument cluster, which automatically fails state safety inspections.
- Erratic electrical behavior — Because the BCM controls multiple body functions, you experience flickering interior lights, erratic gauge readings, or radio dropouts.
- Chime sounds continuously — The short circuit forces the chime to sound constantly or intermittently without any actual warning condition present.
Diagnostic Flowchart
Tap your situation to follow the diagnostic path that matches what you're seeing on this code.
Common Fixes & Costs
- Repairing a damaged wire — Parts: $5-$20, Labor: $125-$250, ~1.5 hr book time (Intermediate)
- Cleaning or reseating a corroded connector — Parts: $5-$15, Labor: $50-$100, ~0.5 hr book time (DIY)
- Replacing a blown fuse — Parts: $1-$10, Labor: $0, ~0.1 hr book time (DIY)
- Replacing the Instrument Panel Cluster — Parts: $400-$900, Labor: $100-$250, ~1.5 hr book time (Professional)
- Replacing the Body Control Module (BCM) — Parts: $300-$800, Labor: $150-$400, ~2.5 hr book time (Professional)
DIY vs Professional
- Repairing a damaged wire — Beginner:
- Cleaning or reseating a corroded connector — Beginner:
- Replacing a blown fuse — Beginner:
- Replacing the Body Control Module (BCM) or Cluster — Beginner:
Used vs. New Parts: Buying Guide
When a used part is worth it: For older, pre-2005 vehicles where the chime is a simple plug-in module that does not require VIN programming.
Donor-vehicle mileage cap: roughly under 100000 miles for the part to have meaningful remaining life.
Donor quality checklist:
- Verify exact part numbers.
- Avoid modules from flood-damaged vehicles.
- Buy from yards offering 90-day warranties.
Decision logic:
- If The part is a modern BCM or Instrument Cluster → Buy new or remanufactured. Used modules require expensive dealer programming that negates initial savings.
- If The part is a simple plug-in module → Used is acceptable and cost-effective.
- If The vehicle is being repaired for resale → Used is cost-effective, but replacing an instrument cluster requires legal odometer mileage transfer.
Warranty tradeoff: Used parts offer 30-90 day part-only warranties. New OEM parts offer 1-year to lifetime warranties.
Worst-case if a used part fails: $300-$600 (paying diagnostic/programming labor twice if the used module is dead).
What Happens If You Wait — Timeline
- 0-1 month: Warning chimes stop working and dashboard warning lights illuminate. The short is present but isolated. (MPG impact: 0%% · Added cost: $0)
- 1-3 months: The short circuit creates a parasitic draw, causing the vehicle to struggle to start after sitting for a few days. (MPG impact: 0%% · Added cost: $20-$50 in reduced battery life)
- 3-6 months: Parasitic drain kills the battery overnight, requiring frequent jump-starts and premature battery replacement. (MPG impact: 0%% · Added cost: $150-$350)
- 6+ months: Constant current flow overheats internal BCM circuits, permanently destroying the module and posing a fire risk. (MPG impact: 0%% · Added cost: $600-$1200)
Cost of Not Fixing It
- Immediate: Loss of federally mandated seatbelt reminders and increased risk of dead batteries. (Added cost: $0)
- 1-6 months: Parasitic battery drain kills the battery overnight, requiring premature replacement. (Added cost: $150-$350)
- 6+ months: Constant current flow overheats internal BCM circuits, permanently destroying the module and posing a fire risk. (Added cost: $600-$1200)
Diagnosis Steps
- Verify the Code and Check for Other DTCs
Use an OBD-II scanner to confirm B1898 is active. Check for 'U' (Network) codes like U0140; if present, diagnose those first. Clear the codes and see if B1898 returns immediately.
Tools: OBD-II Scanner (Beginner) - Perform a Functional Check
Test all chime triggers: open the driver's door with the key in the ignition, turn on headlights and open the door, and start the car unbuckled. Note which functions work to narrow down the affected circuit.
Tools: None (Beginner) - Inspect Fuses
Locate the cabin and engine bay fuse boxes. Inspect fuses related to the instrument panel, BCM, or chimes. If a replacement fuse blows immediately, a dead short is confirmed.
Tools: Owner's Manual, Fuse Puller (Beginner) - Visual Inspection of Wiring
Inspect wiring harnesses connected to the BCM, under the dashboard, and in door jambs. Look for chafed or melted wires, especially near recently installed aftermarket accessories or known trouble spots like Jeep glove box lights.
Tools: Flashlight, Trim Removal Tools (Intermediate) - Test Circuit Resistance to Ground
Disconnect the negative battery terminal and BCM harness. Set a multimeter to Ohms (Ω). Probe the 'Chime Input #2' pin and a clean chassis ground. A reading under 5 ohms confirms a direct short to ground.
Tools: Digital Multimeter, Vehicle-specific Wiring Diagram (Advanced) - Isolate the Short
Disconnect components sharing the circuit (instrument cluster, radio) one by one. Re-check resistance to ground after each. When the multimeter jumps to 'OL' (Open Loop), the short is inside the component or wiring section just disconnected.
Tools: Digital Multimeter, Basic Hand Tools (Advanced)
When This Code Triggers (Freeze-Frame Conditions)
- Battery Voltage: 11.5-12.5V (Key On, Engine Off (KOEO) or immediately after starting.)
- Ignition Status: RUN or START (The fault is detected when the BCM is powered and actively monitoring circuits.)
- Chime-Related Switch Status: On/Off or Open/Closed (Shows the state of the door ajar or seatbelt switch when the short occurred.)
- Fault Counter: 1 to 254 (Tracks how many times the short was detected, useful for tracking intermittent faults.)
Related Codes
- U0140 — Lost Communication With BCM indicates the module is offline. Diagnose U0140 first; B1898 is just a symptom of the larger power or network failure.
- B1867 — Battery Power Supply ECU Circuit Short To Ground points to a main power feed problem. Fix this first, as unstable power generates false codes like B1898.
- B1899 — Microphone Input Signal Circuit Open indicates a broken wire, whereas B1898 is a short. A severely damaged harness causes both simultaneously.
Climate & Environmental Factors
- High Humidity / Coastal Areas: Salt-laden air accelerates corrosion on electrical connectors, creating unintended electrical paths the BCM interprets as a short.
- Cold Climates / Road Salt: Corrosive road salt brines seep into connectors and cracked wire insulation. Cold temperatures also make wire insulation brittle and prone to snapping.
How to Talk to a Mechanic About This Code
Say this: "I have a B1898 code for a Chime Input Short to Ground. Please test the chime circuit wiring for a short to ground with a multimeter before assuming the BCM needs replacement."
Directs the technician to perform proper electrical diagnosis rather than jumping to an expensive module replacement.
Avoid saying:
- 'My car is making a weird silence instead of a dinging noise.'
- 'My check engine light is on, can you just look at it?'
- 'Just replace whatever you think is broken.'
Questions to ask before authorizing the repair:
- Did you test the chime input wire for a direct short to ground with a multimeter?
- Were you able to isolate the short by disconnecting the radio or door switches?
- Does the new module require VIN programming?
Where to Take It: Dealer vs Independent vs Chain
- Dealer:
Expensive choice. Best if a module is confirmed bad and requires proprietary programming.
Best for: Vehicles under warranty., When a BCM or other module is confirmed bad and requires manufacturer-specific programming.
Downsides: Highest labor rates and part costs., Prone to replacing modules over repairing wires. (Typical cost: +50% vs. baseline) - Independent Shop:
Best fit. A skilled diagnostician repairing a single wire saves a fortune over a dealer's module replacement.
Best for: Out-of-warranty vehicles where cost is a major factor., Diagnosing and repairing wiring faults.
Downsides: Requires a shop with specific electrical expertise., May lack tools to program a new BCM. (Typical cost: +0% vs. baseline) - Chain Shop:
AVOID. High risk of misdiagnosis and unnecessary part replacements for complex electrical faults.
Best for: Simple, high-volume jobs like oil changes, tires, and brakes.
Downsides: Lack specialized electrical training and tools., Business model incentivizes replacing parts over wiring diagnostics. (Typical cost: -10% vs. baseline)
When to Walk Away From the Repair
If the worst-case repair (BCM replacement) exceeds 50% of the vehicle's value, reconsider.
- Car worth $4000, fix is $2000: Walk away. Repair is half the car's value.
- Car worth $12000, fix is $1200: Fix it. Cost is 10% of value and restores safety features.
- Car worth $2500, fix is $300: Fix it. A simple wiring repair is a worthwhile investment.
What Scan Tool You Need for This Code
Minimum: A scanner capable of reading Body (B) codes. Basic $20 readers only pull Powertrain (P) codes.
Standard readers cannot communicate with the Body Control Module to see B1898.
Budget: BlueDriver Pro (~$90) — Reads BCM codes, clears B1898, and provides live data for switch statuses.
Mid-range: Foxwell NT510 Elite (~$180) — Provides bi-directional control to manually command the chime on, isolating speaker faults.
Professional: Autel MaxiCOM MK808S (~$500) — Offers full bi-directional control and module programming capabilities if the BCM requires replacement.
Rent vs buy: Auto parts stores loan scanners for free, but verify they read Body codes. Buying a BlueDriver is ideal for DIYers.
How to Clear the Code After You Fix It
- Complete the wiring repair or component replacement.
- Reconnect the negative battery terminal.
- Use an OBD-II scan tool to clear the B1898 code from the BCM.
Drive cycle (~5 minutes): Body codes do not require complex emissions drive cycles. Clear the code, cycle the ignition, and test the failing function (e.g., unbuckle seatbelt) to confirm the fix.
Readiness monitors affected: Not applicable for body codes.
Watch out for:
- Disconnecting the battery rarely clears BCM memory; a scan tool is required.
- If the short remains, the code returns instantly upon the next ignition cycle.
Will This Fail Emissions / State Inspection?
Yes — this code typically fails an OBD-II emissions inspection.
- California: Illuminated warning lights trigger automatic smog check failures, even for body codes.
- New York: NYS inspections include OBD-II scans; active codes commanding the malfunction light result in failure.
- Texas: Counties requiring emissions testing fail vehicles if any active code illuminates the dash warning light.
Most Commonly Affected Vehicles
- Ford F-150, Explorer, Edge (2004-2015) — Chime functions route through the audio control module (radio). High popularity of aftermarket stereos makes incorrect wiring the primary suspect.
- Chevrolet / GMC Silverado / Sierra, Tahoe, Yukon, Suburban (1995-2007) — These use a dedicated, plug-in chime module under the dash. Owners frequently remove or swap them, causing circuit issues.
- Jeep Grand Cherokee (2005-2013) — Failures link to shorts in circuits sharing BCM grounds. A short in the glove box light switch wiring is a highly documented trigger.
- Dodge / Ram Ram 1500/2500, Grand Caravan (2002-2013) — Wiring harnesses passing through the firewall or into doors chafe over time. Visual inspection in these areas is critical.
- Various Any with aftermarket accessories (Any) — Poorly installed stereos, alarms, or remote starts are highly susceptible, as installers incorrectly tap BCM wiring.
Manufacturer-Specific Notes
- General Motors (Chevy/GMC): On 1990s-2000s trucks, the chime is a removable box under the dash. Owners often remove them to silence the noise, instantly triggering this code.
- Ford: If the radio detects a shorted main speaker, it reroutes chimes to a secondary speaker in the instrument cluster, sometimes falsely triggering BCM chime faults.
- Jeep / Chrysler: The glove box light circuit shares wiring paths with BCM inputs. A chafed wire in the glove box assembly is a notorious trigger for B1898.
- BMW: The Front Electronic Module (FEM) disables shorted circuits to prevent damage. After repairing the wire, the module requires a digital reset or a 16-minute sleep cycle to restore the chime.
How to Prevent This Code From Triggering
- Protect Wiring in High-Risk Areas (During any under-dash or door panel repairs) — Wrap harnesses passing through metal bulkheads with anti-abrasion tape or plastic loom to prevent chafing.
- Apply Dielectric Grease to Connectors (When connectors are disconnected for any reason) — Apply non-conductive dielectric grease to connector seals to block moisture and prevent corrosion.
- Ensure Professional Installation of Aftermarket Electronics (Whenever installing a new stereo, alarm, or remote starter) — Use correct vehicle-specific harness adapters for aftermarket stereos to avoid shorting BCM wires.
- Address Water Leaks Immediately (As soon as a leak is noticed) — Seal leaking windshields or sunroofs immediately to prevent water from dripping onto the BCM and causing catastrophic failure.
- Periodically Inspect Battery Terminals and Grounds (Every oil change) — Clean corroded battery terminals to prevent voltage fluctuations that stress electronic modules.
Frequently Asked Questions
What are common misdiagnosis mistakes for B1898?
The most common mistake is replacing the expensive BCM without testing the wiring. A chafed wire is the actual cause in most cases. Always test the circuit for a short to ground with a multimeter first.
Where is the warning chime module located?
Locations vary by era and manufacturer. Older GM trucks use a plug-in box under the dash. Modern vehicles integrate the chime into the BCM, instrument cluster, or radio.
My chimes work sometimes and not others. Can it still be a B1898 short circuit?
Yes, intermittent chimes are a classic symptom of a chafed wire. The exposed wire only touches the metal chassis when you hit a bump or turn a corner, triggering the code sporadically.
Can I just remove the chime module to fix the problem?
No. On older vehicles, removing the module silences the chime but leaves the short circuit active, draining the battery. Modern cars integrate the chime into critical modules that cannot be removed.
Are all vehicle warning chimes required by law?
Federal regulations mandate a seatbelt reminder with an audible signal lasting 4 to 8 seconds. 'Lights-on' or 'key-in-ignition' chimes are not legally required but prevent dead batteries and theft.
Why did this code appear after I installed a new stereo?
Aftermarket stereo harnesses are frequently installed incorrectly or use incompatible adapters. This shorts the factory chime wires to ground. You must remove the stereo and correct the wiring.
Is it expensive to fix a B1898 code?
Wiring repairs cost $150 to $300 for labor and diagnostics. If the BCM requires replacement and dealer programming, the total bill easily exceeds $1,000.
Will a B1898 code cause my car to fail an inspection?
Yes. While the chime itself isn't tested, the resulting illuminated 'Check Engine' or 'Service' light causes an automatic failure in states with OBD-II emissions or safety testing.
Key Takeaways
- Code B1898 disables critical audible safety alerts, including the federally mandated 4-to-8-second seatbelt reminder, due to a short circuit.
- Over 80% of B1898 triggers stem from chafed wiring behind the dashboard or poorly installed aftermarket stereos, not a failed computer module.
- Diagnosis requires a digital multimeter to test the chime input circuit; a reading under 5 ohms confirms a direct short to the vehicle's chassis ground.
- Repairing a damaged wire costs between $130 and $270 at a shop, saving you upwards of $800 compared to unnecessarily replacing the Body Control Module.
Helpful Videos


Shop the Parts Behind B1898
Below are the parts most often responsible for code B1898, ranked by how frequently each one is the actual culprit (per the diagnosis above). Tap any to see what we have for your vehicle.


The information in this article is provided for general reference and educational purposes only. Vehicle specifications, procedures, and part compatibility can vary by production date, trim level, and region. Always consult your vehicle's factory service manual and verify part numbers before purchasing or performing repairs. Safety-critical components such as airbags, seat belts, and braking systems should be installed by a qualified professional.
- 🧭 Diagnostic Flowchart
- 🎬 Helpful Videos
- 🛍️ Shop This Part
- What Does B1898 Mean?
- Can I Drive With B1898?
- Common Causes
- Symptoms
- Common Fixes & Costs
- DIY vs Professional
- Used vs. New Parts: Buying Guide
- What Happens If You Wait — Timeline
- Cost of Not Fixing It
- Diagnosis Steps
- When This Code Triggers (Freeze-Frame Conditions)
- Related Codes
- Climate & Environmental Factors
- How to Talk to a Mechanic About This Code
- Where to Take It: Dealer vs Independent vs Chain
- When to Walk Away From the Repair
- What Scan Tool You Need for This Code
- How to Clear the Code After You Fix It
- Will This Fail Emissions / State Inspection?
- Most Commonly Affected Vehicles
- Manufacturer-Specific Notes
- How to Prevent This Code From Triggering
- Frequently Asked Questions
- What are common misdiagnosis mistakes for B1898?
- Where is the warning chime module located?
- My chimes work sometimes and not others. Can it still be a B1898 short circuit?
- Can I just remove the chime module to fix the problem?
- Are all vehicle warning chimes required by law?
- Why did this code appear after I installed a new stereo?
- Is it expensive to fix a B1898 code?
- Will a B1898 code cause my car to fail an inspection?
- Key Takeaways
- 🎟️ Get 5% Off