
OBD-II Code B2105: Input Circuit Malfunction
What B2105 means, why it triggers, and how to fix it
- Code B2105 is manufacturer-specific, pointing to a faulty ignition switch on GM vehicles, a bad accelerator pedal sensor on Fords, or a 4WD communication error on Subarus.
- This code triggers severe drivability issues, including sudden engine stalling at highway speeds or forcing the vehicle into a 20-mph 'limp mode.'
- Stop driving immediately; the unpredictable power loss and stalling risk create a high probability of a collision.
- Scan for secondary codes like P0122 or U0100 before replacing parts, as these pinpoint whether the fault lies in a $50 sensor or a $500 control module.
What Does B2105 Mean?
B2105 is a Body Control Module (BCM) diagnostic code that signals a problem with a critical input circuit. Its meaning is manufacturer-specific. For General Motors (GM) vehicles, it points to a fault in the ignition switch circuit. For Ford and Chrysler vehicles, it indicates a problem with the accelerator pedal position (APP) sensor or throttle position sensor (TPS). On 4WD/AWD vehicles, this code indicates a communication problem where the 4WD control module lost the throttle position signal from the engine computer.
Technical definition: The generic SAE definition for B2105 is 'Throttle Position Input Out of Range Low,' but actual definitions vary by manufacturer. For example, a 2007 Jeep Grand Cherokee defines it as 'Ignition Unlock Run/Start Control Circuit High.' The code indicates a control module detected a voltage reading from a specific input circuit lower than the expected range, indicating a short to ground, high resistance, or an open circuit.
Can I Drive With B2105?
No — Do Not Drive. Do not drive. The primary risk is the engine stalling unexpectedly in traffic or entering a low-power 'limp mode' on a highway, creating a significant collision hazard. On GM vehicles, a faulty ignition switch drains the battery when parked, leaving you stranded. Continuing to drive with a sensor-related fault causes an overly rich fuel mixture that destroys the catalytic converter, adding an $800-$2500 repair.
Common Causes
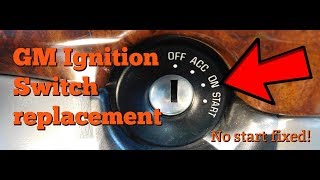
- Faulty Ignition Switch (GM Vehicles) (Very Common) — The electrical contacts inside the ignition switch wear out, causing intermittent power loss to the BCM and other modules. This well-documented issue on GM models leads to stalling and bizarre electrical problems.
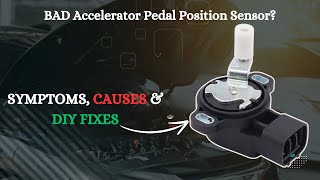
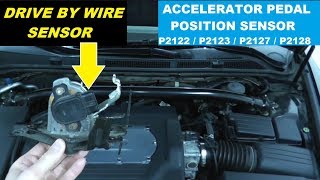
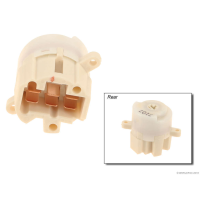
- Defective Accelerator Pedal Position (APP) Sensor (Common) — The sensor reading the gas pedal's position fails, sending incorrect data to the car's computer. This is common on 'drive-by-wire' electronic throttle vehicles. 🎬 See how to test and replace the APP sensor.
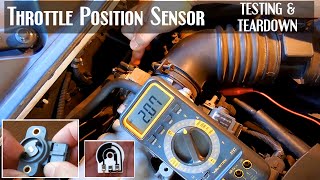
- Defective Throttle Position Sensor (TPS) (Common) — The sensor on the throttle body measuring the throttle plate angle fails.
- Damaged Wiring or Poor Connection (Common) — Wires connected to the ignition switch, APP sensor, TPS, or TCCM fray, corrode, or short to ground. Connectors loosen or accumulate moisture, causing signal loss.
- Bad Ground or Low System Voltage (Uncommon) — A corroded ground connection causes erratic voltage readings. A failing battery providing low system voltage triggers low-input and communication codes.
- Blown Fuse (Uncommon) — A blown fuse for the Transfer Case Control Module (TCCM), BCM, or ignition circuit causes a complete power loss, triggering B2105.
- Faulty 4WD/Transfer Case Control Module (TCCM) (Uncommon) — On 4WD/AWD vehicles, B2105 triggers when the TCCM loses the throttle position signal from the PCM.
- Faulty Control Module (PCM or BCM) (Rare) — The vehicle's main computer fails internally. Rule out all other causes before condemning a module.
Symptoms
- Engine Stalls While Driving — The engine suddenly shuts off, especially at low speeds or when hitting a bump. This is the primary symptom of a bad GM ignition switch.
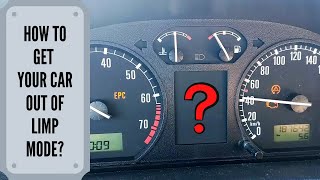
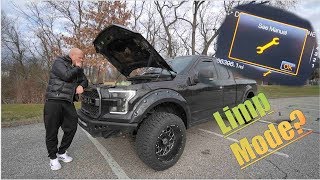
- Vehicle Enters 'Limp Mode' — The car drastically reduces engine power, limiting speed to 20-30 mph. A 'Reduced Engine Power' warning 🎬 Learn more about limp mode causes and how to fix it. appears on the dashboard.
- Poor or No Acceleration — The car hesitates, jerks, or fails to speed up when pressing the gas pedal, pointing to a faulty APP or TPS sensor.
- Car Won't Start or Accessories Malfunction — The engine fails to crank, or the radio and dashboard lights flicker unexpectedly.
- Warning Lights Illuminate — The check engine light, service 4WD light, or another warning indicator illuminates.
- Unable to Shift Into or Out of 4WD — The vehicle refuses to engage or disengage 4WD, and the indicator lights on the switch fail.
Diagnostic Flowchart
Tap your situation to follow the diagnostic path that matches what you're seeing on this code.
Common Fixes & Costs
- Replace Ignition Switch — Parts: $30-$60, Labor: $120-$180, ~1.3 hr book time (Intermediate)
- Replace Accelerator Pedal Position (APP) Sensor — Parts: $100-$250, Labor: $80-$150, ~0.7 hr book time (DIY)
- Replace Throttle Body Assembly — Parts: $250-$450, Labor: $120-$200, ~1.2 hr book time (Intermediate)
- Repair Damaged Wiring or Connector — Parts: $5-$50, Labor: $100-$300, ~2 hr book time (Professional)
- Replace Transfer Case Control Module (TCCM) — Parts: $250-$600, Labor: $100-$200, ~1.3 hr book time (Intermediate)
Used vs. New Parts: Buying Guide
When a used part is worth it: For electronic parts, buying used is only recommended for high-cost OEM parts on older vehicles where budget is the primary driver.
Donor-vehicle mileage cap: roughly under 80000 miles for the part to have meaningful remaining life.
Donor quality checklist:
- Verify the exact part number.
- Avoid parts from flood zones or rust-belt states.
- Prefer sellers offering a 30-90 day functional warranty.
Decision logic:
- If The new aftermarket or OEM part costs less than $200 → Always buy new. The small savings from a used part are not worth the risk of early failure.
- If Vehicle is over 150,000 miles and the new OEM part is over $500 → A used part from a low-mileage donor is a reasonable budget option.
- If The part is a known high-failure item (e.g., GM ignition switch) → Strongly favor a new part, as used ones likely have significant wear.
Warranty tradeoff: Used parts typically offer a 30-90 day functional warranty. New aftermarket parts often come with a 1-year to limited lifetime warranty. New OEM parts usually carry a 1-year warranty.
Worst-case if a used part fails: $200-$500, representing the cost of repeat labor to diagnose and replace the faulty used part, plus the cost of another replacement part.
What Happens If You Wait — Timeline
- 0-2 weeks: Intermittent fault. The Check Engine Light illuminates briefly. GM vehicles experience hard starts; Fords hesitate during acceleration. (MPG impact: 0-2%% · Added cost: $0)
- 2 weeks - 3 months: Fault becomes frequent. The car stalls weekly or enters limp mode, forcing the driver to alter driving habits. (MPG impact: 3-8%% · Added cost: $50-$150 in wasted fuel and potential towing.)
- 3-6 months: Persistent safety hazard. The car stalls regularly in traffic or fails to start. Consistently rich/lean fuel mixtures stress the catalytic converter. (MPG impact: 10-20%% · Added cost: $250-$500 (towing, diagnostic fees, potential battery drain issues).)
- 6+ months: Cascading failures. A bad sensor destroys the catalytic converter. A bad ignition switch damages other electronic modules via voltage spikes. (MPG impact: 15-25%+% · Added cost: $1200-$3000+ (catalytic converter replacement, plus the original B2105 fault).)
Cost of Not Fixing It
- Immediate: Extreme safety hazard. The vehicle stalls in traffic or enters limp mode on the highway, leading to a high collision risk. (Added cost: Potential towing fees ($100-$250) or cost of an accident.)
- 1-6 months: An incorrect air/fuel mixture from a faulty sensor causes the catalytic converter to overheat and fail. (Added cost: $1200-$2800)
- 6+ months: Guaranteed emissions test failure. Cumulative damage extends to O2 sensors and leads to complete vehicle breakdown. (Added cost: $1500-$3500+)
Diagnosis Steps
- Identify the Correct Definition for Your Vehicle
Search online for your car's make, model, and year plus 'B2105 code' to see if it relates to the ignition switch (GM), a throttle/pedal sensor (Ford/Chrysler), or the 4WD system.
Tools: Internet access (Beginner) - Check for Other Diagnostic Trouble Codes (DTCs)
Use an OBD-II scanner to read all stored codes. Powertrain codes like P0122 or P2122 point directly to a sensor. P2105 indicates the PCM forced a shutdown due to the B2105 fault.
Tools: OBD-II Scanner (Beginner) - Perform the 'Key Jiggle Test' (GM Vehicles)
Insert the key and start the engine. Gently jiggle the key in the ignition cylinder. If the dashboard lights flicker, the radio cuts out, or the engine stumbles, the ignition switch is faulty.
Tools: Car key (Beginner) - Perform a Detailed Visual Inspection
Visually inspect the wiring harness and electrical connectors going to the ignition switch, accelerator pedal, throttle body, or TCCM. Look for chafing, melting, or corrosion.
Tools: Flashlight (Beginner) - Monitor Live Data with a Scan Tool
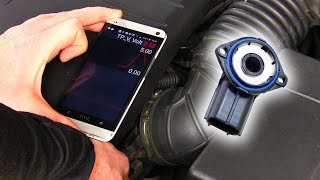
Watch the Accelerator Pedal Position (APP) or Throttle Position (TPS) percentage as you slowly press the pedal. It must move smoothly from 0% to 100% without jumps or dropouts.
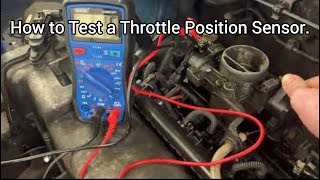
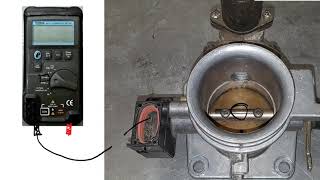
Tools: Advanced OBD-II Scanner (Intermediate) - Test the Sensor Circuit with a Multimeter
Back-probe the sensor connector. Check the 5V reference and ground circuits. Measure the signal wire's voltage as you press the pedal; it must sweep smoothly from 0.5V to 4.5V.
Tools: Multimeter, Back-probe kit (Intermediate) - [PRO TIP] Perform a 5-Volt Reference Circuit Test
If the reference voltage is low, disconnect the suspect sensor. If 5V returns on the harness side, the sensor is internally shorted. If it remains low, the wiring or PCM is faulty.
Tools: Multimeter (Advanced) - [PRO TIP] Check for Voltage Drop at Key Grounds
Place the red multimeter lead on the component's ground wire and the black lead on the negative battery terminal. The reading must be under 100mV (0.1V) with the circuit active.
Tools: Multimeter, Wiring Diagram (Advanced) - [ADVANCED] APP Sensor Voltage Correlation
Monitor both APP signal voltages simultaneously. APP1 sweeps 0.5V to 4.5V, while APP2 sweeps 4.5V to 0.5V. A mismatch triggers the code.
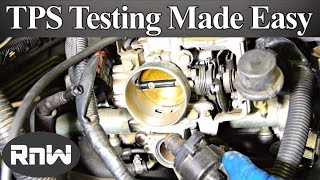
Tools: Advanced OBD-II Scanner, Multimeter (Advanced) - [ADVANCED] TPS Voltage Thresholds
A typical TPS sends 0.5V at idle and 4.5V at Wide Open Throttle. B2105 sets if the PCM sees voltage below 0.2V, indicating a short to ground.
Tools: Multimeter, Vehicle-specific service manual (Advanced)
When This Code Triggers (Freeze-Frame Conditions)
- Engine Coolant Temp: 180-200°F (The fault is often logged when the engine is fully warmed up and running in closed-loop.)
- RPM: 1500-2500 (Often occurs during steady-state cruise, where the computer expects a stable voltage from the ignition or throttle sensor.)
- Engine Load: 30-60% (Typically triggers under moderate, constant load rather than during hard acceleration or deceleration.)
- Vehicle Speed: 35-55 mph (The code frequently sets at city or highway cruising speeds, not necessarily from a standstill.)
Related Codes
- P2105 — This code is the result of B2105. The PCM triggers P2105 as a safety action, forcing the engine into limp mode.
- P0122 — If you have both P0122 and B2105, the problem is almost certainly the TPS or APP sensor.
- B2106 — The direct opposite of B2105, indicating the signal voltage is too high instead of too low.
- U0100 — Points to a systemic problem like a failing BCM/PCM, a major wiring harness issue, or a weak battery causing network instability.
Climate & Environmental Factors
- High Humidity / Moisture: Moisture penetrates worn connector seals, causing corrosion and short circuits that trigger intermittent voltage drops.
- Extreme Cold: Plastics and wiring insulation become brittle and crack, creating shorts. Older ignition switches fail to make proper connection in freezing temperatures.
- Road Salt (Corrosion): Road salt destroys under-vehicle components like the TCCM and its wiring, causing communication and low-voltage codes.
How to Talk to a Mechanic About This Code
Say this: "I have a [Your Car's Make, Model, Year] with a B2105 code and it's stalling/going into limp mode. I'd like to schedule a diagnostic starting with [specific test, e.g., 'performing the key jiggle test' or 'checking live data from the accelerator pedal sensor']."
This tells the shop you're an informed customer and prevents a generic, expensive 'shotgun' approach of replacing parts randomly.
Avoid saying:
- 'My check engine light is on, can you fix it?'
- 'The internet said to replace the throttle body.'
- 'Just do whatever it takes to fix it.'
Questions to ask before authorizing the repair:
- What specific diagnostic test led you to this conclusion?
- Is this a common failure on this model?
- If the part is replaced and the code comes back, is the diagnostic fee applied to further troubleshooting?
- What is the warranty on the part and labor?
Where to Take It: Dealer vs Independent vs Chain
- Dealer:
Best for: Vehicles under warranty or with a potential recall., Complex, manufacturer-specific electrical quirks., When a proprietary diagnostic tool is required.
Downsides: Highest labor rates, typically 1.5-2x more than an independent shop., May default to replacing an entire expensive assembly when a simpler fix is possible. (Typical cost: +50% vs. baseline) - Independent Shop:
Best fit for most out-of-warranty scenarios. An experienced independent technician diagnoses the varied causes of B2105 effectively and affordably.
Best for: Out-of-warranty vehicles where cost is a factor., Diagnosing common, well-documented failures., Building a long-term relationship with a trusted mechanic.
Downsides: Shop quality and diagnostic skill vary widely. (Typical cost: +0% vs. baseline) - Chain Shop:
Avoid for initial diagnosis. The risk of misdiagnosing a B2105 code is high.
Best for: Simple parts replacement after a definitive diagnosis has already been made elsewhere.
Downsides: Technician skill varies dramatically; not ideal for a complex electrical diagnosis., Business model often encourages upselling services. (Typical cost: -10% vs. baseline)
When to Walk Away From the Repair
If the total estimated repair cost exceeds 40-50% of your car's current private-party value, consider selling the car.
- Car worth $4000, fix is $2000: Walk away. A $2,000 repair bill is 50% of the car's value.
- Car worth $12000, fix is $800: Fix it. The repair cost is well below the 50% threshold.
- Car worth $2500, fix is $1500: Walk away. The repair cost is 60% of the car's value.
What Scan Tool You Need for This Code
Minimum: A scanner that reads and graphs live data for the APP and TPS sensors. A basic code reader is not sufficient.
A $20 code reader only tells you the code exists. It cannot show the live sensor voltage causing the fault.
Budget: BlueDriver Pro Scan Tool (~$100) — Connects to your smartphone via Bluetooth. Graphs live data from the APP and TPS sensors to spot dropouts.
Mid-range: Foxwell NT510 Elite (~$180) — Offers bidirectional controls to perform the 'throttle relearn' procedure required after replacing a throttle body.
Professional: Autel MaxiCOM MK808 / MK808BT (~$450-550) — A full-featured diagnostic tablet with robust bidirectional controls and OE-level diagnostics for deep-diving into the BCM.
Rent vs buy: Auto parts stores scan codes for free, but their tools lack live data. Buy a scanner with live data capabilities for full diagnosis.
How to Clear the Code After You Fix It
- Use an OBD-II scan tool to clear all diagnostic trouble codes.
- Perform a full drive cycle to allow the vehicle's onboard diagnostics to re-run.
- Check for pending or permanent codes after the drive cycle to confirm the fix.
Drive cycle (~30 minutes): A generic drive cycle includes: a cold start (sit overnight), 5 minutes of idling with electrical load (A/C, defroster), 15 minutes of mixed city/highway driving including steady speeds and stop-and-go traffic, followed by a 5-minute steady cruise at highway speed (e.g., 55 mph), and a coast-down without braking.
Before emissions retest: drive at least 100 miles to fully set monitors.
Watch out for:
- Clearing the code with a scanner does not fix the underlying electrical fault.
- Disconnecting the battery resets readiness monitors, causing an immediate emissions test failure.
- Some vehicles have 'permanent' DTCs that can only be cleared by the car's computer after it verifies the repair over multiple drive cycles.
Will This Fail Emissions / State Inspection?
Yes — this code typically fails an OBD-II emissions inspection.
- California: Automatic failure. An active B-code illuminating the Check Engine light fails the OBD-II portion.
- New York: Automatic failure. The NYVIP3 inspection includes an OBD-II scan, and any code turning on the Check Engine light results in a failed test.
- Texas: Automatic failure in the 17 counties requiring emissions testing. An active trouble code is an instant fail.
Most Commonly Affected Vehicles
- Chevrolet Cobalt (2005-2010) — Extremely prone to ignition switch failure (Part #23215459 or equivalent) triggering B2105 and causing stalling.
- Chevrolet HHR (2006-2011) — Shares the same faulty ignition switch design as the Cobalt, leading to identical B2105 issues.
- Pontiac G5 / Solstice (2006-2010) — Built on the same GM Delta platform as the Cobalt, suffering from the same common ignition switch failures.
- Nissan Titan (2004-2015) — Often caused by a failing electronic throttle body assembly (e.g., Part #16119-7S00F).
- Jeep Grand Cherokee (2005-2007) — Sets a B2105 code for 'Ignition Unlock Run/Start Control Circuit High.' Diagnosis involves the Front Control Module (FCM) and starter relay.
- Volkswagen Golf / GTI (2000-2014) — Experiences B2105 due to a failing throttle body, where the position sensor is integrated and not sold separately.
- Ford Focus, Escape, F-150 (2004-2018) — Logs this code due to a failing accelerator pedal position (APP) sensor, which is part of the pedal assembly.
- Subaru Various AWD Models (2005-2015) — Relates to the AWD system. A fault in the TCCM or wiring prevents the AWD system from getting throttle data.
Manufacturer-Specific Notes
- General Motors (Chevrolet, Pontiac, Saturn): B2105 almost always points to a failing ignition switch. The 'key jiggle test' is the definitive diagnostic.
- Ford: Typically logs this code due to a faulty accelerator pedal position (APP) sensor integrated into the gas pedal assembly.
- Chrysler / Dodge / Jeep: Points to either the Throttle Position Sensor (TPS) or an ignition switch circuit fault managed by the Front Control Module (FCM).
- Various 4WD/AWD Vehicles (Subaru, etc.): Relates to the Transfer Case Control Module (TCCM) losing the throttle position signal. Always check the 4WD system fuse first.
Real Owner Stories
2008 Chevy Cobalt, 110K miles - Stalling
Car started stalling intermittently at stop lights. Dashboard lights flickered when hitting bumps. Finally, it wouldn't start at all.
What they tried:
- Replaced the battery with no success.
- A mechanic suggested it might be the fuel pump.
- Owner performed the 'key jiggle test' after reading forums.
- Jiggling the key caused the radio to cut out and the engine to stumble, confirming a bad ignition switch.
Outcome: Replaced the ignition switch (AC Delco D1462G) for $40 in parts. The car started reliably, and the stalling and flickering issues were resolved.
Lesson: On GM vehicles, always perform the 'key jiggle test' before suspecting expensive components like the fuel pump or computer. A heavy keychain accelerates this specific failure.
2008 Nissan Titan, 186K miles - Limp Mode
Truck frequently entered limp mode, especially in the morning. SLIP light illuminated, and the engine had no power. Had to restart the truck multiple times to drive normally.
What they tried:
- Scanned codes, showing a voltage correlation error between the accelerator pedal sensor and the throttle position sensor.
- Replaced the accelerator pedal assembly. The problem persisted.
- Replaced the entire throttle body assembly. The problem persisted.
- Noticed the battery terminals were extremely corroded and cleaned them thoroughly.
Outcome: After cleaning the corroded battery terminals, the limp mode issue disappeared. The old battery and poor connections caused voltage drops mimicking sensor failures.
Lesson: Before replacing expensive sensors or modules, ensure the battery is healthy and all power and ground connections are clean and tight. Low system voltage causes bizarre electronic issues.
2005 Ford F-150 5.4L - Forced Idle
While driving, the truck suddenly lost all power and entered 'forced idle' mode, displaying codes P2104 (Forced Idle) and P2111/P2112 (Throttle Actuator Stuck).
What they tried:
- Replaced the throttle body and the integrated Throttle Position Sensor (TPS).
- Had the vehicle's main computer (PCM) reflashed by a dealer.
- The problem continued, pointing away from the replaced parts.
Outcome: A mechanic found a chafed wire in the harness intermittently shorting to ground, causing the PCM to lose the signal and force the engine into idle mode as a safety precaution.
Lesson: When a code persists after replacing the primary component, suspect the wiring or connectors. A visual inspection and voltage drop test are critical before condemning a computer.
2007 Jeep Grand Cherokee - No Start
Vehicle intermittently exhibited a 'click, no start' condition. The B2105 code was present, defined as 'Ignition Unlock Run/Start Control Circuit High'.
What they tried:
- Owner initially suspected the starter or battery.
- A diagnostic procedure pointed to a fault in the circuit between the Front Control Module (FCM) and the shift lever assembly.
Outcome: The fault was traced to a bad connection at the FCM connector, not the ignition switch or shifter. Repairing the connection resolved the no-start issue.
Lesson: The definition of B2105 is highly manufacturer-specific. For this Jeep, it was an ignition control circuit managed by the FCM. Verify the exact definition for your vehicle before starting diagnosis.
How to Prevent This Code From Triggering
- Lighten your keychain (Daily habit) — Excessive weight puts constant strain on the ignition switch, accelerating wear and premature failure on GM models.
- Clean battery terminals and chassis grounds periodically (Every 1-2 years or during battery replacement) — Corrosion creates electrical resistance, lowering system voltage and causing intermittent sensor dropouts.
- Apply dielectric grease to critical electrical connectors (When replacing a part or if a connector is exposed) — Dielectric grease seals connectors from moisture and dirt, preventing corrosion on sensor pins.
- Protect wiring harnesses from abrasion and heat (During any repair near the harness) — Wires rubbing against engine brackets chafe through insulation, causing a short to ground.
Frequently Asked Questions
What is the most common misdiagnosis for B2105?
On 4WD vehicles, mechanics mistakenly replace the expensive TCCM when the actual problem is a blown fuse. On GM vehicles, they replace the throttle body instead of the faulty ignition switch.
What is the difference between code B2105 and P2105?
B2105 is the cause, indicating a low voltage input from a sensor. P2105 is the effect, indicating the PCM forced the engine into limp mode due to that fault.
Can a bad battery cause a B2105 code?
Yes. A weak battery provides low system voltage, triggering low-input codes like B2105 and network codes like U0100. Always ensure your battery is fully charged before diagnosing.
What is a 'key jiggle test' for GM cars?
With the engine running, gently wiggle the key in the ignition. If the engine sputters or the dashboard lights flicker, the ignition switch contacts are worn out.
Do I need to replace the whole throttle body?
On older cars, the TPS is replaceable separately. On most newer cars, the sensor is integrated into the throttle body, requiring replacement of the entire assembly.
Is B2105 an engine code or a body code?
B2105 is a Body Control Module (BCM) code. However, the fault directly affects engine operation via the ignition or throttle, causing severe drivability symptoms.
Can I just clear the B2105 code and keep driving?
The code returns immediately if the underlying electrical problem remains. Ignoring it is unsafe because the vehicle stalls or loses acceleration without warning.
Key Takeaways
- Code B2105 is manufacturer-specific, pointing to a faulty ignition switch on GM vehicles, a bad accelerator pedal sensor on Fords, or a 4WD communication error on Subarus.
- This code triggers severe drivability issues, including sudden engine stalling at highway speeds or forcing the vehicle into a 20-mph 'limp mode.'
- Stop driving immediately; the unpredictable power loss and stalling risk create a high probability of a collision.
- Scan for secondary codes like P0122 or U0100 before replacing parts, as these pinpoint whether the fault lies in a $50 sensor or a $500 control module.
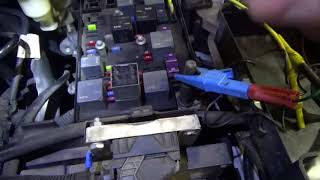
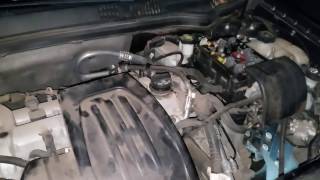
Helpful Videos


Shop the Parts Behind B2105
Below are the parts most often responsible for code B2105, ranked by how frequently each one is the actual culprit (per the diagnosis above). Tap any to see what we have for your vehicle.


The information in this article is provided for general reference and educational purposes only. Vehicle specifications, procedures, and part compatibility can vary by production date, trim level, and region. Always consult your vehicle's factory service manual and verify part numbers before purchasing or performing repairs. Safety-critical components such as airbags, seat belts, and braking systems should be installed by a qualified professional.
- 🧭 Diagnostic Flowchart
- 🎬 Helpful Videos
- 🛍️ Shop This Part
- What Does B2105 Mean?
- Can I Drive With B2105?
- Common Causes
- Symptoms
- Common Fixes & Costs
- Used vs. New Parts: Buying Guide
- What Happens If You Wait — Timeline
- Cost of Not Fixing It
- Diagnosis Steps
- When This Code Triggers (Freeze-Frame Conditions)
- Related Codes
- Climate & Environmental Factors
- How to Talk to a Mechanic About This Code
- Where to Take It: Dealer vs Independent vs Chain
- When to Walk Away From the Repair
- What Scan Tool You Need for This Code
- How to Clear the Code After You Fix It
- Will This Fail Emissions / State Inspection?
- Most Commonly Affected Vehicles
- Manufacturer-Specific Notes
- Real Owner Stories
- 2008 Chevy Cobalt, 110K miles - Stalling
- 2008 Nissan Titan, 186K miles - Limp Mode
- 2005 Ford F-150 5.4L - Forced Idle
- 2007 Jeep Grand Cherokee - No Start
- How to Prevent This Code From Triggering
- Frequently Asked Questions
- What is the most common misdiagnosis for B2105?
- What is the difference between code B2105 and P2105?
- Can a bad battery cause a B2105 code?
- What is a 'key jiggle test' for GM cars?
- Do I need to replace the whole throttle body?
- Is B2105 an engine code or a body code?
- Can I just clear the B2105 code and keep driving?
- Key Takeaways
- 🎟️ Get 5% Off