
OBD-II Code B2251: Power Liftgate/Trunk Latch Switch Failure
The Ultimate 2026 Guide to Diagnosing and Fixing B2251
- Code B2251 indicates a failure in the power liftgate latch assembly or its wiring, requiring a $400-$750 replacement of the latch unit in 80% of cases.
- Always check the glovebox power liftgate override switch and the 30A 'PBD' fuse before buying replacement parts.
- A parasitic battery drain of 200-500mA often accompanies this code because a broken latch switch keeps the vehicle's computers awake overnight.
- After replacing the latch or disconnecting the 12V battery, you must manually open and close the liftgate fully one time to initialize the system.
What Does B2251 Mean?
Code B2251 means the Body Control Module (BCM) detects a malfunction in the position-sensing switches within the power liftgate or trunk latch assembly. The computer relies on signals from the courtesy, half-latch, and full-latch switches to track the liftgate's exact position. When these signals are illogical or missing, the system disables the power function to prevent damage and logs the B2251 fault.
Technical definition: The SAE/OBD-II definition is "Back Door Closer Switch Malfunction." The control module detects a malfunction in the position information received from the back door lock assembly switches. The fault triggers when an expected switch signal fails to register within a specified timeframe during the opening or closing cycle.
Can I Drive With B2251?
Yes, But With Caution. Yes, but only for short, necessary trips. The primary risk is an unlatched liftgate flying open while driving, creating a severe road hazard and exposing you to traffic citations. You must physically verify the liftgate is fully and securely latched before every trip.
Common Causes
- Defective Liftgate Latch Assembly (Very Common) — The latch assembly contains a motor, gears, and multiple micro-switches. Over thousands of cycles, the plastic internal components and switch contacts wear out, causing intermittent or total failure. The entire assembly requires replacement as a single unit. 🎬 Watch this step-by-step guide to replacing a failed latch assembly.
- Broken or Corroded Wiring (Common) — The wiring harness passing from the vehicle body to the liftgate sits inside a flexible rubber boot. Constant flexing breaks the wires, and water penetration corrodes the connector pins, disrupting latch signals.
- Weak Vehicle Battery (Common) — Power liftgate systems are highly sensitive to voltage drops. A failing 12V battery fails to supply enough power for the motor to overcome the door's weight. The control module interprets this mechanical struggle as a fault.
- Water Intrusion at Control Module (Common) — On vehicles like the BMW X5, the liftgate control module sits in the spare tire well. Clogged sunroof drains allow water to submerge and short-circuit the module, causing total system failure.
- Weak Liftgate Support Struts (Less Common) — Gas-charged struts lose pressure over time, forcing the liftgate motor to work harder. The control module detects this increased strain and shuts down operation to prevent motor burnout.
- Blown Fuse or Faulty Relay (Less Common) — A blown fuse instantly disables the entire power liftgate system and stores a fault code.
- Faulty Power Liftgate Control Module (Rare) — Outright failure of the electronic control module (ECU) is rare unless caused by water damage or a major voltage surge. Rule out all wiring and mechanical issues before replacing the ECU.
Symptoms
- Power liftgate/trunk will not open or close — Pressing the button on the remote, dashboard, or liftgate results in no action or only a warning beep.
- Parasitic battery drain — The stuck 'open' signal keeps the vehicle's computers awake, draining the battery overnight.
- Grinding noises during operation — Mechanical sounds from the latch area indicate stripped gears or a struggling motor, preceding the B2251 code.
- Liftgate starts to move, then stops and reverses (also visible on scanner) — The liftgate begins opening or closing but stops partway and reverses after the control module detects an illogical position switch signal.
- 'Hatch Ajar' warning light remains on (also visible on scanner) — A faulty switch in the latch incorrectly reports the liftgate is open, illuminating the dashboard warning light and preventing doors from locking.
Diagnostic Flowchart
Tap your situation to follow the diagnostic path that matches what you're seeing on this code.
Common Fixes & Costs
- Replace Liftgate Latch Assembly — Parts: $250-$500, Labor: $120-$200, ~1.2 hr book time (Intermediate)
- Repair Broken Wiring — Parts: $10-$30, Labor: $150-$300, ~2.5 hr book time (Professional)
- Replace Weak Liftgate Struts — Parts: $60-$120, Labor: $50-$100, ~0.8 hr book time (DIY)
- Replace Blown Fuse — Parts: $1-$5, Labor: $0, ~0.1 hr book time (DIY)
- Replace Liftgate Control Module — Parts: $200-$600, Labor: $100-$250, ~1.0 hr book time (Intermediate)
Used vs. New Parts: Buying Guide
When a used part is worth it: For an older vehicle (>150k miles) where a new OEM part is prohibitive, a used latch assembly from a low-mileage donor vehicle is a cost-effective option.
Donor-vehicle mileage cap: roughly under 70000 miles for the part to have meaningful remaining life.
Donor quality checklist:
- Verify the part number matches exactly; superseded parts use different connectors.
- Source from a reputable salvage yard offering at least a 30-day warranty.
- Avoid parts from regions with heavy road salt usage to prevent corrosion.
- Inspect the electrical connector for any signs of corrosion or damage before purchasing.
Decision logic:
- If Vehicle is under warranty or has less than 80,000 miles → Buy a new OEM part to ensure longevity and compatibility.
- If Budget is the primary concern on an out-of-warranty vehicle → A quality aftermarket part from a known brand (e.g., Aisin, Dorman) offers a good balance of cost and reliability.
- If The failure is the internal micro-switches → Favor new over used, as a used part carries significant wear and a limited remaining lifespan.
Warranty tradeoff: Used parts typically have a 30-90 day warranty. Aftermarket new parts usually offer a 1-year to limited lifetime warranty. New OEM parts have a 1-year warranty.
Worst-case if a used part fails: $150-$300 if a used or cheap aftermarket part fails prematurely, requiring you to pay labor costs again.
What Happens If You Wait — Timeline
- 0-1 month: Intermittent failure. The liftgate works most of the time but occasionally beeps and refuses to operate, especially in cold weather. (Added cost: $0)
- 1-3 months: Consistent failure. The power function stops working entirely. Pressing any liftgate button results in an error beep. The 'Hatch Ajar' light illuminates. (Added cost: $0)
- 3-6 months: Parasitic battery drain begins. A faulty switch in the latch assembly incorrectly reports the liftgate is open, keeping the Body Control Module awake and draining the battery overnight. (Added cost: $150 - $400 (for diagnostic time and a replacement battery killed by deep cycling).)
- 6+ months: Safety risk emerges. The mechanical latching mechanism fails to hold the liftgate securely, allowing it to fly open during vehicle operation. (Added cost: $200 - $2000+ (for traffic citations, damage to own vehicle, and potential liability).)
Cost of Not Fixing It
- Immediate: Loss of convenience. The primary immediate impact is the inability to use the power open/close feature, requiring manual operation. (Added cost: 0)
- 0-3 months: Risk of an unsecured liftgate. The liftgate flies open while driving, leading to loss of cargo, damage to the liftgate/hinges, and a traffic citation for an unsecured load. (Added cost: $150 - $2000+)
- 1-6+ months: Parasitic battery drain. The faulty latch switch keeps the courtesy lights and other modules active, draining the battery overnight and requiring a premature battery replacement. (Added cost: $150 - $400)
Diagnosis Steps
- Check the Liftgate Override Switch
Locate the master power liftgate switch in the glove box or lower dashboard. Ensure it is in the 'ON' position.
Tools: Owner's Manual (Beginner) - Inspect the Fuses
Locate the 'Power Back Door' or 'PBD' fuses in the interior and under-hood panels. Visually inspect for a broken filament or test with a multimeter.
Tools: Fuse Puller, Multimeter (Beginner) - Perform a System Reset and Initialization
Disconnect the negative battery terminal for 15 minutes. Reconnect it, then manually open the liftgate fully and close it completely to relearn the end-stop positions.
Tools: 10mm Wrench (Beginner) - Visually Inspect the Wiring Harness
Peel back the flexible rubber boot connecting the body to the hatch. Inspect wires for breakage, chafing, or green corrosion. Tug gently on individual wires to find hidden internal breaks.
Tools: Flashlight, Trim Tool (Intermediate) - Scan Tool Live Data Analysis
Connect a bi-directional scan tool. Navigate to the 'Back Door' module and view live data for 'Courtesy SW' or 'Half Latch SW'. Manually operate the latch with a screwdriver; if the switch state does not change, the latch is broken.
Tools: Bi-directional OBD-II Scan Tool, Screwdriver (Advanced) - Test Latch Switches with a Multimeter
Remove interior trim to access the latch connector. Test resistance across the position switch pins. For Toyota, the courtesy switch reads below 1 Ω when open and above 10 kΩ when closed. An 'OL' reading confirms a failed switch.
Tools: Trim Removal Tools, Multimeter, Wiring Diagram (Advanced) - Check Wiring Harness Continuity
Disconnect connectors at the latch and the liftgate control module. Use a long jumper wire to check continuity on each wire between the connectors (must be below 1 Ω). Test each signal wire for a short to ground.
Tools: Multimeter, Wiring Diagram, Jumper Wires (Professional)
Related Codes
- B2250 — Often appears with B2251 on Toyota/Lexus models. B2250 points to a problem with the motor's action, while B2251 points to the position switches. Seeing both codes together strongly indicates the latch assembly has failed.
- B1310 — A generic code for 'Power Door Lock Circuit Failure'. A wiring issue in the liftgate harness triggers this code alongside B2251.
- U0140 — Means 'Lost Communication With Body Control Module'. Seeing this with B2251 suggests a severe electrical problem, such as a major wiring harness failure, a loose BCM connector, or a failed liftgate module.
- B222A / B2226 — These Toyota-specific codes appear alongside B2251 and relate to other sensors in the power back door system, such as the touch sensors on the side of the door.
Climate & Environmental Factors
- Cold Weather: Cold temperatures stiffen the grease inside the latch mechanism, increasing mechanical resistance and triggering a fault. Gas support struts lose pressure in the cold, making the motor work harder. Lexus TSB L-SB-0037-17 explicitly notes B2251 associates with cold weather.
- High Humidity / Road Salt: Moisture and salt accelerate corrosion on wiring connectors, pins, and internal latch components. The wiring harness inside the flexible boot traps moisture, leading to failure. Water intrusion also damages control modules located in low-lying trunk areas.
How to Talk to a Mechanic About This Code
Say this: "I have a B2251 code and my power liftgate is not working. I'd like to schedule a diagnostic. Based on my research, the issue is likely the latch assembly itself or the wiring in the harness boot. I've already checked the override switch in the glovebox and the fuses."
This signals you understand the common causes. It focuses the technician's diagnostic time on the most probable failures (latch and wiring) and prevents them from starting with simple checks you've already completed.
Avoid saying:
- 'My trunk is broken, can you fix it?'
- 'The hatch is acting weird, just do whatever it takes.'
- 'I have a check engine light on.' (This is a Body code, not a Check Engine Light code)
Questions to ask before authorizing the repair:
- Did you check the live data from the latch's position switches to see if they are changing state?
- Did you test the wiring harness between the body and liftgate for continuity and shorts?
- If the latch needs to be replaced, is the quoted price for an OEM or an aftermarket part?
- What is the warranty on the replacement part and your labor?
Where to Take It: Dealer vs Independent vs Chain
- Dealer:
Best for: Vehicles still under the factory bumper-to-bumper warranty., Repairs where a known Technical Service Bulletin (TSB) exists (e.g., Lexus RX models)., Complex electrical issues on German brands (like BMW) where modules are prone to water damage.
Downsides: Highest labor rates and OEM part prices., Defaults to replacing expensive modules before thoroughly testing wiring. (Typical cost: +50% vs. baseline) - Independent Shop:
Best fit for most out-of-warranty vehicles. B2251 is a common problem, and a competent independent shop with the right diagnostic tools performs the repair effectively for less than a dealer.
Best for: Out-of-warranty vehicles where cost is a factor., Common failures like those on Toyota Siennas or GMC Acadias., Owners who have a trusted relationship with a local mechanic.
Downsides: Shop must have a full-system scanner capable of reading Body (B-prefix) codes and live data., Quality varies; look for shops with ASE-certified technicians specializing in electrical diagnostics. (Typical cost: +0% vs. baseline) - Chain Shop:
AVOID. This is a diagnostic-intensive electrical repair, not a simple mechanical fix. The risk of misdiagnosis is high.
Best for: Simple, routine maintenance like oil changes, tires, and battery replacement.
Downsides: Technicians lack the advanced diagnostic training for body electrical issues., High pressure to meet sales targets leads to misdiagnosis or unnecessary part replacement., Scanners are often not equipped for deep body control module diagnostics. (Typical cost: -10% vs. baseline)
When to Walk Away From the Repair
If the estimated repair cost for the liftgate exceeds 40-50% of your car's private-party value, pause and consider your options. Since this is a convenience feature, the threshold is lower than a powertrain repair.
- Car worth $15000, fix is $750: Fix it. The repair cost is a small fraction of the car's value.
- Car worth $5000, fix is $750: Borderline, but likely worth fixing if the rest of the car is in good shape. Consider a cheaper aftermarket or used part to lower the cost.
- Car worth $3000, fix is $1200: Walk away. The repair cost is 40% of the car's value for a non-essential feature. It is not a sound investment.
What Scan Tool You Need for This Code
Minimum: A scanner that reads and clears Body (B-prefix) trouble codes and displays live data from the Body Control Module (BCM) or specific liftgate module.
A standard $20-$50 OBD-II code reader only reads Powertrain (P-prefix) codes and shows 'No Codes Found' for a B2251 issue. You cannot diagnose this problem without seeing body codes and the live status of the latch switches.
Budget: BlueDriver Pro (~$100) — Reads and clears enhanced codes (Body, ABS, Airbag) for many major brands. It displays live data for the liftgate switch PIDs, which is essential for diagnosis.
Mid-range: Foxwell NT510 Elite (~$180) — Provides OE-level diagnostics for a specific car brand. It reads B-codes in-depth and offers bi-directional controls to test components, confirming if the latch motor responds to commands.
Professional: Autel MaxiCOM MK808S (~$479) — Offers full bi-directional control. This allows you to command the liftgate to open or close directly from the scanner while watching the live data from the position switches.
Rent vs buy: Most auto parts store loaner tools are basic code readers that cannot diagnose B2251. Buying a capable scanner like the BlueDriver or Foxwell is a worthwhile investment. For a one-time diagnosis, paying a shop's 1-hour diagnostic fee is more cost-effective.
How to Clear the Code After You Fix It
- Fix the underlying mechanical or electrical fault.
- Use an OBD-II scan tool to clear the B2251 code from the Body Control Module or liftgate module.
- Perform the power liftgate initialization procedure by manually opening the liftgate fully, then manually closing it completely to allow the module to relearn the end-stop positions.
Drive cycle (~5 minutes): A drive cycle is not required for this body code. After clearing the code, operate the power liftgate through two full open/close cycles using the remote and interior buttons to confirm the fix.
Readiness monitors affected: None
Watch out for:
- Clearing the code with a scanner fails to fix the problem; the code returns immediately upon the next liftgate operation attempt.
- Forgetting to perform the initialization procedure after a battery disconnect or latch replacement leaves the system inoperative.
- On 2019+ Toyota/Lexus models, initialization requires a bi-directional scan tool.
Will This Fail Emissions / State Inspection?
No — by itself this code doesn't fail OBD inspection (but it can keep readiness monitors from setting, which causes a separate fail).
- California: This code does not cause a smog check failure. California's test focuses on powertrain (P-prefix) codes that affect emissions. B-prefix codes are ignored.
- New York: A B2251 code does not cause a failure of the NYS emissions inspection. The inspection scans for faults that turn on the Malfunction Indicator Lamp (MIL).
- Texas: B2251 is a body code and does not impact emissions, so it passes the emissions test in applicable counties.
Most Commonly Affected Vehicles
- Toyota Sienna (2011-2020) — Extremely common failure of the power liftgate latch assembly (OEM P/N 69350-08040). The internal switches wear out, triggering B2251.
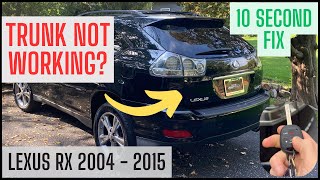
- Lexus RX350 / RX450h (2010-2017) — Prone to latch failures. TSB L-SB-0037-17 addresses B2251 and B2250, often related to cold weather performance. The fix involves replacing the back door lock assembly.
- Toyota RAV4 (2016-2023) — A frequent issue, with the 'back door lock with courtesy light switch assembly' being the primary culprit. For 2019+ models, initialization via scan tool is required after replacement.
- GMC Acadia (2007-2016) — Known for liftgate latch failures and broken wires in the harness boot. Subject to safety recall 15V415000 for falling liftgates, which includes a software update for the control module.
- Toyota Highlander (2011-2019) — The power back door lock assembly is a known weak point that directly causes this code.
- Chevrolet Traverse (2009-2017) — Commonly suffers from liftgate latch failures and wiring breaks. Covered under safety recall 15V415000 for failing support struts and a related software update.
- Nissan Rogue (2014-2020) — Liftgate failures are common. Check for loose connections at the control module in the rear cargo area. Recall NHTSA 16V-219 addresses corroding liftgate support stays.
- BMW X5 (2007-2018) — The tailgate control module (HKL module) sits in the spare tire well, making it highly susceptible to water damage from clogged sunroof drains.
Manufacturer-Specific Notes
- Toyota/Lexus: System initialization is mandatory after replacing the latch or disconnecting the battery. Manually open and close the liftgate fully one time. TSB L-SB-0037-17 for 2016-2017 RX models addresses B2251/B2250 under the basic warranty.
- General Motors (GMC, Chevrolet, Buick): Owners accidentally turn the rotary control switch on the overhead console to 'OFF' and assume the system is broken. Recall 15V415000 addresses falling liftgates due to bad struts with a software update.
- Nissan: The power liftgate system is highly sensitive to battery voltage. Always load-test the 12V battery before diagnosing other components. Entering and exiting 'shipping mode' via the interior fuse box performs a system reset.
- BMW: For E70 and F15 X5 models, water in the spare tire well destroys the tailgate module (HKL). Before ordering a new module, lift the trunk floor and check for moisture or corrosion.
Real Owner Stories
2015 Honda CR-V with intermittent battery drain in winter
Owner woke up to a dead battery and an open trunk, exclusively when temperatures dropped below freezing. The issue resolved in warmer weather.
Outcome: The cold caused the trunk latch mechanism to stick and report an incorrect 'open' status to the computer, keeping modules awake and draining the battery overnight. Replacing the latch solved it.
Lesson: Intermittent electrical issues that are temperature-sensitive point to a mechanical problem (like stiff grease or contracting metal). A parasitic draw test in the failure condition (cold) is necessary.
2018 GMC Acadia with non-functioning liftgate
The rear liftgate would not open. The owner replaced the switch, but the new parts failed, and the dealership could not identify the correct wiring harness based on the VIN.
Outcome: The build sheet revealed an optional 'Hands-Free Liftgate Package' requiring a different wiring harness and connector than the standard model. Ordering the correct harness restored function.
Lesson: Optional packages significantly change wiring. If a replacement part fails to fit or work, verify the exact factory-installed options for your VIN.
Toyota RAV4 with multiple B-series codes (B222A, B2251, B2226)
The power liftgate started to open but stopped almost immediately, requiring manual force. The system logged several codes related to the power back door.
Outcome: The root cause was a faulty connector in the liftgate wiring, not a failed component. Correcting the connection cleared the codes and restored normal operation.
Lesson: A cluster of related codes points to a single, upstream problem like a bad connector, wiring harness, or ground common to all affected circuits.
Lexus RX350 with B2251 and intermittent operation
The power liftgate worked intermittently before failing completely, logging code B2251.
Outcome: Using a multimeter, the owner tested the resistance of the 'Courtesy Switch' pins on the removed latch assembly. The switch failed the test. Replacing the entire back door lock assembly resolved the issue.
Lesson: The internal micro-switches in the latch assembly are a primary wear item. Testing the switches directly with a multimeter is the definitive way to confirm a failed latch.
How to Prevent This Code From Triggering
- Lubricate the Latch Mechanism (Once a year or every 15,000 miles) — A spray of silicone or gel lubricant into the moving parts of the latch keeps the mechanism moving freely, reducing strain on the motor and preventing switches from sticking.
- Clean and Inspect Wiring Harness Boot (Every 2-3 years) — Periodically pulling the boot back to inspect for chafed or broken wires allows for early repair before a complete failure. Keeping the area clean prevents debris from accelerating wear.
- Clean Sunroof Drains (especially on BMW X5) (Once a year) — Clogged sunroof drains cause water to overflow into the trunk, submerging the liftgate control module. Cleaning these drains prevents water damage that destroys expensive electronics.
- Avoid Slamming the Liftgate Manually (Daily habit) — Manually slamming the gate shut damages the delicate plastic gears and micro-switches inside the latch assembly, leading to premature failure.
Frequently Asked Questions
What are the most common misdiagnosis mistakes for B2251?
The biggest mistake is confusing Body code B2251 with Powertrain code P2251 (an O2 sensor code). Another common error is forgetting to check the vehicle's user settings menu or glovebox override switch. Always verify the power liftgate feature is enabled before starting repairs.
Can I replace just the broken switch inside the latch assembly?
The micro-switches are integrated into a sealed latch assembly and are not sold separately. Attempting to solder a new switch is highly impractical and prone to failure. The standard, reliable repair is replacing the entire latch assembly.
My liftgate works intermittently. What does that mean?
Intermittent operation indicates a failing component or a poor electrical connection. If it fails mostly in cold weather, suspect stiff grease inside the latch or weak support struts. Random failures often point to a broken wire inside the rubber hatch boot that makes and breaks contact as the door moves.
What does 'initializing the power liftgate' actually do?
Initialization allows the liftgate's control module to relearn the fully open and fully closed positions. It uses these stored values as a baseline to measure travel distance and speed. Without this baseline, the system shuts down for safety.
Why did my liftgate stop working right after the battery was replaced?
Disconnecting the battery erases the module's memory of the liftgate's position. The system requires re-initialization to function again. Manually opening the liftgate fully and then closing it completely restores normal power operation in most vehicles.
Is it safe to drive with the B2251 code active?
It is safe only if you manually confirm the liftgate is fully and securely latched before driving. An unlatched liftgate can fly open, creating a serious safety hazard for traffic behind you. Repair the issue promptly to restore vehicle safety.
A repair shop quoted me $700. Is this a fair price?
A repair cost of $500-$800 is standard at a dealership or independent shop for this issue. The OEM latch assembly typically costs $250-$500, and labor runs 1 to 1.5 hours. For premium brands like BMW, costs easily exceed $1,000.
Key Takeaways
- Code B2251 indicates a failure in the power liftgate latch assembly or its wiring, requiring a $400-$750 replacement of the latch unit in 80% of cases.
- Always check the glovebox power liftgate override switch and the 30A 'PBD' fuse before buying replacement parts.
- A parasitic battery drain of 200-500mA often accompanies this code because a broken latch switch keeps the vehicle's computers awake overnight.
- After replacing the latch or disconnecting the 12V battery, you must manually open and close the liftgate fully one time to initialize the system.
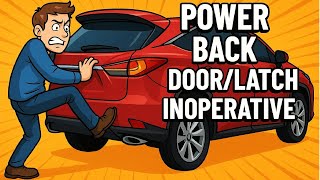
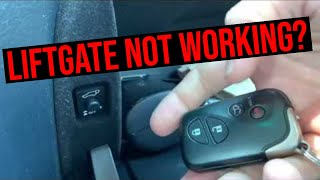
Helpful Videos
Shop the Parts Behind B2251
Below are the parts most often responsible for code B2251, ranked by how frequently each one is the actual culprit (per the diagnosis above). Tap any to see what we have for your vehicle.


The information in this article is provided for general reference and educational purposes only. Vehicle specifications, procedures, and part compatibility can vary by production date, trim level, and region. Always consult your vehicle's factory service manual and verify part numbers before purchasing or performing repairs. Safety-critical components such as airbags, seat belts, and braking systems should be installed by a qualified professional.
- 🧭 Diagnostic Flowchart
- 🎬 Helpful Videos
- 🛍️ Shop This Part
- What Does B2251 Mean?
- Can I Drive With B2251?
- Common Causes
- Symptoms
- Common Fixes & Costs
- Used vs. New Parts: Buying Guide
- What Happens If You Wait — Timeline
- Cost of Not Fixing It
- Diagnosis Steps
- Related Codes
- Climate & Environmental Factors
- How to Talk to a Mechanic About This Code
- Where to Take It: Dealer vs Independent vs Chain
- When to Walk Away From the Repair
- What Scan Tool You Need for This Code
- How to Clear the Code After You Fix It
- Will This Fail Emissions / State Inspection?
- Most Commonly Affected Vehicles
- Manufacturer-Specific Notes
- Real Owner Stories
- 2015 Honda CR-V with intermittent battery drain in winter
- 2018 GMC Acadia with non-functioning liftgate
- Toyota RAV4 with multiple B-series codes (B222A, B2251, B2226)
- Lexus RX350 with B2251 and intermittent operation
- How to Prevent This Code From Triggering
- Frequently Asked Questions
- What are the most common misdiagnosis mistakes for B2251?
- Can I replace just the broken switch inside the latch assembly?
- My liftgate works intermittently. What does that mean?
- What does 'initializing the power liftgate' actually do?
- Why did my liftgate stop working right after the battery was replaced?
- Is it safe to drive with the B2251 code active?
- A repair shop quoted me $700. Is this a fair price?
- Key Takeaways
- 🎟️ Get 5% Off