
OBD-II Code B2595: Headlamp Control Circuit Malfunction
What B2595 means, why it triggers, and how to fix it
- Code B2595 indicates a headlight control circuit fault, most often caused by a simple burnt-out halogen bulb or a melted $20 plastic connector.
- Swap the non-working bulb with the working one from the opposite side to instantly determine if the bulb or the vehicle's wiring is the culprit.
- Installing aftermarket LED or HID bulbs in a halogen system alters circuit resistance, frequently triggering a false B2595 code unless an inline CANbus resistor is added.
- Never replace a $500+ Body Control Module (BCM) or TIPM without first performing a voltage drop test to rule out a corroded ground wire or chafed harness.
What Does B2595 Mean?
B2595 means the Body Control Module (BCM) detects an electrical fault in a headlight control circuit. The computer triggers this code when it reads a voltage or signal that is too high (short to voltage), too low (short to ground), or missing entirely (open circuit).
Technical definition: The SAE/ISO definition for B2595 is 'Headlamp Control Circuit Malfunction', with manufacturer-specific variations like 'Right Cornering Lamp Control Circuit/Open'. This indicates the Body Control Module (BCM) or Headlamp Control Module (HCM) detects an open, short to ground, or short to voltage in the specified headlamp circuit. The module monitors circuit voltage and resistance, setting the fault if measured values deviate from expected parameters.
Can I Drive With B2595?
Yes, But With Caution. Yes, but driving with a burnt-out headlight severely reduces visibility and creates a significant safety hazard. It is illegal in all 50 states, carrying fines from $10 to over $200. If the issue contributes to an accident, you can be held liable. Repair it immediately.
Common Causes
- Burnt-out or incorrect headlight bulb (Very Common) — The most frequent cause is a failed headlight bulb. A typical halogen bulb has low resistance when cold, which increases as it heats up. Using a bulb with the wrong wattage or a poorly manufactured bulb alters the circuit's expected electrical resistance and triggers the code.
- Corroded or melted wiring connector (Common) — The wiring and plastic connector at the back of the headlight are exposed to moisture and engine heat, causing corrosion and damage over time. This creates a poor electrical connection. Look for green/white corrosion or melted plastic on the connector pins.
- Bad ground connection (Common) — The headlight circuit requires a solid connection to the vehicle's metal frame (ground) to function. A loose, frayed, or corroded ground wire interrupts the circuit and causes this fault code. These grounds are often bolted to the radiator support.
- Chafed or shorted wiring harness (Common) — The wiring harness often routes close to sharp metal edges of the bumper or frame. Vibrations cause the harness to rub through, exposing wires and causing a short circuit. This is a known issue on many GM trucks and SUVs. 🎬 Watch this guide on fixing common TIPM control module issues in Dodge Rams.
- Aftermarket LED/HID bulb incompatibility (Common) — Modern vehicles monitor circuit resistance to detect burnt-out bulbs. Aftermarket LED or HID bulbs have a different resistance profile than standard halogen bulbs, tricking the BCM into detecting a circuit fault. This requires installing a CANbus-compatible bulb or an inline resistor.
- Faulty headlight switch or relay (Less Common) — The switch on the steering column or a relay in the fuse box can wear out internally, preventing it from properly sending power to the headlight circuit.
- Failed Body Control Module (BCM) or TIPM (Rare) — The computer module that controls the headlights can fail internally. This is an expensive repair, so all other possibilities like wiring, grounds, and the bulb itself must be thoroughly eliminated first.
Symptoms
- One headlight is not working — The low beam, high beam, or adaptive cornering light on one side of the vehicle will not turn on.
- Headlight is very dim or flickers — A poor electrical connection, failing relay, or faulty module causes the headlight to be noticeably dimmer than the other or to flicker intermittently while driving.
- High beams or low beams do not switch properly — Only one beam setting works, or you cannot switch between high and low beams for the affected headlight.
- Headlight stays on and drains battery — A short circuit in the wiring or a failed control module (like a BMW FRM) causes a headlight to remain on even when the vehicle is turned off, leading to a dead battery. 🎬 See how to reset a BMW FRM module if your lights won't turn off.
- Check Engine Light or other warning light is on — The vehicle's computer illuminates a warning light on the dashboard, often with a specific message like 'Headlamp Malfunction' or 'AFS Failure'.
Diagnostic Flowchart
Tap your situation to follow the diagnostic path that matches what you're seeing on this code.
Common Fixes & Costs
- Replace headlight bulb — Parts: $15-$100, Labor: $0-$50, ~0.5 hr book time (DIY)
- Repair or replace headlight wiring connector/pigtail — Parts: $10-$30, Labor: $100-$250, ~1.2 hr book time (Intermediate)
- Clean or repair headlight ground connection — Parts: $1-$5, Labor: $50-$150, ~0.8 hr book time (DIY)
- Repair damaged wiring harness section — Parts: $20-$50, Labor: $150-$700, ~3.5 hr book time (Professional)
- Replace Headlamp Control Module or Body Control Module (BCM) — Parts: $300-$1200, Labor: $100-$350, ~1.5 hr book time (Professional)
Used vs. New Parts: Buying Guide
When a used part is worth it: A used BCM or TIPM is a cost-effective option for older, high-mileage vehicles where a new part is prohibitively expensive. It is most sensible when the exact part number matches and the donor vehicle's options are identical to yours.
Donor-vehicle mileage cap: roughly under 100000 miles for the part to have meaningful remaining life.
Donor quality checklist:
- Match the part number exactly. Even a single digit difference means incompatibility.
- Verify the donor vehicle did not have flood or fire damage.
- Choose a seller that offers a short-term functional warranty (30-90 days).
- For Chrysler/Dodge TIPMs, a professionally remanufactured unit with an upgraded internal relay is a better choice than a used OEM unit.
Decision logic:
- If The part is a Chrysler/Dodge TIPM or BMW FRM with a known design flaw → Favor a remanufactured part from a specialist that includes upgraded components and a warranty.
- If Vehicle is less than 10 years old and the part is available new → Buy new or remanufactured to get a longer warranty and avoid potential programming headaches with a used part.
- If Budget is the primary concern and the vehicle is over 10 years old → A used part from a reputable recycler is acceptable, but be prepared for the possibility of it needing programming by a dealer or equipped shop.
Warranty tradeoff: Used parts typically have a 30-90 day warranty covering only the part itself. Remanufactured modules often come with a 1-year to lifetime warranty. New OEM parts carry a manufacturer's warranty, usually 1-2 years.
Worst-case if a used part fails: $500-$1000 if a used module is faulty or incompatible, requiring repeat labor costs and the purchase of another part.
What Happens If You Wait — Timeline
- Immediate: One headlight is out. A warning light may be on the dash. Your visibility is reduced, and you are at immediate risk of a traffic ticket. (MPG impact: 0%% · Added cost: $60-$240 in potential fines, depending on the state.)
- 1-3 Months: If the cause is an intermittent short or high resistance, the fault causes repeated electrical stress. Heat builds up at the point of failure, degrading the wire's insulation and making the connector plastic brittle. (MPG impact: 0%% · Added cost: $0, but the risk of escalating damage is high.)
- 3-6 Months: The high resistance from a poor connection melts the headlight connector. What could have been a simple bulb replacement now requires replacing the connector pigtail. The consistent stress puts the control module's driver circuit at high risk of failure. (MPG impact: 0%% · Added cost: $100-$250 for a wiring pigtail replacement.)
- 6+ Months: The solid-state driver (internal relay) in the BCM or TIPM burns out from prolonged stress. The module itself has now failed. The original, simpler problem has cascaded into the most expensive possible failure for this circuit. (MPG impact: 0%% · Added cost: $500-$1,500+ for control module replacement and programming.)
Cost of Not Fixing It
- Immediate: Significantly reduced visibility at night, increasing accident risk. Potential for a 'fix-it' ticket or fine. (Added cost: $10-$238 in fines, depending on the state.)
- 1-3 months: If the fault is an intermittent short, it causes escalating damage to the wiring harness or places stress on the BCM's internal driver circuit. (Added cost: $300-$1500+ if the wiring harness or BCM is damaged.)
- 3+ months: Increased liability in case of an accident. A persistent open or shorted circuit leads to premature failure of the BCM or TIPM, turning a simple wiring fix into an expensive module replacement. (Added cost: $500-$1500+ for module replacement and programming.)
Diagnosis Steps
- Visually inspect the headlight and connector
Look at the headlight bulb to see if the filament is broken. Unplug the electrical connector from the bulb and inspect the plastic and metal pins for melting, browning, or green/white corrosion.
Tools: Flashlight (Beginner) - Swap the headlight bulbs
Test the bulb by swapping it with the working bulb from the other side of the car. If the problem moves to the other side, the bulb is bad. If the problem stays on the same side, the issue is with the wiring or module.
Tools: Gloves (to avoid touching the new bulb glass) (Beginner) - Test the headlight relay and fuse
Locate the headlight fuse and relay in the vehicle's fuse box. Swap the headlight relay with an identical relay from another system (like the horn) to see if the problem resolves. Visually inspect the fuse to ensure it is not blown.
Tools: Owner's manual, fuse puller (Beginner) - Check for voltage at the connector
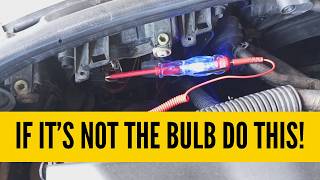
Set a multimeter to DC Volts. With the headlights turned on, connect the black probe to a known good ground and touch the red probe to the power wire contact inside the headlight connector. You should see approximately 12 volts. No voltage indicates a problem upstream. A low reading (5-10V) suggests high resistance.
Tools: Multimeter (Intermediate) - Perform a voltage drop test on the ground circuit
Set the multimeter to a low DC voltage scale (e.g., 2V). Connect the red probe to the ground pin on the headlight connector and the black probe to the negative battery terminal. Turn the headlights on. A good ground circuit reads less than 0.2 volts. A higher reading indicates high resistance in the ground connection.
Tools: Multimeter (Advanced) - Inspect the wiring harness for chafing
Carefully inspect the wires leading to the headlight for visible damage. Pay close attention to areas where the harness bends or is secured by clips, especially where it rubs against the metal bumper reinforcement bar or radiator support.
Tools: Flashlight, trim removal tools (Intermediate) - Load test the circuit
A wire can show 12V with a multimeter but fail to carry enough current to power a bulb. Connect a test light or an old headlight bulb between the power and ground pins of the connector. If the test light is dim or doesn't light up, it confirms high resistance in the circuit.
Tools: Test light or spare headlight bulb (Advanced) - Check Bulb and Circuit Resistance
With the circuit off and the bulb disconnected, use a multimeter to measure the resistance of the headlight bulb. A standard halogen bulb has very low resistance (under 2 ohms) when cold. An infinite reading means the filament is broken. Next, check the resistance of the control circuit wiring to chassis ground.
Tools: Multimeter (Advanced) - Check for control signal with a scan tool
Use a bidirectional scan tool to view the status of the headlight switch and command the headlight circuit on and off. If the BCM commands the light on but there is no voltage at the connector, the problem is in the wiring or relay. If the BCM does not respond, the module itself is faulty.
Tools: Bi-directional scan tool (Professional)
When This Code Triggers (Freeze-Frame Conditions)
- System Voltage: 11.5-13.5V (During startup or immediately after activating headlights.)
- Headlight Switch Status: On (The code is set when the BCM attempts to activate the circuit.)
- Vehicle Speed: 0 mph (Often triggers when lights are first turned on before driving.)
- Time Since Engine Start: 0-30 seconds (The fault is typically detected during the BCM's initial power-on self-test of the lighting circuits.)
Related Codes
- B2590 — This code is for the opposite headlamp. If you have both codes simultaneously, the diagnostic focus shifts to a component common to both circuits, such as the BCM, a shared ground point, or a power supply issue.
- B2580 — This code is for the 'Headlamp High Beam Control Circuit'. If you see B2580 and B2595 together, it strongly suggests a physical wiring harness issue, such as the chafing problem identified in GM TSB #PIT5487F.
- B1342 — This is a general code for an ECU Internal Failure. If you see B1342 alongside B2595, the problem is the Body Control Module itself failing its internal self-test. Confirm power and ground at the BCM before replacing it.
- U0140 — This code means 'Lost Communication with the Body Control Module'. B2595 means the BCM is online and reporting a circuit fault, while U0140 means the BCM is offline entirely. Diagnose the U0140 first by checking BCM power, grounds, and network wiring.
Climate & Environmental Factors
- High Humidity / Coastal Regions: Moisture and salt in the air significantly accelerate corrosion on wiring connectors, bulb sockets, and ground points. This is a primary cause of high resistance faults in headlight circuits.
- Cold Climates / Winter: Cold temperatures make wire insulation and plastic connectors brittle, leading to cracks and failure. Road salt used in snowy areas is highly corrosive and eats away at wiring and ground connections.
- Extreme Heat: High ambient temperatures, combined with engine heat, degrade wire insulation and plastic connectors over time, making them soft or brittle and increasing the risk of shorts.
How to Talk to a Mechanic About This Code
Say this: "I have a headlight out and my scanner shows a B2595 code. I already swapped the bulb and it didn't fix it. I need a diagnostic to test the headlight circuit for a wiring, ground, or module issue."
This tells the shop you have already handled the most basic step, preventing them from charging you a diagnostic fee just to replace a bulb. It directs them to start with more advanced electrical testing, saving time and money.
Avoid saying:
- 'My headlight is out, can you fix it?' (Too vague, invites a simple bulb change without proper diagnosis)
- 'My car has an electrical problem.' (Invites a broad, and potentially expensive, diagnostic fishing expedition)
- 'Just do whatever it takes to fix the light.'
Questions to ask before authorizing the repair:
- What was the specific point of failure? Was it the connector, the ground, or the wiring harness?
- Did you perform a voltage drop test on the ground circuit? What was the reading?
- If you are recommending a module replacement, can you show me that you've confirmed power and ground to the module and tested the output signal from it?
- Will you return the old parts to me?
- What is the warranty on this specific repair, covering both parts and labor?
Where to Take It: Dealer vs Independent vs Chain
- Dealer:
Recommended if the issue is a known module failure on a newer vehicle (especially German brands) or if the vehicle is under warranty. Otherwise, an independent shop is more cost-effective.
Best for: Vehicles under warranty, Known manufacturer-specific issues like a BMW FRM or Dodge TIPM, especially if a warranty extension or recall applies, Complex repairs requiring module programming
Downsides: Highest labor rates, often 1.5-2x more than independent shops., More likely to replace an entire assembly rather than repair a specific wire or component. (Typical cost: +50% vs. baseline) - Independent Shop:
Best fit for most B2595 scenarios, especially if the fault is in the wiring, connector, or ground. A good independent shop provides the best balance of expertise and value for this type of electrical repair.
Best for: Out-of-warranty vehicles where cost is a factor., Diagnosing and repairing common wiring and connector issues., Vehicles with well-known, non-warranty module failures (e.g., sending a TIPM for third-party repair)
Downsides: Quality and expertise vary greatly; look for shops specializing in electrical diagnostics with ASE-certified technicians., May not have the expensive, manufacturer-specific tools to program a new BCM if one is required. (Typical cost: +0% vs. baseline) - Chain Shop:
Acceptable only for a simple bulb replacement if you are unable to do it yourself. AVOID for any further diagnosis of a B2595 code, as they are generally not equipped for in-depth electrical troubleshooting.
Best for: Simple, clear-cut bulb replacements.
Downsides: Technician skill varies dramatically., Often lack the advanced diagnostic tools and experience for complex electrical circuit testing., May be quick to recommend replacing expensive parts without a thorough diagnosis. (Typical cost: -10% vs. baseline)
When to Walk Away From the Repair
If the estimated repair cost for the headlight issue, combined with any other needed repairs, exceeds 50% of the car's private-party value, it's time to seriously consider selling the car as-is.
- Car worth $4000, fix is $1500: Borderline. A $1500 repair for a BCM replacement is a significant portion of the car's value. Get a second opinion before proceeding.
- Car worth $12000, fix is $400: Fix it. A $400 wiring repair is well below the threshold and necessary for safety.
- Car worth $2500, fix is $1200: Walk away. The repair cost is nearly half the car's value. It's not an economical repair.
What Scan Tool You Need for This Code
Minimum: A scanner that can read and clear Body (B-prefix) codes. Basic $20 readers often only handle Powertrain (P-prefix) codes.
A standard code reader might not see the B2595 code at all, leaving you to guess why the headlight is out. To properly diagnose, you need a tool that can communicate with the Body Control Module (BCM).
Budget: BlueDriver Pro (~$100) — Reads and clears body codes like B2595, displays live data from the BCM, and provides repair reports. It is an excellent choice for DIYers who need more than just basic engine codes.
Mid-range: Foxwell NT510 Elite / Innova 5610 (~$150-250) — These scanners offer full system access, including the BCM. The key feature is bidirectional control, which allows you to command the headlight on and off directly from the scanner to confirm if the BCM is sending the signal.
Professional: Autel MaxiCOM MK808S / Launch X431 Series (~$450-600) — Provides full bidirectional control and offers advanced functions like module coding and programming. If the BCM itself needs to be replaced, a tool at this level is often required to program the new module to the vehicle.
Rent vs buy: Most auto parts stores offer free code scanning, but their tools may not read B-codes. For a one-time issue, it is best to pay a shop for a proper diagnosis. If you plan to do your own car repairs regularly, buying a scanner like the BlueDriver or Foxwell is a worthwhile investment.
How to Clear the Code After You Fix It
- Use an OBD-II scan tool to clear the B-code from the Body Control Module.
- Turn the ignition off, then start the vehicle.
- Cycle the headlights on and off, including high and low beams, to confirm the repair.
Drive cycle (~5 minutes): A complex drive cycle is not required. After clearing the code, the BCM re-runs its self-test of the lighting circuit the next time the headlights are activated. If the fault is fixed, the code will not return.
Readiness monitors affected: None. B-codes (Body) do not affect emissions readiness monitors.
Watch out for:
- Using a basic scanner that only reads P-codes (Powertrain) and cannot see or clear B-codes.
- Disconnecting the battery clears the code but causes other issues, like resetting infotainment and adaptive memory.
Will This Fail Emissions / State Inspection?
No — by itself this code doesn't fail OBD inspection (but it can keep readiness monitors from setting, which causes a separate fail).
- California: While a B-code itself won't fail the OBD-II emissions scan, a non-functioning headlight fails the visual/functional safety portion of the inspection. A ticket for a broken headlight is around $238.
- New York: A non-working headlight is an automatic failure of the mandatory annual safety inspection. All lights must be functional.
- Texas: As of 2025, safety inspections are no longer required for non-commercial vehicles in many counties. However, an emissions test is still required in 17 counties, and driving with a defective headlight remains illegal.
Most Commonly Affected Vehicles
- Ford F-150 (2009-2014) — Issues are often related to the cab fuse box (Smart Junction Box), which acts as the BCM. If fuses and switches are good but there is no power to the headlights, a faulty SJB is the likely cause.
- Chevrolet / GMC Silverado, Sierra, Tahoe, Escalade (2007-2020) — Prone to issues with the ground wire for the headlight assembly. On 2015-2020 GM SUVs, TSB #PIT5487F points to a chafed front bumper wiring harness on the passenger side as a common cause for code B2595.
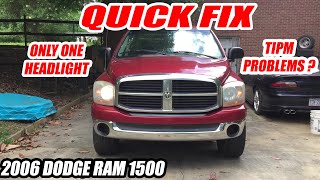
- Dodge / Ram Ram 1500/2500/3500 (2009-2018) — Commonly experiences headlight failures due to an internal fault in the Totally Integrated Power Module (TIPM). The TIPM contains non-serviceable internal relays that fail, requiring module repair or replacement.
- Saab 9-5 (2010-2011) — This model specifically lists B2595 for a 'Right Cornering Lamp Circuit' failure. The fault is often in the dedicated K26 Headlamp Control Module rather than the bulb or wiring.
- Jeep Grand Cherokee (2011-2017) — Susceptible to failures in the TIPM causing erratic headlight behavior. Diagnosis must confirm power output from the TIPM before condemning the headlight assembly.
- BMW 3-Series, 5-Series, X5 (E/F-chassis) (2007-2019) — These models use a Footwell Module (FRM) to manage lighting. A low battery or jump-starting corrupts the module's memory, causing headlights to get stuck on or fail completely. This requires a specialized repair service to reset the module.
- Volkswagen/Audi Golf, Jetta, A4 (2010-2018) — On models with Xenon headlights, a faulty Adaptive Front-lighting System (AFS) module causes a 'Headlight Range Control Defective' warning. This is often caused by water intrusion or a burnt-out H7 cornering bulb.
- Hyundai/Kia Sonata, Optima, Sorento (2009-2020) — Experiences widespread, intermittent electrical issues due to an internal BCM failure. Rule out a weak battery, bad grounds, and all related fuses before replacing the BCM.
Manufacturer-Specific Notes
- General Motors (Chevy, GMC): The front bumper wiring harness chafes against the metal bumper support on the passenger side, causing shorts that trigger B2595 and other lighting codes (TSB #PIT5487F).
- Dodge / Ram: The Totally Integrated Power Module (TIPM) is a notorious failure point. Internal relays that control the headlight circuits fail, causing one or both headlights to stop working. The official fix is a costly TIPM replacement.
- BMW: The Footwell Module (FRM) is highly sensitive to low voltage. Jump-starting the car or a dying battery corrupts its software, leading to a total loss of lighting functions. BMW extended the warranty for the FRM on many E-series models under SIB B01 20 16.
- Volkswagen / Audi: On vehicles with adaptive headlights, a simple burnt-out cornering light bulb (H7) triggers a system-wide 'AFS Failure' warning on the dashboard. Always check the cornering bulbs before diagnosing the expensive AFS control module.
- Ford: Recalls exist for F-150 headlights, but they typically relate to flickering or brightness issues, not a complete circuit failure triggering B2595. Recalls 20C03 and 22C22 involve reprogramming the BCM for LED headlight issues on 2018-2022 models.
Real Owner Stories
2012 Dodge Ram 1500 at 115K miles
Passenger side low-beam headlight suddenly stopped working. Code B2595 was present. High beam on the same side worked fine.
What they tried:
- Replaced the headlight bulb, but the new bulb did not work.
- Swapped the working driver's side bulb over; it did not work on the passenger side.
- Used a multimeter and confirmed 0V at the low-beam power wire on the headlight connector.
Outcome: Diagnosed as a failed internal driver in the Totally Integrated Power Module (TIPM). As a temporary fix, the owner spliced the passenger low-beam wire into the driver's side low-beam wire. Later, the TIPM was replaced with a remanufactured unit for ~$400 to permanently fix the issue.
Lesson: On Dodge/Ram/Jeep products, if a bulb and fuse are good but there is no power for one specific headlight function, the TIPM is a very common point of failure.
2010 BMW 328i (E90) at 95K miles
After having the battery replaced at an independent shop, the headlights, power windows, and turn signals stopped working. The headlights were stuck on.
What they tried:
- The shop scanned the car and found no communication with the Footwell Module (FRM).
- The shop quoted $1,500 to replace and program a new FRM module.
Outcome: The owner researched the issue and found it is a common problem caused by voltage drops during a battery change corrupting the FRM's software. They discovered BMW extended the warranty for the FRM under SIB B01 20 16. The owner had the vehicle towed to a BMW dealer, who replaced the FRM at no charge.
Lesson: On BMWs, FRM failure is a known issue triggered by battery replacement or jump-starts. Check for extended warranty coverage or find a specialist who can repair the corrupted software for a few hundred dollars before paying for a replacement.
2016 GMC Sierra at 80K miles
The passenger side cornering lamp and low-beam headlight worked intermittently, triggering code B2595. The light flickered or went out when hitting bumps.
What they tried:
- Replaced the bulb, which did not solve the intermittent issue.
- Wiggled the wiring harness near the headlight assembly, which caused the light to flicker on and off.
- Inspected the connector and found no visible corrosion or melting.
Outcome: Following the wiring harness from the headlight, the owner found a spot where the harness rubbed against a sharp metal edge on the bumper support frame. The insulation on two wires had worn through, causing an intermittent short. The repair involved cutting out the damaged section, splicing in new wires, and wrapping the harness in protective loom.
Lesson: An intermittent fault is almost always a connection or wiring issue. Wiggling the harness is a key diagnostic step. On many GM trucks and SUVs, check for harness chafing near the bumper and radiator support.
How to Prevent This Code From Triggering
- Apply Dielectric Grease to Connectors (Whenever a bulb is replaced or connector is unplugged.) — Dielectric grease is a non-conductive, waterproof sealant. It seals the connector from moisture, road salt, and dirt, preventing the corrosion that causes high resistance and intermittent connections.
- Inspect and Clean Ground Connections (Every 30,000 miles or 2 years.) — The headlight circuit relies on a clean connection to the vehicle's chassis (ground). Periodically removing the ground bolt, cleaning the contact area to bare metal, and re-securing it tightly prevents voltage drops.
- Secure Wiring Harnesses (During any under-hood maintenance.) — Vibrations cause wiring harnesses to rub against sharp metal edges of the frame or engine components. Use zip ties to secure any loose harnesses away from edges and moving parts.
- Use Quality Bulbs, Avoid High-Wattage Gimmicks (At bulb replacement.) — Cheap, poorly made bulbs or those advertised with excessively high wattage draw more current than the circuit is designed for. This overheats and melts the plastic connector and wiring.
Frequently Asked Questions
Can I fix a B2595 code myself?
Replacing a burnt-out bulb or fuse is an easy DIY fix. Testing wiring with a multimeter requires intermediate electrical skills. Replacing a Body Control Module or TIPM requires a professional, as it involves specialized programming tools.
Will replacing the headlight bulb clear the code?
If a burnt-out bulb caused the fault, the code usually clears itself after starting the vehicle and cycling the headlights. You can also clear it immediately using an OBD-II scanner.
Why did my headlight stop working right after replacing the battery?
Voltage spikes or drops from connecting a battery can corrupt the lighting control module software, especially on BMWs. This requires a specialized module reset or repair.
Why does my headlight work sometimes and not others?
Intermittent operation is almost always caused by a poor electrical connection. Suspect a corroded bulb socket, a loose ground wire, or a chafed harness wire. Wiggling the wiring harness while the light is on helps pinpoint the bad connection.
Can a weak battery cause one headlight to go out?
A weak battery typically causes both headlights to dim, but it can also make control modules act erratically and trigger false single-circuit codes. Rule out the battery if you experience multiple unrelated electrical gremlins.
What is the most common mistake when diagnosing B2595?
The most common mistake is assuming the Body Control Module (BCM) or TIPM is faulty without testing the wiring. A module reporting a circuit fault is usually doing its job correctly. Always rule out the bulb, connector, and ground before replacing an expensive module.
How much does it cost to fix headlight wiring?
Replacing a simple pigtail connector costs $100 to $250. Repairing a damaged section of a wiring harness ranges from $300 to $700. A full harness replacement requiring dashboard removal easily exceeds $1,000.
Key Takeaways
- Code B2595 indicates a headlight control circuit fault, most often caused by a simple burnt-out halogen bulb or a melted $20 plastic connector.
- Swap the non-working bulb with the working one from the opposite side to instantly determine if the bulb or the vehicle's wiring is the culprit.
- Installing aftermarket LED or HID bulbs in a halogen system alters circuit resistance, frequently triggering a false B2595 code unless an inline CANbus resistor is added.
- Never replace a $500+ Body Control Module (BCM) or TIPM without first performing a voltage drop test to rule out a corroded ground wire or chafed harness.
Helpful Videos
Shop the Parts Behind B2595
Below are the parts most often responsible for code B2595, ranked by how frequently each one is the actual culprit (per the diagnosis above). Tap any to see what we have for your vehicle.


The information in this article is provided for general reference and educational purposes only. Vehicle specifications, procedures, and part compatibility can vary by production date, trim level, and region. Always consult your vehicle's factory service manual and verify part numbers before purchasing or performing repairs. Safety-critical components such as airbags, seat belts, and braking systems should be installed by a qualified professional.
- 🧭 Diagnostic Flowchart
- 🎬 Helpful Videos
- 🛍️ Shop This Part
- What Does B2595 Mean?
- Can I Drive With B2595?
- Common Causes
- Symptoms
- Common Fixes & Costs
- Used vs. New Parts: Buying Guide
- What Happens If You Wait — Timeline
- Cost of Not Fixing It
- Diagnosis Steps
- When This Code Triggers (Freeze-Frame Conditions)
- Related Codes
- Climate & Environmental Factors
- How to Talk to a Mechanic About This Code
- Where to Take It: Dealer vs Independent vs Chain
- When to Walk Away From the Repair
- What Scan Tool You Need for This Code
- How to Clear the Code After You Fix It
- Will This Fail Emissions / State Inspection?
- Most Commonly Affected Vehicles
- Manufacturer-Specific Notes
- Real Owner Stories
- 2012 Dodge Ram 1500 at 115K miles
- 2010 BMW 328i (E90) at 95K miles
- 2016 GMC Sierra at 80K miles
- How to Prevent This Code From Triggering
- Frequently Asked Questions
- Can I fix a B2595 code myself?
- Will replacing the headlight bulb clear the code?
- Why did my headlight stop working right after replacing the battery?
- Why does my headlight work sometimes and not others?
- Can a weak battery cause one headlight to go out?
- What is the most common mistake when diagnosing B2595?
- How much does it cost to fix headlight wiring?
- Key Takeaways
- 🎟️ Get 5% Off