
OBD-II Code B3770: Mode Door Actuator Circuit Malfunction
What B3770 means, why it triggers, and how to fix it
- Code B3770 indicates a failure in the mode door actuator circuit, locking your airflow to a default defrost or floor setting.
- A repetitive clicking noise from the dashboard confirms the actuator's internal plastic gears are stripped and require replacement.
- Always perform a free 60-second HVAC system recalibration by pulling the HVAC fuse before buying replacement parts.
- On 2003-2007 GM trucks, deteriorated door seals cause this code; fix it with a 1-hour dealer software update (TSB #06-01-38-003) instead of a mechanical repair.
What Does B3770 Mean?
B3770 means the HVAC Control Module lost communication with the mode door actuator—the small electric motor that directs air to the face, floor, or defrost vents. The computer commands the door to move, but the actuator's feedback sensor returns an out-of-range voltage, indicating the door is stuck, broken, or uncalibrated.
Technical definition: The official SAE/OBD-II definition is "Air Flow Control 6 Feedback Circuit Range/Performance". The HVAC Control Module sends a 5-volt reference to the actuator and monitors the return voltage on a signal wire to track the door's position. A B3770 code sets if the module sees a position outside the learned range (e.g., less than 5 counts or more than 250 counts) or if the actuator fails its calibration routine.
Can I Drive With B3770?
Yes, But With Caution. Yes, but you lose control over airflow direction. This is a severe safety hazard if you cannot direct air to the windshield for defrosting. Many vehicles default to a defrost/floor setting as a fail-safe. Ignoring the code poses no mechanical threat to the engine, but driving with a foggy or icy windshield is dangerous.
Common Causes
- Failed Mode Door Actuator (Stripped Gears) (Very Common) — The small plastic gears inside the actuator motor strip or break over time. This causes the motor to get stuck or make a repetitive clicking and grinding noise.
- Needs Recalibration (Memory Loss) (Common) — After a battery replacement or voltage drop, the HVAC module loses its memory of the actuator's start and end points. A simple recalibration procedure fixes this without replacing parts.
- Deteriorated Blend Door Foam Seals (GM TSB) (Common) — On older GM vehicles, the foam seals on the HVAC doors degrade, allowing the door to travel further than intended during calibration. GM released a software update (TSB #06-01-38-003) to expand the acceptable travel range to account for this.
- Improperly Indexed Replacement Actuator (Common) — A new actuator is often not correctly aligned ('indexed') out of the box. It must be manually powered to the correct starting position 🎬 Watch: How to reset and align your blend door actuator before installation, otherwise the system cannot calibrate it and the code returns immediately.
- Damaged Wiring or Loose Connector (Common) — The wiring harness leading to the actuator becomes frayed or shorted, or the connector corrodes. This interrupts the 5-volt reference or signal wire between the control module and the actuator.
- Physical Obstruction in Ductwork (Less Common) — An object, like a pen or a piece of loose foam insulation, falls into the vents and physically blocks the mode door from moving through its full range of motion.
- Failed HVAC Control Module (Rare) — The control module itself fails internally and stops sending the correct 5-volt reference or command signals to the actuator. This is the last component to suspect after ruling out wiring and the actuator.
Symptoms
- Airflow Stuck on Defrost/Floor — You select the face vents, but air only comes out at the floor or defrost vents. Pressing the mode button does nothing. The system defaults to this position as a fail-safe to ensure windshield visibility.
- Clicking or Grinding Noise from Dashboard — A repetitive clicking or grinding sound emits from behind the dash when you start the car or change climate settings. This is the sound of a broken gear inside the actuator slipping.
- Check Engine Light or Service Message (also visible on scanner) — The B3770 code illuminates the check engine light or displays a "Service HVAC" message on the instrument cluster.
Diagnostic Flowchart
Tap your situation to follow the diagnostic path that matches what you're seeing on this code.
Common Fixes & Costs
- Recalibrate HVAC System — Parts: $0, Labor: $0 - $120, ~0.3 hr book time (DIY)
- Replace Mode Door Actuator
— Parts: $30 - $150, Labor: $150 - $1200, ~1.5-8.0 hr book time
(Intermediate)
Chevrolet Trailblazer / GMC Envoy (2002-2009): OEM ACDelco 15-72811, GM 88892975 (Alt: Dorman 604-130, GPD 988AY61)
Chevrolet Silverado / GMC Sierra (2000-2007): OEM ACDelco 15-73517, GM 89018365 (Alt: Dorman 604-106, SKP SK604106) - Reprogram HVAC Control Module (GM TSB) — Parts: $0, Labor: $100 - $200, ~1.0 hr book time (Professional)
- Repair Damaged Wiring or Connector — Parts: $5 - $25, Labor: $100 - $350, ~1.0-3.0 hr book time (Intermediate)
- Replace HVAC Control Module
— Parts: $150 - $600, Labor: $100 - $250, ~1.0-1.5 hr book time
(Professional)
Chevrolet Silverado / GMC Sierra (2003-2007 Classic, Auto AC): OEM GM 22622883 (Alt: Dorman 599-001, Dorman 599-003)
DIY vs Professional
- Recalibrate HVAC System — Beginner:
- Replace Mode Door Actuator — Beginner:
- Repair Damaged Wiring or Connector — Beginner:
- Reprogram HVAC Control Module — Beginner:
Used vs. New Parts: Buying Guide
When a used part is worth it: Never buy a used mode door actuator if replacement requires dashboard removal. The labor cost makes the risk of a second failure too high. It only makes sense if the part is easily accessible under the glove box and budget is extremely tight.
Donor-vehicle mileage cap: roughly under 50000 miles for the part to have meaningful remaining life.
Donor quality checklist:
- Match the part number exactly, as actuators for different functions look identical.
- Visually inspect for any cracks in the housing or damage to the connector.
- Test the internal resistance with a multimeter before purchase.
Decision logic:
- If Labor to replace the part is more than 1 hour → Buy a new OEM or high-quality aftermarket part. The risk of a used part failing and requiring repeat labor is too high.
- If Labor is under 1 hour AND budget is the primary concern → A used part is a viable risk, but understand it has a significantly shorter lifespan.
- If The part is known for high failure rates (e.g., on a Trailblazer) → Favor a new part with a good warranty, as even new parts are sometimes faulty.
Warranty tradeoff: Used parts typically offer a 30-90 day warranty. Aftermarket new parts (like Dorman) come with a 1-year to lifetime warranty. OEM new parts carry a manufacturer's warranty, typically 1-2 years.
Worst-case if a used part fails: $200 - $1200 if a used part fails after installation, primarily due to the cost of repeating the labor.
What Happens If You Wait — Timeline
- 0-1 month: Code B3770 is set. A clicking noise starts, usually for 10-30 seconds after startup or when changing modes. Airflow becomes stuck in a default position (defrost/floor). (MPG impact: 0%% · Added cost: $0)
- 1-6 months: The clicking becomes a constant annoyance. The plastic gear inside the actuator is significantly stripped. The primary issue is the loss of defroster control, which is a major safety hazard in cold or humid weather. (MPG impact: 0%% · Added cost: $0)
- 6-12 months: The actuator's electric motor burns out from continuously trying to move against a stripped gear. The clicking noise stops, but the actuator remains completely unresponsive. There is a low risk of the constant force damaging the plastic HVAC door. (MPG impact: 0%% · Added cost: $0 - $500)
- 12+ months: The failure is stable. No further damage to the engine or other major systems occurs. The cost of not fixing remains the lack of defroster function and the potential for a failed state safety inspection due to the Check Engine Light. (MPG impact: 0%% · Added cost: $0)
Cost of Not Fixing It
- Immediate: Loss of control over airflow direction, creating a severe safety hazard if the windshield cannot be defrosted. (Added cost: $0)
- 1-6 months: Continuous clicking/grinding from a failed actuator. The constant grinding damages the plastic HVAC door or its pivot point inside the dash. (Added cost: $0 - $500)
- 6+ months: No direct mechanical damage to the engine occurs. The primary cost remains the loss of function and the ongoing safety risk associated with poor visibility. (Added cost: $0)
Diagnosis Steps
- Attempt an HVAC System Recalibration
Turn the car off, remove the HVAC/BATT fuse from the fuse box for 60 seconds, reinstall it, then start the car. Wait for 60 seconds without touching the climate controls while the system recalibrates. This free step fixes the code if it was caused by a memory loss.
Tools: Fuse puller or pliers (Beginner) - Confirm Symptoms and Listen Carefully
Start the car and switch between all airflow modes. Listen for clicking or grinding noises from under the dashboard. A clicking noise confirms the actuator's internal gears are stripped, requiring immediate replacement.
Tools: Your ears (Beginner) - Scan for HVAC Data (Pro Tip)
Use a bi-directional scan tool to monitor the 'Mode Door Position' parameter. Command the actuator to different positions. A value stuck at 0 or 255 counts points directly to a feedback circuit fault, broken wire, or failed actuator potentiometer.
Tools: Bi-directional Scan Tool (Advanced) - Visually Inspect the Actuator and Connector
Locate the mode door actuator. Check if the electrical connector is fully seated and inspect the pins for green corrosion or backed-out wires.
Tools: Flashlight, trim removal tools (Intermediate) - Test the Actuator Circuit with a Multimeter
Back-probe the actuator's connector. Check for a stable 4.8-5.2 volt reference and verify the ground circuit has less than 100mV of resistance. The signal wire's voltage must change smoothly (typically 1V to 4V) as you command the mode to change.
Tools: Multimeter, vehicle-specific wiring diagram, back-probe pins (Advanced) - Isolate the 5-Volt Reference Circuit
If multiple actuator codes are present (e.g., B0414, B0424), disconnect the other actuators one by one. A short in one actuator pulls down the shared 5-volt reference circuit for all of them. The disconnected actuator that restores function to the mode door is the source of the short.
Tools: Basic hand tools (Intermediate) - Remove and Bench Test the Actuator
Remove the actuator. With it plugged in, try to change modes. If it doesn't move or just clicks, the actuator is bad. You can also use a multimeter to check the internal potentiometer's resistance; a reading of 0 ohms or infinite resistance confirms internal failure.
Tools: Basic hand tools, multimeter, 9V battery (Advanced) - Check for Physical Obstructions
With the actuator removed, move the HVAC door by hand. It must move smoothly through its full range. If it binds, a physical blockage inside the ductwork requires removal.
Tools: Flashlight, long pliers or grabber tool (Intermediate)
When This Code Triggers (Freeze-Frame Conditions)
- Ignition Status: ON (The fault is typically detected shortly after the vehicle is started.)
- Battery Voltage: 11.5 - 14.5V (Normal operating voltage is required for the HVAC module to function.)
- HVAC Mode Command: Any change (Code sets when the driver or auto climate system commands a change in airflow direction (e.g., from vent to floor).)
- Actuator Feedback Signal: Out of Range (<0.5V or >4.5V) (The direct trigger; the module sees an illogical voltage or count from the actuator's position sensor.)
Related Codes
- B0414 — This code is for the driver's side temperature blend door. B3770 affects airflow direction, while B0414 affects driver temperature. A short in a shared 5V circuit causes both codes to appear simultaneously.
- B0424 — This is for the passenger side temperature blend door. B3770 affects airflow direction for everyone, while B0424 affects only the passenger's temperature.
- B0229 — This code relates to the recirculation actuator. B3770 controls airflow direction inside the cabin, while B0229 controls the source of the air (outside fresh air vs. inside recirculated air).
- B3771 / B3772 — These are companion codes to B3770. B3771 indicates the feedback circuit voltage is too low (short to ground), while B3772 indicates it is too high (short to voltage).
Climate & Environmental Factors
- Extreme Temperature Cycling: Climates with extreme temperature swings accelerate failure. Plastic gears become brittle in sub-zero weather. Frequent cycling from maximum heat to maximum cool puts repetitive stress on the actuator, stripping gears prematurely.
How to Clear the Code After You Fix It
- Clear codes with an OBD-II scan tool
- Perform HVAC system recalibration (fuse pull or scan tool command)
- Cycle through all airflow modes manually to confirm proper operation
Drive cycle (~5 minutes): After clearing the code and performing the recalibration, start the vehicle and let it idle for 2 minutes without touching the HVAC controls. Then, manually command the system to switch to each mode (vent, floor, defrost), confirming airflow changes correctly. No extensive driving is required.
Readiness monitors affected: None
Watch out for:
- Forgetting to perform the HVAC recalibration after replacing the part is the most common reason for the code to return immediately.
- If the Check Engine Light was on, clearing the code resets emissions readiness monitors, requiring a separate drive cycle before an emissions test.
Will This Fail Emissions / State Inspection?
Yes — this code typically fails an OBD-II emissions inspection.
- California: An illuminated Check Engine Light causes an automatic failure of the OBD-II portion of the smog check. The code itself is not emissions-related, but the light is the trigger.
- New York: NYS vehicle inspections include an OBD-II scan. If the Check Engine Light is on for any reason, the vehicle automatically fails the emissions part of the inspection.
- Texas: In the 17 counties requiring emissions testing, an illuminated Check Engine Light causes the vehicle to fail the On-Board Diagnostic (OBDII) test.
Most Commonly Affected Vehicles
- Chevrolet Trailblazer (2002-2009) — Extremely common failure. The mode actuator is notoriously difficult to access, requiring significant dashboard disassembly and leading to labor costs exceeding $1,000.
- GMC Envoy (2002-2009) — Shares the same platform and HVAC components as the Trailblazer, making it equally prone to this expensive labor issue.
- Chevrolet Silverado / Tahoe / Suburban (2000-2007) — For the 2003-2007 models, this code is often caused by degraded door seals causing over-travel. A software reprogram (TSB #06-01-38-003) is the correct fix.
- GMC Sierra / Yukon (2000-2007) — Mechanically identical to their Chevrolet counterparts, suffering from the same frequent actuator failures and TSB-related calibration issues.
- Chevrolet Impala (2006-2013) — Prevalent in this generation, where the plastic actuator gears wear out and fail, causing the classic clicking sound.
- Chevrolet Aveo / Cruze (2004-2015) — Commonly reported on these smaller Chevrolet sedans, typically requiring a straightforward actuator replacement.
- Subaru Legacy / Outback (2015-2019) — While B3770 is a GM-specific code, the equivalent failure occurs here. The Denso mode door actuator (Part No. 72131AJ14A) is a known failure point.
- Buick Rainier / Rendezvous (2004-2007) — Sharing platforms with other affected GM SUVs, these Buicks are highly susceptible to B3770.
Manufacturer-Specific Notes
- General Motors (Chevrolet, GMC, Buick, Cadillac): This code is overwhelmingly found on GM vehicles. The standard non-scan tool recalibration procedure involves pulling the HVAC fuse for 60 seconds, reinstalling it, and letting the system cycle for two minutes without touching the controls.
- General Motors (GMT800 Trucks/SUVs 2003-2007): A common cause for B3770 is the foam seal on the door inside the HVAC case deteriorating, allowing the door to travel too far. GM issued TSB #06-01-38-003 to reprogram the HVAC module to allow for more travel, fixing the code without mechanical repair.
- General Motors (GMT360 SUVs 2002-2009): On Trailblazers and Envoys, there are five separate actuators. The mode door actuator (B3770) is distinct from the temperature actuators (B0414/B0424). You must pinpoint which one is clicking to avoid replacing the wrong part.
- Subaru: Subaru does not use the B3770 code, but experiences the identical mechanical failure on 2015-2019 models. The symptoms (clicking dash, wrong vents) are the same, caused by a failed Denso mode door actuator.
Real Owner Stories
2004 Chevy Suburban - The Misdiagnosis Loop
Passenger side A/C only blew hot air, driver side was fine. Eventually, all airflow became stuck on defrost.
What they tried:
- Replaced the passenger side blend door actuator; performed a fuse-pull reset. Problem persisted.
- The new actuator then started clicking, indicating a deeper issue.
- Replaced the HVAC control head with a used unit from eBay, but there was still no response from the mode door actuator.
Outcome: The issue was not the actuator or control head, but the underlying issue of deteriorated foam seals on the HVAC doors, which requires a software update via TSB #06-01-38-003 to fix.
Lesson: Don't keep throwing parts at the problem. If a new actuator and control head don't fix it, the issue is likely in the wiring, calibration, or a known TSB. A new part clicking suggests it's being commanded past its intended range.
2002 Chevy Trailblazer - The Difficult Repair & Indexing Problem
Code B3770 was present, along with temperature control codes (B0408, B0414). Airflow was stuck. The original mode door actuator was confirmed to have stripped internal gears.
What they tried:
- Replaced the mode door actuator, but the new part would not move and the B3770 code remained.
- Tested the wiring and confirmed 5V reference, ground, and signal wires were functioning, ruling out a wiring issue.
- Discovered the new actuator was not 'indexed' correctly out of the box and was at its maximum travel limit, preventing the system from calibrating it.
Outcome: The technician manually applied voltage to the new actuator on the bench to move it to a centered, or 'indexed', position before installation. After reinstalling the correctly indexed part and performing a recalibration, the system began working correctly.
Lesson: A new actuator not working is not always a faulty part. It must be manually indexed to a neutral position before the vehicle's HVAC module can recognize and calibrate it. This is a common pitfall for DIY repairs.
2005 GMC Envoy - The Simple Fix That Worked
Code B3770 was active, and the airflow was stuck, only coming out of the floor and defrost vents. The owner could not get air to blow from the main dash vents.
What they tried:
- Before buying any parts, the owner performed an HVAC system recalibration.
Outcome: The owner pulled the designated HVAC fuse from the fuse box for 60 seconds, reinstalled it, and started the car without touching the controls for 2 minutes to force the system to relearn the actuator positions. This simple, free step resolved the code.
Lesson: Always try the simplest and cheapest fix first. An HVAC system recalibration via a fuse pull is the very first step in diagnosing B3770, especially if the battery was recently disconnected.
How to Prevent This Code From Triggering
- Cycle Through All HVAC Modes Periodically (Monthly) — Regularly moving the mode doors through their full range of motion prevents the plastic gears and pivot points from seizing or becoming stiff from disuse, particularly in climates where one setting is used for months at a time.
- Perform a Proactive Recalibration (Annually or after battery replacement) — Periodically forcing the system to relearn the door stop points corrects minor drift in calibration before it becomes severe enough to set a fault code. This is critical after disconnecting the vehicle's battery.
- Clean or Replace Cabin Air Filter (Per manufacturer's schedule (typically every 15,000 miles)) — A severely clogged cabin air filter increases the strain on the entire HVAC system. Maintaining good airflow ensures the system operates under its intended load, reducing overall stress on components.
- Address Water Leaks Promptly (As needed) — Water intrusion into the dashboard area from a leaking windshield or cowl causes corrosion on actuator connectors and wiring harnesses. Keeping the electronics dry prevents electrical failures that mimic actuator faults.
- Open and Clean Actuator (Advanced) (Only if easily accessible and showing early signs of failure) — The grease on the internal contacts of the actuator becomes contaminated with copper or carbon dust, causing erratic signals. Carefully opening it and cleaning the contact plate with electrical cleaner restores function without replacement.
Frequently Asked Questions
Can I fix code B3770 myself?
Yes, if the problem is a simple recalibration or an easily accessible actuator. However, vehicles like the Chevy Trailblazer require extensive dashboard disassembly, making it a difficult 6-to-8-hour job for beginners. Stop DIY and consult a shop if the actuator is buried behind the main dash harness.
What is the clicking noise I hear in my dash?
The clicking is the sound of broken plastic teeth on a gear inside the mode door actuator. The motor tries to turn the gear to move the airflow door, but the stripped teeth slip, causing the repetitive click. You must replace the actuator to fix this.
I replaced the actuator, but the code came back. Why?
The HVAC system likely needs a recalibration to learn the new actuator's position. Alternatively, the new actuator was not manually 'indexed' (centered) before installation, or your vehicle requires the GM TSB #06-01-38-003 software update. Always pull the HVAC fuse for 60 seconds to force a recalibration after installing new parts.
What's a common misdiagnosis mistake for B3770?
Technicians often replace the actuator without testing the electrical circuit first. A broken wire, corroded connector, or a shorted 5-volt reference from a different actuator causes the exact same code. Always verify power and ground at the connector before buying parts.
Can a bad mode actuator (B3770) cause other HVAC codes too?
Yes. The HVAC actuators share the same 5-volt reference and ground circuits from the control module. A short in the mode door actuator's wiring disrupts communication for the entire system, triggering simultaneous codes for the blend and recirculation doors.
Is it safe to ignore this code?
While it won't damage your engine, it is a severe safety hazard in cold or wet climates. You lose the ability to direct air to the windshield, making it impossible to clear ice or fog. Fix this immediately if you rely on your defroster for visibility.
How do I perform the HVAC recalibration?
Turn the ignition off and remove the HVAC/BATT fuse from the fuse box for 60 seconds. Reinstall the fuse, start the engine, and wait two minutes without touching any climate controls. The system will automatically cycle and learn the new actuator positions.
How do I know if I need the mode actuator or the blend door actuator?
The Mode Door Actuator (Code B3770) controls airflow direction, such as switching between face, floor, and defrost vents. The Blend Door Actuator (Codes B0414/B0424) controls the air temperature by mixing hot and cold air. Identify which function is broken to replace the correct part.
Key Takeaways
- Code B3770 indicates a failure in the mode door actuator circuit, locking your airflow to a default defrost or floor setting.
- A repetitive clicking noise from the dashboard confirms the actuator's internal plastic gears are stripped and require replacement.
- Always perform a free 60-second HVAC system recalibration by pulling the HVAC fuse before buying replacement parts.
- On 2003-2007 GM trucks, deteriorated door seals cause this code; fix it with a 1-hour dealer software update (TSB #06-01-38-003) instead of a mechanical repair.
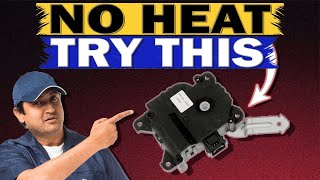
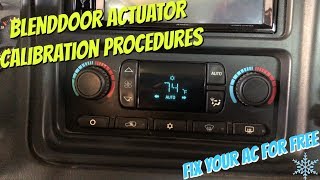
Helpful Videos
Shop the Parts Behind B3770
Below are the parts most often responsible for code B3770, ranked by how frequently each one is the actual culprit (per the diagnosis above). Tap any to see what we have for your vehicle.


The information in this article is provided for general reference and educational purposes only. Vehicle specifications, procedures, and part compatibility can vary by production date, trim level, and region. Always consult your vehicle's factory service manual and verify part numbers before purchasing or performing repairs. Safety-critical components such as airbags, seat belts, and braking systems should be installed by a qualified professional.
- 🧭 Diagnostic Flowchart
- 🎬 Helpful Videos
- 🛍️ Shop This Part
- What Does B3770 Mean?
- Can I Drive With B3770?
- Common Causes
- Symptoms
- Common Fixes & Costs
- DIY vs Professional
- Used vs. New Parts: Buying Guide
- What Happens If You Wait — Timeline
- Cost of Not Fixing It
- Diagnosis Steps
- When This Code Triggers (Freeze-Frame Conditions)
- Related Codes
- Climate & Environmental Factors
- How to Clear the Code After You Fix It
- Will This Fail Emissions / State Inspection?
- Most Commonly Affected Vehicles
- Manufacturer-Specific Notes
- Real Owner Stories
- 2004 Chevy Suburban - The Misdiagnosis Loop
- 2002 Chevy Trailblazer - The Difficult Repair & Indexing Problem
- 2005 GMC Envoy - The Simple Fix That Worked
- How to Prevent This Code From Triggering
- Frequently Asked Questions
- Can I fix code B3770 myself?
- What is the clicking noise I hear in my dash?
- I replaced the actuator, but the code came back. Why?
- What's a common misdiagnosis mistake for B3770?
- Can a bad mode actuator (B3770) cause other HVAC codes too?
- Is it safe to ignore this code?
- How do I perform the HVAC recalibration?
- How do I know if I need the mode actuator or the blend door actuator?
- Key Takeaways
- 🎟️ Get 5% Off