
B3979 on 2017-2022 Cadillac XT5: HVAC Drain Leak Causing BCM Water Damage and Electrical Failure
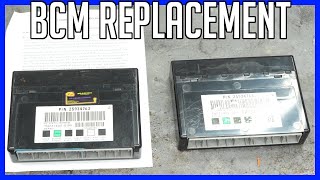
Code B3979 on a 2017-2022 Cadillac XT5 is almost always caused by water from a leaking HVAC evaporator drain hose dripping onto the Body Control Module (BCM). This well-documented design flaw leads to bizarre electrical problems like inoperative door locks, random alarms, and no-start conditions. The official fix, outlined in TSB 21-NA-183, requires sealing the leak and often replacing and reprogramming the water-damaged BCM.
- B3979 on a Cadillac XT5 strongly points to water damage on the Body Control Module (BCM).
- The water source is a known issue: a leaking HVAC drain hose located inside the center console area.
- Symptoms include erratic door locks, alarms, and potential no-start conditions.
- The fix involves sealing the leak and, in most cases, replacing and reprogramming the BCM. This is not a simple DIY repair.
- Before expensive repairs, check for wet carpets and have a technician inspect for the specific leak described in TSB 21-NA-183.
What's Unique About the 2017-2022 Cadillac XT5
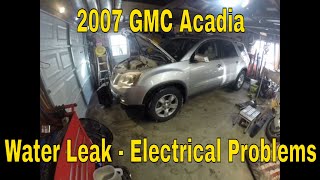
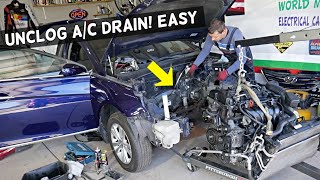
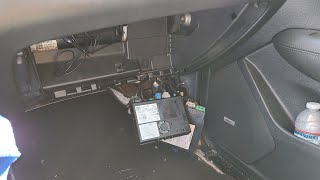
The Cadillac XT5 and its GM C1XX platform-mates are known for a specific design flaw addressed in Technical Service Bulletin (TSB) 21-NA-183. The HVAC evaporator drain hose has a tendency to leak where it connects to the housing, allowing condensation to drip directly onto the Body Control Module (BCM) located below. This water damage is the primary trigger for code B3979 and the associated cluster of bizarre electrical symptoms. 🎬 Watch: Real-world example of BCM failure from water damage The TSB explicitly mentions that adding a simple zip tie (GM Part #11509086) to the hose connection 🎬 Watch: How to locate and access the A/C drain hose is the corrective action to prevent future leaks.
Diagnostic Flowchart
Tap your situation to follow the diagnostic path that matches what you're seeing on this vehicle.
Symptoms You May Notice
- Intermittent failure of power door locks
- Unwanted horn or hazard flasher activation
- Various warning lamps illuminating on the instrument panel
- Immobilizer system warnings or a no-start/start-and-stall condition
- Wet carpet in the passenger or driver side footwell
- Passive entry (keyless unlock) system inoperative
- Key fob not detected warnings
- Radio or infotainment screen behaving erratically or going black
- Service Transmission warning messages
- Replacing individual door lock actuators when the problem is intermittent or affects multiple doors.
- Replacing the key fob or key fob battery, as the symptoms are caused by a deeper electrical issue within the BCM.
- Replacing the battery without addressing the underlying parasitic drain that may be caused by the faulty, water-damaged BCM.
- Assuming a clogged sunroof drain, which is a common leak source on many vehicles but is superseded by the known HVAC drain issue on this specific platform.
Most Likely Causes
- Water Intrusion into Body Control Module (BCM) 🔴 High Probability → Shop Body Control Module As documented in TSB 21-NA-183, the HVAC drain hose connection to the evaporator housing is prone to leaking condensation directly onto the BCM, causing corrosion and electrical faults. The TSB shows the water drips from a small notch in the hose connection.
How to confirm: Remove the front floor console extension panels on both sides. Run the A/C on high and observe the HVAC drain hose connection for water drips. Inspect the BCM and its electrical connectors for any signs of moisture or blue/green corrosion. TSB 21-NA-183 includes images of what the internal BCM corrosion looks like.
Typical fix: First, the HVAC drain hose leak must be sealed by installing a zip tie (GM Part #11509086) around the hose at the connection point to the HVAC module. If the BCM shows any signs of corrosion, it must be replaced. A new BCM requires programming by a dealer or qualified shop.
Est. part cost: $300-$500 - Chafed Instrument Panel (IP) Wiring Harness ⚪ Low Probability TSB PIT5606F notes that the IP wiring harness can rub against the steering column I-shaft, causing wires to chafe and short out, leading to similar electrical symptoms.
How to confirm: Visually inspect the wiring harness at the base of the steering column for any signs of rubbing, exposed copper, or damage where it passes the intermediate shaft.
Typical fix: Repair the damaged wires and use a zip tie to secure the harness away from the I-shaft to prevent future damage.
Est. part cost: $5-$20
Rare But Worth Checking
- Low Voltage Event: According to TSB 21-NA-277, a cluster of 'Environment ID' DTCs, including B3979, can be set following a low battery voltage condition, jump start, or battery replacement. In this case, there may be no physical fault. Clearing the codes after ensuring the battery is fully charged may resolve the issue.
- Heater Core Leak: While far less common than the A/C drain leak, a leaking heater core can also drip fluid (coolant) onto the BCM, causing similar damage. This would typically be accompanied by the smell of coolant inside the cabin and a loss of coolant from the reservoir.
Diagnosis Steps
- Scan the BCM for all stored Diagnostic Trouble Codes (DTCs). Note if B3979 is present with other lock, security, or communication codes (B3125, B3130, B3135, B3980).
- Check for wet carpet in the front footwells, a key sign of a leaking HVAC drain.
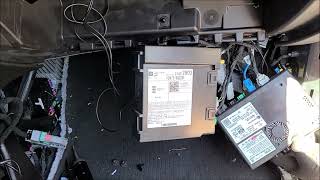
- Remove the left and right front floor console extension panels to gain access to the HVAC module.
- Start the vehicle, turn the A/C to its coldest setting, and set the blower fan to maximum speed.
- Using a good light source, carefully observe the connection point of the rubber drain hose to the plastic HVAC module housing. Look for any signs of water dripping, specifically from a small notch in the hose.
- If a leak is found, inspect the BCM and its connectors for any signs of water damage or corrosion. This may require careful removal of the BCM for a full inspection. TSB 21-NA-183 provides a photo of what internal corrosion looks like for reference.
- If no leak is found, inspect the instrument panel wiring harness near the base of the steering column for chafing against the I-shaft, as noted in TSB PIT5606F.
- If the vehicle recently had a dead battery or was jump-started, charge the battery fully, clear all codes, and see if they return.
Parts You'll Likely Need
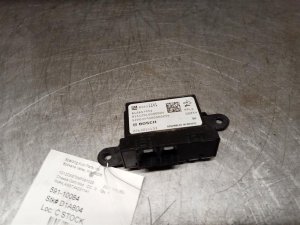
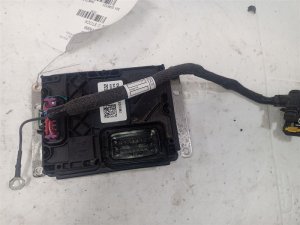
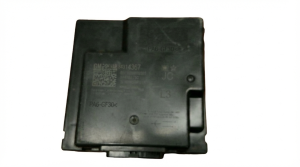
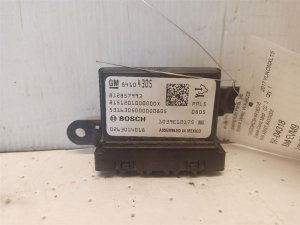
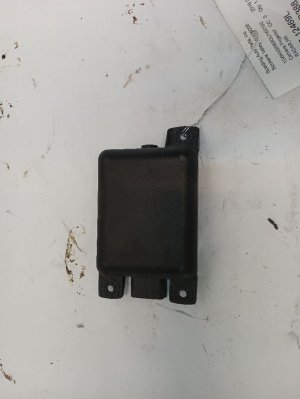
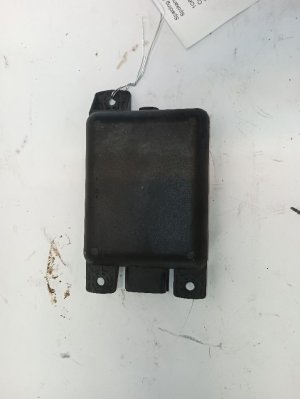
- Body Control Module (BCM)
(OEM #84527295 (Note: Part numbers vary by year and options. Always verify with VIN.))— This module is the most common point of failure due to its location directly beneath the leaking HVAC drain hose. Water damage requires its replacement.
Trusted brands: ACDelco (Genuine GM)
OEM price range: $300-$500
Aftermarket price range: $200-$400 - Zip Tie / Cable Strap
(OEM #11509086)— To fix the source of the problem, a zip tie is installed around the HVAC drain hose connection to secure it and prevent future leaks, as per TSB 21-NA-183.
Trusted brands: Any standard automotive zip tie
OEM price range: $5
Aftermarket price range: <$1
Related Codes That Often Appear With This One
- B3125 — This code relates to the 'Driver Door Lock/Unlock Circuit' and is often set alongside B3979 due to the BCM's water damage.
- B3130 — This code relates to the 'Passenger Door Lock/Unlock Circuit' and is part of the same cluster of faults caused by BCM water intrusion.
- B3135 — This code relates to the 'All Door Lock Circuit' and indicates a general locking system fault, triggered by the erratic BCM.
- B3980 — This code for 'Incorrect Environmental Identifier Received From Instrument Cluster' is often set with B3979, indicating widespread communication confusion caused by the faulty BCM.
- Various U-codes — U-codes indicate a loss of communication between modules. A water-damaged BCM can disrupt the vehicle's data network, causing multiple U-codes to appear.
Technical Service Bulletins (TSBs) & Recalls
- 21-NA-183: Intermittent Door Locks Inoperative, DTCs B3125, B3130, B3135, B3979, B3980... The primary TSB identifying the HVAC drain leak as the cause of BCM water intrusion. It applies to the XT5 and several platform mates.
- PIT5606F: Power Door Locks Cycle or Intermittently Inoperative... Mentions IP wiring harness chafe and water intrusion as potential causes for similar symptoms.
- 21-NA-277: Vehicle Will Not Crank or Will Start and Immediately Stall... Notes that B3979 can be set after a low voltage event.
Platform-Specific Known Issues
- TSB 21-NA-183 explicitly details the procedure to diagnose and correct a water leak from the HVAC drain hose onto the BCM, which causes code B3979 and other electrical problems. The fix involves adding a zip tie.
- TSB PIT5606F identifies a potential secondary cause for similar electrical issues: a chafed wiring harness at the steering column.
Scan Tool Commands That Help
- GDS2 (GM Global Diagnostic System 2): Bi-Directional Controls / Control Functions — After confirming the BCM has power and communication, a technician can use GDS2 to command specific outputs like door locks, exterior lights, or wipers. If the BCM receives the command but the component does not activate, it points to a problem in the output circuit or the component itself. If the BCM cannot execute the command, it suggests an internal BCM fault.
- GM SPS/TIS2Web (Service Programming System): BCM Programming and Setup — This is mandatory when replacing the BCM. A new BCM is blank and must be programmed with the vehicle's specific VIN, RPO codes (feature configuration), and security credentials. The process involves connecting a J2534 device (like a GM MDI 2), logging into the TIS2Web service, and flashing the correct calibration file to the module. Failure to perform this step will result in a no-start condition and multiple system malfunctions.
Wiring & Ground Locations
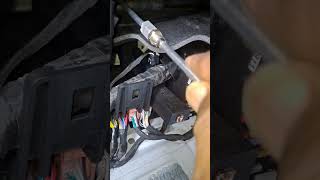
- BCM Connectors — The BCM is located under the dash/center console area, often near the passenger footwell, directly under the HVAC housing where the drain leak occurs.. Water from the HVAC drain drips directly onto these connectors and the BCM itself. One of the main connectors is a brown, 26-way female connector designated as X5. Inspecting these connectors for blue/green corrosion is a primary diagnostic step.
- BCM Ground Path — BCM grounds are typically routed to a splice pack or a ring terminal connected to the chassis inside the passenger compartment.. Per GM bulletin 07-08-47-004D, the BCM can be internally damaged if battery power is supplied while its ground path is removed. It is critical to disconnect the negative battery cable *before* disconnecting any BCM ground terminal or splice pack to prevent frying the module during service.
Real Owner Repair Stories
- Reddit user on r/Cadillac (2018 Cadillac XT5) — Vehicle would not learn a second key fob. The manual 30-minute relearn procedure was attempted; it successfully learned the first fob but would not recognize the second, leaving the car in a 'Ready for remote 2' state.
❌ Tried (didn't work) Changing the battery in the non-working key fob., Attempting to program an aftermarket key fob., The dealership re-attempting the manual key learn procedure.
✅ What actually fixed it The dealership's diagnostics concluded that the Body Control Module (BCM) itself was faulty and needed to be replaced. The BCM had failed in such a way that it could not complete the key learning process, even though other functions may have been working prior to the attempt.
OEM Part Supersession History
Unknown→84155667— Updated BCM Shield design.
Heads up: For early production 2017 XT5 models built before November 1st, 2016, an older BCM shield was used. Part number 84155667 is the second design. Verify build date if replacing the shield.
Model Year Variations Within This Range
- 2020-2022: The 2020 model year introduced a significant refresh. While the BCM leak issue remains, technicians should be aware of major interior and electronic changes. This includes a redesigned center console, a new infotainment system with a rotary controller (replacing some touch functions), and the addition of USB-C ports. These changes affect the disassembly process for accessing the BCM and surrounding components compared to 2017-2019 models.
Helpful Videos


We Have This Part in Stock

The information in this article is provided for general reference and educational purposes only. Vehicle specifications, procedures, and part compatibility can vary by production date, trim level, and region. Always consult your vehicle's factory service manual and verify part numbers before purchasing or performing repairs. Safety-critical components such as airbags, seat belts, and braking systems should be installed by a qualified professional.
- Cadillac XT5:
- 🧭 Diagnostic Flowchart
- 🎬 Helpful Videos
- 🛍️ Shop This Part
- What's Unique About the 2017-2022 Cadillac XT5
- Symptoms You May Notice
- Most Likely Causes
- Rare But Worth Checking
- Diagnosis Steps
- Parts You'll Likely Need
- Related Codes That Often Appear With This One
- Technical Service Bulletins (TSBs) & Recalls
- Platform-Specific Known Issues
- Scan Tool Commands That Help
- Wiring & Ground Locations
- Real Owner Repair Stories
- OEM Part Supersession History
- Model Year Variations Within This Range
- 🎟️ Get 5% Off