
B3980 on 2017-2022 GMC Acadia: Causes and Fixes for Electrical Issues
This code indicates a communication error or fault within the Body Control Module (BCM), often caused by water intrusion from a leaking HVAC drain hose. The most common fix is to repair the leak, inspect the BCM for corrosion, and replace it if damaged, as outlined in TSB #21-NA-183.
- B3980 on a 2017-2022 Acadia almost always points to a problem with the Body Control Module (BCM), not the instrument cluster itself.
- The most probable cause is water damage to the BCM from a leaking HVAC drain hose, a known issue addressed by GM TSB #21-NA-183.
- Symptoms are widespread, including door lock failure, random alarms, wet carpets, and warning lights.
- The fix involves repairing the leak (often with just a zip tie) and inspecting the BCM for corrosion. If any corrosion is found, the BCM must be replaced and programmed by a professional.
- Do not waste money on individual door lock actuators until the BCM and its wiring have been confirmed to be in good condition.
What's Unique About the 2017-2022 Gmc ACADIA
For this generation of Acadia and its platform mates (like the Cadillac XT5 and Chevy Blazer), a significant number of electrical gremlins, including the B3980 code, are traced back to a single, well-documented design flaw: water intrusion into the Body Control Module (BCM). A poorly sealed HVAC drain hose can leak condensation directly onto the BCM and its connectors, causing corrosion and erratic behavior. This makes the problem less about a random software glitch and more about a specific mechanical-to-electrical failure point that GM has addressed with a detailed repair procedure in TSB #21-NA-183.
Diagnostic Flowchart
Tap your situation to follow the diagnostic path that matches what you're seeing on this vehicle.
Symptoms You May Notice
- Intermittent or complete failure of power door locks.
- Unwanted horn activation or hazard lights flashing.
- Various warning lamps illuminating on the instrument panel (IP).
- Immobilizer or security system warnings.
- Vehicle may not recognize it is in 'Park', preventing it from shutting off.
- No-start or starts-and-stalls condition in severe cases.
- Wet or damp carpet in the front passenger or driver footwell.
- A 'clicking' noise from the dashboard area as relays in the failing BCM cycle erratically.
- Replacing door lock actuators. While an actuator can fail for a single door, it is highly unlikely for all of them to fail simultaneously. The symptoms associated with B3980 point to a central controller issue, not individual actuators.
Most Likely Causes
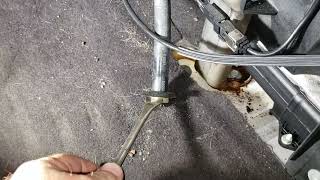
- Water Intrusion into Body Control Module (BCM) from HVAC Drain 🔴 High Probability → Shop Body Control Module As documented in TSB #21-NA-183, the HVAC drain hose connection to the HVAC module can leak. The BCM is located directly in the path of this leak, leading to water dripping onto the module and its electrical connectors.
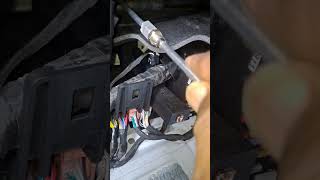
How to confirm: Inspect the carpet in the front passenger footwell for dampness. Following the procedure in TSB #21-NA-183, remove the right front floor console extension panel to view the BCM. Look for water on the wiring or connectors. To confirm the leak source, start the vehicle and run the A/C on max speed. Water will appear at the notch in the drain hose where it connects to the HVAC module. Visually inspect the BCM and its connectors for any signs of blue or green corrosion. The TSB notes you may need to open the BCM case to see the internal corrosion.
Typical fix: Repair the HVAC drain hose leak by installing a zip tie tightly around the hose, just below the locking nib, to secure the connection. The BCM and its connectors must be inspected for corrosion; if any is found, the BCM must be replaced and the new module programmed by a professional.
Est. part cost: $300-$600 - Water Intrusion from Clogged Sunroof Drains ⚪ Low Probability While the HVAC drain is the most documented cause, clogged or disconnected sunroof drain tubes can also cause water to enter the cabin, potentially reaching the BCM or other electronics. This has been a known issue on various GM SUVs.
How to confirm: If no leak is found from the HVAC drain, pour water into the sunroof tray and check if it drains properly underneath the vehicle. Check for wetness in the headliner or along the A-pillars.
Typical fix: Locate the drain tubes and clear any blockages using compressed air or a flexible wire. Reconnect any disconnected tubes. Dry out any affected electronics.
Est. part cost: $0-$50
Rare But Worth Checking
- BCM Software/Logic Lock-up: A low voltage event from a weak battery or jump-start can sometimes cause modules to enter a confused state. While less common than the water leak, it's a possibility. A hard reset (disconnecting the battery) or reprogramming by a dealer may resolve it.
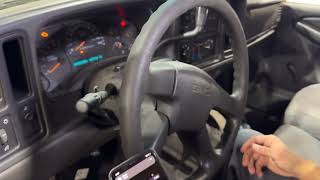
- Damaged Wiring or Connectors: Less common than a water-damaged module, but frayed wires or loose pins can cause issues. TSB PIT5606J notes that the instrument panel wiring harness can chafe at the steering column I-shaft, causing door lock and no-start issues. Water can also corrode other large inline connectors in the footwells (X200, X500, etc.).
Diagnosis Steps
- Scan for all DTCs in all modules. Note the presence of B3980 along with B3125, B3130, B3135, B3979, or any U-codes, as this strongly points towards the issue described in TSB #21-NA-183.
- Inspect the front passenger and driver footwell areas for any signs of moisture or dampness. This is a key physical symptom.
- Following the procedure in TSB #21-NA-183, remove the right front floor console extension panel to gain access to the Body Control Module (BCM).
- Inspect the BCM, its wiring, and the surrounding area for obvious signs of water or corrosion.
- To confirm the leak source, start the vehicle, turn the A/C to its coldest setting, and set the blower to maximum speed. Observe the HVAC drain hose connection to the HVAC module. The TSB indicates a leak will be visible at a notch in the hose. 🎬 Watch this video to see the A/C drain leak location.
- If a leak is confirmed, secure the hose by installing a zip tie tightly below the locking nib near the top of the drain hose connection.
- Carefully disconnect the BCM's electrical connectors (GM warns against touching pins to avoid static discharge damage) and inspect the module pins and connector terminals for any signs of blue/green corrosion.
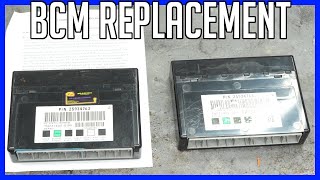
- If corrosion is found, the BCM must be replaced. The TSB even suggests opening the BCM case to check for internal corrosion, which confirms the need for replacement.
- A new BCM must be programmed by a dealer or a qualified shop with GM-specific software (SPS2). 🎬 See how to perform the BCM programming and setup process.
- If no water damage is found, investigate other causes, such as chafed wiring at the steering column I-shaft as described in TSB PIT5606J.
Parts You'll Likely Need
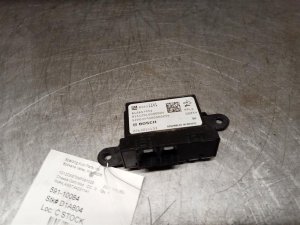
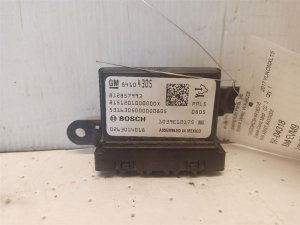
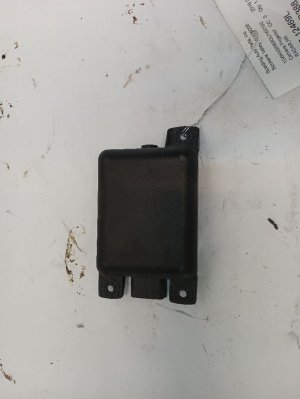
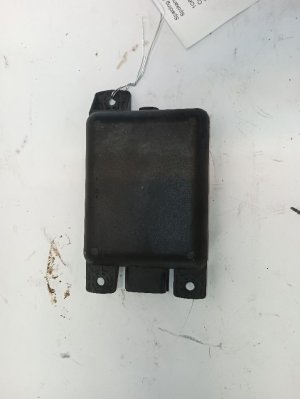
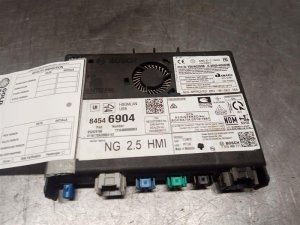
- Body Control Module (BCM)
(OEM #13512679 (2017), 13535993 (2022), 13535989 (2022) - Part numbers are year/trim specific. Always verify with VIN.)— This module is highly susceptible to damage from a leaking HVAC drain hose, which is the primary cause of code B3980 and its related symptoms. If corrosion is present, replacement is mandatory. 🎬 Watch a professional walkthrough on how to replace a BCM.
Trusted brands: ACDelco (GM Genuine)
OEM price range: $300-$600
Aftermarket price range: $250-$500
Related Codes That Often Appear With This One
- B3125 — Driver Door Lock/Unlock Switch Circuit fault, often triggered by the same BCM failure.
- B3130 — All Door Lock/Unlock Circuit fault, indicating a central command issue from the BCM.
- B3135 — Passenger Door Lock/Unlock Switch Circuit fault, also commonly seen with BCM issues.
- B3979 — Incorrect Environmental Identifier from HVAC Control Module, often set alongside B3980 during a BCM communication breakdown caused by water damage.
- Various U codes — U-codes indicate a loss of communication between modules. A failing BCM can disrupt the vehicle's data network, causing other modules to report communication loss.
Technical Service Bulletins (TSBs) & Recalls
- 21-NA-183: Intermittent Door Locks Inoperative, DTCs B3125, B3130, B3135, B3979, B3980, Various U codes, IP Lamps Illuminate, Immobilizer, Unwanted Horn or Hazard Flasher Operation. This TSB directly identifies the cause as a potential water leak onto the BCM and provides the detailed repair procedure.
- PIT5606J: Power Door Locks Cycle or Intermittently Inoperative. This TSB also points to potential water intrusion into the BCM from the HVAC drain hose as a cause for these symptoms on the Acadia and Cadillac XT5.
Platform-Specific Known Issues
- HVAC Drain Hose Leak onto BCM: A known design issue exists where the HVAC drain hose can leak water onto the Body Control Module (BCM), which is located behind the right front floor console extension panel. This causes corrosion and a wide range of electrical faults, as documented in GM Technical Service Bulletin 21-NA-183. The official fix involves securing the hose with a zip tie and replacing the BCM if it shows any sign of corrosion.
Mechanic-Grade Diagnostic Values
- High-Speed CAN Bus Network Resistance — expected: Approximately 60 Ohms. Failure: A reading of 120 Ohms indicates an open circuit or a missing termination resistor. A reading significantly below 60 Ohms (e.g., 40 Ohms) suggests a short circuit or an extra termination resistor on the network.
- CAN Bus Voltage (Key On, Engine Off) — expected: CAN-High (Pin 6): 2.5V to 3.0V. CAN-Low (Pin 14): 2.0V to 2.5V.. Failure: Voltages outside of this range, or a CAN-Low voltage that is higher than CAN-High, indicates a fault on the data bus wiring or a malfunctioning module.
Hidden / Shadow Codes Worth Checking
- B1001: Sensing and Diagnostic Module (SDM) Configuration Error. This code is not a direct cause of B3980 but is a common 'shadow' code that appears *after* a new BCM has been installed. It indicates the new BCM and the airbag control module (SDM) are not properly configured to work together. (see via This code will be stored in the SDM and is visible with a professional scan tool like the GM GDS2. It often results in the airbag warning light staying illuminated after a BCM replacement.)
Scan Tool Commands That Help
- GM GDS2 (Global Diagnostic System 2) / Techline Connect: SPS2 (Service Programming System) - Replace and Program Module — This function is mandatory when installing a new, blank BCM. It downloads the correct firmware, writes the vehicle's VIN, and configures all vehicle-specific RPO codes (Regular Production Options) into the new module.
- GM GDS2 or Manual Procedure: Immobilizer Learn / Key Relearn — After a new BCM is programmed, the vehicle's keys must be re-synced to the immobilizer system. This can be a scan tool function or a manual 30-minute procedure (3 cycles of turning the key to 'ON' for 10 minutes each) depending on the vehicle's system.
- GM GDS2 (Global Diagnostic System 2): Setup SDM — This function is used after BCM replacement if the airbag light is on and code B1001 is present. It establishes communication and configuration between the new BCM and the existing Sensing and Diagnostic Module (airbag module).
Wiring & Ground Locations
- BCM Connectors (X1, X2, X3, etc.) — The BCM, located behind the right front floor console extension panel, has multiple large electrical connectors, typically designated with an 'X' prefix in service manuals.. Water from the HVAC drain leak drips directly onto these connectors, causing corrosion on the pins and terminals. A thorough inspection requires disconnecting them and checking for any blue/green residue inside the connector housings and on the BCM pins themselves.
- BCM Ground Pins — Within the various BCM connectors, specific pins are designated as grounds. These wires are typically black or black with a white stripe and terminate at chassis ground points (e.g., G303, G304).. A corroded or broken ground connection at a BCM pin can cause the module to malfunction in ways that mimic internal failure. If no water damage is visible, testing for continuity to ground on these specific pins is an advanced diagnostic step.
Real Owner Repair Stories
- AcadiaForum.net & GM-Trucks.com forum consensus (2017-2022 GMC Acadia (all trims)) — Sudden onset of multiple electrical issues: door locks inoperative, alarm sounding randomly, warning lights on dash, no-start, or unable to shut off vehicle.
❌ Tried (didn't work) Replacing the vehicle battery., Resetting the system by disconnecting the battery., Replacing individual door lock actuators or switches.
✅ What actually fixed it The overwhelming majority of resolved cases follow the procedure in TSB #21-NA-183. The fix involves a dealer or independent shop confirming water damage to the BCM, securing the leaking HVAC drain hose with a zip tie, replacing the corroded BCM, and programming the new module to the vehicle using GM's SPS2 software.
OEM Part Supersession History
13512679→13512679 is still referenced for 2017 models, but may have internal revisions. Interchange numbers include 13594614 and 13534190.— Standard part evolution and supplier changes.
Heads up: Always verify the part number with the vehicle's VIN. Some vendors offer cloning services to transfer data from the old module, which can bypass the need for dealer programming if the original module is still readable.13518626, 13518628, 84469210→13534191— Part consolidation and updates for the model refresh.
Heads up: This part number is associated with the 2020 model year refresh and later vehicles. It is likely not backward compatible with pre-2020 models.
Model Year Variations Within This Range
- 2017-2019 vs 2020-2022: The GMC Acadia received a facelift for the 2020 model year. This included changes to the electrical architecture, resulting in different Body Control Module (BCM) part numbers. For example, part number 13512679 is commonly used for 2017 models, while 13534191 is listed for 2020 models. While the root cause of the water leak may be the same, the specific replacement part required is different.
Helpful Videos
We Have This Part in Stock


The information in this article is provided for general reference and educational purposes only. Vehicle specifications, procedures, and part compatibility can vary by production date, trim level, and region. Always consult your vehicle's factory service manual and verify part numbers before purchasing or performing repairs. Safety-critical components such as airbags, seat belts, and braking systems should be installed by a qualified professional.
- Gmc ACADIA:
- 🧭 Diagnostic Flowchart
- 🎬 Helpful Videos
- 🛍️ Shop This Part
- What's Unique About the 2017-2022 Gmc ACADIA
- Symptoms You May Notice
- Most Likely Causes
- Rare But Worth Checking
- Diagnosis Steps
- Parts You'll Likely Need
- Related Codes That Often Appear With This One
- Technical Service Bulletins (TSBs) & Recalls
- Platform-Specific Known Issues
- Mechanic-Grade Diagnostic Values
- Hidden / Shadow Codes Worth Checking
- Scan Tool Commands That Help
- Wiring & Ground Locations
- Real Owner Repair Stories
- OEM Part Supersession History
- Model Year Variations Within This Range
- 🎟️ Get 5% Off