
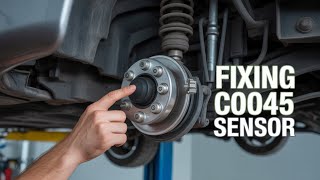
C0045 on 2009-2015 Honda Pilot: Left Rear Wheel Speed Sensor Circuit Fixes
Code C0045 on a 2009-2015 Honda Pilot means there's a fault in the left rear wheel speed sensor circuit. This is most often caused by a failed sensor or damaged wiring. Expect to pay $40-$60 for an aftermarket sensor or around $70 for OEM; it's a common DIY fix, but the sensor's mounting bolt is prone to seizing.
- C0045 on a 2009-2015 Pilot means the ABS and VSA systems are off due to a fault with the left rear wheel speed sensor circuit.
- Before buying parts, test the sensor with a multimeter at its connector near the spare tire; a good sensor reads ~1.4-1.5 kΩ.
- The most difficult part of the repair is often not the diagnosis, but removing the single 10mm sensor mounting bolt, which frequently seizes and requires drilling.
- The correct OEM part is 57475-SZA-A02, which replaces the older 57475-SZA-A01.
- After replacing the sensor, a 'VSA Sensor Neutral Position Memorization' procedure may be required, which can sometimes be done without a scan tool.
What's Unique About the 2009-2015 Honda Pilot
On the second-generation Honda Pilot, the C0045 code is a straightforward circuit fault. Unlike some other manufacturers where this code can imply a complex module communication issue, on the Pilot it almost always points directly to the sensor, its wiring, or the magnetic ring on the wheel hub. The sensor is a separate component from the wheel hub assembly, making for a more affordable part replacement compared to vehicles with integrated hub/sensor units. The main vehicle-specific challenge is not diagnosis, but the high likelihood of the sensor's single 10mm mounting bolt being rusted solid into the steering knuckle, often requiring drilling to remove.
Symptoms You May Notice
- ABS warning light is illuminated
- VSA (Vehicle Stability Assist) warning light is illuminated
- Traction Control light (often a skidding car icon) may be on
- Anti-lock braking system is disabled, wheels may lock during hard braking
- Vehicle may feel less stable during hard cornering or on slippery surfaces
- Replacing the VSA/ABS control module before thoroughly checking the sensor and its wiring.
- Replacing the wheel hub/bearing when only the sensor has failed.
- Replacing the sensor without first checking for a simple wiring break, which is a much cheaper fix.
Most Likely Causes
- Failed Left Rear Wheel Speed Sensor 🔴 High Probability → Shop ABS Wheel Speed Sensor The sensor is exposed to weather, road salt, and debris, leading to internal failure or corrosion over time. It's a common failure point on many vehicles of this age.
How to confirm: Disconnect the sensor's electrical connector (located near the spare tire) and measure the resistance between its two pins with a multimeter. A good sensor should read approximately 1.4-1.5 kΩ. An open loop (infinite resistance, 'OL') or a short (zero resistance) confirms failure. Compare the reading to the working sensor on the right side for a baseline.
Typical fix: Replace the left rear wheel speed sensor. The sensor is held to the knuckle by a single 10mm bolt, which is often seized and may require heat, penetrating oil, or even drilling out.
Est. part cost: $40-$100 - Damaged Wiring or Connector 🟡 Medium Probability The wiring harness runs along the suspension and is susceptible to chafing, breaking from impacts with road debris, or corrosion at the connector where it plugs into the main harness.
How to confirm: Visually inspect the entire length of the wiring from the sensor to where it enters the vehicle body. Pay close attention to the connector plug, which is accessible by pulling down a harness mount near the spare tire. Look for breaks, chafed insulation, or green/white corrosion inside the connector.
Typical fix: Repair the broken section of wire with a new piece of wire and weatherproof butt connectors or heat-shrink tubing. If the connector is corroded, it may need to be cleaned with electrical contact cleaner or replaced.
Est. part cost: $5-$25 - Damaged Tone Ring / Wheel Bearing Assembly ⚪ Low Probability The tone ring is integrated into the wheel hub/bearing. While durable, severe corrosion can cause it to crack or delaminate, or a failing wheel bearing can create an incorrect air gap with the sensor, leading to an erratic signal.
How to confirm: With the wheel off, inspect the magnetic ring on the back of the hub for cracks, missing sections, or heavy rust/debris. Also, check for any play, grinding noise, or roughness in the wheel bearing by spinning it by hand and trying to rock the hub.
Typical fix: Replace the entire rear wheel hub and bearing assembly.
Est. part cost: $100-$250
Rare But Worth Checking
- Faulty VSA/ABS Control Module: → Shop ABS Control Module This is the least likely cause. The module is the computer for the brake system. It should only be suspected if all other causes have been ruled out, especially if multiple, unrelated wheel speed sensor codes are present or if communication codes like U0122 are also stored. A new module is extremely expensive, but used units or repair services are available.
Diagnosis Steps
- Connect an OBD-II scanner capable of reading ABS codes to confirm C0045 is present and active.
- Use the scanner's live data feature to monitor all four wheel speeds while driving slowly (or spinning the wheels with the vehicle raised). Confirm the Left Rear (LR) wheel reads 0 MPH or has an erratic signal compared to the others.
- Raise and secure the rear of the vehicle on jack stands. Remove the left rear wheel.
- Visually inspect the wheel speed sensor and its wiring harness for any obvious damage, like cuts, chafing, or signs of melting.
- Locate the sensor's electrical connector near the spare tire area, disconnect it, and inspect for corrosion or loose pins.
- Use a multimeter set to Ohms (Ω). Test the resistance across the two pins on the SENSOR side of the connector. A good sensor will read around 1.4-1.5 kΩ. A reading of 'OL' (Open Loop) or 0 ohms indicates a bad sensor.
- If the sensor tests good, the fault is likely in the wiring harness or, rarely, the VSA module. Perform a continuity test on the wiring harness between the connector and the VSA module if necessary.
- If replacing the sensor, be prepared for the 10mm mounting bolt to be seized. Apply penetrating oil liberally. If it rounds off, an extractor socket or drilling out the bolt may be necessary.
- After replacing any parts, clear the codes with the scanner and perform a test drive to ensure the ABS and VSA warning lights do not return.
Parts You'll Likely Need
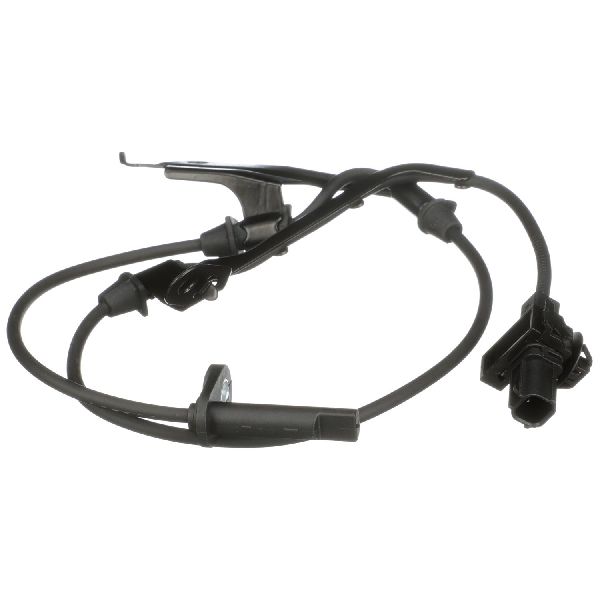
- Left Rear ABS Wheel Speed Sensor
(OEM #57475-SZA-A02)— This is the most common failure point for code C0045. The sensor is an electronic component that fails over time due to heat and environmental exposure. The OEM part 57475-SZA-A02 supersedes the previous version 57475-SZA-A01.
Trusted brands: Honda (OEM), Beck Arnley, Delphi, Standard Motor Products (SMP), NTK
OEM price range: $70-$100
Aftermarket price range: $40-$60
Platform-Specific Known Issues
- Seized Sensor Mounting Bolt: A very common repair story involves the single 10mm bolt holding the sensor to the knuckle rusting completely solid. Owners frequently report rounding off the bolt head and having to resort to bolt extractors or drilling the bolt out entirely to remove the old sensor. Applying heat and penetrating oil is highly recommended before attempting removal.
Documented NHTSA Reports
While the C0045 code on the Honda Pilot is typically a sensor or wiring issue, records from other manufacturers illustrate how this code can manifest. For instance, NHTSA ODI #11219167 describes a case where the C0045 code was triggered by a broken left rear wheel speed sensor encoder ring, requiring replacement of both the sensor and the hub assembly. In another instance, NHTSA ODI #11165895 notes that a service center recommended replacing the hub bearing assembly for this code, although the owner observed that solutions reported online varied significantly. Additionally, NHTSA ODI #10382746 reports a scenario where C0045 appeared alongside several other codes, leading a manufacturer to recommend a software re-program. Finally, NHTSA ODI #11399819 highlights a complex case where C0045 was present alongside fuel system codes P0463 and P069E, showing that in some vehicle architectures, this code can be part of a broader electrical fault cluster.
Hidden / Shadow Codes Worth Checking
- C0045-06: Left Rear Wheel Speed Sensor Circuit Low Voltage/Open. This indicates a likely break in the wire or a disconnected/failed sensor. (see via Dealer-level scan tool (like Honda HDS) or advanced professional scanner.)
- C0045-0F: Left Rear Wheel Speed Sensor Circuit Signal Erratic. This suggests the sensor is providing an inconsistent or jumpy signal, possibly due to a damaged tone ring, electrical interference, or a failing sensor. (see via Dealer-level scan tool (like Honda HDS) or advanced professional scanner.)
- C0045-18: Left Rear Wheel Speed Sensor Circuit Low Signal Amplitude. The signal from the sensor is too weak, which could be caused by an excessive air gap between the sensor and tone ring, or internal sensor degradation. (see via Dealer-level scan tool (like Honda HDS) or advanced professional scanner.)
- C0045-5A: Left Rear Wheel Speed Sensor Circuit Not Plausible. The signal from this sensor doesn't make sense when compared to the other wheel speed sensors or vehicle speed data. (see via Dealer-level scan tool (like Honda HDS) or advanced professional scanner.)
Scan Tool Commands That Help
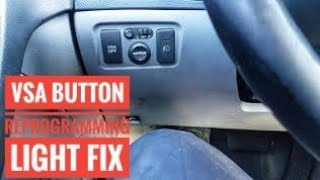
- Honda HDS or equivalent professional scanner: VSA Sensor Neutral Position Memorization — This procedure is required after replacing the VSA modulator-control unit, and may be necessary after replacing a wheel speed sensor or performing a wheel alignment to ensure the system has a correct baseline for the vehicle's state. Failure to perform this can sometimes leave warning lights on even after a successful part replacement.
- Manual Procedure (No Scan Tool): VSA Neutral Position Setting (Manual) — On some Honda models, this procedure can be performed without a scan tool by jumping specific pins on the OBD-II connector and pressing the VSA-off switch in a specific sequence. This is attempted when a scan tool is not available to clear persistent VSA lights after a repair.
Wiring & Ground Locations
- G101 — Top front of the engine.. This is a primary engine and chassis ground. A loose or corroded G101 can cause widespread electrical issues and unpredictable fault codes across multiple systems, including the VSA/ABS module.
- G401 — Under the left side of the dash.. This is a key interior and control module ground point. A fault at this location can affect communication between the gauge control module and the VSA/ABS system.
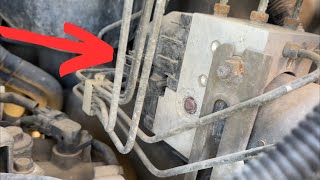
- VSA Modulator-Control Unit — Located in the engine bay, under the air intake hose, on the passenger side of the vehicle.. This is the central computer for the ABS and VSA systems. All wheel speed sensor wiring terminates here. Checking for corrosion at its main connector is a critical step if the sensor and wiring test good.
Real Owner Repair Stories
- Honda Pilot Forum User (2009 Honda Pilot) — VSA and ABS lights came on after about 5 minutes of driving. Codes 15-13 (Right Rear Wheel Speed Sensor Malfunction), 61-01 (Low Voltage), 83-13 (ECM/PCM Relation Failure), and 84-21 (VSA Sensor Neutral Position not writing) were present.
❌ Tried (didn't work) The user had previously replaced the right rear wheel speed sensor because the wires were cut, which cleared some codes but the main VSA/ABS lights returned.
✅ What actually fixed it The user discovered that a body shop had forgotten to reinstall a ground strap (Part # 32610-STX-A00) on the passenger side motor mount after a front-end collision. Reinstalling this critical ground strap resolved the cluster of electrical and communication-related fault codes.
OEM Part Supersession History
57475-SZA-A01→57475-SZA-A02— Standard part revision by the manufacturer, likely for improved durability or a minor design change.
Heads up: None. The new part number is a direct replacement for the old one and is fully compatible with all 2009-2015 Pilot models.
Diagnostic Flowchart
Other Known Issues on This Vehicle
Issues unrelated to this code that are worth knowing about as an owner of this generation:
- Variable Cylinder Management (VCM) Malfunctions 🔴 High — Very common. Can lead to fouled spark plugs (P0300-P0304 codes), excessive oil consumption, and eventual piston ring damage. Honda issued warranty extension TSB 13-082 for 2009-2013 models. (Ref: TSB 13-082)
- Cracked/Leaking Front Compliance Bushings 🟠 Medium — Common after 60,000 miles. The fluid-filled lower control arm bushings crack and leak, causing vibrations, clunking noises, and sloppy steering feel. Honda issued TSB 15-045 and a warranty extension. (Ref: TSB 15-045)
- Torque Converter Judder/Shudder 🟠 Medium — Frequently reported. A vibration or judder is felt under light acceleration, often caused by degraded automatic transmission fluid. The fix often starts with a fluid flush and software update before a costly torque converter replacement. (Ref: TSB 15-086, TSB 17-040)
- Leaking Spool Valve / VVT Oil Control Valve 🟡 Low — A common oil leak point at higher mileage. The valve, located on the front cylinder head, leaks oil that can drip onto the alternator below, causing premature alternator failure. (Ref: TSB 20-023 (mentioned in source))
Used vs. New Parts: Buying Guide for This Vehicle
When a used part is the smart pick: A used wheel speed sensor is generally not recommended as it's a wear-and-tear electronic component with an unknown remaining lifespan. However, a used VSA/ABS Control Module from a reputable recycler can be a smart choice, as a new OEM module is extremely expensive. Ensure the donor vehicle is the same model year and has a warranty/return policy.
Donor-vehicle mileage cap: roughly under 80000 miles for the part to have meaningful remaining life.
What to inspect on the donor part:
- For a VSA/ABS Module: Check for any signs of external corrosion, especially around the brake line fittings and electrical connector.
- Verify the part number on the used module exactly matches the one on your vehicle.
- Ask the seller if they can confirm the donor vehicle did not have ABS/VSA warning lights on.
OEM-only on this vehicle (don't cheap out):
- VSA/ABS Control Module (if not buying a quality used unit). Cheaply rebuilt or non-OEM modules can have programming and reliability issues.
Aftermarket brands forum-validated for this vehicle:
- NTK
- Delphi
- Beck/Arnley
- Standard Motor Products (SMP)
Brands owners have reported issues with on this vehicle:
- Unnamed, no-brand sensors from online marketplaces. While cheap, they have a high failure rate and may not have the correct resistance, causing the code to return.
Real Owner Stories
Aggregated from forums and TSBs cited above. Mileages and costs reflect what owners reported in those sources.
2009-2015 Honda Pilot
Symptoms: The single 10mm bolt holding the sensor to the knuckle was rusted completely solid. The bolt head rounded off during the attempt to remove it.
What fixed it: Used bolt extractors or drilled the bolt out entirely to remove the old sensor and replace it.
Source hint: vehicle_specific_issues
Related OBD-II Codes
Frequently Asked Questions
Is there a TSB for the ABS/VSA lights on my 2009-2015 Honda Pilot?
Can I use a used wheel speed sensor from a donor Acura MDX?
I'm trying to replace the sensor but the 10mm bolt won't budge. Is this common?
Where is the electrical connector for the left rear sensor located on the Pilot?
What resistance should I see when testing the sensor with a multimeter?
Could my VCM (Variable Cylinder Management) issue be related to the ABS light?
Helpful Videos
We Have This Part in Stock


The information in this article is provided for general reference and educational purposes only. Vehicle specifications, procedures, and part compatibility can vary by production date, trim level, and region. Always consult your vehicle's factory service manual and verify part numbers before purchasing or performing repairs. Safety-critical components such as airbags, seat belts, and braking systems should be installed by a qualified professional.
- Honda Pilot:
- 🧭 Diagnostic Flowchart
- 🎬 Helpful Videos
- 🛍️ Shop This Part
- What's Unique About the 2009-2015 Honda Pilot
- Symptoms You May Notice
- Most Likely Causes
- Rare But Worth Checking
- Diagnosis Steps
- Parts You'll Likely Need
- Platform-Specific Known Issues
- Documented NHTSA Reports
- Hidden / Shadow Codes Worth Checking
- Scan Tool Commands That Help
- Wiring & Ground Locations
- Real Owner Repair Stories
- OEM Part Supersession History
- Other Known Issues on This Vehicle
- Used vs. New Parts: Buying Guide for This Vehicle
- Real Owner Stories
- 2009-2015 Honda Pilot
- Related OBD-II Codes
- Frequently Asked Questions
- 🎟️ Get 5% Off