
OBD-II Code C0050: Right Rear Wheel Speed Sensor Circuit
The Ultimate 2026 Guide to Diagnosing and Fixing C0050
- Code C0050 disables your ABS and stability control by flagging a signal failure in the right rear wheel speed sensor circuit.
- Graph live data on an OBD-II scanner while driving above 10 mph to instantly verify if the right rear sensor is reading 0 mph or jumping erratically.
- Inspect the wiring harness within 4 inches of the sensor and clean the hub's magnetic encoder ring before spending $150+ on replacement parts.
- Expect to pay between $130 and $300 for a professional sensor replacement, or up to $700 if the entire wheel hub bearing assembly requires replacement.
What Does C0050 Mean?
Code C0050 means the Electronic Brake Control Module (EBCM) detects a problem with the signal from the right rear wheel speed sensor. This sensor tells the computer how fast the right rear wheel is spinning. When the signal is lost, erratic, or illogical compared to the other wheels, the computer shuts down the ABS and stability control systems to prevent unpredictable braking behavior.
Technical definition: Right Rear Wheel Speed Sensor Circuit Malfunction. The Electronic Brake Control Module (EBCM) detects an open, short, or abnormal signal from the right rear wheel speed sensor circuit, disabling ABS, traction control, and stability control.
Can I Drive With C0050?
Yes, But With Caution. Yes, but with caution. Primary hydraulic brakes function, but anti-lock (ABS), traction control, and stability control systems are disabled. This increases the risk of wheel lock-up and skidding during hard braking, especially on wet or gravel surfaces, extending stopping distances. Repair promptly to restore these critical safety features.
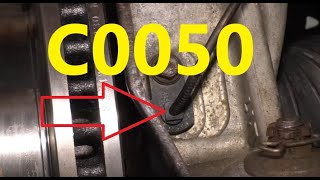
🎬 Watch: Overview of common causes and fixes for C0050.Common Causes
- Damaged or Corroded Wiring/Connector (Very Common) — Exposed to road salt and debris, the wiring harness frequently breaks internally or corrodes at the connector pins. Rodent damage and intermittent shorts from suspension movement also fall under this primary cause.
- Failed Right Rear Wheel Speed Sensor (Very Common) — Sensors fail electronically due to age, internal short circuits, or extreme heat and vibration.
- Debris on or Damage to the Tone Ring (Common) — Metallic brake dust and road grime stick to the magnetic encoder ring, blocking the sensor's signal. The ring also cracks or delaminates from rust.
- Failed Wheel Hub Bearing Assembly (Common) — The magnetic encoder ring is integrated into the wheel hub on most modern vehicles. Excessive bearing play or internal ring damage requires replacing the entire hub assembly.
- Incorrect Sensor Air Gap (Uncommon) — Improper mounting or rust buildup on the mounting surface pushes the sensor too far from the tone ring, resulting in a weak or non-existent signal.
- Faulty Electronic Brake Control Module (EBCM) (Rare) — The ABS computer itself rarely fails, but a faulty internal driver circuit stops providing power to the sensor or fails to process the return signal.
Symptoms
- ABS Warning Light On — The ABS light on the dashboard illuminates immediately.
- Traction Control/Stability Control Light On — The TCS or stability control light illuminates, as these systems rely on wheel speed data.
- ABS System Inoperative — During a hard stop, wheels lock up and skid. Anti-lock braking does not function.
- Service StabiliTrak / Trailer Brake Messages — A message appears on the Driver Information Center indicating stability or trailer brake systems need service.
- Cruise Control Inoperative — Cruise control disengages or fails to activate due to missing wheel speed data.
Diagnostic Flowchart
Tap your situation to follow the diagnostic path that matches what you're seeing on this code.
Common Fixes & Costs
- Replacing the Right Rear Wheel Speed Sensor
— Parts: $30-$100, Labor: $100-$200, ~1.1 hr book time
(DIY)
2010-2017 Chevrolet Equinox / GMC Terrain: OEM GM 85157542 (Alt: Dorman 970-086, NTK/NGK AB0835)
2007-2018 GMC Sierra / Chevrolet Silverado: OEM GM 23299335 (Alt: ACDelco 23498355, Standard Motor Products ALS2584) - Repairing Damaged Wiring or Connector — Parts: $15-$50, Labor: $125-$350, ~1.5 hr book time (Intermediate)
- Cleaning Debris from the Magnetic Encoder Ring — Parts: $0-$15, Labor: $50-$125, ~0.8 hr book time (DIY)
- Replacing the Wheel Hub Bearing Assembly
— Parts: $100-$300, Labor: $150-$400, ~2.2 hr book time
(Intermediate)
2010-2017 Chevrolet Equinox / GMC Terrain: OEM GM 13597428 (Alt: Timken HA590369, MOOG 512440)
2014-2018 GMC Sierra / Chevrolet Silverado 1500: OEM GM 84403334 (Alt: Timken SP580305, MOOG 512514) - Replacing the Electronic Brake Control Module (EBCM) — Parts: $300-$800, Labor: $150-$400, ~1.8 hr book time (Advanced)
Used vs. New Parts: Buying Guide
When a used part is worth it: Buying a used wheel speed sensor is not recommended due to the low cost of new aftermarket parts. For a complete wheel hub assembly, a low-mileage used OEM part is a cost-effective alternative to a new OEM unit, but a quality new aftermarket hub is safer.
Donor-vehicle mileage cap: roughly under 50000 miles for the part to have meaningful remaining life.
Donor quality checklist:
- Verify the donor vehicle was not scrapped due to a collision impacting the wheel area.
- Inspect the used part for corrosion, damage to the wiring pigtail, or play in the bearing.
- Match the part number exactly to ensure sensor type compatibility.
Decision logic:
- If The part is a standalone wheel speed sensor → Buy a new OEM or high-quality aftermarket sensor. Savings on a used part are minimal and not worth the risk.
- If The part is a complete wheel hub assembly and the vehicle is older (>10 years) → A new, quality aftermarket hub (Timken, MOOG, SKF) is the best balance of cost and reliability.
- If The part is a wheel hub assembly and the vehicle is newer (<5 years) → Favor a new OEM part to ensure perfect compatibility with advanced safety systems.
Warranty tradeoff: Used parts carry a 30-90 day warranty. New aftermarket parts offer 1-year to limited lifetime warranties. Cheap new parts fail quickly and cause ABS malfunctions.
Worst-case if a used part fails: $200-$400 if a used part fails shortly after installation, requiring repeat labor and a new part.
What Happens If You Wait — Timeline
- 0-1 week: ABS, Traction Control, and Stability Control warning lights illuminate. Code C0050 is stored in the EBCM. No other physical symptoms occur. (MPG impact: 0%% · Added cost: $0)
- 1 week - 2 months: Cruise control is disabled on many models. The driver faces a significantly higher risk of a skidding accident in a panic stop or bad weather. (MPG impact: 0%% · Added cost: $0)
- 2-12 months: The vehicle automatically fails its annual state safety inspection in states like New York, requiring immediate repair to remain street legal. (MPG impact: 0%% · Added cost: $50-$100 (Cost of failed inspection and re-inspection))
- 6+ months: Long-term driving without ABS causes uneven tire wear from wheel lockup during hard braking. A severe wiring short damages the EBCM driver circuit. (MPG impact: 0%% · Added cost: $200-$800 (Tire replacement or EBCM damage))
Cost of Not Fixing It
- Immediate: Loss of Anti-lock Brakes (ABS), Traction Control (TCS), and Electronic Stability Control (ESC). This creates a significant safety risk, increasing stopping distances and skidding chances. (Added cost: N/A (Safety Risk))
- Short Term (Weeks to Months): Systems relying on wheel speed data, such as cruise control or all-wheel drive (AWD) engagement, are disabled. (Added cost: Negligible)
- Long Term (6+ Months): Continued driving without ABS causes uneven tire wear from wheel lockup. It normalizes driving with a critical safety system disabled. (Added cost: Potential cost of an accident or $200+ for premature tire replacement.)
Diagnosis Steps
- Read Codes and Check for TSBs
Use an OBD-II scanner capable of reading ABS codes to confirm C0050. Check for manufacturer-specific symptom bytes (like GM's C0050 0F for an erratic signal). Always check for Technical Service Bulletins (TSBs) for your specific vehicle.
Tools: OBD-II Scanner (with ABS capability) (Beginner) - Analyze Live Data
Graph live data for all four wheel speed sensors while driving above 10 mph. A right rear sensor reading 0 mph or jumping erratically confirms the isolated fault.
Tools: OBD-II Scanner (with live data graphing) (Intermediate) - Visual Inspection of Harness and Connector
Raise the rear of the vehicle. Visually inspect the entire wiring harness for the right rear wheel speed sensor. Look for chafed wires, melting, or green/white corrosion in the connector.
Tools: Jack, Jack Stands, Flashlight (Beginner) - Inspect and Clean the Tone/Encoder Ring
Look at the back of the wheel hub for the ring the sensor reads. Clean this ring thoroughly with a dry, soft nylon brush and brake cleaner. Ensure all teeth are present and not packed with rust.
Tools: Brake Cleaner, Soft Brush, Rag, Flashlight (Intermediate) - Perform a 'Wiggle Test'
Set your scan tool to graph the right rear wheel speed. While a helper watches the graph, wiggle the wiring harness at various points. A dropout on the graph indicates a hidden internal wire break.
Tools: OBD-II Scanner (with live data graphing) (Advanced) - Test Sensor Voltage and Ground
Disconnect the sensor. With the key on, use a multimeter to test the vehicle-side harness connector. Check for the correct reference voltage (5V or 12V) and for good ground (less than 1 ohm).
Tools: Digital Multimeter, Vehicle Wiring Diagram (Advanced) - Test Circuit Integrity
Disconnect the sensor and the EBCM connector. Check for continuity on the two wires between the sensor and EBCM (resistance < 2 ohms). Check for a short to ground (should be OL).
Tools: Digital Multimeter, Vehicle Wiring Diagram (Advanced) - Test Passive Sensor Resistance (Ohms)
For older 2-wire passive sensors, measure the resistance between the two pins on the sensor itself. A good sensor reads between 800 and 2,000 Ohms. Do not perform this on active sensors.
Tools: Digital Multimeter (Advanced) - Test Passive Sensor AC Voltage Output
Set the multimeter to AC Volts. Reconnect probes to the sensor pins and spin the wheel by hand. A healthy passive sensor generates a small AC voltage (over 100mV) that increases with speed.
Tools: Digital Multimeter (Advanced) - Scope the Sensor Signal
Use a lab scope to back-probe the sensor's signal wire. Spinning the wheel produces a clean square wave (active) or sine wave (passive). A missing or noisy waveform indicates a faulty sensor or tone ring.
Tools: Oscilloscope, Back-probe pins (Advanced)
When This Code Triggers (Freeze-Frame Conditions)
- Vehicle Speed: > 8 mph (The code sets once the vehicle is in motion, as the EBCM needs a signal to compare with other wheels.)
- Ignition Status: ON (The EBCM is powered and running its diagnostic checks.)
- ABS/TCS Status: Active Self-Test (The fault is detected during the system's initial self-test upon startup or while driving.)
- System Voltage: 11-14 Volts (Normal operating voltage; low system voltage triggers erroneous communication codes but rarely a single sensor circuit fault.)
Related Codes
- C0045 — Left Rear Wheel Speed Sensor Circuit. Having both C0045 and C0050 strongly suggests a shared wiring harness issue (like the GM X411 connector), a shared ground fault, or an EBCM failure.
- C0040 — Right Front Wheel Speed Sensor Circuit. Seeing C0050 and C0040 simultaneously points to a wiring harness issue specific to the right side of the vehicle.
- C0035 — Left Front Wheel Speed Sensor Circuit. Seeing this with C0050 indicates multiple sensors failing around the same time due to age and element exposure.
- U0415 — Invalid Data Received From Electronic Brake Control Module. Sets as a secondary code to C0050 because modules like power steering lose critical data input.
Climate & Environmental Factors
- Cold Weather / Snow and Ice: Extreme cold makes wiring insulation brittle. Ice builds up around the sensor, physically blocking the signal until it melts.
- High Humidity and Rain: Moisture penetrates failing connector seals, causing corrosion and intermittent shorts that appear exclusively in wet weather.
- Road Salt / Rust Belt Regions: Road salt aggressively corrodes wiring connectors, sensor housings, and the tone ring, making C0050 highly prevalent in Rust Belt states.
How to Talk to a Mechanic About This Code
Say this: "I have an ABS light on and my scanner shows code C0050 for the right rear wheel speed sensor circuit. I'd like to book a diagnostic appointment to confirm the cause. Based on my research, the common failures are the sensor, the wiring harness, or debris on the hub's magnetic ring."
Signals you are an informed customer. Isolates the specific corner and common culprits, focusing the technician's diagnostic time and reducing the chance of unrelated repair suggestions.
Avoid saying:
- 'My ABS light is on, can you fix it?' (Too vague; invites a lengthy diagnostic process.)
- 'Just replace the right rear speed sensor.' (The sensor might not be the problem; leads to paying for parts that don't fix the issue.)
- 'Do whatever you think is best.' (Gives up all control and leads to being oversold.)
Questions to ask before authorizing the repair:
- What was the specific failure you found? Was it the sensor, the wiring, the hub, or something else?
- Did you test the wiring and connector for continuity and shorts before recommending a new sensor?
- If recommending a hub replacement, is it because the bearing failed or the magnetic ring is damaged?
- Can you provide a cost breakdown showing parts and labor separately?
- What is the warranty on the parts and labor for this specific repair?
Where to Take It: Dealer vs Independent vs Chain
- Dealer:
Use if the vehicle is under warranty or if an independent shop failed to diagnose it. Otherwise, it is not cost-effective.
Best for: Vehicles still under warranty., Complex electrical issues requiring specialized tools and factory engineering support., Rare dual-failure scenarios involving module programming.
Downsides: Highest labor rates and part costs., Defaults to replacing expensive assemblies (like the hub) when a simpler fix (cleaning the encoder ring) suffices. (Typical cost: +50% vs. baseline) - Independent Shop:
Best fit for most owners. A good independent shop diagnoses and repairs this efficiently and cost-effectively.
Best for: Out-of-warranty vehicles., Common codes like C0050 where fixes are well-documented., Building a long-term relationship with a trusted mechanic.
Downsides: Quality and diagnostic capability vary widely. Vet the shop by checking ASE certifications., Lacks advanced diagnostic tools for very new vehicles. (Typical cost: +0% vs. baseline) - Chain Shop:
Acceptable with caution. They replace a failed sensor if clearly diagnosed, but avoid them for intermittent or wiring-related faults.
Best for: Simple, straightforward part replacements like brakes or tires.
Downsides: Technician skill is inconsistent., High pressure to upsell services leads to misdiagnosis (selling a whole hub assembly when only a sensor is needed)., Lacks experience for electrical circuit testing. (Typical cost: -10% vs. baseline)
When to Walk Away From the Repair
If the estimated repair cost for the C0050 code exceeds 40-50% of your car's current private-party value, pause and consider your options.
- Car worth $4000, fix is $300: Fix it. This is a minor cost to restore a key safety feature and maintain vehicle value.
- Car worth $12000, fix is $700: Fix it. The repair cost is well below the 50% threshold and is a worthwhile investment.
- Car worth $2500, fix is $1300: Walk away. The repair cost is over 50% of the car's value. It is not economically sensible to proceed.
What Scan Tool You Need for This Code
Minimum: An OBD-II scanner that reads and clears codes from the ABS module and displays live sensor data.
A basic $20 engine code reader cannot see or diagnose C0050. The fault is stored in the ABS computer. You need a tool that accesses chassis (C-prefix) codes and graphs live data for all four wheel speed sensors.
Budget: BlueDriver Pro Scan Tool (~$120) — Connects to a smartphone via Bluetooth. Reads and clears ABS codes and graphs live data from all four wheel speed sensors to identify dropouts.
Mid-range: Foxwell NT630 Plus / Autel MaxiCheck Pro (~$130-250) — Dedicated handheld units offering full ABS diagnostics. They include bi-directional control to perform an automated ABS bleed service, necessary if replacing the ABS hydraulic module.
Professional: Autel MaxiCOM MK808 / MK906BT (~$450-1200) — Professional-grade tablets offering full bi-directional control, advanced module programming (for EBCM replacement), and wider vehicle coverage.
Rent vs buy: For a one-time fix, borrow an ABS-capable scanner for free from an auto parts store loaner program. For regular DIY maintenance, buying a budget pick like the BlueDriver is a worthwhile investment.
How to Clear the Code After You Fix It
- Use an ABS-capable OBD-II scan tool to clear the C0050 code from the Electronic Brake Control Module (EBCM).
- Perform a short test drive, exceeding 10 mph to allow the EBCM to verify the repair and confirm the sensor reports speed correctly.
Drive cycle (~10 minutes): Start the vehicle and drive in a straight line, accelerating smoothly to over 10 mph. Continue driving for 5-10 minutes, including gentle turns. If the ABS light remains off, the system successfully reset.
Readiness monitors affected: This is an ABS/Chassis code and does not affect emissions readiness monitors.
Watch out for:
- A standard OBD-II code reader cannot clear ABS codes.
- Disconnecting the battery does not reliably clear a C0050 code, as it is stored in non-volatile memory.
- If the ABS light returns immediately, the root cause was not fixed.
Will This Fail Emissions / State Inspection?
No — by itself this code doesn't fail OBD inspection (but it can keep readiness monitors from setting, which causes a separate fail).
- California: An illuminated ABS light is not an automatic failure for the smog check. However, the vehicle fails a separate brake and lamp inspection with the ABS light on.
- New York: An illuminated ABS warning light is grounds for automatic failure of the annual safety inspection.
- Texas: For commercial vehicles requiring a safety inspection, an illuminated ABS light is NOT a cause for rejection.
Most Commonly Affected Vehicles
- Chevrolet Equinox / GMC Terrain (2010-2017) — Extremely prone to metallic debris collecting on the rear hub's magnetic encoder ring (GM TSB 17-NA-047). Also susceptible to internal wire breaks near the X411 connector.
- GMC Sierra / Chevrolet Silverado (2007-2018) — Frequently experience wiring harness corrosion, internal breakage near the sensor connector, and harness chafing over the frame.
- Chevrolet Express / GMC Savana (2008-2017) — Known for wiring harness failures. TSB PIT4648D points directly to problems with wiring, crimps, and terminals at the wheel speed sensor connector.
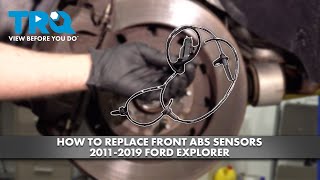
- Ford Explorer (2011-2019) — The cause is often a failed wheel hub bearing assembly where the integrated tone ring fails.
- Dodge Grand Caravan / Chrysler Town & Country (2008-2016) — Commonly experience failures of the wheel speed sensor itself or the wiring leading to it due to suspension movement.
- Hyundai Santa Fe (2007-2012) — Issues point to a failed wheel speed sensor or a damaged/corroded toothed tone ring on the axle.
- Chevrolet Tahoe / Suburban / GMC Yukon (2007-2014) — Experiences similar wiring harness problems and sensor failures due to debris on the magnetic encoder as the Silverado/Sierra.
- Buick Enclave / Chevrolet Traverse / GMC Acadia (2008-2017) — Shares a platform with the Equinox/Terrain and is susceptible to the same magnetic encoder ring debris and wiring corrosion issues.
Manufacturer-Specific Notes
- General Motors (Chevrolet, GMC, Buick, Cadillac): GM vehicles from 2007-2017 are highly susceptible to debris on the magnetic encoder ring or wiring harness breakage. Always inspect and clean the hub and check the wiring before replacing the sensor.
- General Motors (Chevrolet, GMC, Buick, Cadillac): On 2007+ GM trucks/SUVs, rear wheel speed sensors do not show a signal on a scan tool with the key on, engine off. The vehicle must be running and in gear for rear sensors to report speed.
- General Motors (Chevrolet, GMC, Buick, Cadillac): GM uses two-digit symptom bytes. 'C0050 18' indicates low signal amplitude (debris/air gap), 'C0050 5A' means signal not plausible (cracked ring), and 'C0050 0F' means erratic signal (wiring/sensor fault).
- General Motors (Chevrolet Equinox/GMC Terrain): A common failure point on 2010-2017 models is the X411 body harness connector in the left rear wheel well. Water intrusion causes corrosion triggering C0050 and C0045.
Real Owner Stories
2013 Chevrolet Silverado with ABS/Stabilitrak lights on.
Inherited a truck; ABS, Stabilitrak, and traction control lights illuminated immediately upon startup.
What they tried:
- Scanned the vehicle and pulled code C0050.
- Inspected the right rear wheel area.
Outcome: Found a snapped right rear wheel speed sensor. Replacing the single sensor resolved all warning lights.
Lesson: Multiple warning lights (ABS, Traction, Stabilitrak) are commonly caused by a single wheel speed sensor fault. Always scan for the specific code to isolate the correct wheel.
2017 GMC Sierra with a persistent C0050 code after sensor replacement.
ABS and Service Stabilitrak lights were on. A shop replaced the right rear speed sensor, but C0050 remained.
What they tried:
- Confirmed the new sensor was installed properly.
- Performed a continuity test on the wiring from the EBCM to the sensor connector.
- Found high resistance indicating an open circuit.
Outcome: Discovered a tiny pinhole in the wire insulation near the connector causing internal corrosion. Cutting out and repairing the corroded wire fixed the fault. The original sensor was likely fine.
Lesson: Do not assume a new part fixes the problem. A continuity or resistance check of the harness is critical before spending money on parts, as wiring failures near the connector are extremely common.
2007 GMC Sierra with an intermittent C0050 code.
The ABS light illuminated randomly, but only after the truck reached operating temperature.
What they tried:
- Monitored live data on a hoist with the truck running and in gear.
- Used a heat gun to warm up the right rear speed sensor while watching the scan tool.
Outcome: When heated, the sensor's signal dropped to zero, confirming a temperature-related internal failure. Replacing the sensor permanently fixed the issue.
Lesson: Intermittent faults often stem from temperature changes or vibration. A heat gun recreates the failure condition to confirm a component fails when hot.
2014 Chevrolet Tahoe with C0050 and no sensor signal.
ABS light on. Scan tool showed C0050 and live data confirmed 0 MPH from the right rear sensor.
What they tried:
- Used a multimeter at the sensor connector and found the 12V reference voltage from the EBCM missing.
- Tested for 12V directly at the EBCM connector pin; it was also missing.
- Replaced and programmed the EBCM, restoring the 12V reference.
- Scoped the sensor and found an erratic signal.
Outcome: A rare dual failure. The EBCM failed and stopped powering the sensor, AND the sensor itself failed. Both required replacement.
Lesson: Always verify the repair is complete. Re-test the entire circuit after replacing a major component to ensure a secondary fault isn't hiding behind the primary one.
How to Prevent This Code From Triggering
- Apply Dielectric Grease to Connectors (Whenever a wheel-area repair is performed (brakes, bearings, etc.)) — Blocks moisture and road salt from entering the connector, preventing the pin corrosion that causes intermittent C0050 faults.
- Clean the Hub Encoder Ring (During every tire rotation or brake service, especially on GM vehicles.) — The magnetic encoder ring attracts metallic brake dust. Periodically cleaning this surface with brake cleaner and a soft brush prevents signal blockage.
- Inspect and Secure Wiring Harnesses (During under-vehicle inspections or oil changes.) — Loose harnesses rub against suspension components or the frame, chafing the insulation and causing a short. Securing the harness in its retainers prevents this damage.
- Underbody Washes in Winter (Monthly during winter months in areas using road salt.) — Rinses away corrosive salt deposits, extending the life of exposed wiring, connectors, and sensors.
Frequently Asked Questions
What is the most common misdiagnosis for C0050?
Immediately replacing the sensor when the actual fault is metallic debris on the magnetic encoder ring or a broken wire near the connector. Cleaning the hub and testing the circuit prevents wasted money.
Can a bad wheel bearing cause a C0050 code?
Yes. The magnetic encoder ring is integrated into the wheel bearing hub on most modern cars. Excessive bearing play or a cracked internal ring causes an erratic signal, triggering the code.
Is it safe to drive with code C0050?
You can drive, but ABS and stability control are disabled. Wheels lock up in a panic stop, significantly increasing stopping distance and skidding risk.
How much does it cost to fix code C0050?
Cleaning debris costs $50-$125 in labor. Professional sensor replacement runs $130-$300, while a full wheel hub bearing assembly replacement costs $250-$700 depending on the vehicle.
Will clearing the code make it go away?
No. The light returns as soon as the EBCM runs its self-test and detects the hard fault, usually within minutes of driving over 10 mph.
Does it matter if I use a cheap aftermarket sensor?
Yes. Low-quality sensors often have incorrect resistance or improper dimensions, causing immediate code return or premature failure. Stick to OEM or reputable aftermarket brands like NTK or Standard Motor Products.
What is a 'tone ring' or 'encoder ring'?
It is a toothed or magnetic ring attached to the wheel hub or axle. The wheel speed sensor counts the teeth or magnetic poles as the wheel turns to calculate speed.
Key Takeaways
- Code C0050 disables your ABS and stability control by flagging a signal failure in the right rear wheel speed sensor circuit.
- Graph live data on an OBD-II scanner while driving above 10 mph to instantly verify if the right rear sensor is reading 0 mph or jumping erratically.
- Inspect the wiring harness within 4 inches of the sensor and clean the hub's magnetic encoder ring before spending $150+ on replacement parts.
- Expect to pay between $130 and $300 for a professional sensor replacement, or up to $700 if the entire wheel hub bearing assembly requires replacement.
Helpful Videos
Shop the Parts Behind C0050
Below are the parts most often responsible for code C0050, ranked by how frequently each one is the actual culprit (per the diagnosis above). Tap any to see what we have for your vehicle.


The information in this article is provided for general reference and educational purposes only. Vehicle specifications, procedures, and part compatibility can vary by production date, trim level, and region. Always consult your vehicle's factory service manual and verify part numbers before purchasing or performing repairs. Safety-critical components such as airbags, seat belts, and braking systems should be installed by a qualified professional.
- 🧭 Diagnostic Flowchart
- 🎬 Helpful Videos
- 🛍️ Shop This Part
- What Does C0050 Mean?
- Can I Drive With C0050?
- Common Causes
- Symptoms
- Common Fixes & Costs
- Used vs. New Parts: Buying Guide
- What Happens If You Wait — Timeline
- Cost of Not Fixing It
- Diagnosis Steps
- When This Code Triggers (Freeze-Frame Conditions)
- Related Codes
- Climate & Environmental Factors
- How to Talk to a Mechanic About This Code
- Where to Take It: Dealer vs Independent vs Chain
- When to Walk Away From the Repair
- What Scan Tool You Need for This Code
- How to Clear the Code After You Fix It
- Will This Fail Emissions / State Inspection?
- Most Commonly Affected Vehicles
- Manufacturer-Specific Notes
- Real Owner Stories
- 2013 Chevrolet Silverado with ABS/Stabilitrak lights on.
- 2017 GMC Sierra with a persistent C0050 code after sensor replacement.
- 2007 GMC Sierra with an intermittent C0050 code.
- 2014 Chevrolet Tahoe with C0050 and no sensor signal.
- How to Prevent This Code From Triggering
- Frequently Asked Questions
- What is the most common misdiagnosis for C0050?
- Can a bad wheel bearing cause a C0050 code?
- Is it safe to drive with code C0050?
- How much does it cost to fix code C0050?
- Will clearing the code make it go away?
- Does it matter if I use a cheap aftermarket sensor?
- What is a 'tone ring' or 'encoder ring'?
- Key Takeaways
- 🎟️ Get 5% Off