
OBD-II Code C0061: Lateral Acceleration Sensor Fault
What C0061 means, why it triggers, and how to fix it
- Code C0061 disables your vehicle's Electronic Stability Control, increasing the risk of a fatal single-vehicle rollover by up to 75%.
- For 2015-2016 Jeep Renegade and Fiat 500X models, a $150-$280 dealer software update is the primary fix, not a part replacement.
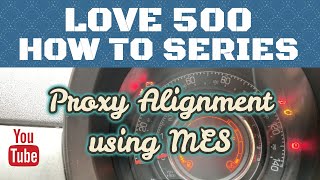
- Always perform a 'Zero Point Calibration' or 'Proxy Alignment' using a professional scan tool after replacing the sensor or disconnecting the battery.
- Before testing electrical circuits, check for network U-codes; a U0428 code indicates a CAN bus communication failure rather than a broken sensor.
What Does C0061 Mean?
Code C0061 indicates a fault with the lateral acceleration sensor, which measures side-to-side G-forces during turns or slides. The Electronic Stability Control (ESC) and traction control systems rely on this data to prevent skids by applying individual brakes.
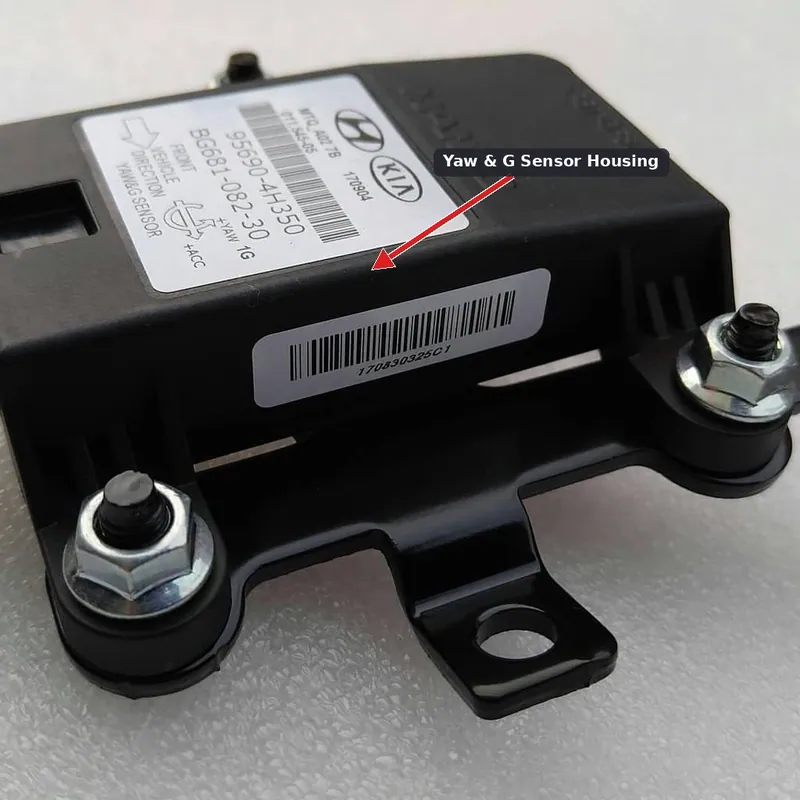
Technical definition: The SAE definition is Lateral Acceleration Sensor (Subfault). The sensor's signal is missing, out of range, or invalid, disabling ESC and ABS. Modern vehicles often integrate this sensor into a multi-axis Inertial Measurement Unit (IMU) alongside yaw rate and longitudinal acceleration sensors, housed within the Airbag (SRS) or ABS control module.
Can I Drive With C0061?
Yes, But With Caution. You can drive, but Electronic Stability Control (ESC) and Traction Control are disabled. ESC reduces the risk of fatal single-vehicle rollovers by up to 75%. Drive with extreme caution on slippery roads and avoid aggressive maneuvers until repaired.
Common Causes

- Outdated Control Module Software (Very Common) — A software glitch in the ABS or powertrain control module incorrectly flags a sensor fault. Manufacturers release Technical Service Bulletins (TSBs) with software updates to fix this.
- Sensor Not Calibrated (Common) — If the battery dies or a module is replaced, the system loses the sensor's baseline reading. A 'zero point calibration' or 'proxy alignment' restores this data.
- Faulty Lateral Acceleration Sensor (Common) — The sensor fails internally due to age, moisture, or impact, stopping signal transmission to the vehicle's computer.
- Damaged Wiring or Corroded Connectors (Common) — Pinched wires or corroded electrical connectors interrupt the 5V reference or signal circuit between the sensor and the control module.
- CAN Bus Communication Fault (Less Common) — A Controller Area Network (CAN) bus failure prevents the ABS module from receiving sensor data. Diagnosing network U-codes is required first.
- Improperly Mounted Sensor/Module (Less Common) — The sensor must sit perfectly flat and securely bolted to the chassis. Loose mounting bolts generate implausible readings during vehicle movement.
- Faulty ABS/ESC Control Module (Rare) — The control module receiving the sensor signal fails internally and cannot process the data.
- Incorrect Tire Size or Suspension Modifications (Rare) — Changes in tire diameter or suspension height alter vehicle dynamics. If unprogrammed, the ECU interprets the new dynamics as a sensor fault.
Symptoms

- ESC/VSC/VSA Warning Light On — The dashboard light depicting a car with squiggly lines illuminates permanently.
- ABS and Traction Control Lights On — The ABS and Traction Control systems disable simultaneously, triggering their respective warning lights.
- Vehicle Feels Less Stable — The vehicle feels loose or unresponsive during cornering, especially on wet or gravel roads.
- Limp Mode Activation — The vehicle limits engine power and speed to prevent dangerous driving conditions.
Diagnostic Flowchart

Tap your situation to follow the diagnostic path that matches what you're seeing on this code.
Common Fixes & Costs
- Control Module Software Update (Reflash) — Parts: $0, Labor: $120-$280, ~1.0 hr book time (Professional)
- Perform Proxy Alignment / System Initialization — Parts: $0, Labor: $100-$150, ~1.0 hr book time (Professional)
- Replace Lateral Acceleration Sensor — Parts: $75-$250, Labor: $80-$150, ~1.2 hr book time (Intermediate)
- Repair Wiring or Connector — Parts: $10-$50, Labor: $50-$150, ~1.5 hr book time (Intermediate)
- Replace ABS/ESC Control Module — Parts: $600-$900, Labor: $200-$300, ~2.0 hr book time (Professional)
DIY vs Professional
- Control Module Software Update — Beginner:
- Replace Lateral Acceleration Sensor — Beginner:
- Repair Wiring or Connector — Beginner:
- Perform Proxy Alignment — Beginner:
Used vs. New Parts: Buying Guide
When a used part is worth it: For a standalone sensor on an older vehicle, a used part from a reputable seller is cost-effective. Avoid used sensors integrated into critical modules like the SRS or ABS controller.
Donor-vehicle mileage cap: roughly under 100000 miles for the part to have meaningful remaining life.
Donor quality checklist:
- Verify the part number matches exactly.
- Ensure the seller offers a warranty.
- Avoid parts from flood-damaged or heavy-impact vehicles.
- Confirm control modules are not VIN-locked.
Decision logic:
- If The fault is a known software issue fixed by a TSB → do not buy any part; pay for the software update at a dealer.
- If The sensor is integrated into the SRS/Airbag module → buy new OEM only. The risk of a faulty used safety component is too high.
- If The part is a standalone sensor and the vehicle is over 10 years old → a tested, warrantied used part is a reasonable choice to save money.
Warranty tradeoff: Used parts have a 30-90 day warranty covering only the part. New aftermarket parts have a 1-year warranty. New OEM parts carry a 1-2 year warranty, often including labor if installed by a dealer.
Worst-case if a used part fails: $200-$400 if a used part fails after installation, requiring repeat labor costs.
What Happens If You Wait — Timeline
- Immediately: The ESC/ABS warning light illuminates. Stability control and traction control are disabled. (MPG impact: 0%% · Added cost: $0 (Safety risk is the immediate cost))
- First 1-10 drives: The vehicle operates normally under standard driving conditions. The latent risk becomes apparent during evasive maneuvers. (MPG impact: 0%% · Added cost: $0 (Risk of loss-of-control accident increases))
- 1-6 months: Warning light fatigue sets in. The probability of encountering an emergency situation where ESC is critical increases. (MPG impact: 0%% · Added cost: Increased statistical likelihood of an accident.)
- 6+ months / An incident occurs: A loss-of-control event occurs that a functional ESC system prevents. (MPG impact: 0%% · Added cost: Potential for thousands in accident repairs, insurance premium hikes, and total vehicle loss.)
Cost of Not Fixing It
- Immediately: Electronic Stability Control (ESC) and Traction Control are disabled. The risk of losing control in an emergency maneuver increases significantly. (Added cost: N/A (Safety risk))
- Ongoing: Other related systems like ABS, cruise control, or hill descent control disable. (Added cost: N/A (Loss of features))
- Long-term: Immense safety risk and potential for an accident, resulting in catastrophic vehicle damage, injury, and liability costs. (Added cost: N/A (Accident liability))
Diagnosis Steps
- Check for Technical Service Bulletins (TSBs)
Search online for TSBs related to code C0061 for your specific vehicle. For many models, a simple software update from the dealer is the only required fix.
Tools: Internet access (Beginner) - Read Fault Codes
Use an OBD-II scanner to read Chassis (C) and Network (U) codes. Sub-codes like C0061-29 indicate a software issue, while C0061-54 points to a missing calibration.
Tools: Advanced OBD-II Scanner (Beginner) - Check Live Sensor Data
View the live data stream for the lateral acceleration sensor. The reading must be near 0 m/s² when parked on a flat surface. Firmly rock the vehicle side to side; the value must change smoothly. If it remains stuck, the sensor or circuit is faulty.
Tools: Advanced OBD-II Scanner (Intermediate) - Inspect the Sensor and Wiring
Locate the sensor (often under the center console or seats). Visually inspect the wiring harness and connector for damage or corrosion. Ensure the sensor is securely bolted down and sitting level.
Tools: Flashlight, trim removal tools (Intermediate) - Perform a Wiggle Test
While monitoring the sensor's live data on your scan tool, gently wiggle the wiring harness at the connector and along its path. If the reading jumps or drops out, repair the intermittent connection.
Tools: Advanced OBD-II Scanner (Intermediate) - Test Sensor Voltage and Resistance
With the key on and engine off, backprobe the sensor's connector. The 5V reference wire must read ~5.0V, the ground <0.1V, and the signal wire ~2.5V when stationary. Disconnect the battery and measure resistance between the sensor signal wire and the module connector; it must be less than 1.0 ohm.
Tools: Digital Multimeter, backprobe kit, vehicle-specific wiring diagram (Advanced) - Perform a Sensor Calibration
If a new sensor or module was installed, use a high-level scan tool to perform a 'zero point calibration' or 'proxy alignment'. This resets the sensor's baseline and allows the system to recognize it.
Tools: Professional Scan Tool (Professional) - Analyze CAN Bus Communication
If U-codes are present, use a factory-level scan tool to perform a bidirectional data exchange with the stability-control module. A failed handshake points to a network wiring fault.
Tools: Professional Scan Tool, Oscilloscope (Professional)
When This Code Triggers (Freeze-Frame Conditions)
- Vehicle Speed: 30+ mph (50+ km/h) (The code sets during steady driving, followed by a turning or lane change maneuver.)
- Steering Angle: > 5 degrees (The system expects a change in lateral acceleration corresponding with steering input but receives an invalid signal.)
- System Voltage: 12.0V - 14.8V (The fault sets when system voltage is normal; low voltage triggers different codes.)
- Lateral Acceleration Sensor Signal: Stuck at 2.5V, 0V, or 5V (Shows a flatlined or out-of-range signal value while other dynamics change.)
Related Codes
- C0062 — Indicates a fault in the Longitudinal Acceleration Sensor. Often part of the same multi-axis sensor unit as C0061.
- C0063 — Indicates a fault in the Yaw Rate Sensor. A fault in one often accompanies a fault in the others during module failures.
- C0051 — Indicates a fault in the Steering Angle Sensor. The ESC module compares steering input (C0051) with actual vehicle movement (C0061).
- U-Codes (e.g., U0428, U1424) — Indicate 'Implausible Data Received' due to a CAN bus communication breakdown. Always diagnose U-codes before replacing sensors.
Climate & Environmental Factors
- High Humidity / Salt Belt Regions: Moisture and road salt accelerate corrosion on the sensor's electrical connector pins, introducing high resistance and triggering the code.
- Extreme Cold Weather: Very low temperatures affect electronic components, causing them to transmit delayed or inaccurate data. Condensation freezes on sensor surfaces, leading to temporary failures.
- Rough Roads / Potholes: Harsh impacts damage sensitive internal components or loosen the sensor's mounting, causing implausible readings.
How to Talk to a Mechanic About This Code
Say this: "I have a C0061 code and my stability control light is on. Please check for any applicable TSBs before recommending a sensor replacement."
Directs the technician to check for the cheapest fix (a software update) first, preventing them from immediately quoting a more expensive sensor replacement.
Avoid saying:
- 'My traction control light is on, can you fix it?'
- 'Just do whatever it takes to get the light off.'
- 'I think I need a new G-force sensor.'
Questions to ask before authorizing the repair:
- Did you find a TSB that applies to my vehicle's VIN?
- What was the result of the sensor's live data test and the voltage checks at the connector?
- Does the repair estimate include the cost of the required zero-point calibration or proxy alignment?
- What is the warranty on this repair, including both parts and labor?
Where to Take It: Dealer vs Independent vs Chain
- Dealer:
Best fit if you own a vehicle known for software-related C0061 faults. They have exclusive access to the tools and software updates.
Best for: Vehicles with known software issues (Jeep, Fiat, Mazda), Vehicles still under warranty, Repairs requiring a 'Proxy Alignment' (Fiat, Chrysler, Jeep)
Downsides: Higher labor rates, Less willing to diagnose complex wiring issues (Typical cost: +40% vs. baseline) - Independent Shop:
Good fit, but call ahead to ensure they have a scan tool capable of performing a 'zero point calibration' for your specific vehicle.
Best for: Out-of-warranty vehicles where the cause is likely a bad sensor or wiring, Shops with ASE-certified technicians specializing in electrical systems
Downsides: May not have access to the latest manufacturer TSBs or proprietary software for reflashing. (Typical cost: +0% vs. baseline) - Chain Shop:
Not recommended. The high likelihood of this code requiring a software update or specific calibration makes chain shops a poor choice.
Best for: Simple, clear-cut sensor replacements on common vehicles.
Downsides: Least likely to have advanced diagnostic tools for software updates or calibrations., Higher potential for misdiagnosis. (Typical cost: -10% vs. baseline)
When to Walk Away From the Repair
If the estimated repair cost exceeds 50% of your car's private-party value, reconsider the investment.
- Car worth $4500, fix is $900: Fix it. This is a critical safety feature and the repair cost is well below the threshold.
- Car worth $3000, fix is $1500: Walk away. The repair cost is 50% of the car's value.
- Car worth $15000, fix is $1200: Fix it. The repair cost is a small fraction of the vehicle's value and restores a vital safety system.
What Scan Tool You Need for This Code
Minimum: An OBD-II scanner that reads Anti-lock Brake System (ABS) codes and displays live data for the lateral acceleration sensor.
A basic $20 code reader only accesses Powertrain (P) codes and cannot see Chassis (C) codes like C0061. You need a tool that communicates with the ABS module to read the code, view live sensor data, and clear the code.
Budget: BlueDriver Pro (~$119) — Connects to your smartphone via Bluetooth. Reads and clears ABS codes and displays live data from the lateral acceleration sensor.
Mid-range: Foxwell NT510 Elite (~$180) — A handheld scanner offering all-system diagnostics. Provides bidirectional control and special functions like 'SAS Calibration'.
Professional: Autel MaxiCOM MK808 (~$500) — Professional-level tool with full bidirectional control. Performs advanced functions like 'Zero Point Calibration' and 'Proxy Alignment'.
Rent vs buy: Auto parts stores scan ABS codes for free but cannot perform calibrations. If your repair requires a calibration step, you must buy a capable scanner or take it to a shop.
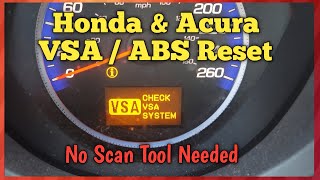
How to Clear the Code After You Fix It
- Use an advanced OBD-II scan tool to clear codes from the ABS/ESC module.
- Perform any required calibration (e.g., 'Zero Point Calibration' or 'Proxy Alignment').
- Perform the specific ESC/VSA drive cycle to confirm the repair.
Drive cycle (~10 minutes): Drive straight at a speed over 30 mph (50 km/h) for at least 10 seconds. Perform several stable lane changes or turns. The warning light remains off if the repair was successful.
Readiness monitors affected: This is a Chassis (C) code and does not affect emissions readiness monitors.
Watch out for:
- Clearing the code with a basic scanner does not fix the issue; the light returns immediately.
- Forgetting to perform the mandatory sensor calibration causes the code to return.
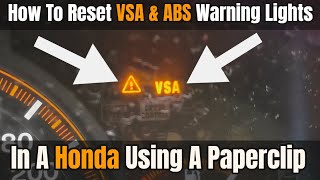
- Disconnecting the battery on Honda/Acura models de-calibrates the VSA system.
Will This Fail Emissions / State Inspection?
No — by itself this code doesn't fail OBD inspection (but it can keep readiness monitors from setting, which causes a separate fail).
- California: An illuminated ESC light does not cause a smog test failure, but shops refuse dynamometer testing for safety reasons.
- New York: An ABS/ESC light is not a cause for rejection in the annual safety inspection, but inspectors advise on the repair.
- Texas: An ABS light does not cause a failure of the safety inspection. The brake system is tested for performance, not dashboard warnings.
Most Commonly Affected Vehicles
- Jeep Renegade (2015-2016) — Prone to a software glitch on 2.4L models. TSB #18-063-16 recommends a PCM software update as the primary fix.
- Fiat 500X (2016) — Shares a platform with the Jeep Renegade. TSB #08-010-16 REV. D addresses this code with a software reflash.
- Mazda Mazda3, Mazda6, CX-5 (2014-2015) — Internal failure of the SAS (Airbag) Control Module triggers C0061:29. TSB 08-001/15 recommends replacing the module.
- Jeep Compass (2022-2022) — A software issue in the ABS module causes this code. TSB 08-007-23 involves reprogramming the ABS module.
- Ford Super Duty (F-250/F-350) (2014-2019) — C0061 appears with C0063, triggering 'Service AdvanceTrac' warnings due to network communication faults at the C210 connector.
- Honda / Acura Accord, Civic, CR-V, TL, RDX (2004-2012) — The VSA light triggers after clearing codes or disconnecting the battery. Requires a manual reset/recalibration procedure.
- Chevrolet / GMC Cruze, Equinox, Terrain (2010-2017) — Typically caused by a failed sensor or wiring issue in the harness running under the center console.
- General Motors Tahoe, Silverado, Yukon (2007-2014) — The sensor is part of the Yaw Rate Sensor assembly under the passenger seat, susceptible to moisture damage.
Manufacturer-Specific Notes
- Fiat / Chrysler / Jeep: A software update is the most common fix. Replacing any electronic module requires a 'Proxy Alignment' with a factory tool to sync communications.
- Honda / Acura: The VSA system requires a manual 'neutral position sensor calibration' after battery disconnects, often done by jumping specific OBD-II pins.
- Mazda: Codes C0061:29, C0062:29, and C0063:29 point to an internal failure of the SAS (Airbag) Control Module, requiring full module replacement.
- Ford: C0061 often appears with network U-codes, pointing to a communication loss caused by a loose C210 connector near the parking brake pedal.
Real Owner Stories
2016 Jeep Renegade with multiple warning lights
Owner experienced sluggish transmission performance followed by ESC/ABS warning lights, triggering code C0061.
Outcome: A dealer-performed software update for the Powertrain Control Module (TSB #18-061-16) fixed the issue completely for the cost of 1 hour of labor.
Lesson: For 2015-2016 Jeep Renegades and Fiat 500X models, always have a dealer check for outstanding software TSBs before replacing sensors.
2015 Ford F-250 with 'Service AdvanceTrac' message
The 'Service AdvanceTrac' warning appeared constantly, throwing codes C0061, C0063, and multiple U-codes.
Outcome: Disconnecting, cleaning, and securely reconnecting the large C210 electrical connector near the parking brake bracket provided a long-term solution.
Lesson: When C0061 is accompanied by U-codes, the root cause is a wiring issue. On Ford Super Duty trucks, the C210 connector is a documented weak point.
2013 Acura TSX with 'Check VSA System' light
The 'Check VSA System' light illuminated, and a shop diagnosed code C0061.
Outcome: Jumping pins 4 and 9 on the OBD-II port and following a specific sequence recalibrated the system and resolved the fault for free.
Lesson: On older Honda and Acura vehicles, attempt a manual recalibration procedure before replacing parts.
2021 Audi SQ7 with ABS warning light after service
Shortly after routine maintenance, the ABS and ESC warning lights illuminated.
Outcome: The sensor was slightly misaligned from the recent work. A full system recalibration fixed the issue.
Lesson: If a C0061 code appears immediately after maintenance, suspect an installation error or missed calibration step.
How to Prevent This Code From Triggering
- Apply dielectric grease to connectors (Whenever a relevant connector is disconnected for service.) — Creates a barrier that seals out moisture, preventing pin corrosion which causes high resistance and signal loss.
- Perform regular underbody cleaning (Seasonally, especially before and after winter in Salt Belt regions.) — Washes away road salt and grime, preventing accelerated corrosion of wiring harnesses and sensor mounting points.
- Avoid piercing wires for testing (During any electrical diagnosis.) — Puncturing insulation creates an entry point for moisture, leading to hidden corrosion. Always use back-probe pins.
- Ensure new modules are properly configured (During module replacement.) — A 'Proxy Alignment' procedure syncs the module with the vehicle network, preventing communication-related fault codes.
Frequently Asked Questions
What are common misdiagnosis pitfalls for C0061?
The most common mistake is replacing the sensor without checking for TSBs first. On many vehicles, the root cause is a software glitch fixed by a dealer reflash. Mechanics also frequently overlook network communication U-codes, which indicate wiring faults rather than a bad sensor.
Can I fix code C0061 myself?
You can fix simple wiring issues or loose mounting bolts yourself. However, software updates and post-replacement sensor calibrations require a professional-grade scan tool. Take the vehicle to a shop equipped with an OEM-level scanner for these tasks.
Will disconnecting the battery clear the C0061 code?
Disconnecting the battery temporarily turns off the warning light, but the code returns immediately upon driving. On Honda and Acura models, this action de-calibrates the system and triggers additional faults.
Where is the lateral acceleration sensor located?
The sensor sits near the vehicle's center of gravity to ensure accurate readings. Common locations include under the center console, beneath the front seats, or integrated directly into the SRS airbag module.
Can modifications like different tires or a lift kit cause a C0061 code?
Yes. Changing tire diameter or suspension height alters the vehicle's roll and yaw characteristics. The system interprets these uncalibrated dynamic changes as a sensor error.
Is it safe to drive with the stability control light on?
The vehicle remains mechanically drivable, but your safety is severely compromised. Avoid aggressive driving and exercise extreme caution in rain or snow until the system is repaired.
Can a bad wheel alignment cause a C0061 code?
An off-center steering wheel creates a data conflict between the Steering Angle Sensor and the lateral acceleration sensor. The computer interprets this mismatch as a 'Signal Plausibility Failure', triggering the code.
Key Takeaways
- Code C0061 disables your vehicle's Electronic Stability Control, increasing the risk of a fatal single-vehicle rollover by up to 75%.
- For 2015-2016 Jeep Renegade and Fiat 500X models, a $150-$280 dealer software update is the primary fix, not a part replacement.
- Always perform a 'Zero Point Calibration' or 'Proxy Alignment' using a professional scan tool after replacing the sensor or disconnecting the battery.
- Before testing electrical circuits, check for network U-codes; a U0428 code indicates a CAN bus communication failure rather than a broken sensor.
Helpful Videos


Shop the Parts Behind C0061
Below are the parts most often responsible for code C0061, ranked by how frequently each one is the actual culprit (per the diagnosis above). Tap any to see what we have for your vehicle.


The information in this article is provided for general reference and educational purposes only. Vehicle specifications, procedures, and part compatibility can vary by production date, trim level, and region. Always consult your vehicle's factory service manual and verify part numbers before purchasing or performing repairs. Safety-critical components such as airbags, seat belts, and braking systems should be installed by a qualified professional.
- 🧭 Diagnostic Flowchart
- 🎬 Helpful Videos
- 🛍️ Shop This Part
- What Does C0061 Mean?
- Can I Drive With C0061?
- Common Causes
- Symptoms
- Common Fixes & Costs
- DIY vs Professional
- Used vs. New Parts: Buying Guide
- What Happens If You Wait — Timeline
- Cost of Not Fixing It
- Diagnosis Steps
- When This Code Triggers (Freeze-Frame Conditions)
- Related Codes
- Climate & Environmental Factors
- How to Talk to a Mechanic About This Code
- Where to Take It: Dealer vs Independent vs Chain
- When to Walk Away From the Repair
- What Scan Tool You Need for This Code
- How to Clear the Code After You Fix It
- Will This Fail Emissions / State Inspection?
- Most Commonly Affected Vehicles
- Manufacturer-Specific Notes
- Real Owner Stories
- 2016 Jeep Renegade with multiple warning lights
- 2015 Ford F-250 with 'Service AdvanceTrac' message
- 2013 Acura TSX with 'Check VSA System' light
- 2021 Audi SQ7 with ABS warning light after service
- How to Prevent This Code From Triggering
- Frequently Asked Questions
- What are common misdiagnosis pitfalls for C0061?
- Can I fix code C0061 myself?
- Will disconnecting the battery clear the C0061 code?
- Where is the lateral acceleration sensor located?
- Can modifications like different tires or a lift kit cause a C0061 code?
- Is it safe to drive with the stability control light on?
- Can a bad wheel alignment cause a C0061 code?
- Key Takeaways
- 🎟️ Get 5% Off