
OBD-II Code C0369: Four-Wheel Drive (4WD) System Fault
What C0369 means, why it triggers, and how to fix it
- Code C0369 is a GM-specific Chassis code indicating a complete shutdown of the 4WD system due to an electrical or sensor fault.
- Over 50% of C0369 triggers stem from corroded wiring, a damaged transfer case connector, or a rusted frame ground, rather than a failed motor.
- Replacing the transfer case encoder motor requires a mandatory relearn procedure using a bi-directional scan tool to clear the code permanently.
- Do not confuse C0369 with P0369; P0369 is a Powertrain code for a camshaft position sensor, while C0369 requires a scanner capable of reading Chassis codes.
What Does C0369 Mean?
C0369 is a GM-specific code indicating a general failure in the four-wheel drive (4WD) system. The Transfer Case Control Module (TCCM) has detected a fault preventing it from engaging, disengaging, or verifying the position of the transfer case.
Technical definition: Although officially listed as 'ISO/SAE Reserved', GM uses C0369 to flag a Transfer Case Control System fault. It usually triggers alongside specific codes (like C0306 or C0396) pointing to the transfer case encoder motor or its position sensor circuit. This forces the TCCM to disable the 4WD system and illuminate the 'Service 4WD' warning.
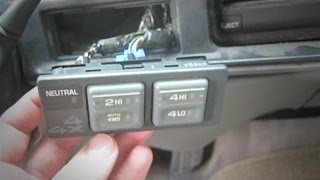
🎬 See this overview of common 4WD parts and their locations.Can I Drive With C0369?
Yes, But With Caution. Yes, but your four-wheel drive and traction control/StabiliTrak systems are disabled. The vehicle is mechanically safe to drive on dry roads in two-wheel drive. However, the lack of traction control increases the risk of losing control in emergency maneuvers. Avoid conditions requiring 4WD, like snow, ice, or mud, as you will get stuck.
Common Causes
- Corroded or Damaged Wiring/Connectors (Very Common) — Transfer case wiring and connectors are exposed to moisture, road salt, and debris. Corrosion on the connector pins (especially the main connector at the transfer case actuator), poor terminal tension at the TCCM, or physical wire damage is the most frequent cause of 4WD system faults.
- Poor Ground Connection (Very Common) — GM trucks frequently suffer from grounding issues where the main 4WD system ground attaches to the vehicle's frame (often on the driver's side near a body mount). Rust and road grime interrupt this connection, triggering a 'Service 4WD' light.
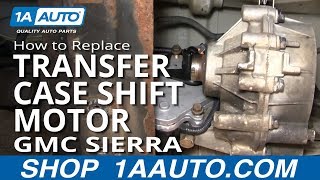
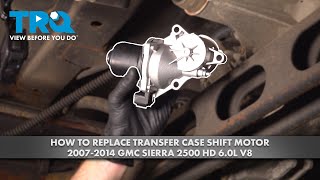
- Failed Transfer Case Encoder Motor (Actuator) (Common) — This electric motor physically shifts the transfer case between 2WD and 4WD. The position sensor, which tells the TCCM the current gear, is built into this assembly. The motor burns out or the internal sensor fails, causing a loss of position feedback.
- Failed 4WD Selector Switch (Occasional) — The dash-mounted switch used to select 4WD modes fails internally. This prevents the TCCM from receiving the shift command or causes it to see an invalid input, disabling the system.
- Weak or Failing Battery (Occasional) — Low battery voltage causes modules, including the TCCM, to malfunction during startup self-tests. This sets erroneous fault codes even if the 4WD components are functional. Batteries over 4 years old require professional testing.
- Failed Transfer Case Control Module (TCCM) (Less Common) — The TCCM is the brain of the 4WD system. While it fails from water intrusion or voltage spikes, it more commonly reports a problem with the wiring, grounds, or encoder motor. Misdiagnosing a bad TCCM is a frequent error.
- Low Transfer Case Fluid or Internal Failure (Rare) — Fluid leaks cause low levels, leading to grinding noises and excessive wear on internal gears. An internal mechanical bind prevents the encoder motor from completing a shift, registering as an electrical fault code.
Symptoms
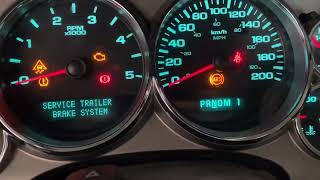
- 'Service 4WD' Light is On — A 'Service 4WD' message appears on the dashboard information center.
- 4WD Will Not Engage or Disengage — The system gets stuck in its current mode (usually 2WD). When pressing the button to switch modes, the indicator light flashes briefly and returns to the original setting.
- 4WD Indicator Lights are Flashing or Inoperative — The lights on the 4WD selector switch blink continuously without a successful shift, or go out completely, indicating the TCCM has shut the system down.
- Traction Control or StabiliTrak Warning Light — Modern stability and traction control systems rely on 4WD components. A 4WD fault disables these safety features, illuminating their respective warning lights.
- Grinding, Clicking, or Humming Noises — Unusual noises emit from underneath the vehicle when shifting 4WD modes. This indicates a failing encoder motor struggling to move or an internal transfer case mechanical issue.
Diagnostic Flowchart
Tap your situation to follow the diagnostic path that matches what you're seeing on this code.
Common Fixes & Costs
- Clean or Repair Wiring/Grounds — Parts: $0-$50, Labor: $120-$240, ~1.5 hr book time (DIY)
- Replace Transfer Case Encoder Motor/Actuator — Parts: $150-$600, Labor: $150-$300, ~2 hr book time (Intermediate)
- Replace 4WD Selector Switch — Parts: $40-$150, Labor: $50-$100, ~0.5 hr book time (DIY)
- Replace Transfer Case Control Module (TCCM) — Parts: $200-$500, Labor: $100-$200, ~1 hr book time (Intermediate)
- Replace Transfer Case Assembly — Parts: $2,500-$4,500+, Labor: $700-$1,000, ~6 hr book time (Professional)
Used vs. New Parts: Buying Guide
When a used part is worth it: For a common failure like the transfer case encoder motor, a used part makes sense if the vehicle is older (over 10 years or 150k miles) and the budget is tight. Used TCCM modules are viable but require programming.
Donor-vehicle mileage cap: roughly under 100000 miles for the part to have meaningful remaining life.
Donor quality checklist:
- Verify the exact part number, as multiple versions exist for different transfer cases.
- For electronic modules like the TCCM, ensure the seller offers a functional warranty.
- Avoid parts from vehicles in heavy rust-belt areas; corrosion is a primary failure cause for the encoder motor connector.
Decision logic:
- If The vehicle is newer and you plan to keep it long-term → Buy a new OEM or high-quality aftermarket part for the longer warranty and reliability.
- If The budget is the primary concern and you are performing the labor yourself → A used part from a reputable recycler is a reasonable gamble to save money.
- If You are paying a shop for labor → Favor a new part with a warranty. Paying for the same labor twice if a used part fails negates initial savings.
Warranty tradeoff: Used parts typically come with a 30-90 day warranty. New aftermarket parts offer a 1-year to limited lifetime warranty. New OEM parts usually have a 1-2 year warranty.
Worst-case if a used part fails: $300-$500 if a used encoder motor or TCCM fails after installation, primarily due to repeated labor costs.
What Happens If You Wait — Timeline
- 0-3 months: Intermittent 'Service 4WD' light, often triggered by moisture or vibration. The light turns off after restarting the engine. 4WD works occasionally. (MPG impact: 0%% · Added cost: $0. The problem is a nuisance but not yet causing damage.)
- 3-6 months: The fault becomes permanent. The 'Service 4WD' light stays on continuously. The 4WD system is completely disabled and stuck in 2WD. Traction and stability control systems are disabled. (MPG impact: 0%% · Added cost: $0-$250. No direct damage, but risk of getting stuck in adverse conditions leads to towing bills.)
- 6-12 months: If the root cause is a wiring short, it causes a voltage spike that damages the Transfer Case Control Module (TCCM), turning a simple fix into a module replacement. (MPG impact: 0%% · Added cost: $200-$500 for a replacement TCCM, plus programming fees.)
- 12+ months: If the root cause is internal mechanical binding in the transfer case, continued driving leads to catastrophic failure. The transfer case locks up or breaks internally. (MPG impact: 0%% · Added cost: $3,000 - $5,500+ for a complete transfer case replacement.)
Cost of Not Fixing It
- Immediate: Loss of 4WD capability. The vehicle remains stuck in its current mode (usually 2WD), making it unsafe in snow, ice, mud, or off-road conditions. (Added cost: Potential cost of towing or recovery if stuck ($200+).)
- Short Term (0-6 months): Associated safety systems like traction control and stability control are disabled, increasing the risk of losing control in emergency maneuvers. (Added cost: Negligible direct cost, but high potential cost in an accident.)
- Long Term (6+ months): If the root cause is a mechanical binding issue within the transfer case, continued driving causes catastrophic failure, requiring complete replacement. (Added cost: $3,000 - $5,500+)
Diagnosis Steps
- Read All Trouble Codes from All Modules
Use a high-quality OBD-II scanner capable of reading Chassis ('C') codes from the Transfer Case Control Module (TCCM). C0369 is a general code; look for specific codes like C0306, C0396, C0387, or C0569 that pinpoint the root cause.
Tools: OBD-II Scan Tool (capable of reading Chassis 'C' codes) (Beginner) - Inspect the TCCM Ground Connection
Locate the primary ground wire for the 4WD system, typically bolted to the frame on the driver's side near the front body mount. Unbolt the connection, use a wire brush to clean the ring terminal and frame surface to shiny bare metal, and re-secure tightly.
Tools: Socket set, wire brush, safety glasses (Beginner) - Visually Inspect Wiring and Connectors
Locate the transfer case encoder motor under the vehicle. Unplug its main electrical connector and inspect for green/white corrosion, bent pins, or a damaged weather seal grommet (GM TSB 22-NA-187). Follow the wiring harness, looking for breaks, melting, or chafing.
Tools: Flashlight, safety glasses, mechanic's mirror (Intermediate) - Test the 4WD Selector Switch
Using a scan tool with live data, monitor the 4WD selector switch status as you change its position. If the scan tool does not show the position changing, the switch is faulty. Alternatively, test internal resistance with a multimeter.
Tools: Scan tool with live data, multimeter (Intermediate) - Check Transfer Case Fluid
Remove the fill plug on the rear of the transfer case. Fluid should sit at the bottom of the fill hole. If it is very low, dark, smells burnt, or contains metallic particles, an internal mechanical failure is likely.
Tools: Socket set, fluid pump (if refilling) (Intermediate) - Pro Tip: Test the Encoder Position Sensor Circuit
With the key on, engine off, and encoder motor unplugged, use a multimeter to test the harness-side connector. Verify a 5-volt reference wire, a good ground wire (<0.5 ohms to frame), and a signal wire. Missing voltage or bad ground points to wiring/TCCM issues, not a bad motor.
Tools: Multimeter, vehicle-specific wiring diagram (Advanced) - Advanced: Test Encoder Sensor Voltages (C0396)
To diagnose C0396, test voltages at the TCCM or encoder motor connector with the key on. The 8V reference supply must be 7.5V-8.5V. The impulse signal must be 0.5V-4.6V. Voltages outside these ranges indicate a wiring short/open or failed sensor.
Tools: Multimeter, back-probe pins, wiring diagram (Advanced) - Advanced: Test Encoder Sensor Resistance (C0396)
With the encoder motor unplugged, measure internal resistance between the sensor pins on the motor side. A good sensor reads approximately 2.11 MΩ. A reading of OL (Open Loop) or near zero ohms means the internal sensor failed and the motor requires replacement.
Tools: Multimeter (with Mega-ohm capability) (Advanced) - Advanced: Test Encoder Motor Circuit (C0306)
To diagnose C0306, disconnect the encoder motor and measure resistance between the two large motor control pins. Resistance should be 0.3-32 ohms. Infinite resistance (OL) on the motor or a short on the harness side indicates a failure.
Tools: Multimeter, wiring diagram (Advanced) - Pro Tip: Scope the Position Sensor Signal
Use an oscilloscope to back-probe the position sensor signal wire at the TCCM. Command a shift with a bi-directional scan tool. A healthy sensor produces a clean square wave. A flat line, noisy signal, or dropout indicates a failed position sensor.
Tools: Oscilloscope, bi-directional scan tool, wiring diagram (Professional) - Perform a Relearn Procedure
If the encoder motor or TCCM is replaced, a 'relearn' procedure is mandatory. Use a bi-directional scan tool to command the TCCM to learn the new part's positions. Skipping this results in a permanent C0569 code.
Tools: Bi-directional Scan Tool (Professional)
When This Code Triggers (Freeze-Frame Conditions)
- Event: Key-On Self-Test (The TCCM performs a self-test each time the ignition turns to 'RUN'. Existing electrical faults (open/short) are detected immediately.)
- Event: Shift Attempted (The code sets when the driver presses the 4WD selector switch. The TCCM commands the shift and flags a fault if it misses expected feedback from the position sensor.)
- Vehicle Speed: 0 mph (Faults frequently log when a shift is attempted while stationary, the standard procedure for shifting into 4-Low.)
- System Voltage: < 11.5V (During engine cranking with a weak battery, voltage drops cause the TCCM to set erroneous codes.)
Related Codes
- C0306 — Indicates a fault in the transfer case motor's electrical circuit (short to ground, short to power, or open circuit). Focus diagnostics on the two large wires leading to the motor and the motor's internal windings.
- C0396 — Indicates a problem with the transfer case position sensor circuit. Because this sensor is inside the encoder motor, this code usually requires replacing the motor assembly. GM TSB PIP5304 calls out checking for poor pin tension at the TCCM connector.
- C0569 — Means 'System Configuration Error' or 'Calibration Not Learned'. Sets when a 'relearn' procedure isn't performed after replacing a part, or if the relearn fails because the original fault (bad wire, poor ground, internal bind) still exists.
- C0387 — Means 'Unable to Complete Shift'. The TCCM commanded a shift, but the position sensor did not report completion in time. Caused by a weak motor, binding transfer case, or faulty position sensor.
Climate & Environmental Factors
- Road Salt and High-Humidity Climates: Vehicles in the 'Salt Belt' or coastal areas are significantly more prone to C0369. Salt creates a conductive brine that seeps into connectors and accelerates corrosion of wiring and frame grounds, causing the electrical resistance that triggers this code.
How to Talk to a Mechanic About This Code
Say this: "I have a 'Service 4WD' light on my [Vehicle Year/Make/Model] and my scanner can't read the code, so I know it's a Chassis code. I know the most common causes are the frame ground, the connector at the transfer case, or the encoder motor. Can you start by checking the simple electrical connections before recommending major parts?"
This signals you are an informed customer. It directs them to the cheapest-to-fix issues first, preventing immediate high-cost part replacement quotes, and confirms they need a scanner capable of reading 'C' codes.
Avoid saying:
- 'My 4-wheel drive is broken, can you fix it?'
- 'My 'Service 4WD' light is on, just do whatever it takes.'
- 'I think I need a new transfer case.'
Questions to ask before authorizing the repair:
- What specific 'C' code did you find in the Transfer Case Control Module?
- Did you inspect the frame ground under the driver's door and the main connector on the transfer case for corrosion?
- If you are recommending an encoder motor, is that because the position sensor circuit failed its test?
- Does the proposed repair cost include the labor for the mandatory TCCM relearn procedure?
- What is the warranty on the parts and labor for this repair?
Where to Take It: Dealer vs Independent vs Chain
- Dealer:
A safe, but expensive, option. They have the correct diagnostic tools but are not the most cost-effective for out-of-warranty vehicles.
Best for: Vehicles under warranty., When a known Technical Service Bulletin (TSB) or Special Coverage campaign applies., If the repair requires complex, vehicle-specific programming of a new TCCM.
Downsides: Highest labor rates and OEM part costs., Less willing to diagnose and repair a simple wiring fault, preferring to replace a larger assembly. (Typical cost: +50% vs. baseline) - Independent Shop:
Best fit for most owners. This is a common GM failure, and experienced independent mechanics will perform a cost-effective wiring or ground repair.
Best for: Out-of-warranty vehicles where cost is a factor., Diagnosing common, well-documented problems like C0369., Shops with ASE-certified technicians specializing in electrical or drivetrain repairs.
Downsides: Quality varies greatly. Vet the shop through reviews., Must confirm they have a bi-directional scan tool capable of performing the GM-specific 'relearn' procedure. (Typical cost: +0% vs. baseline) - Chain Shop:
AVOID. This repair requires specialized diagnostic capabilities. There is a high risk of misdiagnosis or incomplete repair (e.g., replacing a part without performing the relearn).
Best for: Simple services like oil changes or tires.
Downsides: Technician skill varies dramatically., Unlikely to have the advanced bi-directional scan tools required for diagnosis and relearn procedures., High pressure to upsell leads to misdiagnosis and unnecessary part replacement. (Typical cost: -10% vs. baseline)
When to Walk Away From the Repair
If the estimated repair cost exceeds 40-50% of the vehicle's current private-party market value, seriously consider selling it as-is or trading it in.
- Car worth $8000, fix is $4000: Walk away. A $4,000 repair for a full transfer case replacement on an $8,000 truck is not a sound financial decision.
- Car worth $20000, fix is $950: Fix it. A $950 repair for a new encoder motor is well below the 50% threshold and restores significant functionality.
- Car worth $4500, fix is $250: Fix it. A $250 repair to clean and fix a ground wire is an excellent value and should be done immediately.
What Scan Tool You Need for This Code
Minimum: A scanner that reads manufacturer-specific Chassis ('C') codes for GM vehicles. A basic OBD-II reader that only gets Powertrain ('P') codes is NOT sufficient.
A $20 code reader incorrectly reports 'No Codes' because it cannot communicate with the Transfer Case Control Module (TCCM). You need the correct 'C' code (e.g., C0306, C0396, C0569) to guide diagnosis.
Budget: BlueDriver Pro (~$119) — Reads and clears GM-specific Chassis ('C') codes and provides live data to monitor switch positions. It does NOT have the bi-directional capability to perform the mandatory 'relearn' procedure.
Mid-range: Foxwell NT510 Elite for GM (~$150) — Reads and clears all TCCM codes and provides live data. Includes the GM-specific bi-directional function 'ATC Motor Learn' needed to calibrate a new encoder motor, making it a complete DIY solution.
Professional: Autel MaxiCOM MK808 / XTOOL D7 (~$450-600) — Provides OE-level diagnostics for all modules, comprehensive live data graphing, and all necessary bi-directional controls, including the TCCM relearn. Overkill for a single fix but invaluable for a serious DIYer.
Rent vs buy: Buying is necessary. Parts store loaner tools are typically basic readers that cannot read 'C' codes or perform the required bi-directional relearn procedure.
How to Clear the Code After You Fix It
- Use a compatible OBD-II scan tool to clear Chassis ('C') codes from the TCCM.
- If the encoder motor or TCCM was replaced, perform the mandatory 'relearn' or 'calibration' procedure using a bi-directional scan tool.
- Perform a complete GM drive cycle to ensure all systems function and no codes return.
Drive cycle (~20 minutes): Start with a cold engine. Idle for 2-3 minutes with electrical load (A/C, defroster on). Accelerate to 55 mph and hold for 3-5 minutes. Coast down to 20 mph without braking. Accelerate to 55-60 mph and hold for 5 minutes. Coast down again.
Readiness monitors affected: Catalyst Monitor, Evaporative System Monitor, Oxygen Sensor Monitor
Before emissions retest: drive at least 50 miles to fully set monitors.
Watch out for:
- Disconnecting the battery clears the code temporarily, but it returns immediately if the root cause remains.
- Failing to perform the TCCM relearn procedure with a scan tool after replacing the encoder motor guarantees a repeat failure (setting code C0569).
- Using a basic code reader that only clears Powertrain ('P') codes fails to clear the Chassis ('C') code from the TCCM.
Will This Fail Emissions / State Inspection?
No — by itself this code doesn't fail OBD inspection (but it can keep readiness monitors from setting, which causes a separate fail).
- General Note: Code C0369 is a Chassis code and does not illuminate the 'Check Engine Light' (MIL). Standard OBD-II emissions tests fail a vehicle only if the MIL is commanded on. C0369 alone does not cause an emissions test failure.
- California: A smog check fails for an illuminated MIL or incomplete emissions readiness monitors. Since C0369 affects neither, it passes.
- New York: The OBD-II emissions test checks MIL status, so C0369 passes. While 4WD is not a specific safety inspection failure point, an inspector may note the warning light.
- Texas: Emissions testing looks for MIL-related codes. C0369 passes. Safety inspections are no longer required for most non-commercial vehicles as of 2025.
Most Commonly Affected Vehicles
- Chevrolet Silverado 1500/2500/3500 (2007-2019) — Extremely common issue. TSB 22-NA-187 notes water enters the transfer case actuator connector via a torn grommet, causing corrosion. The frame ground is also a primary failure point.
- GMC Sierra 1500/2500/3500 (2007-2019) — Identical platform to the Silverado, suffering from the same wiring, ground, and encoder motor issues.
- Chevrolet Tahoe / Suburban (2007-2014) — Shares the same 4WD system components. TSB PIP5089A explains how an unfixed root cause leads to a C0569 code after a repair attempt.
- GMC Yukon / Yukon XL (2007-2014) — Frequently experiences 'Service 4WD' messages caused by bad encoder motors or faulty TCCM wiring. Diagnostic process is identical to the Tahoe/Suburban.
- Cadillac Escalade (2007-2014) — Uses the same transfer case and control system as the Tahoe/Yukon, making it susceptible to identical electrical faults.
- Ford / Honda Various Models (All) — CRITICAL MISDIAGNOSIS WARNING: On Ford and Honda vehicles, code P0369 (a Powertrain code) refers to a Camshaft Position Sensor circuit fault. This is an engine issue, NOT a 4WD problem. Do not confuse P0369 with C0369.
Manufacturer-Specific Notes
- General Motors (Chevrolet, GMC, Cadillac): The vast majority of 'Service 4WD' issues are caused by poor electrical connections, not failed components. TSBs point to poor terminal tension in TCCM connectors, corroded frame grounds, and water intrusion at the transfer case connector. Check these before replacing parts.
- General Motors (Chevrolet, GMC, Cadillac): A 'relearn' procedure with a bi-directional scan tool is absolutely required after replacing the encoder motor or TCCM. Skipping this sets code C0569, and the 4WD will not work.
- General Motors (Chevrolet, GMC, Cadillac): GM has issued multiple TSBs for this issue. TSB PIP5304B is critical for diagnosing C0396, pointing to poor terminal tension at the TCCM connector. Service Campaign 14795 reprogrammed the TCCM on some 2015 models to prevent false 'Service 4WD' messages.
Real Owner Stories
2004 Chevy Silverado, mileage unknown - The 'Easy Fix'
The 'Service 4WD' light came on and the system would not shift into any 4WD mode; the selector light just blinked.
What they tried:
- Cleaned the main ground connection to the frame under the driver's door, which did not solve the problem.
Outcome: The owner found a smaller, separate ground wire in the same area that had broken. Re-connecting this wire with a new terminal restored all 4WD functions.
Lesson: Thoroughly inspect all wiring and grounds in known problem areas (under the driver's door on GM trucks) before assuming a major component has failed.
2009 Chevy Silverado, mileage unknown - The Misdiagnosis
'Service 4WD' light was on with codes C0396 (position sensor circuit) and C0569 (relearn error). 4WD would not engage.
What they tried:
- Checked the wiring harness for corrosion and found none.
- Tested resistance of the position sensor pins on the original encoder motor and found an open circuit.
Outcome: The owner replaced the encoder motor assembly and performed a 'relearn' procedure using a Snap-on scan tool. This cleared both codes and restored 4WD operation.
Lesson: Code C0569 often appears alongside C0396. You must fix the root cause (the bad sensor indicated by C0396) before the relearn procedure will work and clear the C0569 code.
2008 Silverado, mileage unknown - The Unusual Root Cause
A repair shop faced a persistent C0569 code that would not clear after replacing the 4WD selector switch and encoder motor.
What they tried:
- Replaced selector switch.
- Replaced encoder motor.
- Verified all wiring and electrical tests passed.
Outcome: The shop removed the encoder motor and tried to shift the transfer case manually with a wrench. The internal shift rail was broken and spinning freely. This mechanical failure prevented the new motor from calibrating. The transfer case required replacement.
Lesson: If you replace the common parts and perform the relearn correctly, but C0569 persists, the root cause is likely an internal mechanical failure within the transfer case.
How to Prevent This Code From Triggering
- Clean and Protect Frame Grounds (Every 1-2 years, especially in the Salt Belt) — The primary 4WD ground on the frame under the driver's door is prone to rust. Cleaning it to bare metal and applying dielectric grease prevents the #1 cause of electrical faults.
- Apply Dielectric Grease to Connectors (Anytime a relevant connector is disconnected) — Applying dielectric grease to the rubber seals of under-vehicle connectors prevents moisture and road salt from corroding the pins.
- Cycle the 4WD System Periodically (Once a month) — Engaging 4WD High for a short drive on a suitable surface keeps the encoder motor and internal transfer case components lubricated and moving freely.
- Check Transfer Case Fluid (Per manufacturer's schedule (e.g., every 50,000 miles)) — Clean fluid prevents internal mechanical wear and binding, which puts excess strain on the encoder motor and causes electrical fault codes.
Frequently Asked Questions
What is the difference between code C0369 and P0369?
C0369 is a GM-specific Chassis code indicating a 4WD system fault. P0369 is a Powertrain code used by Ford, Honda, and others to indicate an engine Camshaft Position Sensor fault. These are completely unrelated problems.
Can I just replace the sensor inside the transfer case motor?
No, the position sensor is integrated into the transfer case encoder motor assembly. If the sensor fails, the entire motor unit must be replaced.
Why does the 'Service 4WD' light come and go?
This indicates an intermittent electrical problem. A loose ground wire or corroded pin makes and loses connection as the vehicle vibrates, causing the TCCM to pass and fail its self-test intermittently.
I replaced the transfer case motor, but a C0569 code came back. What now?
Code C0569 means the system failed to calibrate. This happens if you skip the mandatory scan tool 'relearn' procedure, or if the original root cause (like a broken wire or internal bind) prevents the new motor from completing calibration.
Can I do a 4WD relearn procedure without a scan tool?
No. The specific Transfer Case Control Module (TCCM) calibration requires a bi-directional scan tool to command the module into relearn mode. Disconnecting the battery will not work.
Could a weak car battery really cause this 4WD problem?
Yes. Low voltage during startup causes electronic modules, including the TCCM, to fail self-tests and set fault codes even if the 4WD hardware is fine. Test any battery over four years old.
My 'Service 4WD' light is on but I don't have any codes. What's wrong?
You are likely using a basic code reader that only accesses Powertrain ('P') codes. 4WD system codes are Chassis ('C') codes and require an advanced scan tool to read.
Key Takeaways
- Code C0369 is a GM-specific Chassis code indicating a complete shutdown of the 4WD system due to an electrical or sensor fault.
- Over 50% of C0369 triggers stem from corroded wiring, a damaged transfer case connector, or a rusted frame ground, rather than a failed motor.
- Replacing the transfer case encoder motor requires a mandatory relearn procedure using a bi-directional scan tool to clear the code permanently.
- Do not confuse C0369 with P0369; P0369 is a Powertrain code for a camshaft position sensor, while C0369 requires a scanner capable of reading Chassis codes.
Helpful Videos

Shop the Parts Behind C0369
Below are the parts most often responsible for code C0369, ranked by how frequently each one is the actual culprit (per the diagnosis above). Tap any to see what we have for your vehicle.


The information in this article is provided for general reference and educational purposes only. Vehicle specifications, procedures, and part compatibility can vary by production date, trim level, and region. Always consult your vehicle's factory service manual and verify part numbers before purchasing or performing repairs. Safety-critical components such as airbags, seat belts, and braking systems should be installed by a qualified professional.
- 🧭 Diagnostic Flowchart
- 🎬 Helpful Videos
- 🛍️ Shop This Part
- What Does C0369 Mean?
- Can I Drive With C0369?
- Common Causes
- Symptoms
- Common Fixes & Costs
- Used vs. New Parts: Buying Guide
- What Happens If You Wait — Timeline
- Cost of Not Fixing It
- Diagnosis Steps
- When This Code Triggers (Freeze-Frame Conditions)
- Related Codes
- Climate & Environmental Factors
- How to Talk to a Mechanic About This Code
- Where to Take It: Dealer vs Independent vs Chain
- When to Walk Away From the Repair
- What Scan Tool You Need for This Code
- How to Clear the Code After You Fix It
- Will This Fail Emissions / State Inspection?
- Most Commonly Affected Vehicles
- Manufacturer-Specific Notes
- Real Owner Stories
- 2004 Chevy Silverado, mileage unknown - The 'Easy Fix'
- 2009 Chevy Silverado, mileage unknown - The Misdiagnosis
- 2008 Silverado, mileage unknown - The Unusual Root Cause
- How to Prevent This Code From Triggering
- Frequently Asked Questions
- What is the difference between code C0369 and P0369?
- Can I just replace the sensor inside the transfer case motor?
- Why does the 'Service 4WD' light come and go?
- I replaced the transfer case motor, but a C0569 code came back. What now?
- Can I do a 4WD relearn procedure without a scan tool?
- Could a weak car battery really cause this 4WD problem?
- My 'Service 4WD' light is on but I don't have any codes. What's wrong?
- Key Takeaways
- 🎟️ Get 5% Off