
C0800 on 2015-2017 Chevrolet Suburban: Low Voltage Causes and Fixes
Code C0800 on a 2015-2017 Suburban almost always means there is a low voltage problem, most commonly caused by a bad Body Control Module (BCM) ground at location G218 under the driver's side dash. Fixing this ground by clearing trapped insulation is often a low-cost, high-success repair documented in GM TSBs PIT5405C and 18-NA-161.
- C0800 on your Suburban means 'low voltage' at a control module.
- Before suspecting expensive components, fully test your battery and charging system.
- The most likely cause is a poor ground at location G218 on the driver's side, due to trapped dash insulation. This is a well-documented factory issue.
- Fixing the G218 ground is a low-cost repair that requires removing some interior trim but can solve a host of electrical problems.
- Do not drive the vehicle if you are experiencing intermittent loss of power steering, as this is a serious safety hazard.
What's Unique About the 2015-2017 Chevrolet SUBURBAN
The 2015-2017 Suburban and its GM K2XX platform siblings (Tahoe, Yukon, Silverado, Sierra) are uniquely prone to a specific design flaw that triggers code C0800. During assembly, the front dash insulator mat can get trapped under the main ground stud (G218) for the Body Control Module (BCM). This creates a poor ground connection that worsens over time, causing a cascade of bizarre electrical issues, especially when electrical load is high (like during low-speed turns using the electric power steering). This exact issue is the primary subject of GM Technical Service Bulletin PIT5405C and is also a main cause listed in the superseding bulletin 18-NA-161.
Diagnostic Flowchart
Tap your situation to follow the diagnostic path that matches what you're seeing on this vehicle.
Symptoms You May Notice
- Intermittent or total loss of power steering assist, especially at low speeds or when turning the wheel while stopped.
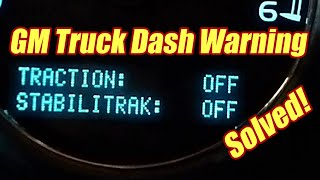
- Service Stabilitrak message appears on the dash, often with a chime.
- Instrument panel, radio, or HVAC controls go blank, flicker, or reset.
- Headlights and interior lights flicker or dim, especially when turning, braking, or using accessories like power windows.
- Engine may stall unexpectedly, particularly during low-speed maneuvers.
- No-start condition or slow, chattering crank.
- Warning chimes and various erroneous messages on the driver information center (e.g., 'Hood Ajar', 'Service Park Assist').
- Door locks may cycle randomly while driving or after shutdown.
- Wipers may continue to run for a short time after being turned off.
- Replacing the Power Steering Rack
- Replacing the Body Control Module (BCM)
- Replacing the Alternator without proper testing
- Replacing the battery without confirming it failed a load test.
Most Likely Causes
- Poor Body Control Module (BCM) Ground at G218 🔴 High Probability → Shop Body Control Module A known factory assembly issue where the dash insulation mat gets pinched between the ground stud and the ground wire eyelet, preventing a secure connection. This is the primary cause identified in GM TSBs PIT5405C and 18-NA-161.
How to confirm: Visually inspect the G218 ground stud, located under the driver's side dash, inboard of the A-pillar and typically near the dash speaker. 🎬 Watch: How to find and fix the G218 ground issue. You will need to remove the driver's side lower dash/kick panel. Look for the black dash insulation material trapped under the ground nut and eyelet. A phone camera can help see the location, which is often difficult to view directly.
Typical fix: Disconnect the battery. Remove the 10mm nut from the G218 stud. Pull the ground eyelet(s) off the stud. Use a utility knife to carefully cut away the interfering insulation material from around the stud. Scrape the body surface and eyelet terminal to ensure a bright, clean metal-to-metal contact. Re-secure the ground eyelet directly to the metal stud and tighten the nut. Torque specifications are not typically listed for this ground, but it should be snug.
Est. part cost: $0-$5 - Weak or Failing Battery 🟡 Medium Probability → Shop Vehicle Battery These vehicles have a high electrical demand, which can expose a weak battery. The complex electrical systems are sensitive to voltage drops that an aging battery can cause.
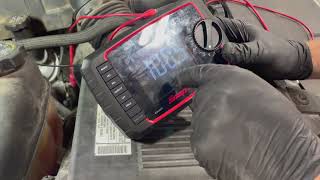
How to confirm: Perform a battery load test using a digital battery tester, not just a voltage check. Many auto parts stores offer this service for free. The resting voltage should be above 12.4V, and the tester must confirm its Cold Cranking Amps (CCA) health under load.
Typical fix: Replace the vehicle's 12V AGM battery. Ensure the new battery is fully charged before installation.
Est. part cost: $150-$300 - High Resistance in Battery Cables 🟡 Medium Probability → Shop Vehicle Battery TSB 18-NA-161 specifically highlights high internal resistance in the factory battery cables (especially the negative cable) as a cause for these electrical issues. The resistance can develop internally from corrosion or strand breakage and may not be visually apparent.
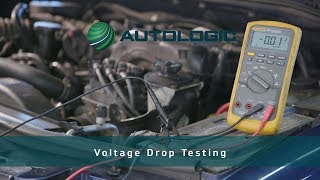
How to confirm: Perform a loaded voltage drop test on the positive and negative cables while cranking the engine (with fuel disabled). 🎬 See this guide on how to perform a voltage drop test. Per TSB 18-NA-161, voltage drop on the negative cable should not exceed 200mV (0.2V), and the positive cable should not exceed 100mV (0.1V). Also, physically check that the cable terminals do not spin on the battery posts after being tightened to 7 Nm (62 lb-in).
Typical fix: Clean the battery posts and terminals thoroughly with a wire brush. If cables are corroded internally or fail a voltage drop test, they must be replaced. The negative cable is a more common failure point. 🎬 Watch: Step-by-step walkthrough for replacing the negative battery cable.
Est. part cost: $50-$250
Rare But Worth Checking
- Starter Motor B+ Cable Shorting to Heat Shield: → Shop Starter Motor TSB PIT5405C and 18-NA-161 mention this as a possible cause. The main power cable at the starter can rub against or be installed incorrectly near the starter's heat shield, causing an intermittent short to ground that drops system voltage. Inspection requires raising the vehicle.
- Failing Alternator: → Shop Alternator If the alternator is not charging the battery correctly (typically should be 13.5-14.5V when running), system voltage will eventually drop low enough to trigger this code, usually accompanied by a battery warning light and dimming headlights.
- Parasitic Battery Drain: → Shop Vehicle Battery A module may fail to 'sleep' when the vehicle is off, draining the battery. TSB PIE0546 points to the Seat Memory Control Module (SMCM) as a potential culprit in cold weather. A parasitic draw test can isolate the faulty circuit; a normal draw after 45 minutes should be under 50 milliamps.
- Loose Power Steering Rack Connector (X183/X133): TSB PIT5405C notes that a loose connection at the main 2-way power and ground connector for the electric power steering rack can also cause these symptoms.
Diagnosis Steps
- Scan for all DTCs in all modules. Note that C0800 is often accompanied by a long list of communication (U-prefix) codes, which are symptoms of the voltage drop, not the root cause.
- Perform a comprehensive battery and charging system test. A weak battery or failing alternator must be ruled out first. Use a load tester for the battery.
- Inspect battery terminals and the main engine/body ground connections for tightness and corrosion. Per TSB 18-NA-161, ensure terminals cannot be rotated by hand after tightening to 7 Nm (62 lb-in).
- Perform a loaded voltage drop test on the main positive and negative battery cables while cranking. Replace the negative cable if the drop exceeds 200mV; replace the positive if it exceeds 100mV.
- Gain access to the G218 ground location. This requires removing the driver's side lower instrument panel/kick panel. The ground stud is on the A-pillar, often partially obscured by the dash speaker and insulation.
- Visually inspect the G218 ground stud. Confirm if the thick, black dash insulator mat is trapped under the ground eyelet(s).
- If insulation is present, disconnect the battery. Remove the 10mm nut, pull the eyelet(s) off, and carefully trim away the insulation from the stud area with a utility knife.
- Clean the contact surfaces of the eyelet(s) and the body stud with a wire brush or sandpaper to ensure a bright metal finish.
- Reinstall the eyelet(s) and nut, ensuring a tight metal-to-metal connection. Reconnect the battery.
- Clear all DTCs and test drive the vehicle, paying attention to low-speed turns to see if symptoms are resolved. The power steering should feel normal and warning messages should not reappear.
Parts You'll Likely Need
- Negative Battery Cable
(OEM #84494554)— In some cases, the factory negative battery cable can develop high internal resistance, causing voltage drop issues similar to a bad ground. TSB 18-NA-161 recommends replacement if it fails a voltage drop test (over 200mV).
Trusted brands: ACDelco, Standard Motor Products
OEM price range: $60-$90
Aftermarket price range: $40-$70
Related Codes That Often Appear With This One
- U0073 — Control Module Communication Bus A Off
- U0100 — Lost Communication With ECM/PCM
- U0121 — Lost Communication With Anti-Lock Brake System (ABS) Control Module
- U0140 — Lost Communication With Body Control Module
- C0544 — Steering Wheel Angle Sensor
- C0710 — Steering Position Signal
- P0513 — Incorrect Immobilizer Key
Technical Service Bulletins (TSBs) & Recalls
- PIT5405C / 18-NA-161: Addresses a wide range of electrical issues including C0800, pointing to the G218 ground, bad battery cables with high resistance (specifying voltage drop test limits), or a short at the starter.
- 17-NA-345: Relates to loss of power steering assist, which is a primary symptom of the electrical issues that set C0800. It recommends a software update to prevent the system from shutting down during momentary voltage drops.
Platform-Specific Known Issues
- Technical Service Bulletin PIT5405C (and its successor 18-NA-161) specifically identifies the G218 ground being fouled by dash insulation as the primary cause for a cluster of electrical issues, including code C0800.
- GM Recall 18289 (NHTSA #18V586000) was issued for over a million 2015 model year trucks and SUVs on this platform for temporary loss of power steering caused by voltage drops, the primary symptom of the C0800 fault.
Mechanic-Grade Diagnostic Values
- EBCM/PSCM System Voltage (DTC C0800-03 Set Condition) — expected: 9.0V - 17.0V. Failure: Voltage is < 10.5V at initialization, or < 9.0V during operation for several seconds.
- EBCM/PSCM System Voltage (DTC C0800-07 Set Condition) — expected: 9.0V - 17.0V. Failure: Voltage is > 17.0V.
- Battery Cable Clamp Nut Torque — expected: 7 Nm (62 lb-in). Failure: Loose terminals that can be rotated by hand after tightening.
- Battery Fuse Block Cable Nut Torque — expected: 15 Nm (11 ft-lb). Failure: Loose connections at the fuse block.
- Negative Battery Cable to Engine Block Torque — expected: 45 Nm (33 ft-lb). Failure: Loose ground connection at the engine block.
- Parasitic Draw (after 45 min sleep) — expected: < 50 milliamps (0.050A). Failure: A sustained draw above 50mA.
Hidden / Shadow Codes Worth Checking
- C0800-03: Device Power 1 Circuit Voltage Below Threshold. This is the most common sub-code and directly indicates a low voltage condition detected by a module. (see via A professional scan tool like the GM GDS2, or some high-end consumer scan tools.)
- C0800-0F: Control Module Power Circuit - Signal Erratic. This suggests the voltage supply is fluctuating rapidly or unpredictably, which can also be caused by a poor ground or loose connection. (see via A professional scan tool like the GM GDS2.)
Scan Tool Commands That Help
- GDS2 (GM Global Diagnostic System 2): Module Diagnostics > PSCM > Control Functions — After verifying main power and ground, use this to attempt direct communication with the Power Steering Control Module (PSCM). If the module responds to bidirectional commands here but fails to communicate on the main vehicle network, it suggests the module itself is likely functional and the problem is in the communication wiring.
- GDS2 (GM Global Diagnostic System 2): Steering Angle Sensor Reset/Calibration — After any repair involving the steering rack, BCM, or PSCM, the steering angle sensor may need to be re-calibrated to prevent false Stabilitrak activations and related codes.
Wiring & Ground Locations
- G218 — Under the driver's side dash, on the A-pillar, often near or behind the dash speaker.. This is the primary ground for the Body Control Module (BCM). A factory defect often leaves dash insulation trapped under the ground eyelet, causing high resistance and triggering C0800 and numerous other electrical faults.
- X183 / X133 — The main 2-way power and ground connector for the electric power steering rack.. A loose connection at this main power feed for the steering rack can cause a loss of power steering and trigger related voltage and communication codes. Mentioned as a key inspection point in TSB PIT5405C.
- G103 — Frame ground location.. TSB 16-NA-161 identifies a loose or corroded G103 ground as a cause for intermittent no-start conditions and DTC P0513 (Incorrect Immobilizer Key), which is often seen alongside C0800 and other electrical fault codes.
Real Owner Repair Stories
- Reddit user 'bryberg' on r/Chevy (2016 Silverado 1500) — Dash goes black, steering locks up, 'Stabilitrak' message appears for a second, then everything returns to normal.
❌ Tried (didn't work) Owner suspected a recent dealership recall/software update was the cause.
✅ What actually fixed it The confirmed fix was replacing the negative battery cable due to high internal resistance. The diagnosing user cited TSB 18-NA-161 and the specific diagnostic test: measuring voltage drop across the cable while cranking, with anything over 200mV indicating a bad cable. - YouTube comment on 'G218 Ground Issue Fix' video (2014-2018 GM Truck (implied)) — Unspecified electrical issues, described as a 'biggest headache'.
❌ Tried (didn't work) Hours of online research trying to diagnose the ground issue.
✅ What actually fixed it Following the video's instructions to access and clean the G218 ground location completely fixed the truck's issues in 30 minutes.
"I Checked Everything" — The Actual Cause
- In one documented case on a similar GM vehicle (Chevy Malibu), the C0800 code persisted even after the main power and ground wires to the power steering rack tested good with a multimeter. However, live data on the scan tool showed the module itself was reporting less than 1 volt of power. The actual cause was an internal failure in the electric motor on the steering rack, which had to be replaced. This illustrates that a module can be faulty in a way that misleads traditional voltage testing at the connector.
OEM Part Supersession History
N/A→N/A— Part Number Correction
Heads up: The part number listed in the Pass 2 data, 84494554, is for the POSITIVE battery cable. The relevant TSB (18-NA-161) and multiple repair stories point to the NEGATIVE battery cable as the common failure point for high internal resistance. When ordering, ensure you are sourcing the NEGATIVE cable for this specific repair.
Model Year Variations Within This Range
- 2015: Certain 2015 models were subject to a specific safety recall (GM #14743 / NHTSA #14V719000) for a sudden loss of power steering assist. The official remedy was to replace the entire power steering assist motor kit, indicating a known hardware issue with some early-production units of the K2XX platform.
Helpful Videos


We Have This Part in Stock


The information in this article is provided for general reference and educational purposes only. Vehicle specifications, procedures, and part compatibility can vary by production date, trim level, and region. Always consult your vehicle's factory service manual and verify part numbers before purchasing or performing repairs. Safety-critical components such as airbags, seat belts, and braking systems should be installed by a qualified professional.
- Chevrolet SUBURBAN:
- 🧭 Diagnostic Flowchart
- 🎬 Helpful Videos
- 🛍️ Shop This Part
- What's Unique About the 2015-2017 Chevrolet SUBURBAN
- Symptoms You May Notice
- Most Likely Causes
- Rare But Worth Checking
- Diagnosis Steps
- Parts You'll Likely Need
- Related Codes That Often Appear With This One
- Technical Service Bulletins (TSBs) & Recalls
- Platform-Specific Known Issues
- Mechanic-Grade Diagnostic Values
- Hidden / Shadow Codes Worth Checking
- Scan Tool Commands That Help
- Wiring & Ground Locations
- Real Owner Repair Stories
- "I Checked Everything" — The Actual Cause
- OEM Part Supersession History
- Model Year Variations Within This Range
- 🎟️ Get 5% Off