
OBD-II Code C1009: Brake Fluid Level Low - The Ultimate 2026 Guide
What C1009 means, why it triggers, and how to fix it for good
- Check brake fluid and pad thickness (under 4mm) first, as normal pad wear drawing fluid into the calipers is the #1 cause of this code.
- If the fluid reservoir is full, test the sensor and wiring; a failed float switch or corroded connector is the most likely electrical culprit.
- On Dodge, Ram, and Jeep vehicles, aftermarket master cylinders trigger false C1009 codes due to a 10kΩ sensor resistance instead of the required 1kΩ OEM spec.
- Never drive normally with an active C1009; it disables your ABS and stability control, increasing stopping distances by up to 30% in emergencies.
What Does C1009 Mean?

C1009 indicates the Powertrain Control Module (PCM) or Anti-lock Brake System (ABS) module detects brake fluid in the master cylinder reservoir is below the minimum safe level. The system monitors fluid via a float sensor. This code sets when the sensor sends an out-of-range signal, indicating genuine fluid loss or an electrical fault in the monitoring circuit.
Technical definition: The SAE/ISO definition for C1009 is "Brake Fluid Level Low". The ABS module or Totally Integrated Power Module (TIPM) triggers this when the brake fluid level sensor circuit voltage drops below a specified threshold. On Ram trucks, the code sets if circuit voltage drops below 0.10 volts, indicating a short to ground or sensor failure.
Can I Drive With C1009?
Yes, But With Caution. Yes, but it is strongly discouraged. Driving with this code means your vehicle's primary safety system is compromised. You may have a hydraulic leak, which causes a sudden and complete loss of braking ability. At a minimum, your Anti-lock Braking (ABS) and Traction/Stability Control systems are disabled, increasing stopping distances and the risk of a skid. Inspect the vehicle immediately to prevent brake failure.
Common Causes

- Low Brake Fluid Level due to Pad Wear (Very Common) — As brake pads wear down, caliper pistons extend further to apply the brakes. This draws more fluid from the master cylinder reservoir to fill the space behind the pistons, causing the overall fluid level to drop and trigger the sensor.
- Brake Fluid Leak (Very Common) — A leak in the master cylinder, brake lines, hoses, calipers, or wheel cylinders causes a rapid and dangerous drop in fluid level. This is a critical safety issue requiring immediate repair.
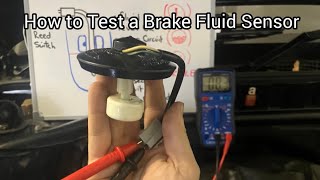
- Faulty Brake Fluid Level Sensor (Common) — The float switch inside the reservoir fails over time. It becomes saturated and sinks, gets stuck in the 'low' position, or develops an internal electrical fault, sending a false signal even when fluid is full. 🎬 Watch: How to test your brake fluid level sensor.
- Incorrect Aftermarket Master Cylinder / Sensor (Dodge/Ram/Jeep) (Common) — Many aftermarket master cylinders for Chrysler-family vehicles use a level sensor with an internal resistance of 10,000 ohms (10kΩ). The factory specification is 1,000 ohms (1kΩ). The ABS module sees this incorrect resistance and sets a false C1009 code.
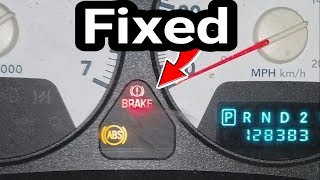
- Damaged Wiring, Connectors, or Ground (Less Common) — Sensor wires fray, corrode, or short to ground. The connector plug accumulates moisture, or the main ground wire on the fender wall 🎬 See how to fix ABS and traction lights for C1009. (common on Dodge Rams) corrodes, causing high resistance and a false code.
- Worn Brake Pad Wear Sensor (BMW/European) (Less Common) — Many European vehicles use a separate brake pad wear sensor. When this circuit breaks due to pad wear, generic OBD-II scanners sometimes misinterpret the specific manufacturer signal as a general C1009 fault.
- Faulty Control Module or Software (Rare) — The ABS, TIPM, or ETACS module fails internally, or a software glitch triggers a false code. For example, Ford TSB SSM 50211 notes some 2021 F-150s set a C1009 due to a power running board software error, not a brake issue.
Symptoms

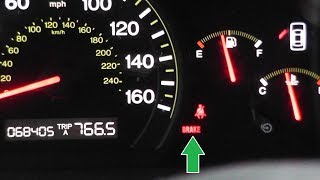
- Red BRAKE Warning Light On — The primary indicator of a base hydraulic system fault requiring immediate attention.
- ABS and Traction/Stability Control Lights On — The ABS module disables itself and related stability systems as a precaution when a critical base brake fault occurs.
- Spongy, Soft, or Low Brake Pedal — If a fluid leak introduces air into the brake lines, the pedal feels soft and travels further to the floor before engaging.
- Visible Brake Fluid Leak — Puddles of clear to brownish, slightly oily fluid under the wheels, frame, or master cylinder.
Diagnostic Flowchart
Tap your situation to follow the diagnostic path that matches what you're seeing on this code.
Common Fixes & Costs
- Top-Off Brake Fluid and Replace Brake Pads/Rotors — Parts: $150-$400 per axle, Labor: $150-$300 per axle, ~1.5 hr book time (Intermediate)
- Replace Brake Fluid Level Sensor or Reservoir — Parts: $25-$100, Labor: $75-$150, ~0.8 hr book time (DIY)
- Replace Master Cylinder Assembly
— Parts: $150-$500, Labor: $200-$450, ~2.5 hr book time
(Professional)
2008 Dodge Ram 1500: OEM {'brand': 'Mopar', 'part_number': '68000908AB'} (Alt: {"brand": "Dorman", "part_number": "M630498", "price_comparison": "Lower"})
2006 Dodge Dakota: OEM {'brand': 'Mopar', 'part_number': '5102294AA'} (Alt: {"brand": "Dorman", "part_number": "M630025", "price_comparison": "Lower"}) - Repair Damaged Wiring or Ground Connection — Parts: $5-$50, Labor: $150-$500, ~2.5 hr book time (Professional)
- Replace/Update ABS Control Module — Parts: $300-$800, Labor: $150-$350, ~1.5 hr book time (Professional)
DIY vs Professional
- Top-Off Brake Fluid and Replace Brake Pads/Rotors 🟢 Beginner
Tools: ['Jack and Jack Stands', 'Lug Wrench', 'Socket/Wrench Set', 'Caliper Piston Compressor Tool', 'Brake Grease', 'Torque Wrench'] - Replace Brake Fluid Level Sensor or Reservoir 🟢 Beginner
Tools: ['Socket/Wrench Set', 'Turkey Baster or Fluid Siphon', 'Shop Towels'] - Replace Master Cylinder Assembly 🟢 Beginner
Tools: ['Flare-Nut Wrenches', 'Brake Fluid Bleeder Kit', 'Bench Vise', 'New Brake Fluid', 'Torque Wrench'] - Repair Damaged Wiring or Ground Connection 🟢 Beginner
Tools: ['Multimeter', 'Wire Strippers/Cutters', 'Soldering Iron', 'Heat Shrink Tubing', 'Wiring Diagram'] - Replace/Update ABS Control Module 🟢 Beginner
Tools: ['Dealer-Level Scan Tool']
Used vs. New Parts: Buying Guide
When a used part is worth it: Buying a used master cylinder is highly discouraged due to unknown internal seal conditions. A used OEM sensor from a junkyard is a reasonable low-cost option to test a faulty circuit.
Donor-vehicle mileage cap: roughly under 20000 miles for the part to have meaningful remaining life.
Donor quality checklist:
- Verify donor vehicle had low mileage and was scrapped for a non-braking reason.
- Avoid parts from flood vehicles or the rust belt.
- For Chrysler/Dodge/Jeep, ensure the sensor is the correct OEM style (1kΩ resistance).
Decision logic:
- If Part is a master cylinder for any daily-driven vehicle → Buy new OEM or high-quality aftermarket. The safety risk is too high for a used part.
- If Vehicle is a Dodge/Ram/Jeep with a C1009 → Buy a new OEM (Mopar) master cylinder to avoid false codes from aftermarket parts.
- If Part is just the sensor and can be separated → A used OEM sensor is acceptable for testing purposes.
Warranty tradeoff: Used parts offer a 30-90 day warranty covering only the part. New aftermarket parts offer 1-year to lifetime warranties. New OEM parts offer a 1-2 year warranty.
Worst-case if a used part fails: $400-$950 if a used master cylinder fails, requiring repeat labor and a new part.
What Happens If You Wait — Timeline
- Immediate: Red BRAKE, ABS, and Traction Control lights illuminate. ABS and stability control are disabled. (Added cost: $0)
- Days to Weeks (if a slow leak is present): The brake pedal feels soft or spongy as air enters the system. Fluid level continues to drop. (Added cost: $0 - $50)
- Weeks to Months (if leak is ignored): A persistent leak drains the master cylinder, allowing air into the ABS module. A rusted brake line bursts under pressure. (Added cost: $500 - $2500)
- Long-Term: Catastrophic brake failure occurs, leading to a collision. (Added cost: $5000 - $1000000)
Cost of Not Fixing It
- Immediate (Days): ABS and stability control are disabled, increasing stopping distances and risk of a skid. If a leak is present, the brake pedal feels spongy. (Added cost: $0)
- Weeks to Months: Continued driving with a leak introduces air into the hydraulic system, damaging master cylinder seals and leading to a sudden brake line burst. (Added cost: $350 - $2500)
- Long-Term: Catastrophic brake failure leading to a collision, resulting in vehicle replacement, liability, and increased insurance premiums. (Added cost: $5000 - $1000000)
Diagnosis Steps
- Visual Inspection of Fluid and Pads
Locate the brake fluid reservoir and check the level against the 'MIN' and 'MAX' marks. If low, inspect your brake pads. Thin pads (less than 4mm) are the most likely cause. Do not add fluid without checking pad thickness first.
Tools: Flashlight (Beginner) - Inspect for Leaks
If the fluid is low but pads are thick, you have a leak. Inspect the master cylinder, brake line fittings, flexible rubber hoses, and calipers for wetness or fresh fluid stains.
Tools: Flashlight, Jack and Jack Stands (Beginner) - Check the Sensor Connector and Wiring
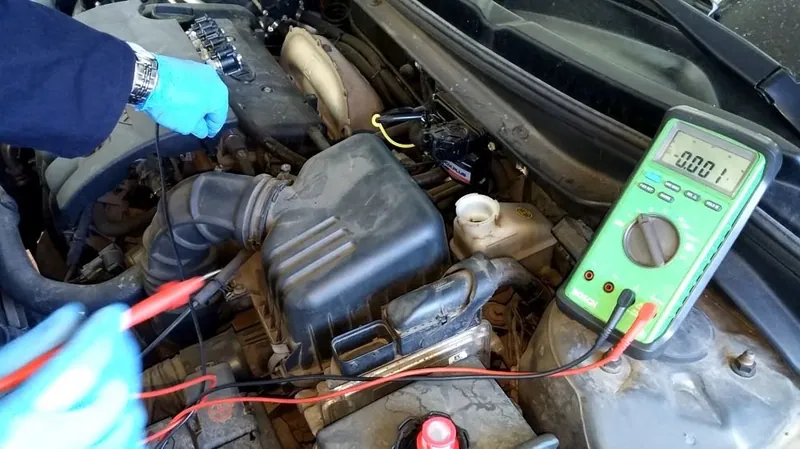
If the fluid level is full, the problem is electrical. Unplug the brake fluid level sensor. Inspect pins for green corrosion or moisture. Perform a 'wiggle test' on the harness with the ignition on to see if the brake light flickers.
Tools: Flashlight (Beginner) - Test the Sensor's Resistance
With the sensor unplugged, measure resistance across its pins. A standard float switch reads open (O.L.) when full and near-zero ohms when low. A Dodge/Ram OEM sensor reads exactly 1,000 ohms. If it reads 10,000 ohms, it is the incorrect aftermarket part.
Tools: Multimeter (Intermediate) - Pro Tip: The Resistor Test (Dodge/Ram/Jeep)
If you have a C1009 after replacing the master cylinder, insert a 1,000 ohm (1kΩ) 1/4 watt resistor into the wiring harness connector terminals. Turn the key on. If the brake light goes out, the new sensor has the wrong resistance.
Tools: 1kΩ Resistor (Intermediate) - Test the Sensor Circuit Voltage
With the sensor unplugged and ignition on, test the harness connector. One terminal is ground (< 0.1 ohms to chassis). The signal wire should have a 5-volt reference voltage. If you have 0 volts, suspect a broken wire or bad ABS module.
Tools: Multimeter (Intermediate) - Check for a Short to Ground
C1009 indicates 'low' circuit voltage, often meaning the signal wire is shorted to ground. Disconnect the sensor and ABS module. Measure resistance between the signal wire terminal and chassis ground. It should be infinite (O.L.). A low reading means the wire is shorted.
Tools: Multimeter, Vehicle Wiring Diagram (Advanced) - Scan Tool Live Data Analysis
Use a bi-directional scanner to view ABS live data. Locate the 'Brake Fluid Level Switch Signal' PID. Voltage should be stable. Disconnecting the sensor should cause voltage to jump to 5V. If it stays near 0V, a short to ground exists.
Tools: Bi-directional OBD-II Scanner (Advanced)
When This Code Triggers (Freeze-Frame Conditions)
- Ignition Status: ON (The code sets with the key on, engine running or not, as the ABS module is powered.)
- Brake Fluid Circuit Voltage: < 0.5V (On Chrysler products, the code sets when voltage drops below 0.10V, indicating a short or failed sensor.)
- System Voltage: 11.5V - 14.8V (Code sets during normal battery voltage; a separate low voltage code (P0562) triggers false C1009s.)
Related Codes
- C1008 — Means 'Brake Fluid Level Circuit High'. C1009 (Low Voltage) points to a short to ground, while C1008 (High Voltage) indicates an open circuit or unplugged sensor.
- C121C — Means 'Torque Request Signal Denied'. The ABS module sets C1009, distrusts the brake system, and denies PCM torque requests as a safety measure. Fix C1009 first.
- P0562 — Means 'System Voltage Low'. Diagnose the battery or alternator first, as low system voltage causes modules to generate false codes.
- U0121 — Means 'Lost Communication With ABS Module'. Indicates a network failure or dead ABS module that must be diagnosed before addressing C1009.
Climate & Environmental Factors
- High Humidity / Road Salt (Rust Belt): Salt and moisture accelerate the corrosion of steel brake lines, leading to fluid leaks. They also corrode electrical connectors and chassis ground points, triggering false electrical codes.
How to Talk to a Mechanic About This Code
Say this: "I have a C1009 code and the red BRAKE and ABS lights are on. My brake fluid level is full. I'd like a diagnostic to determine if this is a sensor, wiring, or module issue. Please check the fluid level sensor circuit before replacing any parts."
This signals you know the fluid level is full and the problem is electrical. It focuses the technician on proper diagnosis rather than immediately suggesting an expensive master cylinder or ABS module.
Avoid saying:
- 'My brake light is on, can you look at it?' (Invites a full, expensive brake system upsell).
- 'Just fix whatever is wrong.' (Gives the shop a blank check).
- 'I think I need a new ABS module.' (Never suggest the most expensive fix first).
Questions to ask before authorizing the repair:
- What was the result of the visual inspection? Was the fluid low or were the pads worn?
- If the fluid was full, what diagnostic steps did you take to test the sensor and the wiring?
- Can you show me the faulty part or a picture of the corrosion?
- If recommending a master cylinder replacement, are you using an OEM part to avoid resistance issues?
- Is there a warranty on the parts and labor for this repair?
Where to Take It: Dealer vs Independent vs Chain
- Dealer:
Recommended for known software quirks on Ford or Jeep, or warranty work.
Best for: Vehicles under warranty., Known manufacturer-specific quirks (e.g., Ford F-150 running board or Jeep Renegade power steering issue)., Complex electrical diagnostics requiring factory scan tools.
Downsides: Significantly higher labor rates., Defaults to replacing entire assemblies rather than individual sensors. (Typical cost: +50% vs. baseline) - Independent Shop:
Best fit for most C1009 scenarios. An experienced diagnostician handles leaks, wiring, and sensor issues effectively.
Best for: Out-of-warranty vehicles., Common C1009 causes like leaks, pad wear, or sensor replacement., Shops specializing in your vehicle's brand.
Downsides: Quality varies widely; vet shops based on ASE certifications., Lacks specific software to diagnose non-brake related C1009 quirks on Fords/Jeeps. (Typical cost: +0% vs. baseline) - Chain Shop:
Acceptable for simple brake pad replacement ONLY. Avoid for diagnosing an unknown C1009.
Best for: Simple fixes like replacing worn brake pads and rotors if confirmed as the cause.
Downsides: High pressure to upsell unnecessary services., Technicians lack equipment for complex electrical diagnosis., Likely to misdiagnose the Dodge/Ram aftermarket sensor issue. (Typical cost: -10% vs. baseline)
When to Walk Away From the Repair
If the estimated repair cost for the C1009 fault exceeds 50% of your car's current private-party value, consider selling or trading in the vehicle.
- Car worth $3000, fix is $1800: Walk away. A repair costing over half the car's value for a critical safety system is a poor investment.
- Car worth $15000, fix is $950: Fix it. This repair is well below the threshold and restores a critical safety function.
- Car worth $5000, fix is $400: Fix it. A $400 repair for a sensor or minor leak keeps a functional vehicle safe.
What Scan Tool You Need for This Code
Minimum: A scanner that reads and clears Chassis ('C') codes from the ABS module. Basic engine-only readers will not see C1009.
Basic $20 readers cannot access the ABS module. You need a tool that reads ABS/SRS codes and displays live data to check sensor circuit voltage.
Budget: BlueDriver Pro or Foxwell NT301 (~$70) — Reads and clears ABS codes. BlueDriver displays live data on your phone, essential for diagnosing electrical problems.
Mid-range: Innova 5610 or Autel MaxiCOM MK808S (~$350) — Provides full bidirectional control to command the ABS module and watch live data response, confirming wiring and module functionality.
Professional: Autel MaxiCOM MK900BT or XTOOL D7 (~$500) — Offers bidirectional controls, advanced graphing, and access to manufacturer-specific codes to identify Ford and Jeep/Fiat C1009 quirks.
Rent vs buy: Auto parts stores offer loaner tool programs. Renting a capable OBD-II scanner for free is the most cost-effective option for a one-time diagnosis.
How to Clear the Code After You Fix It
- Perform the physical repair (e.g., replace sensor, fix leak, install correct master cylinder).
- Use an OBD-II scan tool capable of reading ABS codes to clear the fault from the ABS module.
- Turn the ignition off and then back on to confirm the warning lights have extinguished.
Drive cycle (~20 minutes): A specific drive cycle is not required; the light extinguishes upon repair and code clear. To reset emissions monitors, perform a cycle including a cold start, 5 minutes idle, 10 minutes city driving, and 5 minutes highway driving.
Readiness monitors affected: This code does not affect emissions readiness monitors.
Before emissions retest: drive at least 50 miles to fully set monitors.
Watch out for:
- Disconnecting the battery will not fix the problem; the code returns instantly if the fault persists.
- Basic code readers cannot clear 'C' (chassis) codes from the ABS module.
- The code reappears immediately if an incorrect aftermarket sensor is installed on a Dodge/Ram.
Will This Fail Emissions / State Inspection?
No — by itself this code doesn't fail OBD inspection (but it can keep readiness monitors from setting, which causes a separate fail).
- California: Causes immediate failure of the safety inspection. An illuminated red brake warning light is an automatic fail.
- New York: An illuminated red 'BRAKE' warning light is a cause for safety inspection failure.
- Texas: Automatically fails the safety portion of the inspection if the red brake warning light is on.
Most Commonly Affected Vehicles
- Dodge Ram 1500/2500/3500 (2002-2009) — Prone to false codes from incorrect aftermarket master cylinder sensors (10kΩ vs 1kΩ OEM), bad fender grounds, and failed sensors.
- Dodge Dakota (2005-2008) — Frequently experiences persistent C1009 codes after master cylinder replacement due to aftermarket sensors having the wrong 10kΩ resistance.
- Dodge Durango (2004-2007) — Shares the problematic brake hydraulic and electrical systems with the Ram and Dakota.
- Jeep Renegade, Compass (2013-2018) — C1009 often indicates an internal software fault in the Electric Power Steering (EPS) module, completely unrelated to the brakes.
- Mitsubishi Lancer, Outlander (2008-2015) — A CAN bus communication network error between the ETACS-ECU and ASC-ECU frequently logs a false C1009.
- Ford F-150 (2021-2021) — Per Ford SSM 50211, C1009 is set by the Driver Seat Module (DSM) due to a software issue with Power Running Boards, not a brake fault.
- BMW 1-Series, 3-Series, X3 (2004-2024) — Brake warnings are frequently caused by a worn two-stage brake pad wear sensor, which generic scanners misinterpret as C1009.
- Hyundai / Kia Elantra, Sorento (2010-2024) — Water intrusion into rear wheel hub assemblies damages ABS wheel speed sensor wiring, leading to generic ABS codes.
Manufacturer-Specific Notes
- Dodge / Ram / Chrysler / Jeep: Aftermarket master cylinders come with a sensor that has a 10kΩ resistance instead of the 1kΩ OEM spec, guaranteeing a false C1009 code. Use a Mopar part or wire a 1kΩ resistor into the harness.
- Ford: On 2021 F-150s, C1009 is a false code related to Power Running Boards (SSM 50211). A Ford-specific scanner is crucial for correct diagnosis.
- Fiat / Jeep: On the Jeep Renegade and Fiat 500X, C1009 is an internal software error within the Electric Power Steering (EPS) module. The fix is a dealer software update (TSB S1808000012).
- Mitsubishi: Factory manuals state CAN bus diagnostics must be performed before troubleshooting C1009, as communication line failures cause false codes.
Real Owner Stories
2008 Dodge Dakota with 188k miles
Red BRAKE and yellow ABS lights came on immediately after replacing the master cylinder. Brake fluid level was full.
What they tried:
- Replaced the master cylinder a second time.
- Replaced the ABS module and TIPM.
- Tested the new aftermarket sensor and found it had ~10,000 ohm resistance.
Outcome: The owner plugged a 1,000 ohm (1kΩ) resistor into the sensor's wiring harness connector, immediately clearing the lights. The aftermarket master cylinder came with the wrong sensor.
Lesson: On Dodge/Ram/Jeep vehicles, if C1009 appears after a master cylinder replacement, the cause is an incorrect aftermarket sensor. Use the 1kΩ resistor test to confirm before replacing expensive modules.
2007 Dodge Ram 2500
Intermittent BRAKE and ABS lights. Fluid level was full. Code C1009 present.
What they tried:
- Replaced front brake pads.
- Replaced the brake fluid reservoir.
- Checked ground wires.
Outcome: The fix was inserting a 1,000 ohm resistor into the sensor connector, turning off the lights and indicating the original sensor had failed.
Lesson: A failed sensor is the root cause when fluid is full. Tapping on the reservoir to see if the light flickers points to a faulty float sensor.
2021 Ford F-150
ABS light on, no noticeable brake problems. Advanced scan revealed code C1009:93.
What they tried:
- A basic OBD-II reader showed no codes.
- Used an advanced scanner capable of reading module-specific codes.
Outcome: The C1009 code was related to the Power Running Boards (PRB), not the brake system, per Ford Service Bulletin SSM 50211.
Lesson: On modern Fords, C1009 is not always a brake fault. A manufacturer-specific scan is essential to avoid chasing the wrong problem.
2015 Jeep Renegade
Power steering warning light on and steering became difficult. Scan showed code C1009 in the Electric Power Steering (EPS) module.
What they tried:
- Technicians suspected a hardware failure in the steering column.
Outcome: The issue was a known software glitch within the EPS module. The fix was a dealer software update via the CAN bus.
Lesson: On Fiat/Chrysler platforms, C1009 is often a software issue in the power steering system. Investigate software updates before replacing steering components.
How to Prevent This Code From Triggering
- Flush and replace brake fluid (Every 2-3 years or 30,000 miles) — Brake fluid absorbs moisture. Old fluid lowers the boiling point and causes internal corrosion of brake lines, calipers, and the ABS module.
- Perform regular brake system inspections (Every 6-12 months or with every oil change) — Visually inspecting for fluid leaks catches small issues before catastrophic failure and provides an opportunity to check pad thickness.
- Wash the vehicle's undercarriage regularly (Seasonally, especially after winter in 'Rust Belt' areas) — Washing away road salt prevents accelerated corrosion of steel brake lines and electrical ground points.
- Use high-quality OEM parts (During any brake system repair) — Using OEM (Mopar) parts prevents the resistance mismatch that triggers false C1009 codes on Chrysler products.
Frequently Asked Questions
My brake fluid is full, but the C1009 code and brake light are on. What's the problem?
This indicates an electrical issue. The most likely causes are a failed brake fluid level sensor, a corroded connector, or damaged wiring. On Dodge, Ram, and Jeep vehicles, an incorrect aftermarket sensor installed during a master cylinder replacement is the top culprit.
I just replaced the master cylinder and now the light is on. What did I do wrong?
You likely installed an aftermarket master cylinder with the wrong sensor resistance. Dodge, Ram, and Jeep vehicles require a 1kΩ sensor, but many aftermarket parts use a 10kΩ sensor. Replace it with a genuine Mopar part or test the circuit using a 1kΩ resistor.
Can I just bypass the brake fluid level sensor?
Bypassing the sensor disables a critical safety warning system and is highly discouraged. You will not be alerted if your brake fluid runs dangerously low due to a leak. This leads directly to catastrophic brake failure.
What is the difference between the red 'BRAKE' light and the yellow 'ABS' light?
The red 'BRAKE' light indicates a serious base hydraulic system failure, like low fluid or an engaged parking brake. The yellow 'ABS' light signals a fault in the anti-lock braking system. Code C1009 triggers the red light, which forces the ABS computer to disable itself and illuminate the yellow light.
I replaced the sensor but the code came back. What did I miss?
You likely missed worn brake pads, a short to ground in the wiring, or a bad ground connection. On Dodge/Ram vehicles, replacing an incorrect aftermarket sensor with another incorrect aftermarket sensor is a common mistake. Always verify the new part's resistance matches the OEM specification.
Is the brake fluid level sensor hard to replace?
Replacement difficulty depends entirely on the vehicle model. On older cars, the sensor easily twists or unclips from the reservoir. On many modern vehicles, the sensor is permanently integrated into the reservoir or master cylinder, requiring a full assembly replacement and system bleed.
Will a C1009 code cause my car to fail an inspection?
It does not affect an emissions test. However, it causes an immediate failure of any state safety inspection. An illuminated red BRAKE warning light is universally considered a critical safety hazard.
Key Takeaways
- Check brake fluid and pad thickness (under 4mm) first, as normal pad wear drawing fluid into the calipers is the #1 cause of this code.
- If the fluid reservoir is full, test the sensor and wiring; a failed float switch or corroded connector is the most likely electrical culprit.
- On Dodge, Ram, and Jeep vehicles, aftermarket master cylinders trigger false C1009 codes due to a 10kΩ sensor resistance instead of the required 1kΩ OEM spec.
- Never drive normally with an active C1009; it disables your ABS and stability control, increasing stopping distances by up to 30% in emergencies.
Helpful Videos
Shop the Parts Behind C1009
Below are the parts most often responsible for code C1009, ranked by how frequently each one is the actual culprit (per the diagnosis above). Tap any to see what we have for your vehicle.


The information in this article is provided for general reference and educational purposes only. Vehicle specifications, procedures, and part compatibility can vary by production date, trim level, and region. Always consult your vehicle's factory service manual and verify part numbers before purchasing or performing repairs. Safety-critical components such as airbags, seat belts, and braking systems should be installed by a qualified professional.
- 🧭 Diagnostic Flowchart
- 🎬 Helpful Videos
- 🛍️ Shop This Part
- What Does C1009 Mean?
- Can I Drive With C1009?
- Common Causes
- Symptoms
- Common Fixes & Costs
- DIY vs Professional
- Used vs. New Parts: Buying Guide
- What Happens If You Wait — Timeline
- Cost of Not Fixing It
- Diagnosis Steps
- When This Code Triggers (Freeze-Frame Conditions)
- Related Codes
- Climate & Environmental Factors
- How to Talk to a Mechanic About This Code
- Where to Take It: Dealer vs Independent vs Chain
- When to Walk Away From the Repair
- What Scan Tool You Need for This Code
- How to Clear the Code After You Fix It
- Will This Fail Emissions / State Inspection?
- Most Commonly Affected Vehicles
- Manufacturer-Specific Notes
- Real Owner Stories
- 2008 Dodge Dakota with 188k miles
- 2007 Dodge Ram 2500
- 2021 Ford F-150
- 2015 Jeep Renegade
- How to Prevent This Code From Triggering
- Frequently Asked Questions
- My brake fluid is full, but the C1009 code and brake light are on. What's the problem?
- I just replaced the master cylinder and now the light is on. What did I do wrong?
- Can I just bypass the brake fluid level sensor?
- What is the difference between the red 'BRAKE' light and the yellow 'ABS' light?
- I replaced the sensor but the code came back. What did I miss?
- Is the brake fluid level sensor hard to replace?
- Will a C1009 code cause my car to fail an inspection?
- Key Takeaways
- 🎟️ Get 5% Off