
OBD-II Code C1050: Left Front Wheel Speed Sensor Circuit Fault
What C1050 means, why it triggers, and how to fix it
- Code C1050 indicates a left front wheel speed sensor circuit failure, immediately disabling your ABS, traction control, and stability control.
- Over 80% of C1050 codes stem from three accessible issues: a dead sensor, a corroded wiring pigtail, or a cracked tone ring.
- Your primary hydraulic brakes remain fully functional, but stopping distances on loose or slippery surfaces increase by up to 25% without ABS.
- Never replace the sensor without first checking the wheel bearing for play; a wobbling hub creates an erratic signal that mimics a dead sensor.
What Does C1050 Mean?
Code C1050 means your car's computer detects a problem with the electrical circuit for the left front wheel speed sensor. This sensor tells the computer how fast that wheel turns. When the computer loses this signal, it shuts down the ABS and traction control systems for safety and illuminates the dashboard warning lights.
Technical definition: The Anti-Lock Brake System (ABS) module detects an open circuit, short circuit, or abnormal signal from the left front wheel speed sensor.
Can I Drive With C1050?
Yes, But With Caution. Yes, you can still drive the vehicle, but do so with caution. Your main hydraulic brakes function normally, but the Anti-lock Braking System (ABS), traction control, and stability control are disabled. This means your wheels lock up during a panic stop, increasing the risk of losing steering control on wet or slippery surfaces. Stopping distance without ABS increases by over 25% on loose gravel. If a failing wheel bearing causes the fault, continued driving leads to catastrophic bearing failure.
Common Causes
- Damaged or Corroded Wiring (Very Common) — The sensor's wiring is exposed to road salt, water, and debris, causing it to break, chafe, or corrode. This is the most frequent reason for a C1050 code.
- Failed Wheel Speed Sensor (Very Common) — The sensor fails internally from age, heat, or vibration. It is a solid-state electronic part that eventually wears out.
- Worn or Loose Wheel Bearing/Hub (Common) — A bad wheel bearing allows the hub to wobble. This wobble constantly changes the distance (air gap) between the sensor and the tone ring, creating an unreliable signal. This is a notorious issue on early Chevy Silverados and Ford F-150s. 🎬 See how to replace the front wheel hub on a Silverado.
- Damaged or Dirty Tone Ring (Common) — The sensor reads a notched tone ring on the wheel hub or axle. If this ring cracks, loses teeth, or accumulates heavy rust, the sensor loses its signal. A hairline crack you cannot see is often felt by hand.
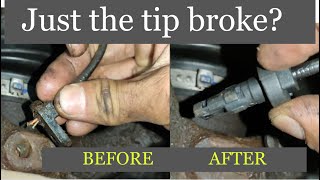
- Rust Buildup Under Sensor Mounting Surface (Common) — Common on Honda and GM vehicles, 🎬 Watch: How to handle a rusted or stuck Honda ABS sensor. rust forms on the steering knuckle directly under the sensor. This 'rust jacking' lifts the sensor, increasing the air gap to the tone ring and weakening the signal.
- Incorrect Wheel Bearing Installation (Less Common) — If a wheel bearing was recently replaced, it was likely installed backwards. Modern bearings feature a magnetic encoder on one side that must face the sensor.
- Faulty ABS Control Module (Rare) — The sensor and wiring are intact, but the ABS computer itself fails to process the signal. This is the least common and most expensive cause.
Symptoms
- ABS Warning Light On — The most common and immediate sign on your dashboard.
- Traction or Stability Control Light On — These systems rely on wheel speed sensors and disable themselves simultaneously with the ABS.
- Brake Pulsation at Low Speeds — The ABS incorrectly activates when coming to a slow stop, causing a grinding feeling in the brake pedal. This points directly to a cracked tone ring, a bad wheel bearing, or excessive rust buildup.
- Wheels Lock Up During Hard Braking — Without ABS, your wheels lock and skid during a panic stop.
- Erratic Speedometer or Cruise Control Failure — On some vehicles, the left front sensor data drives the speedometer or cruise control. A fault causes the speedometer to bounce or the cruise control to disengage.
Diagnostic Flowchart
Tap your situation to follow the diagnostic path that matches what you're seeing on this code.
Common Fixes & Costs
- Replace the Wheel Speed Sensor — Parts: $40-$150, Labor: $100-$200, ~1 hr book time (DIY)
- Repair Damaged Wiring or Connector — Parts: $20-$50, Labor: $100-$200, ~1.5 hr book time (Intermediate)
- Clean Tone Ring and Sensor Mounting Surface — Parts: $10, Labor: $100-$150, ~0.8 hr book time (DIY)
- Replace Wheel Hub Bearing Assembly — Parts: $150-$450, Labor: $200-$400, ~2 hr book time (Intermediate)
- Replace the ABS Control Module — Parts: $600-$1500, Labor: $150-$350, ~2.5 hr book time (Professional)
DIY vs Professional
- Replace the Wheel Speed Sensor — Beginner:
- Repair Damaged Wiring or Connector — Beginner:
- Clean Tone Ring and Sensor Mounting Surface — Beginner:
- Replace Wheel Hub Bearing Assembly — Beginner:
Used vs. New Parts: Buying Guide
When a used part is worth it: For a simple bolt-in wheel speed sensor, buy new. For a complete wheel hub assembly, a used OEM part from a low-mileage vehicle is a cost-effective alternative to cheap aftermarket parts.
Donor-vehicle mileage cap: roughly under 60000 miles for the part to have meaningful remaining life.
Donor quality checklist:
- Verify the donor vehicle was not scrapped due to a collision involving that specific wheel.
- Inspect the part for corrosion, damaged wiring pigtails, or roughness when turning the bearing by hand.
- Match the part number exactly; different trim levels use incompatible sensors.
Decision logic:
- If The part is a simple bolt-in sensor → Buy new. The savings from a used part are minimal and not worth the risk of premature failure.
- If The part is a complete wheel hub assembly and the vehicle is over 100K miles → A new, quality aftermarket assembly (Timken, MOOG, SKF) is the best choice for longevity.
- If The part is an expensive ABS control module → A professionally rebuilt or used module is a viable option, provided it includes a warranty.
Warranty tradeoff: Used parts from a scrapyard offer a 30-90 day warranty. Aftermarket new parts include a 1-year to limited lifetime warranty. New OEM parts offer a 1-2 year warranty.
Worst-case if a used part fails: 200-500 if a used hub assembly fails prematurely, requiring repeat labor and a new part.
What Happens If You Wait — Timeline
- 0-1 month (Sensor/Wiring Fault): Code sets, ABS/Traction Control lights illuminate. No other symptoms. The cause is an electrical fault. (MPG impact: 0% · Added cost: 0)
- 0-2 months (Failing Bearing - Early Stage): If caused by a bad bearing, a faint humming noise begins at highway speeds. The ABS light is intermittent. (MPG impact: 0-2% · Added cost: 0-50)
- 2-6 months (Failing Bearing - Mid Stage): Bearing noise becomes a distinct grinding that changes when turning. Steering feels loose. Uneven tire wear begins. (MPG impact: 2-5% · Added cost: 150-450)
- Potentially immediate after Stage 3 (Failing Bearing - Late Stage): Extreme heat causes the bearing to seize or break apart. The wheel wobbles violently or detaches, causing a complete loss of control. (MPG impact: 0% · Added cost: 1000-4000)
Cost of Not Fixing It
- Immediate: Loss of ABS, traction control, and stability control. Increased risk of skidding and loss of control during emergency braking or on slippery surfaces. (Added cost: 0)
- 1-6 months: If caused by a bad wheel bearing, continued driving leads to increased noise, vibration, and uneven tire wear, requiring premature tire replacement. (Added cost: 150-300)
- 6+ months: A completely failed wheel bearing damages the wheel hub, steering knuckle, or axle. The wheel can seize or detach, leading to a catastrophic accident. (Added cost: 1000-4000)
Diagnosis Steps
- Confirm the Code with a Scanner
Use an OBD-II scanner capable of reading Chassis ('C') codes to verify C1050. Note any other stored codes, especially communication (U) codes, which take priority.
Tools: OBD-II Scanner (ABS/Chassis capable) (Beginner) - Visually Inspect the Sensor and Wiring
Follow the wire from the back of the left front wheel hub up into the engine bay. Look for obvious breaks, melting, or green/white corrosion on the wire and its connectors.
Tools: Flashlight, Jack and Jack Stands (Beginner) - Inspect the Wheel Bearing, Tone Ring, and Air Gap
Raise the vehicle safely. Grab the tire at 12 and 6 o'clock and push/pull to check for bearing play (wobble). Remove the wheel and inspect the tone ring for heavy rust, cracks, or missing teeth. Check the sensor's mounting surface for rust lifting it away from the ring.
Tools: Lug Wrench, Jack and Jack Stands, Wire Brush (Intermediate) - Monitor Live Data
Use an advanced scanner to view the live data stream from all four wheel speed sensors. Drive slowly (under 10 mph). The left front wheel reading will show zero, jump erratically, or differ significantly from the other three.
Tools: Advanced OBD-II Scanner with Live Data (Intermediate) - Pro Tip: Test Sensor Resistance (Passive Sensors Only)
For older 2-wire passive sensors, unplug the sensor and set a multimeter to Ohms (Ω). Measure resistance between the two sensor pins. A good sensor reads between 1500-2000 Ohms. An 'OL' (Open Loop) or zero reading confirms internal failure. Do not perform this on active sensors.
Tools: Digital Multimeter (Advanced) - Pro Tip: Test Sensor AC Voltage (Passive Sensors Only)
With the sensor unplugged, set a multimeter to AC Volts (mV AC). Connect leads to the sensor pins and spin the wheel by hand at half a revolution per second. A good passive sensor generates at least 250mV AC. No voltage indicates a failed sensor or tone ring issue.
Tools: Digital Multimeter (with mV AC) (Advanced) - Pro Tip: Test Sensor Voltage (Active Sensors)
For newer 2 or 3-wire active sensors, back-probe the connector with the key on. One wire carries a bias voltage from the ABS module (1.5V to 5V). The signal wire produces a DC square wave as the wheel spins. A multimeter shows toggling voltage, but an oscilloscope is definitive.
Tools: Digital Multimeter, Back-probe pins (Advanced) - Pro Tip: Analyze with an Oscilloscope
Connect an oscilloscope to the sensor's signal wire and ground. Spinning the wheel produces a clean, consistent square wave (active) or sine wave (passive). Gaps, dropouts, or a noisy pattern confirm a damaged tone ring or failing wheel bearing.
Tools: Oscilloscope (Professional) - Check the ABS Module
If the sensor, tone ring, and wiring test perfectly, the ABS control module has failed. This requires professional equipment to test for voltage and ground at the module connector.
Tools: Professional Scan Tool, Advanced Electrical Tools (Professional)
When This Code Triggers (Freeze-Frame Conditions)
- Vehicle Speed: 5-15 mph or 35-55 mph (Triggers at low speeds when a signal is expected but missing, or at cruising speeds where an erratic signal deviates from the other three wheels.)
- Brake Pedal Status: Off or On (Logs during normal driving if the signal drops out completely, or during braking if an erratic signal causes unwanted ABS activation.)
- Steering Angle: Near 0° (Straight) (Faults frequently log while driving straight, as the computer expects identical wheel speeds, making the faulty sensor's reading obvious.)
- System Voltage: 12.0-14.5V (Logs when the vehicle's electrical system is in its normal voltage range, proving the problem is isolated to the sensor circuit.)
Related Codes
- C1045 — The equivalent code for the 'Right Front Wheel Speed Sensor Circuit'. Seeing both indicates a shared wiring problem or a failed ABS module.
- C1234 — A Ford-specific code for 'Wheel Speed Mismatch'. This confirms C1050, as the module explicitly sees the left front wheel speed deviating from the others.
- U0121 — Means 'Lost Communication With ABS Control Module'. This network code takes priority. Fix the communication issue first, as a dead module triggers false sensor codes.
- C0035 — The generic SAE J2012 equivalent code for 'Left Front Wheel Speed Sensor Circuit'. The diagnostic process is identical.
Climate & Environmental Factors
- Road Salt / De-icing Agents: Saltwater corrodes the copper wiring and pins in the sensor's electrical connector, causing high resistance. It also accelerates rust buildup on the hub, causing 'rust jacking' that increases the sensor air gap.
- High Humidity / Water Submersion: Driving through deep puddles forces water past brittle connector seals, leading to intermittent faults or complete short circuits.
- Extreme Cold: Water trapped in cracked wiring insulation freezes and expands, breaking the wire or forcing the connection apart.
How to Talk to a Mechanic About This Code
Say this: "I have an ABS light on and my scanner shows a C1050 code for the left front wheel speed sensor circuit. I'd like to schedule a diagnostic to confirm the cause. Please check the sensor, wiring, tone ring, and wheel bearing before recommending a part replacement."
This signals that you expect a thorough diagnosis, not a quick parts swap. It directs them to check all failure points and prevents them from replacing the sensor without confirming it's the true cause.
Avoid saying:
- 'My ABS light is on, can you fix it?'
- 'Just replace the left front speed sensor.'
- 'Do whatever you think is best.'
Questions to ask before authorizing the repair:
- What was the specific point of failure? Did you see a broken wire, a cracked tone ring, or play in the wheel bearing?
- If you are recommending a sensor replacement, did you test the old sensor's output and check the wiring to the ABS module first?
- If you are recommending a wheel bearing replacement, how much play did you find in the wheel?
- Will you be cleaning the rust from the sensor mounting surface before installing the new part?
- What is the warranty on the recommended parts and the labor for this repair?
Where to Take It: Dealer vs Independent vs Chain
- Dealer:
Best for: Vehicles still under warranty., Complex cases involving manufacturer-specific quirks (e.g., Mercedes, BMW)., If the issue is suspected to be the ABS control module, requiring proprietary programming.
Downsides: Highest labor rates, often 1.5-2x more than an independent shop., Defaults to replacing entire assemblies (like a hub) when a smaller component is the cause. (Typical cost: +50% vs. baseline) - Independent Shop:
Best fit. C1050 is a bread-and-butter job for any competent independent mechanic. They diagnose sensors, wiring, and wheel bearings at a reasonable cost.
Best for: Out-of-warranty vehicles where cost is a factor., Diagnosing common codes like C1050, which have well-known fixes., Getting a second opinion on a costly dealer estimate.
Downsides: Quality and diagnostic skill vary widely; ASE-certified technicians are a must., May lack experience with brand-new models. (Typical cost: +0% vs. baseline) - Chain Shop:
Use with caution. Acceptable if you have already diagnosed the problem as a simple sensor failure. AVOID for initial diagnosis.
Best for: Simple, straightforward repairs like replacing an easily accessible, bolt-on wheel speed sensor.
Downsides: Technician skill varies dramatically., High pressure to meet sales targets leads to upselling unnecessary services., Lacks the advanced diagnostic tools to correctly identify a bad wheel bearing or cracked tone ring. (Typical cost: -10% vs. baseline)
When to Walk Away From the Repair
If the estimated repair cost exceeds 40-50% of the car's private-party value, consider selling it. An active ABS light reduces a car's trade-in value by $500 or more.
- Car worth $3000, fix is $350: Fix it. This is a low-cost repair that restores a critical safety feature and makes the car easier to sell.
- Car worth $5000, fix is $800: Fix it. The repair cost for a wheel bearing is significant but well below the walk-away threshold and prevents costlier damage.
- Car worth $4000, fix is $2000: Walk away. The cost to replace the ABS module is 50% of the car's value. It is not an economical repair.
What Scan Tool You Need for This Code
Minimum: A scanner that reads and clears ABS/Chassis ('C') codes AND displays live data for individual wheel speed sensors.
A basic $20 code reader only checks for 'P' (Powertrain) codes and cannot see the ABS module. You need live speed data from all four wheels to confirm the left front sensor is failing.
Budget: BlueDriver Pro (~$100) — Connects to a smartphone app via Bluetooth. It reads/clears ABS codes and displays live data for individual wheel speed sensors for most major brands.
Mid-range: Foxwell NT630 Plus (~$150) — A dedicated handheld unit providing robust ABS/SRS diagnostics. It views live wheel speed data and performs ABS-specific active tests, like activating the ABS pump for brake bleeding.
Professional: Autel MaxiCOM MK808BT (~$550) — A professional-level tablet scanner. It offers full system diagnostics, comprehensive live data, graphing, and bidirectional controls, including ABS module coding.
Rent vs buy: Most auto parts store 'loaner' tools are basic code readers that cannot access ABS systems or live data. Buying a budget pick like the BlueDriver is more economical than paying a shop's diagnostic fee.
How to Clear the Code After You Fix It
- Use an OBD-II scan tool capable of accessing the ABS module to clear the C1050 fault code.
- Perform a short test drive, including turns and stops, allowing the ABS module to verify the repair.
- Re-scan the ABS module to confirm the code remains clear.
Drive cycle (~10 minutes): Drive the vehicle above 10 mph. The ABS light turns off after the system completes its self-test, usually within the first few seconds of driving.
Readiness monitors affected: This code does not affect emissions-related readiness monitors.
Watch out for:
- Using a basic OBD-II scanner that cannot read or clear Chassis ('C') codes.
- Disconnecting the battery fails to clear the code from the ABS module's non-volatile memory.
- The code returns immediately if the underlying mechanical or electrical fault persists.
Will This Fail Emissions / State Inspection?
No — by itself this code doesn't fail OBD inspection (but it can keep readiness monitors from setting, which causes a separate fail).
- California: An illuminated ABS light does not cause a smog check failure. The inspection only targets emissions-related faults indicated by the Check Engine light.
- New York: An illuminated ABS warning light is not currently a cause for rejection during the annual safety inspection, though proposed legislation aims to change this.
- Texas: An illuminated ABS light passes the state safety inspection. The inspection checks primary service brakes, but ABS functionality is not a pass/fail item.
Most Commonly Affected Vehicles
- Ford Expedition / F-150 (1998-2008) — The sensor is a common failure point on 1999-2003 models. On 2004-2008 models, the wiring harness along the frame chafes and breaks.
- Dodge / Chrysler / Jeep Avenger, 300, Grand Cherokee, Grand Caravan (2005-2015) — Tone rings integrated into the CV axle or wheel bearing frequently rust, crack, and split, requiring complete axle or hub replacement.
- Chevrolet / GMC Silverado / Sierra 1500 (1999-2010) — Corrosion of the sensor mounting surface causes a poor signal (addressed by GM Recall 05068C). Failing front wheel bearings are also a primary cause.
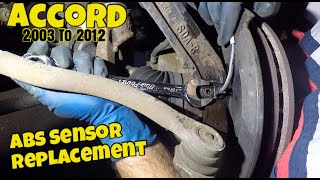
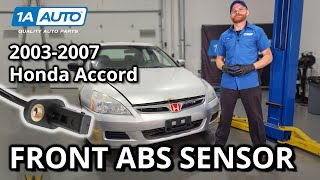
- Honda Accord / Civic (2003-2012) — Rust buildup on the knuckle surface underneath the sensor mount increases the air gap. Removing the sensor and cleaning the surface to bare metal usually fixes the code.
- BMW 3-Series (E90) / X5 (E70) (2006-2013) — Reluctor rings are prone to corrosion and swelling, which damages the sensor. These models also suffer from DSC/ABS hydraulic unit failures that trigger false sensor codes.
- Toyota Camry / 4Runner (2002-2011) — Issues stem from corrosion in the wiring harness connectors near the sensor. A resistance check of the wiring to the ABS module is mandatory.
Manufacturer-Specific Notes
- Chrysler / Dodge / Jeep: The tone ring is built into the wheel bearing or CV axle. It frequently cracks or delaminates, requiring replacement of the entire hub or axle.
- Ford: The wiring harness for the front sensors fails where it flexes near suspension components. On some 2006 Ram trucks, C1050 indicates an ABS module valve fault, not a sensor issue.
- Honda: Rust buildup on the steering knuckle under the sensor is guaranteed in northern states. Always file the mounting surface flat before installing a new sensor.
- Mercedes-Benz: C1050 sometimes indicates a fault with the brake booster vacuum pump control module, requiring a brand-specific scanner to interpret correctly.
Real Owner Stories
2008 Honda Accord at 125K miles
ABS and VSA lights came on intermittently during wet weather. No other symptoms.
What they tried:
- Replaced the left front wheel speed sensor, but code C1050 returned.
- Took it to an independent mechanic who diagnosed 'rust jacking'.
Outcome: The mechanic removed the new sensor, cleaned the rust from the steering knuckle's mounting surface with a wire wheel, and reinstalled the sensor. Total cost was 1 hour of labor ($120). The code did not return.
Lesson: On Hondas in rust-prone areas, always clean the sensor's mounting surface before replacing the sensor. The increased air gap from rust is the true cause.
2007 Chevy Silverado 1500 at 150K miles
ABS light was on, accompanied by a low-speed grinding/pulsing in the brake pedal just before stopping.
What they tried:
- Replaced the left front wheel speed sensor ($60 part), but symptoms remained.
- Visually inspected the wiring and found no damage.
Outcome: The owner jacked up the truck and found significant wobble when pushing the tire at 12 and 6 o'clock, indicating a failed wheel bearing. Replacing the wheel hub assembly ($180 part, DIY) fixed the grinding and the code.
Lesson: A worn wheel bearing is a primary cause of this code on trucks. Check for wheel play before buying any parts.
2012 Dodge Grand Caravan at 110K miles
ABS and traction control lights came on suddenly. A scan confirmed C1050.
What they tried:
- Replaced the left front wheel speed sensor, but the light returned immediately.
- Tested the new sensor with a multimeter (showed good resistance).
Outcome: A mechanic watched live data; the left front read 0 mph. Inspecting the tone ring on the CV axle revealed a hairline crack. The ring had split and stopped rotating with the axle. Replacing the CV axle ($250 parts and labor) resolved the issue.
Lesson: A cracked tone ring causes an immediate code. Live data confirms the dead wheel, and a thorough visual inspection is critical if a new sensor fails to fix it.
How to Prevent This Code From Triggering
- Apply dielectric grease to sensor connectors (Anytime a wheel-end repair is performed or every 2-3 years in rust-belt regions) — Dielectric grease seals electrical connectors from moisture, dirt, and road salt, preventing the corrosion that causes wiring failures.
- Periodically clean the undercarriage, focusing on wheel wells (Seasonally, especially after winter in snowy climates) — Washing away accumulated road salt reduces the corrosive environment around the sensor, wiring, and hub assembly.
- Clean the sensor mounting surface during brake jobs (Whenever brake pads or rotors are replaced) — Using a wire brush to remove rust buildup on the steering knuckle prevents 'rust jacking' and maintains the correct sensor air gap.
- Avoid driving through deep standing water or mud (Daily habit) — Submerging the wheel hubs forces water past bearing seals and into electrical connectors, accelerating corrosion.
Frequently Asked Questions
Will my regular brakes still work with a C1050 code?
Yes, your primary hydraulic braking system functions normally. However, the anti-lock feature is disabled, meaning your wheels lock up and skid in a panic stop.
Is it safe to drive with the ABS and traction control lights on?
It is safe for short-term, careful driving in dry conditions. Avoid hard braking and slippery surfaces, and stop driving immediately if you hear a grinding noise indicating a bad wheel bearing.
What are the most common mistakes when diagnosing a C1050 code?
The biggest pitfall is replacing the sensor without testing it. Mechanics often overlook a worn wheel bearing that creates an excessive air gap, or fail to inspect the tone ring for hairline cracks. Always use a scanner with live data to confirm the fault location before buying parts.
I just replaced my wheel bearing and now the ABS light is on with a C1050 code. What happened?
The wheel bearing was likely installed backwards. Modern bearings have a magnetic encoder built into one side that must face the sensor. The bearing must be removed and reinstalled correctly.
Can I fix a C1050 code by myself?
Yes, replacing a bad wheel speed sensor or cleaning a rusty mounting surface is a manageable DIY repair. Diagnosing a wiring short or a bad ABS module requires professional tools.
Why did my traction control light come on with the ABS light?
Traction and stability control systems rely on wheel speed sensors to detect slipping. When one sensor fails, the computer disables all related systems as a precaution.
Can a bad alignment or tire cause this code?
No. A bad alignment or tire issue does not cause an electrical circuit fault. The cause is isolated to the sensor, its wiring, the tone ring, or the wheel bearing.
Can I just clear the code?
You can clear it, but it returns as soon as the ABS module runs its self-test, usually within a few feet of driving. Clearing the code does not fix the underlying hardware failure.
Key Takeaways
- Code C1050 indicates a left front wheel speed sensor circuit failure, immediately disabling your ABS, traction control, and stability control.
- Over 80% of C1050 codes stem from three accessible issues: a dead sensor, a corroded wiring pigtail, or a cracked tone ring.
- Your primary hydraulic brakes remain fully functional, but stopping distances on loose or slippery surfaces increase by up to 25% without ABS.
- Never replace the sensor without first checking the wheel bearing for play; a wobbling hub creates an erratic signal that mimics a dead sensor.
Helpful Videos


Shop the Parts Behind C1050
Below are the parts most often responsible for code C1050, ranked by how frequently each one is the actual culprit (per the diagnosis above). Tap any to see what we have for your vehicle.


The information in this article is provided for general reference and educational purposes only. Vehicle specifications, procedures, and part compatibility can vary by production date, trim level, and region. Always consult your vehicle's factory service manual and verify part numbers before purchasing or performing repairs. Safety-critical components such as airbags, seat belts, and braking systems should be installed by a qualified professional.
- 🧭 Diagnostic Flowchart
- 🎬 Helpful Videos
- 🛍️ Shop This Part
- What Does C1050 Mean?
- Can I Drive With C1050?
- Common Causes
- Symptoms
- Common Fixes & Costs
- DIY vs Professional
- Used vs. New Parts: Buying Guide
- What Happens If You Wait — Timeline
- Cost of Not Fixing It
- Diagnosis Steps
- When This Code Triggers (Freeze-Frame Conditions)
- Related Codes
- Climate & Environmental Factors
- How to Talk to a Mechanic About This Code
- Where to Take It: Dealer vs Independent vs Chain
- When to Walk Away From the Repair
- What Scan Tool You Need for This Code
- How to Clear the Code After You Fix It
- Will This Fail Emissions / State Inspection?
- Most Commonly Affected Vehicles
- Manufacturer-Specific Notes
- Real Owner Stories
- 2008 Honda Accord at 125K miles
- 2007 Chevy Silverado 1500 at 150K miles
- 2012 Dodge Grand Caravan at 110K miles
- How to Prevent This Code From Triggering
- Frequently Asked Questions
- Will my regular brakes still work with a C1050 code?
- Is it safe to drive with the ABS and traction control lights on?
- What are the most common mistakes when diagnosing a C1050 code?
- I just replaced my wheel bearing and now the ABS light is on with a C1050 code. What happened?
- Can I fix a C1050 code by myself?
- Why did my traction control light come on with the ABS light?
- Can a bad alignment or tire cause this code?
- Can I just clear the code?
- Key Takeaways
- 🎟️ Get 5% Off