
OBD-II Code C1064: The Ultimate Guide to a Code That Isn't a Code
Why C1064 appears, what it really means for Ford, Subaru, & Dodge, and how to diagnose the actual problem
What Does C1064 Mean?
If you encounter code 'C1064', recognize that this is not a standard OBD-II diagnostic trouble code (DTC) for most vehicles. On Ford and Lincoln models, 'C1064' is the internal engineering name for the electrical wiring connector that plugs into the Engine Coolant Temperature (ECT) or Cylinder Head Temperature (CHT) sensor. Its appearance on a scan tool is a powerful clue pointing toward a known wiring problem in that specific circuit, not a sensor failure.
Technical definition: There is no official SAE/ISO definition for OBD-II trouble code C1064. Extensive repair database searches confirm it is not a valid generic DTC. The term is most commonly an internal connector designation in Ford/Lincoln wiring diagrams, referenced in TSB SSM 47791. However, on Dodge, Chrysler, and Ram vehicles, C1064 is a valid, manufacturer-specific code indicating a 'Right Front Outlet Valve Control Circuit Low' fault inside the ABS module.
Can I Drive With C1064?
No, recommended Do not drive the vehicle. Because C1064 is usually a scan tool error masking the true fault, the underlying issue is unknown. If the actual fault relates to engine temperature, the computer cannot reliably protect the engine from overheating. Continuing to drive causes severe engine damage (warped cylinder heads) or catalytic converter failure from a rich fuel condition, adding $800 to $2500 in repair costs. If the vehicle enters a low-power 'limp mode', drive it slowly and only for a short distance to a safe location.
Common Causes
- Incorrect Code Reading or Scan Tool Error (Very Common) — A basic or incompatible OBD-II scanner lacks the software to interpret manufacturer-specific data. It misinterprets the data stream and displays the internal connector name 'C1064' in error instead of the true Diagnostic Trouble Code (DTC).
- Damaged or Chafed Wiring Harness (Very Common) — On Ford and Lincoln models, physical damage to the wiring harness leading to the ECT or CHT sensor is the primary fault. The harness rubs against engine brackets or linkages, causing wires to break or short to ground.
- Loose or Corroded Connector (Common) — The connector labeled C1064 is not fully seated or has corrosion on its pins from moisture intrusion. This poor connection disrupts the critical voltage signal between the temperature sensor and the Powertrain Control Module (PCM).
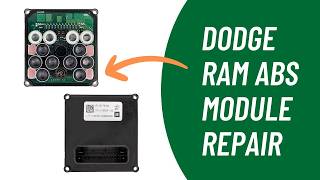
- Internal Failure of ABS Control Module (Less Common) — On Dodge, Chrysler, and Ram vehicles, C1064 is a real fault code indicating an internal electrical failure within the Anti-lock Brake System (ABS) module, specifically related to the right front outlet valve.
- Faulty ECT or CHT Sensor (Less Common) — The temperature sensor itself develops an internal short or open circuit. However, you must exhaustively inspect the wiring and connector C1064 before replacing the sensor, as wiring faults are far more common.
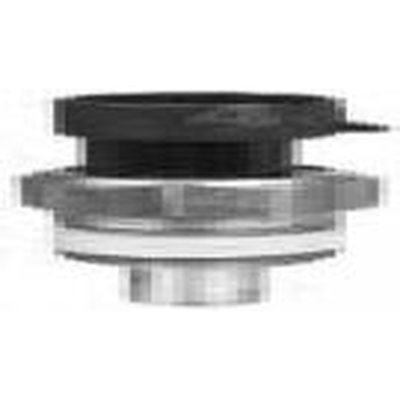
- Internal Failure of Thermo Control Valve (TCV) (Rare) — On 2019-2022 Subaru models, the electronically controlled thermostat fails, causing symptoms often confused with C1064 online. Coolant leaks past an internal seal, corroding the circuit board and disabling systems like EyeSight.
Symptoms
- Check Engine Light is On — The computer stores a real trouble code (like P0117 or P0118) related to the circuit failure, even if your scanner displays C1064.
- Engine Overheating Warning — The dashboard displays an 'Engine Coolant Over Temperature' warning because the computer receives a bad signal from the temperature sensor.
- Engine Cooling Fans Run Constantly — The vehicle's computer runs the cooling fans at high speed continuously as a failsafe to prevent overheating when it loses the temperature signal.
- Reduced Engine Power ('Limp Mode') — The PCM limits engine power and RPM to prevent catastrophic damage when it receives data indicating extreme overheating, even if the engine is cold.
- Erratic Temperature Gauge — The dashboard temperature gauge swings wildly, reads full hot immediately after a cold start, or drops to zero.
- Disabled Advanced Features — On Dodge/Chrysler vehicles, a true C1064 code disables the ABS and traction control. On Subarus with TCV failures, the ECU disables EyeSight and X-Mode.
Common Fixes & Costs
- Repair Damaged Wiring Harness — Parts: $10-$30, Labor: $150-$400, ~1.5 hr book time (Intermediate)
- Replace ECT/CHT Sensor Connector Pigtail — Parts: $25-$60, Labor: $150-$250, ~1.2 hr book time (Intermediate)
- Replace Engine Coolant Temperature (ECT) / CHT Sensor — Parts: $30-$85, Labor: $100-$200, ~1.0 hr book time (DIY)
- Replace ABS Control Module - Dodge/Chrysler — Parts: $300-$800, Labor: $150-$350, ~1.8 hr book time (Advanced)
- Replace Thermo Control Valve (TCV) - Subaru — Parts: $150-$250, Labor: $500-$900, ~4.5 hr book time (Advanced)
Used vs. New Parts: Buying Guide
When a used part is worth it: For an expensive electronic component like a Dodge ABS module, a used part from a reputable salvage yard is a cost-effective option, often saving 50% compared to a new OEM part.
Donor-vehicle mileage cap: roughly under 100000 miles for the part to have meaningful remaining life.
Donor quality checklist:
- Verify the part number matches exactly, as modules are specific to vehicle options.
- Purchase from a seller offering a 30-90 day warranty and return policy.
- Inspect the part for signs of physical damage, corrosion, or heat stress.
- Check the donor car's VIN history to avoid flood-damaged parts.
Decision logic:
- If The part is an inexpensive sensor or connector pigtail → Always buy new. The minimal cost savings do not justify the risk of installing a faulty used part.
- If The part is a complex electronic module (e.g., ABS Module) → A used or professionally rebuilt module is reasonable, but requires VIN programming by a specialized shop to function.
- If The part has a known wear-out failure mode (e.g., Subaru TCV) → Buy a new, updated OEM part to avoid a repeat failure. Used parts contain the same original design flaw.
Warranty tradeoff: Used parts typically have a 30-90 day warranty. New aftermarket parts offer 1-year to lifetime warranties. Rebuilt modules often include a 1-year warranty.
Worst-case if a used part fails: $300-$800 if a used electronic module is dead on arrival, requiring repeat labor costs and a replacement part.
Cost of Not Fixing It
- Immediate to 1 month: Vehicle enters 'limp mode' with reduced power, experiences hard starting, and suffers a 5-10% drop in fuel economy as the PCM defaults to a rich fuel mixture. (Added cost: Negligible, other than increased fuel consumption.)
- 1 to 6 months: Consistently running a rich fuel mixture superheats and damages the catalytic converter by feeding it unburned fuel, leading to a complete blockage. (Added cost: $1200-$2800 for catalytic converter replacement.)
- 6+ months: If the fault prevents the cooling fans from activating, the engine genuinely overheats, causing catastrophic damage like a warped cylinder head or blown head gasket. (Added cost: $1500-$5000+ for major engine repairs.)
Diagnosis Steps
- Re-Scan for the Correct Code
Use a high-quality OBD-II scanner capable of reading manufacturer-specific codes (e.g., FORScan for Ford). Because C1064 is usually a scan tool error, you must find the actual DTC (e.g., P0117, P1299) stored in the PCM to begin diagnosis.
Tools: Professional-Grade OBD-II Scanner (Beginner) - Research the Real Trouble Code and TSBs
Look up the specific diagnostic procedure for the real code. Search for Technical Service Bulletins (TSBs) for your vehicle's year, make, and model. TSBs like Ford's SSM 47791 provide the exact cause and repair procedure.
Tools: Internet access (Beginner) - Visually Inspect the Wiring Harness
Locate the ECT or CHT sensor. Carefully inspect the entire length of the wiring harness connected to it for rubbing, chafing, melting, or broken wires. Pay close attention to where the harness touches metal brackets.
Tools: Flashlight, Inspection Mirror (Intermediate) - Perform a 'Wiggle Test'
With the ignition on and a scan tool displaying live temperature data, carefully wiggle the wiring harness and connector. If the temperature reading fluctuates wildly or drops out, you have pinpointed the wiring fault.
Tools: OBD-II Scanner with live data (Intermediate) - Check Connector Pins
Unplug the sensor connector. Inspect the male and female pins for green corrosion, moisture, or pins pushed out of the plastic body. Ensure the pins have tight tension when reconnected.
Tools: Flashlight, Small Pick (Intermediate) - Test Reference Voltage & Ground
With the sensor unplugged and ignition ON, probe the connector. One wire must have a 5-volt reference signal from the PCM. Probing the ground wire with a multimeter connected to the positive battery terminal must show battery voltage. A missing 5V reference points to a broken wire upstream.
Tools: Digital Multimeter (Advanced) - Sensor Resistance Test (Bench Test)
Remove the sensor. Use a multimeter set to Ohms. Submerge the sensor tip in ice water (32°F) and then boiling water (212°F). Resistance must be very high when cold and very low when hot. An open circuit (OL) or no change indicates a bad sensor.
Tools: Digital Multimeter, Containers for hot/cold water, Thermometer (Advanced) - Oscilloscope Waveform Analysis
Connect an oscilloscope to the sensor's signal wire. A good sensor produces a clean, steady voltage line. While performing a wiggle test, look for sharp drops to zero (short to ground) or spikes to 5V (open circuit). Any noise indicates the exact moment of the fault.
Tools: Automotive Oscilloscope (Expert)
When This Code Triggers (Freeze-Frame Conditions)
- Engine Coolant Temp: 240°F+ (for P0117) or -40°F (for P0118) (The fault code sets immediately upon startup or while driving, showing an implausible temperature. For a short to ground, the PCM interprets the low resistance as extreme heat.)
- RPM: Any (The fault triggers at any engine speed, as it is an electrical circuit fault independent of engine load or speed.)
- Vehicle Speed: Any (The code sets while stationary or driving. The key factor is the PCM detecting an out-of-range voltage from the temperature sensor circuit.)
Related Codes
- P0117 — Means 'Engine Coolant Temperature Sensor Circuit Low Input'. This is the most common actual code found when the wiring at Ford connector C1064 is shorted to ground. The PCM sees near 0V, interpreting it as extreme heat.
- P0118 — Means 'Engine Coolant Temperature Sensor Circuit High Input'. Set when the circuit is open (broken wire or unplugged sensor). The PCM sees 5V, interpreting it as extreme cold (-40°F).
- P1299 — A Ford-specific code meaning 'Cylinder Head Over Temperature Protection Active'. It confirms the PCM has put the engine in limp mode because it believes the engine is overheating. Diagnose the primary circuit code (P0117) first.
How to Clear the Code After You Fix It
- Use an OBD-II scan tool to clear the stored Diagnostic Trouble Codes (DTCs).
- If the battery was disconnected, it clears codes but resets all vehicle memory and readiness monitors.
- Perform a complete drive cycle to allow the vehicle's readiness monitors to run and self-test the emissions systems.
Drive cycle (~30 minutes): A generic drive cycle includes a cold start (engine off for 6-8 hours), a 2-3 minute idle, 15-20 minutes of mixed city and highway driving (including steady speeds around 55 mph), and at least four 30-second idle periods.
Readiness monitors affected: Catalyst Monitor, Evaporative System Monitor, Oxygen (O2) Sensor Monitor
Before emissions retest: drive at least 100 miles to fully set monitors.
Watch out for:
- Clearing the code resets the readiness monitors to 'Not Ready', causing an automatic emissions test failure.
- The code returns immediately if the underlying electrical fault (e.g., chafed wire) is not properly repaired.
- Failing to drive the vehicle through a varied drive cycle prevents the EVAP monitor from setting to 'Ready'.
Will This Fail Emissions / State Inspection?
Yes — this code typically fails an OBD-II emissions inspection.
- California: An illuminated Check Engine Light is an automatic failure. After repairs, a full drive cycle must be completed. For 2001+ vehicles, only one monitor is allowed to be 'Not Ready'.
- New York: An active Check Engine Light causes an automatic failure. For 2001 and newer vehicles, only one readiness monitor can be 'Not Ready'.
- Texas: In emissions-testing counties, an illuminated Check Engine Light results in an automatic failure. After clearing codes, drive 50-100 miles to reset readiness monitors before re-testing.
Most Commonly Affected Vehicles
- Ford F-150 (2015-2020) — Models with the 2.7L EcoBoost are highly prone to wiring harness chafing near the back of the engine, triggering P0117 or P1299. 🎬 Watch: How to fix Ford cylinder head overtemperature protection codes. 'C1064' refers to the CHT sensor connector. TSB 21-2168 provides a specific fix.
- Lincoln Continental (2017-2020) — TSB SSM 47791 points to wiring damage in the ECT sensor circuit. The bulletin specifies inspecting the harness between inline connectors C1016 and C1168.
- Lincoln MKX / Nautilus (2016-2020) — Shares powertrains with the Ford Edge and is covered under TSB SSM 47791 for wiring harness damage causing ECT sensor-related codes.
- Ford Edge (2015-2018) — Shares a platform with the Lincoln MKX and is highly susceptible to the wiring issues described in TSB SSM 47791.
- Ford Fusion (2017-2019) — Seeing 'C1064' is most often a misreading by a basic scanner when the actual issue is a wheel speed sensor fault. TSB SSM 47791 confirms C1064 is not the relevant connector for this model's cooling system.
- Subaru Outback, Forester, Crosstrek, Legacy (2019-2022) — These models do not use code C1064, but owners confuse symptoms. They are known for Thermo Control Valve (TCV) failures triggering P26A3. 🎬 See this walkthrough for diagnosing Subaru thermo control valve failures. Subaru issued a warranty extension (WMM-23) to 15 years/150,000 miles.
- Dodge / Chrysler / Ram Dakota, Ram 1500, Durango (2007-2020) — C1064 is a valid, manufacturer-specific code for 'Right Front Outlet Valve Control Circuit Low', indicating an internal fault in the Anti-lock Brake (ABS) Module. The fix requires replacing the ABS module. 🎬 Watch: Step-by-step guide to Dodge and Ram ABS module replacement.
Manufacturer-Specific Notes
- Ford / Lincoln: Ford uses 'C1064' as an internal name for an electrical connector in wiring diagrams, not as a fault code. The issue is almost always the wiring harness chafing, not the sensor itself.
- Subaru: Does not use C1064. Widespread issues with the electronic Thermo Control Valve (TCV) produce similar symptoms. Subaru covers this part under an extended warranty (campaign WMM-23) for 15 years or 150,000 miles.
- Chrysler / Dodge / Ram: These brands use C1064 as a valid, manufacturer-specific DTC pointing to an internal failure of the ABS module. Diagnosis focuses entirely on the brake electronics, usually ending in ABS module replacement.
Helpful Videos


Shop the Parts Behind C1064
Below are the parts most often responsible for code C1064, ranked by how frequently each one is the actual culprit (per the diagnosis above). Tap any to see what we have for your vehicle.


The information in this article is provided for general reference and educational purposes only. Vehicle specifications, procedures, and part compatibility can vary by production date, trim level, and region. Always consult your vehicle's factory service manual and verify part numbers before purchasing or performing repairs. Safety-critical components such as airbags, seat belts, and braking systems should be installed by a qualified professional.
- 🎬 Helpful Videos
- 🛍️ Shop This Part
- What Does C1064 Mean?
- Can I Drive With C1064?
- Common Causes
- Symptoms
- Common Fixes & Costs
- Used vs. New Parts: Buying Guide
- Cost of Not Fixing It
- Diagnosis Steps
- When This Code Triggers (Freeze-Frame Conditions)
- Related Codes
- How to Clear the Code After You Fix It
- Will This Fail Emissions / State Inspection?
- Most Commonly Affected Vehicles
- Manufacturer-Specific Notes
- 🎟️ Get 5% Off