
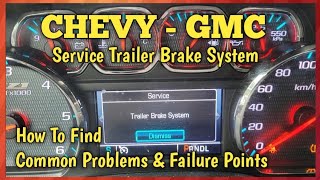
C1112 on 2009-2013 Chevrolet Avalanche: Service Trailer Brake System Causes and Fixes
On a 2009-2013 Avalanche, code C1112 triggers the 'Service Trailer Brake System' message and is most often caused by wiring issues, not a failed module. Check for corrosion or damage to the wiring and connectors for the trailer brake system, especially the dark blue wire (circuit 47) and the G401 ground on the driver's side frame rail, before replacing any parts.
- Code C1112 means the integrated trailer brake system is disabled due to an electrical fault.
- Do NOT immediately replace the Trailer Brake Control Module (TBCM); the problem is far more likely to be in the wiring.
- Your first step should be to have the vehicle's battery professionally load-tested.
- Thoroughly inspect the wiring harness and connectors from the middle of the truck to the rear bumper, especially the dark blue wire, for any signs of corrosion or damage.
- Towing a trailer with electric brakes is unsafe until this fault is corrected and the 'Service Trailer Brake System' message is gone.
What's Unique About the 2009-2013 Chevrolet AVALANCHE
The Chevrolet Avalanche from this era shares its GMT900 platform with the Silverado, Suburban, Sierra, and Yukon. These trucks feature an integrated trailer brake control system that communicates with other vehicle modules. TSB PIT4595J specifically notes that for this platform, many C1112 codes are caused by wiring faults rather than failed control modules, leading to unnecessary parts replacement. The system's sensitivity to voltage variations and the exposure of rear wiring harnesses and the G401 ground to the elements are key factors in the frequency of this code.
Diagnostic Flowchart
Tap your situation to follow the diagnostic path that matches what you're seeing on this vehicle.
Symptoms You May Notice
- "Service Trailer Brake System" message on the Driver Information Center (DIC)
- Integrated trailer brake controller is disabled and will not apply trailer brakes
- The gain adjustment for the trailer brake controller will not function
- Red trailer icon on the dash may be illuminated
- Replacing the Trailer Brake Control Module (TBCM) before checking wiring and grounds.
- Replacing the in-dash trailer brake controller switch assembly. While this switch can fail, it typically does not set code C1112.
Most Likely Causes
- Wiring Harness Damage or Corrosion 🔴 High Probability The wiring harness running to the rear 7-pin connector and the Trailer Brake Control Module (located on the driver's side frame rail near the spare tire) is exposed to road spray, salt, and moisture. This leads to corrosion, nicks, and cuts, particularly affecting the dark blue wire (circuit 47). TSB PIT5529A notes that missing cavity plugs in the module connector allow water intrusion, causing terminal corrosion.
How to confirm: Visually inspect the entire wiring harness from the trailer brake relay to the 7-pin bumper connector. Pay close attention to the TBCM connector on the driver's side frame rail, often near the spare tire. Check for green or white crust ('blue crusties'), broken wires, or poor-quality splices. TSB PIT4595J even warns that non-sealed or poorly sealed splices can wick moisture into the harness.
Typical fix: Repair the damaged section of the wire or replace the corroded connector. The connector pigtail is available as GM Part #89047377 or ACDelco #PT2713. Ensure all repairs are made with sealed, watertight connectors or heat-shrink tubing and apply dielectric grease to prevent future corrosion.
Est. part cost: $10-$70 - Poor Ground Connection (G401) 🟡 Medium Probability The G401 ground, a critical grounding point for the trailer brake system, is typically located on the top or outer side of the driver's side frame rail, often behind the rear tire. Its location makes it highly susceptible to rust and corrosion, leading to high resistance and intermittent electrical faults.
How to confirm: Locate the G401 ground on the frame rail. It will be a ring terminal with one or more black wires bolted to the frame. Disconnect it, and clean the contact surfaces of the frame and the terminal with a wire brush until they are bare metal. TSB PIT4595J explicitly lists checking G401 as a key diagnostic step.
Typical fix: Clean and re-secure the ground connection. Applying a dielectric grease can help prevent future corrosion.
Est. part cost: $0-$5 - Weak or Failing Vehicle Battery 🟡 Medium Probability → Shop Vehicle Battery The TBCM is sensitive to voltage and requires a stable voltage between 9.5 and 17 volts to initialize and operate correctly. A weak battery can cause voltage drops during startup that trigger this fault code. TSBs PIT5521A and PIT5529A specifically instruct technicians to check battery health first before other diagnostics.
How to confirm: Have the vehicle's battery professionally load-tested using a tool like a Midtronics GR8. A simple voltage check is often not sufficient to identify a weak battery that fails under load.
Typical fix: Replace the vehicle battery if it fails the load test. Ensure terminals are clean and tight.
Est. part cost: $150-$300 - Outdated TBCM Software/Calibration ⚪ Low Probability For earlier models in the GMT900 range (especially 2007-2008, but applicable to later years), GM released updated software calibrations to improve the TBCM's ability to diagnose and filter out false positives, particularly for high-resistance shorts to voltage.
How to confirm: A GM dealer or a shop with a subscription to GM's TIS2WEB can check if your vehicle's TBCM has the latest calibration. A scan tool can monitor the 'TBCM Relay Feedback Signal'; if the voltage is consistently higher than the normal 3.2-4.1 volts, an update may be needed per TSB PIT4595J.
Typical fix: Reprogram the Trailer Brake Control Module (TBCM) with the latest software. This is a dealer or qualified shop-level repair.
Est. part cost: $0 (if under warranty) - $150
Rare But Worth Checking
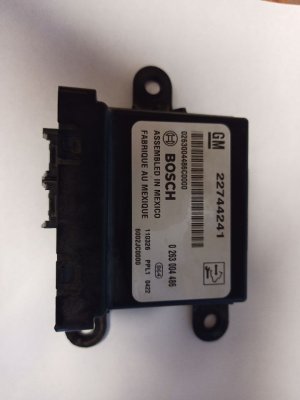
- Failed Trailer Brake Control Module (TBCM): → Shop Trailer Brake Control Module While this is a possibility, TSB PIT4595J explicitly states that GM receives many functional modules that were replaced unnecessarily. This should only be considered after all wiring, ground, and power supply issues have been completely ruled out. If replaced, the new module must be programmed to the vehicle's VIN.
- Failed Trailer Brake Relay: Similar to the TBCM, the relay is often replaced when the actual fault lies in the wiring. It should be tested before replacement. TSB PIT4595J also notes many functional relays are returned. In some repair stories, replacing this relay (located near the spare tire, sometimes called the Trailer Brake Power Module) was the fix.
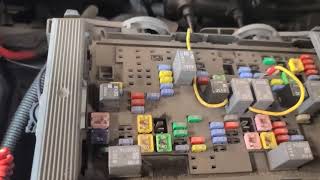
- Blown Fuse: A short circuit, often from the trailer itself, can blow the 30A J-Case fuse for the trailer brake system in the underhood fuse block. This should be one of the first and easiest checks.
Diagnosis Steps
- Confirm the 'Service Trailer Brake System' message is displayed on the DIC.
- Scan the Trailer Brake Control Module (TBCM) for codes. Confirm if C1112 is current or history.
- Perform a professional load test on the vehicle's battery to rule out low voltage issues, as recommended by TSB PIT5521A.
- Check all fuses related to the trailer brake system in the underhood fuse block, especially the 30A J-Case fuse.
- Locate and inspect the G401 ground connection on the driver's side frame rail for rust or looseness. Clean and tighten as needed.
- Thoroughly inspect the wiring harness and connector for the TBCM, located on the driver's side frame rail near the spare tire. Look for corrosion (blue/green crust), damaged pins, or broken wires.
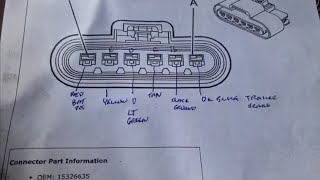
- Inspect the wiring to the 7-pin bumper connector, paying special attention to the dark blue wire (circuit 47) for any nicks, cuts, or poor splices.
- If a capable scan tool (like a Tech 2) is available, monitor the 'TBCM Relay Feedback Signal'. The normal voltage reading is between 3.2-4.1 volts. A reading below 3.2V suggests a short to ground or open circuit, while a reading above 4.1V suggests a short to voltage.
- If wiring, ground, and power are all confirmed good, check with a dealer if a TBCM software update is available, especially if high voltage was noted on the feedback signal.
- As a final step, test and consider replacing the trailer brake relay or the TBCM itself. Remember that a new TBCM requires programming.
Parts You'll Likely Need
- Trailer Wiring Harness Connector Pigtail
(OEM #89047377 (ACDelco PT2713))— The connector for the TBCM on the frame rail is highly susceptible to corrosion from road spray, causing shorts and open circuits that trigger C1112. Often the corrosion is too severe to clean and the connector must be cut out and replaced.
Trusted brands: ACDelco, Dorman
OEM price range: $40-$70
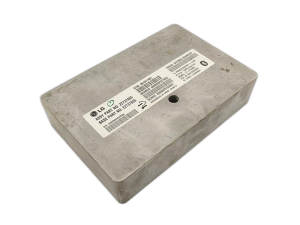
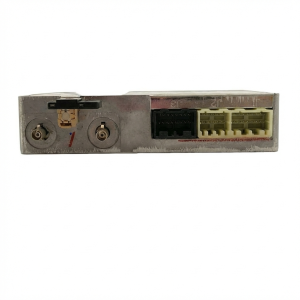
Aftermarket price range: $20-$40 - Trailer Brake Control Module (TBCM)
(OEM #20850923 (supersedes 25788981, 25854535, 25907533))— This module is the final point of failure after all wiring, power, and ground issues have been ruled out. It is often replaced unnecessarily. A new module requires VIN programming to function.
Related Codes That Often Appear With This One
- C1114 — This code for the 'Trailer Brake Control Solenoids Control Circuit' is often set alongside C1112 as they both relate to the output and control side of the trailer brake system. TSB PIT4595J addresses both codes as having the same root causes related to wiring and shorts on circuit 47.
- C1113 — This code for the 'Trailer Brake Control Relay High Control Circuit' can appear with C1112, indicating a broader electrical issue within the relay control system. TSBs often group these codes together.
Technical Service Bulletins (TSBs) & Recalls
- PIT4595J: "This PI communicates diagnostic tips to help dealership diagnosis a service trailer brake message with DTC C1114 and C1112." It emphasizes checking wiring (circuit 47), ground G401, and for shorts before replacing modules, and provides the 3.2-4.1V feedback signal specification.
- PIT5521A / PIT5529A: These related bulletins reinforce the diagnostic path, instructing technicians to address any vehicle battery issues *first* before other diagnostics, and to inspect the TBCM connector for corrosion caused by missing cavity plugs.
Platform-Specific Known Issues
- Per TSB PIT4595J, the TBCM monitors the voltage on the dark blue wire (circuit 47) running to the 7-pin connector. If the voltage is shorted higher or lower than the expected 3.2-4.1V, the code will set.
- The TSB also notes that even well-sealed splices (including heat-shrunk ones) may not be fully watertight and can be a source of water intrusion and intermittent faults.
- A YouTube video by 'George's Projects' documents a successful fix on a Silverado where the G401 ground wire had broken off a corroded bed support, causing an intermittent connection. Re-establishing a solid ground resolved the 'Service Trailer Brake' message.
Mechanic-Grade Diagnostic Values
- TBCM Relay Feedback Signal Voltage — expected: 3.2 - 4.1 Volts (Key On, Engine Off). Failure: A voltage higher than 4.1V suggests a short to voltage. A voltage lower than 3.2V suggests a short to ground or an open/high resistance circuit.
- TBCM Operating Voltage — expected: 9.5 - 17.0 Volts. Failure: If system voltage drops below 9.5V during startup or operation, the module may fail to initialize and set a fault code.
- Ground Circuit Resistance — expected: < 5.0 Ohms. Failure: A reading higher than 5.0 Ohms between the TBCM relay connector ground pin and a clean chassis ground indicates a poor ground connection (like a corroded G401).
Hidden / Shadow Codes Worth Checking
- C1112 (Fault Type): While not a separate code, a professional scan tool (GDS2/Tech 2) can specify the nature of the C1112 fault, such as 'short to ground,' 'open circuit,' or 'short to voltage' on the control circuit. This is critical for targeted electrical diagnosis. (see via GM Tech 2, GDS2, or high-end professional scan tool that can read manufacturer-specific fault data.)
Scan Tool Commands That Help
- Tech 2 / GDS2: Monitor 'TBCM Relay Feedback Signal' Parameter — This is a primary diagnostic step outlined in TSB PIT4595J. It allows a technician to see the voltage on Circuit 47 in real-time to determine if a short-to-voltage, short-to-ground, or open-circuit condition exists without extensive manual probing.
- Tech 2 / GDS2: Command Trailer Brake Relay ON/OFF — This bidirectional command actively tests the trailer brake relay and the integrity of the output circuit. A technician can use this command while checking for voltage with a multimeter or test light at the 7-pin bumper connector to confirm the entire circuit is functional.
- TIS2WEB / SPS: Reprogram Trailer Brake Control Module (TBCM) — TSB PIT4595J notes that for earlier models (2007-2008), an updated calibration was released to improve diagnostics for high-resistance shorts to voltage. If the 'TBCM Relay Feedback Signal' is consistently higher than 4.1V, reprogramming the module may resolve the issue or improve diagnostic accuracy.
Wiring & Ground Locations
- G401 — Mounted to the left (driver's side) rear body mount on the frame, located behind the left rear tire. It may also be described as being on the frame rail near the spare tire hoist bracket.. This is the primary ground point for the trailer brake system. Its exposed location makes it extremely prone to corrosion, which creates high resistance and causes the TBCM to detect voltage anomalies, setting code C1112. TSB PIT4595J explicitly calls for checking this ground.
- TBCM Connector (X411) — On the Trailer Brake Control Module itself, which is mounted to the driver's side frame rail, typically above or just in front of the spare tire.. This connector is the brain's connection to the body. It is highly susceptible to water intrusion from road spray, especially if cavity plugs are missing. Corrosion on its pins is a direct cause of C1112. Pin 28 (Dark Blue) is the critical 'Relay Feedback' circuit (Circuit 47).
- Circuit 47 (Dark Blue Wire) — Runs from the TBCM/Relay assembly along the driver's side frame rail to Pin 3 of the 7-way bumper connector.. This is the trailer brake output wire. The TBCM constantly monitors the voltage on this specific wire to detect faults. Any short to ground, short to power, or open circuit along this wire's path is the most direct cause of codes C1112 and C1114.
Real Owner Repair Stories
- YouTube channel 'Phillip Bailey' (2008 GM 2500HD) — Service Trailer Brake System message with codes C1112, C1114, C1119.
❌ Tried (didn't work) Replacing the trailer brake control relay., Load testing wiring from the relay to the TBCM., Confirming power and ground to the module.
✅ What actually fixed it The problem was two crossed wires in the trailer brake relay plug. After inspecting the connector, the technician found that two wires had been put in the wrong cavities, likely during a previous repair attempt. Correcting the pin positions resolved the codes. - YouTube channel 'How To DIY Moore' (2015 GMC Sierra 3500HD (similar K2XX platform)) — Intermittent 'Service Trailer Brake System' alarm.
❌ Tried (didn't work) Initial scan tool diagnostics failed to communicate properly with the Chassis Control Module when the truck was identified as a 2014 model.
✅ What actually fixed it The final fix was replacing both the 7-pin bumper connector and the Trailer Brake Power Module. A critical diagnostic step was manually identifying the vehicle as a 2015 model in the Snap-on scan tool, which then allowed access to the necessary module data to properly diagnose the fault.
OEM Part Supersession History
25788981, 25818158, 25854535, 25866061, 25907533→20850923— Standard part evolution, integrating design updates and new materials/technologies.
Heads up: The new module (20850923) requires VIN programming with GM's Service Programming System (SPS) to function in the vehicle. It is not a plug-and-play part.
Model Year Variations Within This Range
- 2007-2008 (platform-wide): GM released an updated TBCM software calibration for these early GMT900 models. The update improves the module's ability to correctly diagnose high-resistance shorts to voltage. If a high voltage reading is found on the 'TBCM Relay Feedback Signal' on a 2009+ model, this history indicates that software sensitivity is a known issue on the platform.
Helpful Videos

We Have This Part in Stock

The information in this article is provided for general reference and educational purposes only. Vehicle specifications, procedures, and part compatibility can vary by production date, trim level, and region. Always consult your vehicle's factory service manual and verify part numbers before purchasing or performing repairs. Safety-critical components such as airbags, seat belts, and braking systems should be installed by a qualified professional.
- Chevrolet AVALANCHE:
- 🧭 Diagnostic Flowchart
- 🎬 Helpful Videos
- 🛍️ Shop This Part
- What's Unique About the 2009-2013 Chevrolet AVALANCHE
- Symptoms You May Notice
- Most Likely Causes
- Rare But Worth Checking
- Diagnosis Steps
- Parts You'll Likely Need
- Related Codes That Often Appear With This One
- Technical Service Bulletins (TSBs) & Recalls
- Platform-Specific Known Issues
- Mechanic-Grade Diagnostic Values
- Hidden / Shadow Codes Worth Checking
- Scan Tool Commands That Help
- Wiring & Ground Locations
- Real Owner Repair Stories
- OEM Part Supersession History
- Model Year Variations Within This Range
- 🎟️ Get 5% Off