
OBD-II Code C1135: Definitive 2026 Diagnosis & Repair Guide
What C1135 means, why it triggers, and how to fix it on Toyota, Peugeot, Hyundai, and more
- Code C1135 is manufacturer-specific: it indicates a failed Air-Fuel sensor heater on Toyota/Lexus, but points to a disabled Steering Angle Sensor on Peugeot, Chevy, and Hyundai.
- On Toyota and Lexus models, C1135 almost always requires replacing the upstream Air-Fuel (A/F) sensor after verifying the heater circuit resistance reads outside the normal 0.8 to 1.4 ohms range.
- If C1135 appears immediately after a wheel alignment or suspension repair, the Steering Angle Sensor requires recalibration using a bidirectional scan tool.
- Never replace an A/F sensor without first checking the dedicated 'A/F HEATER' or 'EFI' fuse in the engine bay, as a blown $2 fuse causes the exact same C1135 code.
- Driving with a Toyota C1135 code for more than 2 months forces the engine to run rich, which destroys the catalytic converter and adds up to $2,500 to your repair bill.
What Does C1135 Mean?
C1135 is a manufacturer-specific code with entirely different meanings depending on your vehicle's make. For Toyota and Lexus, it signals a failure in the heater circuit of the upstream air-fuel ratio sensor. On Peugeot, Citroën, Chevrolet, Hyundai, and Infiniti models, it indicates a steering angle sensor fault. For some Fords, it points to an accelerator pedal position sensor issue. This guide covers all major variations, focusing on the most common causes and fixes.
Technical definition: The official SAE/ISO definition for C1135 is reserved for manufacturer-specific use. For Toyota/Lexus, it is defined as 'A/F Sensor Heater Circuit Malfunction (Bank 1, Sensor 1)'. The engine control module (ECM) detects that the current draw from the internal heater of the air-fuel ratio sensor is outside the expected range. This sensor must heat up to approximately 1,200°F (650°C) to provide accurate readings, and the heater circuit is critical for this rapid warm-up phase. For chassis-related definitions (Peugeot/Chevy), it means the ABS/ESC module has lost the signal or detected an implausible reading from the steering angle sensor.
Can I Drive With C1135?
Yes, But With Caution. You can drive temporarily, but long-term driving is strongly discouraged. If the fault relates to an Air-Fuel sensor (Toyota/Lexus), driving for more than a few hundred miles causes poor fuel economy and permanently damages the catalytic converter, adding $800 to $2,500 to your repair bill. If the code relates to a steering angle sensor (Peugeot, Hyundai, Chevy), safety systems like stability control and ABS are disabled, increasing the risk of losing control in an emergency. On some models, this causes a sudden loss of power steering.
Common Causes
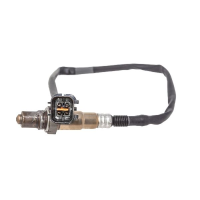
- Failed Air-Fuel Ratio (A/F) Sensor (Very Common) — The internal heater element within the sensor burns out or degrades, preventing rapid warm-up. This causes the vast majority of Toyota/Lexus C1135 codes.
- Improper Sensor Calibration (Steering Angle Sensor) (Very Common) — If the steering angle sensor (SAS) is not recalibrated after a wheel alignment or suspension repair, the system detects a mismatch between the steering wheel position and vehicle trajectory, triggering the code.
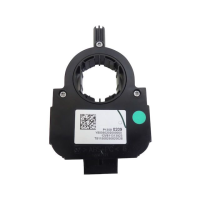
- Failed Steering Angle Sensor (SAS) (Common) — On European and Korean vehicles (Peugeot, Hyundai, Kia), C1135 points directly to an internal electronic fault within the steering angle sensor itself, disabling ABS and stability control.
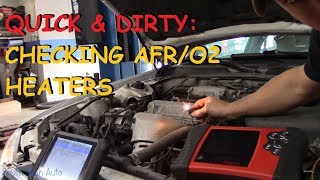
- Blown A/F Heater Fuse or Faulty Relay (Common) — The A/F sensor heater circuit is protected by a fuse (labeled 'A/F HEATER' or 'EFI'). A short in the circuit blows the fuse, cutting power to the sensor's heater. This is a critical, frequently missed diagnostic step. 🎬 Watch: How to test an AFR heater circuit for power.
- Damaged Wiring or Poor Connection (Common) — The wiring harness leading to the A/F sensor or steering angle sensor becomes damaged from road debris, exhaust heat, or connector pin corrosion. This creates an open or short circuit.
- Engine Oil Sludge (Nissan-Specific) (Less Common) — On Nissan vehicles where C1135 indicates an Intake Valve Timing (IVT) control problem, engine oil sludge clogs the fine oil passages in the VVT solenoids, preventing correct cam timing adjustments.
- Faulty Engine Control Module (ECM) or ABS Module (Rare) — The internal driver that controls the ground for the A/F heater circuit (in the ECM) or interprets the SAS signal (in the ABS module) malfunctions. Consider this only after exhausting all other tests.
Symptoms
- Check Engine Light is On — For A/F sensor or engine-related faults, the ECM illuminates the Malfunction Indicator Lamp (MIL) immediately upon detecting the heater circuit failure.
- ABS, Traction Control (TCS), or Stability Control (ESP/VSC) Light is On — For makes where C1135 relates to a steering angle sensor (Peugeot, Chevy, Hyundai), chassis and stability warning lights illuminate instead of, or alongside, the check engine light.
- Decreased Fuel Economy — When the A/F sensor fails to reach operating temperature quickly, it sends inaccurate data, forcing the engine to run rich and consume 10-15% more fuel.
- Heavy or Unpowered Steering — On vehicles with electronic power steering (EPS) where C1135 indicates a steering system fault, you experience a sudden loss of power assist, making the wheel extremely heavy at parking speeds.
- Rough or Unstable Idle — The engine idles erratically during the first few minutes after a cold start before the exhaust heat naturally warms the A/F sensor.
- Failed Emissions Test — A malfunctioning A/F sensor heater circuit prevents the emissions control system from operating efficiently, guaranteeing a failed smog check.
Diagnostic Flowchart
Tap your situation to follow the diagnostic path that matches what you're seeing on this code.
Common Fixes & Costs
- Replace Air-Fuel Ratio Sensor (Bank 1, Sensor 1) — Parts: $70-$220 for an OEM-equivalent part like Denso., Labor: $80-$160. A shop repair including parts, labor, and diagnosis costs between $250 and $450., ~1.2 hr book time (DIY)
- Perform Steering Angle Sensor Calibration — Parts: $0, Labor: $100-$180 for 1 hour of diagnostic and programming time at a shop., ~1.0 hr book time (Intermediate)
- Replace Steering Angle Sensor — Parts: $100-$400 for the sensor itself., Labor: $150-$300, depending on accessibility and required calibration. Total replacement cost ranges from $300 to $750., ~2.5 hr book time (Intermediate)
- Replace Blown A/F Heater or ABS Fuse — Parts: $1-$5, Labor: $50-$150 for diagnosis to find the cause of the blown fuse., ~0.8 hr book time (DIY)
- Repair Damaged Wiring or Connector — Parts: $10-$40 for a new pigtail connector or wiring repair supplies., Labor: $100-$250, depending on the location of the damage., ~1.8 hr book time (Intermediate)
- Replace Integrated Steering Rack/EPS Unit (Peugeot) — Parts: Up to $2,400 for an OEM unit., Labor: $400-$600 due to the need to drop the subframe. Total cost can exceed $3,200., ~4.5 hr book time (Professional)
Used vs. New Parts: Buying Guide
When a used part is worth it: For electronic sensors like an Air-Fuel or Steering Angle sensor, buying used is strongly discouraged. The savings are minimal compared to the high risk of receiving a faulty part.
Donor-vehicle mileage cap: roughly under 40000 miles for the part to have meaningful remaining life.
Donor quality checklist:
- Verify the donor vehicle was not scrapped for a related system failure.
- Always match the OEM part number exactly, as identical-looking electronic components have different internal programming.
Decision logic:
- If The part is an electronic sensor (A/F, SAS, etc.) → Buy a new, high-quality aftermarket (e.g., Denso, Bosch) or OEM part. The risk of premature failure outweighs the savings.
- If The part is a large mechanical assembly where the sensor is integrated (e.g. Peugeot steering rack) → A low-mileage used assembly is a cost-effective option, but verify the warranty and ensure an exact part number match.
Warranty tradeoff: Used parts typically have a 30-90 day warranty covering only the part. New aftermarket parts carry a 1-year to limited lifetime warranty. OEM parts have a 1-year/12,000-mile warranty.
Worst-case if a used part fails: $300-600 if a used sensor fails after installation, representing repeat labor costs.
What Happens If You Wait — Timeline
- 0-2 weeks: For A/F sensor fault: Check Engine Light illuminates. The ECM detects the heater circuit fault on the second consecutive drive cycle. No other symptoms are noticed. (MPG impact: 0-3%% · Added cost: $0)
- 2 weeks - 2 months: The engine runs in open-loop mode for longer during warm-up, causing a drop in fuel economy and a slight rough idle on cold starts. The rich mixture stresses the catalytic converter. (MPG impact: 5-10%% · Added cost: $30-$80 in wasted fuel)
- 2-6 months: Sustained exposure to unburned fuel causes the catalytic converter's internal temperature to exceed design limits. The substrate begins to melt or crack. A P0420 code appears. (MPG impact: 10-15%% · Added cost: $800-$2,500 (Catalytic converter replacement is required))
- 6+ months: The catalytic converter substrate is fully melted or clogged, creating a major exhaust restriction. The car struggles to exceed 40 mph and may stall. (MPG impact: 20-50%% · Added cost: $1,500-$3,000+ (Guaranteed catalytic converter replacement, potential exhaust manifold damage))
Cost of Not Fixing It
- 0-1 month: For A/F sensor faults, a 10-15% decrease in fuel economy. For steering sensor faults, disabled ABS and stability control increase accident risk. (Added cost: $20-$50 in wasted fuel.)
- 1-6 months: Continued rich fuel mixture from a bad A/F sensor overheats and damages the catalytic converter's internal structure. (Added cost: $1000-$2500 for catalytic converter replacement.)
- 6+ months: Complete failure of the catalytic converter guarantees a failed emissions test, severe loss of engine power, and potential stalling. (Added cost: $1200-$3000+)
Diagnosis Steps
- Verify the Code and its Definition
Connect an OBD-II scanner to read the specific code description. This dictates your entire diagnostic path. If it reads 'A/F Sensor Heater', proceed to engine diagnostics. If it reads 'Steering Angle Sensor', proceed to chassis diagnostics.
Tools: OBD-II Scanner (Beginner) - Inspect the Relevant Fuse
Check the 'A/F HEATER' or 'EFI' fuse in the engine bay fuse box (Toyota) or the 'ABS'/'ESC' fuses (Peugeot/Chevy). A blown fuse indicates a short circuit that must be located before installing a replacement.
Tools: Fuse puller or needle-nose pliers (Beginner) - Test the Sensor's Heater Circuit Resistance (Toyota/Lexus)
Disconnect the A/F sensor's electrical connector with the engine off and cool. Set a multimeter to Ohms (Ω). Measure the resistance between the two same-colored wires (usually black) on the sensor side. A good Toyota/Denso sensor reads between 0.8 and 1.4 ohms at 68°F (20°C). A reading of 'OL' (Over Limit) means the heater element is burnt out and the sensor requires replacement.
Tools: Digital Multimeter (Intermediate) - Perform Sensor Calibration (Steering Angle Sensor)
If the code indicates a steering angle sensor fault, especially after an alignment, perform a calibration. Use a bidirectional scan tool to access the ABS/ESC module, center the steering wheel, and initialize the sensor. This often resolves the code without parts replacement.
Tools: Bidirectional OBD-II Scan Tool (Advanced) - Visually Inspect the Sensor and Wiring
Inspect the component identified in Step 1. For an A/F sensor, check for melted plastic, frayed wires, or a loose connector. For a steering angle sensor, look for damaged wiring behind the steering column trim or fretting corrosion on the connector pins.
Tools: Flashlight (Beginner) - Check for Power and Ground at the Harness Connector
With the sensor disconnected, turn the ignition key to 'ON'. Set your multimeter to DC Volts. Probe the power wire on the vehicle's harness side; you should see battery voltage (~12V). The ground wire is pulsed by the ECM and is best checked with the engine running using a test light. Missing power points to a fuse/wiring issue.
Tools: Digital Multimeter, Vehicle-specific wiring diagram (Intermediate) - Pro Tip: Analyze Live Data with a Scan Tool
For an A/F sensor fault, monitor the 'Heater Duty Cycle' PID for Bank 1 Sensor 1. On a cold start, it should command high (>50%) and drop as the sensor warms. A constant 0% or 100% indicates a circuit problem. For an SAS fault, watch the 'Steering Angle' PID. It must read 0.0° when straight and change smoothly without glitches as you turn the wheel.
Tools: Advanced OBD-II Scan Tool with Live Data (Advanced) - Advanced: Check A/F Sensor Reference Voltages
With the sensor unplugged and key ON, check the reference voltages supplied by the ECM on the harness connector's signal wires. On many Toyotas, you should find approximately 3.3V on one wire and 3.0V on the other. Correct voltages confirm the ECM and signal wiring are intact.
Tools: Digital Multimeter, Wiring Diagram (Advanced) - Pro Tip: Scope the Heater Control Circuit
Connect an oscilloscope's signal lead to the ground-side control wire at the sensor connector. With the engine running from a cold start, you should see a square wave pattern as the ECM pulses the ground. A flat line at battery voltage means the ECM is not commanding the heater on; a flat line at 0V means a short to ground.
Tools: Automotive Oscilloscope (Lab Scope) (Professional)
When This Code Triggers (Freeze-Frame Conditions)
- Engine Coolant Temp: 70-140°F (During warm-up phase. The heater circuit is most critical on a cold engine, so the fault is detected on the second consecutive drive cycle after a cold start.)
- Time Since Engine Start: 20-120 seconds (The ECM runs the heater circuit test shortly after startup to ensure the sensor reaches operating temperature quickly.)
- Heater Duty Cycle: 0% or 100% (If available, this PID gets stuck at 0% (open circuit) or 100% (short or failed attempt to heat), directly triggering the code.)
Related Codes
- P0135 — The generic OBD-II code for 'O2 Sensor Heater Circuit Malfunction'. C1135 is Toyota's specific equivalent for their more precise wideband Air-Fuel Ratio sensors. Test procedures are similar, but resistance specs differ.
- P1155 — The equivalent code for the other engine bank ('A/F Sensor Heater Circuit Malfunction Bank 2 Sensor 1'). Seeing both C1135 and P1155 strongly suggests a shared power/ground issue, like a blown 'A/F HEATER' fuse.
- C1638 — On Peugeot and Citroën vehicles, this code for 'Estimation of Steering Wheel Angle - Consistency' often appears with C1135. Seeing both confirms the fault lies within the steering angle sensor or its calibration.
- P2238 — Points to the separate 'pumping current' or sensing circuit of the A/F sensor. If both C1135 and P2238 are present, it guarantees an internal failure of the A/F sensor requiring replacement.
Climate & Environmental Factors
- Cold Climates: The A/F sensor heater gets the sensor to 1200°F quickly. In cold weather, a failing heater circuit causes noticeable symptoms like rough idle and poor fuel economy during cold starts because the exhaust takes longer to heat the sensor naturally.
- Humidity and Temperature Cycles: For chassis-related C1135 codes (Steering Angle Sensor), high humidity accelerates fretting corrosion on electrical connector terminals. This increases circuit resistance, leading to intermittent signal loss.
How to Talk to a Mechanic About This Code
Say this: "I have a C1135 code. My research shows this is an A/F sensor heater circuit on a Toyota, or a steering angle sensor on a Peugeot/Chevy. For the A/F sensor, please test the sensor's resistance and check the heater fuse before recommending replacement. For the steering sensor, please check if calibration is needed before quoting a new part."
This directs the mechanic to perform specific diagnostic steps (checking a fuse or attempting calibration) before jumping to the most expensive conclusion, saving you money on parts replacement.
Avoid saying:
- 'My check engine light is on, can you look at it?' (Invites a broad, expensive diagnostic process).
- 'Just fix whatever's wrong.' (Gives the shop a blank check).
- 'I think I need a new oxygen sensor.' (Don't diagnose it for them; describe the symptoms and let them confirm).
Questions to ask before authorizing the repair:
- Can you show me the failed test result (e.g., the 'OL' resistance reading or failed calibration attempt)?
- Did you check the related fuse and wiring first?
- Will you provide a written estimate that breaks down parts and labor costs?
- What is the warranty on the parts and the labor for this repair?
Where to Take It: Dealer vs Independent vs Chain
- Dealer:
Recommended only if the vehicle is under warranty or if an independent shop fails to calibrate a steering angle sensor due to lack of specific tools.
Best for: Vehicles still under powertrain or emissions warranty., Complex manufacturer-specific issues, like calibrating a steering angle sensor on a Peugeot requiring a proprietary Diagbox tool., Brand new models or issues covered by a Technical Service Bulletin (TSB).
Downsides: Significantly higher labor rates and diagnostic fees ($100-$500)., Often defaults to replacing an entire assembly (like a steering rack) when an independent shop might attempt a smaller repair. (Typical cost: +50% vs. baseline) - Independent Shop:
Best fit for most C1135 scenarios, especially the common Toyota A/F sensor failure. Most reputable independent shops easily handle this repair and perform SAS calibrations.
Best for: Out-of-warranty vehicles where cost is a major factor., Common repairs like an A/F sensor replacement on a Toyota., Building a relationship with a mechanic who knows you and your car.
Downsides: Quality varies greatly; vetting through reviews and ASE certifications is crucial., May lack the latest manufacturer-specific diagnostic tools for complex European models. (Typical cost: +0% vs. baseline) - Chain Shop:
Acceptable for a straightforward A/F sensor replacement if you are confident in the diagnosis, but AVOID for diagnostic work or steering angle sensor calibrations.
Best for: Simple, routine maintenance like oil changes or tire rotations.
Downsides: Technician skill and experience vary dramatically., Business model encourages upselling unnecessary services., Lacks advanced diagnostic tools for anything beyond reading a basic code. (Typical cost: -10% vs. baseline)
When to Walk Away From the Repair
If the estimated repair cost exceeds 50% of the car's private-party value, strongly consider selling or trading in the vehicle instead of repairing it.
- Car worth $4000, fix is $2200: Walk away. The repair cost is over 50% of the car's value. You are unlikely to recoup this cost.
- Car worth $12000, fix is $900: Fix it. The repair cost is well below the 50% threshold and is a reasonable investment to keep a valuable car running safely.
- Car worth $3000, fix is $2800: Walk away. The repair cost is nearly the entire value of the car. It makes no financial sense to proceed.
What Scan Tool You Need for This Code
Minimum: A scanner that reads manufacturer-specific codes (not just generic 'P' codes) and displays live sensor data.
A basic $20 code reader only shows the code number. For a Toyota A/F sensor, you need live data to confirm the fault. For a Peugeot/Chevy steering sensor, a basic reader cannot perform the necessary calibration function.
Budget: BlueDriver Pro or Foxwell NT301 (~$100) — Reads specific C-codes and graphs live A/F sensor data, excellent for diagnosing the Toyota fault. Lacks bidirectional control for SAS calibration.
Mid-range: Foxwell NT510 Elite or Launch Creader Elite (~$180) — Offers bidirectional control to perform the 'Steering Angle Sensor Calibration' required for Peugeot, Hyundai, and Chevy variants. Provides robust live data graphing.
Professional: Autel MaxiCOM MK808S or XTOOL D7 (~$400-600) — Provides full, dealer-level capabilities, comprehensive bidirectional control, advanced live data analysis, and access to special coding required on complex European models.
Rent vs buy: Auto parts stores read codes for free, but their loaner tools are basic readers. They cannot perform a steering angle sensor calibration. If your C1135 code is on a Peugeot, Chevy, or Hyundai, buy a midrange bidirectional tool or pay a shop for calibration.
How to Clear the Code After You Fix It
- Use an OBD-II scan tool to clear the Diagnostic Trouble Codes (DTCs).
- Disconnecting the battery for 30 minutes clears the code but resets all readiness monitors and vehicle memory.
- Perform the specific drive cycle to set the readiness monitors required for emissions testing.
Drive cycle (~20 minutes): 1. Cold start the vehicle (let sit for 8+ hours). 2. Idle for 2-3 minutes. 3. Drive in stop-and-go city traffic for 5 minutes. 4. Drive on a highway at a steady 55-60 mph for 5-10 minutes. 5. Let the vehicle cool down. Check monitor status with a scan tool.
Readiness monitors affected: Oxygen (O2) Sensor Monitor, O2 Sensor Heater Monitor, Catalyst (CAT) Monitor
Before emissions retest: drive at least 50 miles to fully set monitors.
Watch out for:
- Clearing the code with a scanner does not reset readiness monitors; the vehicle will fail an emissions test if monitors are not 'Ready'.
- The code returns on the next drive cycle if the root cause (e.g., a blown fuse) was not fixed.
- Having the fuel tank outside the 1/4 to 3/4 full range prevents the EVAP monitor from running.
Will This Fail Emissions / State Inspection?
Yes — this code typically fails an OBD-II emissions inspection.
- California: An illuminated Check Engine Light is an automatic failure. All required OBD-II readiness monitors must be set to 'Ready'.
- New York: A vehicle with an active Check Engine Light automatically fails the emissions portion of the NYS inspection. Readiness monitors must be set.
- Texas: An illuminated Malfunction Indicator Lamp (MIL) results in an automatic failure. For model years 2001 and newer, only one monitor is allowed to be 'Not Ready'.
Most Commonly Affected Vehicles
- Toyota Camry (2001-2011) — Extremely common code for the upstream A/F sensor on the 2AZ-FE 4-cylinder engine. California emissions models require a true A/F sensor, not a conventional O2 sensor.
- Peugeot 207 / 208 / 407 (2006-2018) — Indicates a steering wheel angle sensor fault. On the 208, the sensor is often integrated with the steering rack, making it an expensive repair requiring calibration with a Diagbox tool.
- Toyota RAV4 (2000-2005) — The A/F sensor heater circuit is a frequent failure point on the 1AZ-FE and 2AZ-FE engines.
- Toyota Tacoma (2001-2004) — The upstream A/F sensor is a common replacement item for this code on the 3.4L V6 and 2.7L 4-cylinder engines.
- Lexus ES300 / RX300 (1999-2003) — Shares powertrain components with the Toyota Camry and Highlander, making it susceptible to the same A/F sensor failures.
- Chevrolet Express (2018-2025) — Points to a fault in the steering angle sensor, critical for StabiliTrak. GM issued service bulletin PI0639D for related codes caused by connector corrosion.
- Hyundai Elantra (2014-2019) — Prone to steering angle sensor (SAS) faults related to the Motor Driven Power Steering (MDPS) system. Requires recalibration after alignment.
- Toyota 4Runner (2003-2008) — Owners frequently report this code, leading to the replacement of the upstream air-fuel ratio sensors.
- Mercedes-Benz Various (2005-2015) — C1135 is one of several codes related to a faulty wheel speed sensor signal or ABS module, disabling the ESP/BAS systems.
Manufacturer-Specific Notes
- Ford: C1135 (often displayed as P1135) means 'Pedal Position Sensor A Circuit Intermittent'. This points to a problem with the accelerator pedal sensor or its wiring, causing erratic acceleration.
- Peugeot/Citroen: Indicates a 'Steering Wheel Angle Sensor Fault', disabling traction control. On models like the 208, the sensor is integrated into the steering rack, resulting in repairs exceeding $3,000.
- Nissan: C1135 (or P1135) means 'Intake Valve Timing Control Performance'. The underlying cause is frequently engine oil sludge from missed oil changes clogging the VVT system's oil passages, not a bad sensor.
- Hyundai/Kia: Relates to the Steering Angle Sensor (SAS). TSBs require an SAS reset with a GDS scan tool after any steering or suspension work to clear intermittent warning lights.
- Chevrolet: On Express vans, C1135-range codes are often due to fretting corrosion on the steering angle sensor connector. GM bulletin PI0639D advises cleaning the terminals and adding dielectric grease rather than replacing the sensor.
Real Owner Stories
2001 Toyota Tacoma V6 - Misdiagnosis & Simple Fix
Check engine light came on with code P1135/C1135. Owner replaced the upstream A/F sensor with a new OEM Denso part, but the light returned immediately.
What they tried:
- Replaced Bank 1 Sensor 1 A/F sensor.
- Dealer diagnosed the new sensor as faulty and recommended another replacement.
- Owner re-inspected their own work.
Outcome: The owner discovered the electrical connector for the new sensor had not been pushed in far enough to 'click' and fully seat. After firmly pushing the connector together, they cleared the codes and the problem was solved permanently.
Lesson: Always ensure electrical connectors are fully seated and locked. A returning code often points to the circuit itself—including the connection you just touched.
2015 Peugeot 208 1.2 VTI - Intermittent Power Steering Loss
The EPS and ASR warning lights appeared, causing a loss of power steering. Turning the car off and on temporarily fixed it.
What they tried:
- A specialist found codes C1135 (Steering wheel angle sensor signal) and C1638.
- The specialist cleared the codes and attempted to recalibrate the sensor, but the fault returned.
Outcome: Because calibration failed, the next step was a complete steering rack replacement, as the sensor is integrated into the unit. The quoted price was over $3,200. The owner returned the car to the dealer under warranty.
Lesson: On modern European cars, C1135 indicates an expensive integrated component failure. If calibration fails, be prepared for a high repair bill.
2018+ Chevy Express Van - StabiliTrak Light On
The StabiliTrak/ESC warning light was on, and the scanner showed a C1135-range code related to the steering angle sensor.
What they tried:
- Initial diagnosis pointed towards a failed steering angle sensor.
- A technician inspected the sensor connector before ordering parts.
Outcome: Following GM Service Bulletin PI0639D, the technician found fretting corrosion on the connector terminals. The fix was to clean the terminals and apply dielectric lubricant. The fault was cleared and did not return.
Lesson: For chassis-related C1135 codes, the problem is often a poor connection, not a failed part. Always check for technical service bulletins (TSBs) related to your vehicle.
How to Prevent This Code From Triggering
- Perform regular, on-time oil changes with high-quality oil (Per manufacturer's schedule) — Specifically for Nissan/Infiniti models, this prevents the engine oil sludge that clogs VVT passages and triggers IVT control codes.
- Replace upstream A/F sensors proactively (Every 100,000 miles) — A/F sensors become slow with age, causing poor fuel trim adjustments that increase emissions and put thermal stress on the catalytic converter.
- Apply dielectric grease to exterior of sensor connectors (When replacing a sensor or working nearby) — For chassis sensors exposed to moisture, applying non-conductive grease seals the connector from water intrusion, preventing pin corrosion.
Frequently Asked Questions
What's the difference between an A/F sensor and an O2 sensor?
An Air-Fuel (A/F) ratio sensor is an advanced, wideband oxygen sensor. While a traditional O2 sensor only switches between rich and lean, an A/F sensor measures the precise air-to-fuel ratio across a wide range for better engine control.
Can I use a cheaper O2 sensor instead of an A/F sensor on my Toyota?
No. If your vehicle requires an Air-Fuel Ratio sensor, installing a conventional O2 sensor causes the computer to misread the signal. The C1135 code will return immediately.
How do I know if my car has California emissions?
Look for the Vehicle Emission Control Information (VECI) sticker under the hood or on the radiator support. It explicitly states if the vehicle 'conforms to regulations of California'.
The code appeared after a recent alignment. What does that mean?
This means you have the 'Steering Angle Sensor' variant of the code. The alignment changed the steering wheel's center position, and the technician failed to perform a 'Steering Angle Sensor Recalibration'. The sensor now reports an incorrect angle, triggering the code.
Can I just clean the sensor instead of replacing it?
No. The Toyota C1135 code points to a burnt-out internal electrical heater circuit that cannot be cleaned or repaired. Similarly, steering angle sensor faults are internal electronic failures requiring replacement or recalibration.
What are the most common misdiagnosis mistakes for C1135?
The biggest mistake is replacing the A/F sensor without checking the $2 'A/F HEATER' fuse first. For Peugeot/Hyundai, replacing the steering angle sensor when it only needed a software recalibration is a costly error.
Why did the code come back after I replaced the sensor?
If a new OEM-equivalent sensor doesn't fix the code, the problem lies in the wiring, fuse, or relay. You must verify 12V power and a proper ground signal at the harness connector.
What is 'Bank 1' and 'Sensor 1'?
Bank 1 is the side of the engine containing the #1 cylinder. Sensor 1 is the 'upstream' sensor, located in the exhaust manifold before the catalytic converter.
Key Takeaways
- Code C1135 is manufacturer-specific: it indicates a failed Air-Fuel sensor heater on Toyota/Lexus, but points to a disabled Steering Angle Sensor on Peugeot, Chevy, and Hyundai.
- On Toyota and Lexus models, C1135 almost always requires replacing the upstream Air-Fuel (A/F) sensor after verifying the heater circuit resistance reads outside the normal 0.8 to 1.4 ohms range.
- If C1135 appears immediately after a wheel alignment or suspension repair, the Steering Angle Sensor requires recalibration using a bidirectional scan tool.
- Never replace an A/F sensor without first checking the dedicated 'A/F HEATER' or 'EFI' fuse in the engine bay, as a blown $2 fuse causes the exact same C1135 code.
- Driving with a Toyota C1135 code for more than 2 months forces the engine to run rich, which destroys the catalytic converter and adds up to $2,500 to your repair bill.
Helpful Videos


Shop the Parts Behind C1135
Below are the parts most often responsible for code C1135, ranked by how frequently each one is the actual culprit (per the diagnosis above). Tap any to see what we have for your vehicle.


The information in this article is provided for general reference and educational purposes only. Vehicle specifications, procedures, and part compatibility can vary by production date, trim level, and region. Always consult your vehicle's factory service manual and verify part numbers before purchasing or performing repairs. Safety-critical components such as airbags, seat belts, and braking systems should be installed by a qualified professional.
- 🧭 Diagnostic Flowchart
- 🎬 Helpful Videos
- 🛍️ Shop This Part
- What Does C1135 Mean?
- Can I Drive With C1135?
- Common Causes
- Symptoms
- Common Fixes & Costs
- Used vs. New Parts: Buying Guide
- What Happens If You Wait — Timeline
- Cost of Not Fixing It
- Diagnosis Steps
- When This Code Triggers (Freeze-Frame Conditions)
- Related Codes
- Climate & Environmental Factors
- How to Talk to a Mechanic About This Code
- Where to Take It: Dealer vs Independent vs Chain
- When to Walk Away From the Repair
- What Scan Tool You Need for This Code
- How to Clear the Code After You Fix It
- Will This Fail Emissions / State Inspection?
- Most Commonly Affected Vehicles
- Manufacturer-Specific Notes
- Real Owner Stories
- 2001 Toyota Tacoma V6 - Misdiagnosis & Simple Fix
- 2015 Peugeot 208 1.2 VTI - Intermittent Power Steering Loss
- 2018+ Chevy Express Van - StabiliTrak Light On
- How to Prevent This Code From Triggering
- Frequently Asked Questions
- What's the difference between an A/F sensor and an O2 sensor?
- Can I use a cheaper O2 sensor instead of an A/F sensor on my Toyota?
- How do I know if my car has California emissions?
- The code appeared after a recent alignment. What does that mean?
- Can I just clean the sensor instead of replacing it?
- What are the most common misdiagnosis mistakes for C1135?
- Why did the code come back after I replaced the sensor?
- What is 'Bank 1' and 'Sensor 1'?
- Key Takeaways
- 🎟️ Get 5% Off