
Ultimate Guide to OBD-II Code C1244: Deceleration Sensor Circuit Malfunction
The Most Comprehensive Resource for What C1244 Means, Why It Triggers, and How to Fix It for Good
- Code C1244 disables your vehicle's ABS and Vehicle Stability Control (VSC) systems due to an electrical fault in the deceleration sensor circuit.
- Inspect the sensor's wiring harness under the center console or front seats first; over 50% of C1244 codes stem from a corroded connector rather than a failed sensor.
- You can safely drive to a repair shop, but increase your following distance by at least 3 seconds since your wheels will lock up during emergency panic braking.
- Mandatory zero-point calibration is required after replacing the sensor or altering suspension; skipping this 15-minute step guarantees the warning lights will remain on.
- Verify your manufacturer's specific code definition, as C1244 means 'Deceleration Sensor Fault' on Toyotas but indicates a 'Brake Booster Pressure' issue on 2022+ Honda Civics.
What Does C1244 Mean?

C1244 indicates the vehicle's primary computer (ECU) detects an electrical fault within the deceleration sensor circuit. This sensor, also known as a G-sensor or part of the yaw rate sensor assembly, measures the vehicle's forward and backward G-forces. This data is essential for the proper operation of the Anti-lock Brake System (ABS) and Vehicle Stability Control (VSC)/Traction Control (TRAC) systems.
Technical definition: Toyota officially defines this as 'Open or Short in Deceleration Sensor Circuit'. This triggers when the control module detects a specific electrical anomaly: the sensor's signal voltage drops below 4.4V or exceeds 5.6V for 1.2 seconds, suffers a complete loss of signal, or reports an illogical reading outside a +/- 1.5 G range for over a second.
Can I Drive With C1244?
Yes, But With Caution. Yes, but standard hydraulic brakes operate without Anti-lock Braking (ABS) or Vehicle Stability Control (VSC). Your wheels will lock during a panic stop, increasing stopping distance, and your vehicle cannot automatically correct for skids. Studies show VSC reduces single-vehicle crash rates by over 50%, making its absence a major safety concern in slippery conditions or emergency maneuvers. Long-term driving leaves critical safety systems inactive.
Common Causes

- Corroded Wiring or Connector (Very Common) — The wiring harness under the seat or center console is highly vulnerable to spilled drinks, leaking sunroofs, and rodent damage. Moisture causes pin corrosion, creating an open or short circuit.
- Failed Deceleration (Yaw/G) Sensor (Common) — The sensor fails internally from age, excessive vibration, or internal short circuits. These sensors are often integrated with the yaw rate sensor into a single unit.
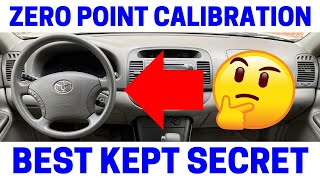
- Missing Zero-Point Calibration (Occasional) — Disconnecting the battery, replacing the sensor, or altering suspension geometry (lift kits) erases the sensor's 'zero point'. The system interprets this uncalibrated state as a fault, sometimes triggering C1244 alongside C1336. 🎬 Watch this walkthrough on performing a zero point calibration.
- Blown ABS/VSC Fuse (Less Common) — A blown fuse cuts power to the sensor's circuit, immediately triggering this code.
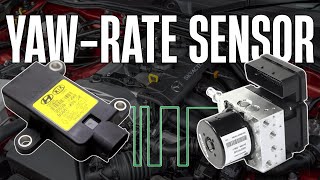
- Failed ABS/VSC Control Module (ECU) (Rare) — The control module processing the sensor's data fails. Stop DIY diagnosis and tow the vehicle to a specialized shop if harness resistance tests confirm the wiring and sensor are intact. 🎬 See how to test the yaw rate sensor with a multimeter.
Symptoms

- Multiple Dashboard Warning Lights (ABS, VSC, Brake) — The ABS, TRAC, VSC, and sometimes the primary red BRAKE lights illuminate simultaneously and remain on.
- ABS and Stability Control Inoperative — Wheels lock and skid during panic stops. The vehicle fails to correct slides during sharp turns or slippery conditions, increasing the risk of losing control.
- Continuous Cabin Buzzer — Certain Toyota and Lexus models sound a continuous or intermittent warning buzzer inside the cabin 🎬 Watch: Calibrating crawl control and zero point on Lexus models. when a VSC/ABS fault like C1244 is detected.
Diagnostic Flowchart

Tap your situation to follow the diagnostic path that matches what you're seeing on this code.
Common Fixes & Costs
- Repairing Wiring or Cleaning Connector — Parts: $5-$50 (for wire, terminals, contact cleaner), Labor: $125-$300, ~1.5 hr book time (Intermediate)
- Performing Zero-Point Calibration — Parts: $0, Labor: $50-$150 (if performed at a shop), ~0.5 hr book time (DIY)
- Replacing the Deceleration Sensor
— Parts: $300-$800 (OEM part), Labor: $150-$400 (includes labor for replacement and mandatory zero-point calibration), ~2 hr book time
(DIY)
Toyota Hilux (2005-2015): OEM 89441-60030 (Alt: Denso (OEM supplier), Aisin)
Toyota Corolla (2003-2008): OEM 89180-12020 (Alt: Denso, Standard Motor Products (SMP))
Toyota Land Cruiser (100 Series, 1998-2007): OEM 89441-60020, 89441-30050, 89440-60100 (Alt: Denso (OEM supplier)) - Replacing a Blown Fuse — Parts: $1-$10, Labor: $0-$75 (labor for diagnosis if not obvious), ~0.2 hr book time (Beginner)
- Repairing/Replacing the ABS Control Module — Parts: $300-$800 (Repair Service) or $1000-$2,800+ (New OEM Part), Labor: $150-$300, ~2.5 hr book time (Professional)
DIY vs Professional
- Replacing a Blown Fuse — Beginner:
- Repairing Wiring or Cleaning Connector — Beginner:
- Performing Zero-Point Calibration — Beginner:
- Replacing the Deceleration Sensor — Beginner:
- Repairing/Replacing the ABS Control Module — Beginner:
Used vs. New Parts: Buying Guide
When a used part is worth it: For a high-cost OEM sensor on an older, high-mileage vehicle, a used sensor from a reputable auto recycler is a cost-effective option. It makes sense when the budget is tight and the part is sourced from a vehicle with no signs of water damage or collision near the sensor's location.
Donor-vehicle mileage cap: roughly under 100000 miles for the part to have meaningful remaining life.
Donor quality checklist:
- Verify the donor vehicle was not scrapped due to flood or water damage.
- Inspect the connector on the used part for any signs of corrosion (green or white powder).
- Match the OEM part number exactly. Superseded numbers work, but require verification.
- Purchase from a seller offering at least a 30-90 day warranty.
Decision logic:
- If The fault is confirmed to be wiring/connector corrosion and not the sensor itself → Do not buy any sensor; repair the wiring first as it is the most common issue.
- If Vehicle is less than 10 years old and the new part is under $400 → Buy a new OEM or high-quality aftermarket (e.g., Denso, Aisin) part for reliability and warranty.
- If Vehicle is over 15 years old and budget is a primary concern → A used part from a low-mileage, non-flood donor is an acceptable risk.
Warranty tradeoff: Used parts typically come with a 30-90 day functional warranty. New aftermarket parts often have a 1-year to limited lifetime warranty. New OEM parts carry a 1-year/12,000-mile warranty.
Worst-case if a used part fails: $200-$500 if a used part is faulty or fails prematurely, requiring repeat labor for diagnosis, removal, and installation of another part.
What Happens If You Wait — Timeline
- Immediate (First 0-10 seconds of driving): ABS/VSC module runs a self-check, detects the open/short circuit, and immediately disables the ABS, VSC, and TRAC systems. The corresponding warning lights (ABS, VSC, etc.) illuminate on the dashboard and stay on. (MPG impact: 0%% · Added cost: $0)
- 0-1 month: The vehicle's conventional brakes work, but without the anti-lock or stability control safety net. The risk of an accident during a panic stop or evasive maneuver is significantly higher. There is no direct mechanical damage to other components. (MPG impact: 0%% · Added cost: Potential for catastrophic cost from an accident. The primary cost is the unquantifiable safety risk.)
- 1-6 months: Continued driving with the warning lights on. The underlying electrical issue (e.g., water intrusion) worsens, causing corrosion to spread to adjacent circuits in the same connector. The main consequence is the ongoing safety risk and the potential to fail a state safety inspection. (MPG impact: 0%% · Added cost: $50 - $200 (failed inspection fees, potential for more complex wiring repair if corrosion spreads).)
- 6+ months: Driving with multiple warning lights on becomes 'normal,' increasing the risk that a new, more critical warning (like low oil pressure) is ignored. Vehicle resale value is negatively impacted. If the fault is an intermittent short, it blows a shared fuse, affecting other systems. (MPG impact: 0%% · Added cost: $200 - $1000+ (reduced resale value, plus the original repair cost which is now unavoidable).)
Cost of Not Fixing It
- Immediate: ABS and Vehicle Stability Control (VSC) are disabled. There is a significantly increased risk of losing control and having an accident during emergency braking or evasive maneuvers, especially in wet or slippery conditions. (Added cost: Potential for catastrophic cost from an accident.)
- 0-6 months: No direct mechanical damage to other components is likely. The primary cost is the ongoing safety risk. An active fault causes uneven tire wear if the system intermittently tries to engage before failing completely. (Added cost: $0 - $200 (for potential uneven tire wear).)
- 6+ months: Continued driving with warning lights on masks new, more serious problems that arise. It leads to a failed state safety inspection and negatively impacts the vehicle's resale value. (Added cost: $50 - $500+ (failed inspection fees, reduced resale value).)
Diagnosis Steps
- Read the Codes
Use an OBD-II scanner capable of reading Chassis ('C') codes to confirm C1244 is present. Document any other codes (e.g., C1243, C1245, C1336) as they provide critical context for the diagnosis.
Tools: OBD-II Scanner (ABS/Chassis capable) (Beginner) - Check the Fuses
Consult the owner's manual to locate the fuse box(es). Identify and visually inspect all fuses related to the 'ABS', 'VSC', and 'ECU-IG' systems. A simple blown fuse is sometimes the entire problem.
Tools: Owner's manual, Fuse puller or needle-nose pliers (Beginner) - Locate and Visually Inspect the Sensor
The sensor is typically found in the vehicle's cabin, under the center console, or beneath the driver/passenger seat, bolted to the floor. Inspect the area for signs of water damage from spills, a leaking sunroof, or corrosion on the connector. Check for any obvious wiring damage.
Tools: Flashlight, Trim removal tools (Intermediate) - Inspect and Clean the Connector
Disconnect the battery. Unplug the sensor's electrical connector and meticulously inspect for bent, corroded, or recessed pins. If any green or white powder (corrosion) is visible, clean the terminals thoroughly with electrical contact cleaner and a small brush. Ensure the connector clicks securely back into place.
Tools: Electrical contact cleaner, Small brush or pick (Intermediate) - Perform Zero-Point Calibration
If the connector is clean, perform a zero-point calibration before tearing into wiring. This procedure teaches the ECU the sensor's baseline reading on a level surface. It is done with a professional scan tool or, on many Toyotas, by shorting specific pins (typically Ts and CG) in the OBD-II port with a jumper wire.
Tools: Professional scan tool or Paperclip/Jumper wire (Toyota-specific method) (Intermediate) - Check Live Data with Scan Tool
Connect an advanced scan tool and view the live data stream for the deceleration sensor. When the vehicle is stationary on a level surface, the sensor's output should be stable and near zero. A healthy sensor typically reads between -0.13 G and +0.13 G. A reading that is stuck high, low, or doesn't change when the vehicle moves points to a hard fault.
Tools: Advanced OBD-II Scanner with Live Data (Advanced) - Test the Circuit at the Connector
With the sensor unplugged and the ignition ON, use a digital multimeter to test the terminals on the harness-side connector. Using a vehicle-specific wiring diagram, verify the reference voltage and ground. The supply voltage (often pin VGS or VYS) should be within the specified range, typically 4.4V to 5.6V. An absence of voltage or ground points to a wiring issue or blown fuse, not a bad sensor.
Tools: Digital multimeter, Vehicle-specific wiring diagram (Advanced) - Bench Test the Sensor's Output
This definitively tests the sensor itself. With the sensor removed, create a low-voltage power source by connecting three 1.5V batteries in series to produce 4.5V. Apply 4.5V to the sensor's power (VGS/VYS) and ground (GGND/GYAW) pins. Measure the voltage on the signal pin (e.g., GL1). While level, the voltage should be stable at approximately 2.3V. Tilting the sensor forward and backward causes the voltage to change smoothly. If the voltage is stuck, absent, or doesn't change, the sensor failed.
Tools: Digital multimeter, 3x 1.5V batteries, Jumper wires, Vehicle-specific pinout diagram (Advanced) - Test Harness Resistance
Disconnect the sensor and the ABS/VSC ECU connectors. Use a multimeter to check for continuity on each wire in the circuit between the two connectors. Resistance should be less than 1 Ω. Then, check the resistance between each wire and the chassis ground. The reading should be 10 kΩ or higher, indicating no short to ground. This definitively tests the integrity of the wiring harness.
Tools: Digital multimeter, Vehicle-specific wiring diagram (Advanced) - Check for Signal with an Oscilloscope
For intermittent issues, back-probe the signal wire at the sensor with an oscilloscope. A healthy sensor shows a clean, stable voltage line that changes with vehicle movement. A faulty circuit shows excessive noise, dropouts, or a flat line, indicating where the fault lies (wiring vs. sensor).
Tools: Oscilloscope, Back-probe pins (Professional)
When This Code Triggers (Freeze-Frame Conditions)
- Vehicle Speed: 0 mph (stationary) (The fault is detected during the initial system self-check immediately after turning the ignition on, before the vehicle moves.)
- System Voltage: 11-14V (The code sets under normal operating voltage; it is not caused by a low battery, although a faulty charging system causes erratic electrical behavior.)
- Time After Ignition ON: 1-5 seconds (The ABS/VSC module performs a self-test upon startup. If the deceleration sensor's circuit shows an open or short, the code sets almost immediately.)
- Deceleration Sensor Signal (Live Data): Stuck at 0V, 5V, or an illogical value (Unlike a functional sensor showing a stable voltage (~2.3V) when level, the faulty circuit shows a fixed, out-of-range value that does not change.)
Related Codes
- C1243 — C1243 means 'Deceleration Sensor Stuck'. While C1244 indicates an electrical circuit problem (open/short), C1243 suggests the sensor is electrically fine but its output signal is not changing as the vehicle moves. This almost always points to an internal failure of the sensor itself.
- C1245 — On Toyota systems, C1245 means 'Deceleration Sensor Output Abnormal'. This indicates the sensor's reading is illogical or out of its expected range, even if the circuit is intact. It often appears with C1244 and reinforces a likely sensor failure.
- C1336 — This code means 'Deceleration Sensor Zero Point Calibration Undone'. It is not a hardware fault. C1336 appears *after* replacing the sensor, altering suspension, or disconnecting the battery if the mandatory calibration procedure was not performed. Seeing C1244 and C1336 together means a new sensor was installed without being calibrated.
- U0124 — This is a network code for 'Lost Communication With Lateral Acceleration Sensor Module'. If you see this code along with C1244, it points towards a severe electrical issue, like a complete wiring harness failure, a blown main fuse, or a faulty control module failing to communicate with the sensor assembly.
Climate & Environmental Factors
- Humidity and Water Intrusion: High humidity or direct water exposure (spilled drinks, leaking seals, deep puddles) is a primary cause of C1244. Moisture gets into the sensor's electrical connector, which is often under a seat or console, causing corrosion (green or white powder) on the pins and leading to a short or open circuit.
- Road Salt (Salt Belt Regions): In regions using road salt during winter, corrosive salt spray gets into the vehicle cabin and accelerates corrosion of electrical connectors. On some vehicles like Subarus, this code traces to a large harness connector in the driver's kick panel corroded from salty meltwater brought in on the driver's feet.
- Extreme Cold: Extreme cold causes older, brittle wiring to crack or break, especially wires flexed by seat movement. This leads to an intermittent open circuit that only appears in cold weather.
How to Talk to a Mechanic About This Code
Say this: "I have an ABS/VSC light on and my scanner shows code C1244. I'd like to book a diagnostic appointment. Based on my research, the cause is often a wiring or connector issue under the center console or seat, rather than a bad sensor. Can you please start by inspecting the wiring harness and connector for corrosion or damage before quoting a sensor replacement?"
This signals you are an informed customer. It directs the technician to check the most common and cheapest failure point first, preventing them from immediately defaulting to replacing the expensive sensor assembly. It also sets the expectation for a diagnostic-led repair, not just parts replacement.
Avoid saying:
- My ABS light is on, can you fix it?
- Just replace the deceleration sensor.
- I need you to clear a C1244 code.
Questions to ask before authorizing the repair:
- Did you find the fault in the wiring, the connector, or the sensor itself?
- Can you show me the corroded connector or the voltage readings from the circuit test?
- If the sensor needs to be replaced, does your quoted price include the mandatory zero-point calibration?
- What is the warranty on this specific repair and the new part?
Where to Take It: Dealer vs Independent vs Chain
- Dealer:
A safe but expensive choice. Best if you suspect a complex issue or want the peace of mind of OEM tools and parts, especially for the zero-point calibration.
Best for: Vehicles under warranty., Complex cases where a zero-point calibration is needed and you want guaranteed access to the correct Techstream software.
Downsides: Highest labor rates., Quicker to replace the entire sensor assembly rather than perform a more detailed wiring repair. (Typical cost: +50% vs. baseline) - Independent Shop:
Best fit for most owners. An experienced independent technician is very familiar with this common code and checks for simple wiring/corrosion issues first, saving you money.
Best for: Out-of-warranty vehicles where cost is a factor., Shops that specialize in your vehicle's brand (e.g., a Toyota/Lexus specialist).
Downsides: Quality and diagnostic capabilities vary greatly. Ensure they have a scanner that reads ABS/Chassis codes and performs a zero-point calibration. (Typical cost: +0% vs. baseline) - Chain Shop:
Avoid for this code. The diagnostic process requires more than a basic code read, and the mandatory calibration step is beyond the scope of their standard services.
Best for: Simple, unrelated services like oil changes or tires.
Downsides: Technician skill varies dramatically; they lack the specific knowledge for C1244 diagnosis., Lack advanced scanners capable of reading chassis codes or performing the necessary zero-point calibration., Higher likelihood of recommending an unnecessary sensor replacement. (Typical cost: -10% vs. baseline)
When to Walk Away From the Repair
If the estimated repair cost exceeds 40% of the car's private-party value, pause and consider alternatives. An illuminated ABS light reduces a car's trade-in value by at least $500 on its own.
- Car worth $4000, fix is $750: Fix it. The repair cost is well below the threshold and less than the potential loss in value from selling it with a known safety system fault.
- Car worth $3000, fix is $1800: Walk away. The repair requires replacing the entire ABS control module, and the cost is over half the car's value.
- Car worth $8000, fix is $250: Fix it immediately. This is a cheap fix for a corroded wire, resolving a major safety issue and restoring vehicle value.
What Scan Tool You Need for This Code
Minimum: A scanner that reads and clears Chassis ('C') codes, specifically for the ABS/VSC system. A basic engine-only code reader will not see or clear C1244.
A standard $20 scanner only reads Powertrain ('P') codes like the check engine light. It is completely blind to the ABS, Airbag (SRS), and other systems. You need a tool explicitly stating ABS/SRS capability to begin diagnosing this code.
Budget: Innova 3040RS / Autel AL619 (~$99) — Reads and clears ABS codes, allowing you to confirm C1244 and turn off the light after a repair. Provides live data for wheel speed sensors. Lacks the specific zero-point calibration function.
Mid-range: BlueDriver Pro / Foxwell NT510 Elite (with Toyota software) (~$120-180) — Reads and clears ABS codes and shows live data. The Foxwell NT510 Elite features bidirectional control to perform the 'Zero Point Calibration' special function, critical after replacing the sensor.
Professional: Autel MK808 / Launch X431 Series (~$450-900) — Full bidirectional control. Easily performs the 'Reset Memory' and 'Test Mode' (Zero Point Calibration) functions required for Toyota/Lexus vehicles. Provides OEM-level diagnostics to definitively test the sensor, wiring, and module.
Rent vs buy: AutoZone's loaner tool program has scanners with ABS capability, but they rarely perform the zero-point calibration. If calibration is needed, buying a mid-range tool like the Foxwell NT510 is cheaper than one hour of diagnostic labor at a dealership.
How to Clear the Code After You Fix It
- Perform Zero-Point Calibration if the sensor was replaced or disconnected (mandatory for many Toyotas).
- Use an OBD-II scan tool capable of accessing the ABS module to clear the C1244 code.
- Perform a short test drive, including speeds above 25 mph, to allow the system to confirm the repair and turn off the warning lights.
Drive cycle (~15 minutes): Unlike emissions monitors, the ABS/VSC system self-tests quickly. After clearing the code, start the vehicle. The lights extinguish. Drive for 5-10 minutes, including some turns and reaching a speed of at least 25-30 mph. If the warning lights remain off, the repair is successful. A full warm-up cycle is not required for this specific code.
Readiness monitors affected: This is a Chassis ('C') code and does not directly affect emissions readiness monitors like the Catalyst or O2 sensor monitors.
Watch out for:
- Forgetting to perform the Zero-Point Calibration after replacing the sensor is the most common pitfall; this prevents the lights from turning off.
- Simply clearing the code without fixing the underlying electrical fault (bad wire, corroded connector, faulty sensor) results in the code returning almost immediately.
- Using a basic OBD-II reader that only clears Powertrain ('P') codes will not clear the Chassis ('C') code from the ABS module.
Will This Fail Emissions / State Inspection?
No — by itself this code doesn't fail OBD inspection (but it can keep readiness monitors from setting, which causes a separate fail).
- California: C1244 is a chassis code and will not cause a failure of the emissions-focused OBD-II smog check. However, an illuminated ABS light causes the technician to refuse the test on safety grounds, though it is not an automatic failure criteria for emissions.
- New York: An illuminated ABS warning light is grounds for failure of the annual safety inspection.
- Texas: As of 2025, most non-commercial vehicles are exempt from the annual safety inspection. However, for commercial vehicles that still require it, an illuminated ABS light is NOT a cause for rejection, though a lit red 'BRAKE' warning light is.
Most Commonly Affected Vehicles
- Toyota Hilux (2005-2015) — Extremely common issue. The deceleration sensor is under the center console. The part number for many of these models is 89441-60030. Failures are split between wiring faults and internal sensor failure.
- Toyota Corolla (2003-2008) — The Yaw Rate Sensor assembly (containing the deceleration sensor) is located under the driver's or passenger's seat, beneath the carpet, making it highly susceptible to water damage from spills or wet shoes. A common part number is 89180-12020.
- Toyota Land Cruiser / Prado (1998-2007) — This code points directly to the deceleration sensor circuit. On the 100-series, it is a known issue where the sensor itself fails. The sensor is often located near the gear shifter under the center console.
- Lexus GX470 (2003-2009) — Shares a platform with the 4Runner/Prado. The yaw/deceleration sensor is a frequent failure point. Zero-point calibration is performed without a scan tool using a jumper wire on the OBD-II port.
- Subaru Forester, Outback, Crosstrek (2014-2018) — On many Subarus, C1244 is caused by corrosion in a large white multi-pin connector in the driver-side kick panel. Water wicks into this connector, causing high resistance. Cleaning this connector resolves the issue without replacing parts.
- Honda Civic (2022-Present) — On 11th generation Civics, this code appears as C1244-1C and means 'Brake Booster Pressure Sensor Incorrect Supply Voltage'. This is a completely different diagnosis, focusing on the sensor near the brake booster and its power supply, not the G-sensor.
- Toyota Fielder / Axio (2006-2012) — The deceleration sensor is a known failure item, often located under the passenger seat. The issue is frequently a broken or corroded wire in the harness leading to the sensor's connector.
- Toyota Tacoma (2001-2004) — C1244 points to a failure in the deceleration sensor circuit. Diagnosis focuses on the sensor located under the center console and its wiring connection to the brake actuator ECU.
Manufacturer-Specific Notes
- Toyota/Lexus: This is the most common brand for this code. It almost always refers to a fault in the deceleration (yaw rate) sensor circuit. A 2022 recall for some 2020-2022 models addressed a software error where the VSC system would not default to 'ON' on startup, a separate issue from C1244.
- Nissan: On certain Nissan vehicles, C1244 has a completely different meaning: 'Intake Camshaft Control (Bank 2) Malfunction'. This is an engine-related powertrain ('P') code misidentified as a chassis ('C') code by some scanners, pointing to a variable valve timing system problem.
- Chevrolet/GM: On some GM models, the code appears as B1244, a Body ('B') code, meaning 'CD Player Cannot Read Disc'. It is critical to use a scanner that correctly identifies the system (Chassis vs. Body vs. Powertrain) reporting the fault.
- General (Multiple): A less common, generic definition for C1244 is 'ABS Outlet Valve Coil LR Circuit Short To Battery'. This points to an electrical fault in the ABS hydraulic control unit for the left-rear wheel, a completely different component from the deceleration sensor.
Real Owner Stories
2010 Toyota Hilux with ABS light on
Owner purchased the vehicle with the ABS light already illuminated. A scanner revealed code C1244, which would not clear.
Outcome: After cleaning the corroded connector and reassembling, the C1244 code successfully cleared. The ABS light went off and stayed off, resolving the problem without replacing any parts.
Lesson: Always inspect and clean wiring connectors in the circuit before condemning the sensor. Corrosion is a very common and inexpensive cause of this 'open or short circuit' code.
2005 Toyota Corolla with ABS and Brake lights on
ABS and brake warning lights appeared on the dash. A scan confirmed code C1244, pointing to the yaw rate/deceleration sensor.
Outcome: The confirmed cause was a wet and corroded connector. Cleaning the connector and ensuring the area was dry resolved the fault.
Lesson: On vehicles where the sensor is under the carpet (like the 2003-2008 Corolla), water intrusion from spills or wet shoes is a primary suspect for C1244. Check for dampness before buying a new sensor.
Toyota Land Cruiser Prado with multiple ABS/VSC lights
ABS, VSC, and TRC warning lights were all illuminated on the dashboard. A diagnostic scan showed code C1244.
Outcome: Plugging the sensor's connector back in securely and clearing the codes immediately fixed the issue. All warning lights extinguished.
Lesson: Before assuming a part has failed, perform a thorough visual inspection. A connector gets knocked loose during unrelated interior work or by items stored in the console, leading to a simple fix.
2008 Toyota Reiz with C1336 after sensor replacement
After replacing the ABS ECU or the G/Yaw Rate Sensor assembly, the vehicle displayed a new code, C1336, for 'Deceleration Sensor Zero Point Calibration uncompleted'.
Outcome: Following the on-screen procedure, which requires the vehicle to be on a flat surface and stationary, successfully calibrated the new sensor. This cleared the C1336 code and restored full system functionality.
Lesson: Replacing the sensor is only half the job. Failure to perform the mandatory zero-point calibration results in a different code (C1336) and the safety systems remain inactive. This step is not optional.
How to Prevent This Code From Triggering
- Apply Dielectric Grease to Connectors (Anytime a connector is disconnected, or once every few years) — Dielectric grease is non-conductive and seals out moisture, oxygen, and salt, preventing the formation of corrosion on the electrical pins of the deceleration sensor and other critical connectors.
- Ensure Weather Seals are Intact (Annual visual inspection) — Check door seals, window seals, and sunroof drains. Degraded seals allow water to enter the cabin, which pools under carpets and saturates sensors and connectors located on the vehicle floor.
- Use Waterproof Sealant or Heat-Shrink Tubing on Wire Repairs (During any wiring repair) — When repairing a wire, using heat-shrink tubing or sealant creates an airtight, waterproof barrier that prevents moisture from wicking into the wire and causing future corrosion and high resistance.
- Perform Zero-Point Calibration After Suspension/Tire Changes (After installing a lift kit or significantly different sized tires) — Calibrating the sensor re-learns the vehicle's new baseline ride height and center of gravity. This prevents the system from interpreting the new normal sensor readings as a fault, which triggers codes like C1244 or C1336.
- Avoid Deep Water and Clean Spills Immediately (Daily habit) — Since many deceleration sensors are located inside the cabin under seats or consoles, avoiding deep puddles that flood the floorpan and immediately cleaning up spilled drinks prevents direct moisture exposure that leads to short circuits.
Frequently Asked Questions
What is the biggest misdiagnosis for C1244?
The most common and expensive mistake is replacing the deceleration sensor without first exhaustively testing the wiring and connector. A corroded connector pin or a broken wire under the carpet is a far more frequent cause and a much cheaper fix. The second biggest mistake is failing to perform the 'zero point calibration' after replacing the sensor, which prevents the warning lights from turning off.
What is 'Zero Point Calibration' and is it always required?
Zero Point Calibration is a mandatory procedure that sets the baseline 'zero' reading for the yaw rate and deceleration sensors when the vehicle is stationary on level ground. It is absolutely required after replacing the sensor, disconnecting the ECU, or altering the vehicle's suspension. Without it, the system cannot function correctly.
Can I fix code C1244 myself?
Yes, a DIY-er can often fix this by inspecting fuses and cleaning the sensor's connector. Replacing the sensor itself is also manageable for many, as it is usually located inside the car's cabin. However, advanced circuit testing requires a multimeter and knowledge of wiring diagrams.
Will clearing the code fix the problem?
No. Clearing the code with a scanner only turns the lights off temporarily. Because C1244 indicates a hard electrical fault, the code and warning lights return as soon as the system runs its self-check, usually within seconds of starting the car.
Is a deceleration sensor the same as a yaw rate sensor or G-sensor?
These terms are often used interchangeably, though they measure different things (G-sensor for forward/backward, Yaw for rotational sliding). Modern cars package them together in a single 'Yaw Rate Sensor Assembly'. A fault in the deceleration portion of this assembly triggers C1244.
Why did my ABS, VSC, and TRAC lights all turn on at once?
The ABS, traction control (TRAC), and vehicle stability control (VSC) systems are all part of an integrated safety system relying on the same sensors. When this critical sensor's data is lost, the main computer disables all dependent systems as a fail-safe measure. This causes all related warning lights to illuminate simultaneously.
Can a bad alignment or hitting a pothole cause a C1244 code?
Yes, indirectly. A severe pothole impact physically damages the sensor or its wiring under the floorboards. A bad alignment changes driving dynamics enough to skew sensor readings, though this typically triggers a C1336 calibration code rather than a C1244 circuit error.
Key Takeaways
- Code C1244 disables your vehicle's ABS and Vehicle Stability Control (VSC) systems due to an electrical fault in the deceleration sensor circuit.
- Inspect the sensor's wiring harness under the center console or front seats first; over 50% of C1244 codes stem from a corroded connector rather than a failed sensor.
- You can safely drive to a repair shop, but increase your following distance by at least 3 seconds since your wheels will lock up during emergency panic braking.
- Mandatory zero-point calibration is required after replacing the sensor or altering suspension; skipping this 15-minute step guarantees the warning lights will remain on.
- Verify your manufacturer's specific code definition, as C1244 means 'Deceleration Sensor Fault' on Toyotas but indicates a 'Brake Booster Pressure' issue on 2022+ Honda Civics.
Helpful Videos
Shop the Parts Behind C1244
Below are the parts most often responsible for code C1244, ranked by how frequently each one is the actual culprit (per the diagnosis above). Tap any to see what we have for your vehicle.


The information in this article is provided for general reference and educational purposes only. Vehicle specifications, procedures, and part compatibility can vary by production date, trim level, and region. Always consult your vehicle's factory service manual and verify part numbers before purchasing or performing repairs. Safety-critical components such as airbags, seat belts, and braking systems should be installed by a qualified professional.
- 🧭 Diagnostic Flowchart
- 🎬 Helpful Videos
- 🛍️ Shop This Part
- What Does C1244 Mean?
- Can I Drive With C1244?
- Common Causes
- Symptoms
- Common Fixes & Costs
- DIY vs Professional
- Used vs. New Parts: Buying Guide
- What Happens If You Wait — Timeline
- Cost of Not Fixing It
- Diagnosis Steps
- When This Code Triggers (Freeze-Frame Conditions)
- Related Codes
- Climate & Environmental Factors
- How to Talk to a Mechanic About This Code
- Where to Take It: Dealer vs Independent vs Chain
- When to Walk Away From the Repair
- What Scan Tool You Need for This Code
- How to Clear the Code After You Fix It
- Will This Fail Emissions / State Inspection?
- Most Commonly Affected Vehicles
- Manufacturer-Specific Notes
- Real Owner Stories
- 2010 Toyota Hilux with ABS light on
- 2005 Toyota Corolla with ABS and Brake lights on
- Toyota Land Cruiser Prado with multiple ABS/VSC lights
- 2008 Toyota Reiz with C1336 after sensor replacement
- How to Prevent This Code From Triggering
- Frequently Asked Questions
- What is the biggest misdiagnosis for C1244?
- What is 'Zero Point Calibration' and is it always required?
- Can I fix code C1244 myself?
- Will clearing the code fix the problem?
- Is a deceleration sensor the same as a yaw rate sensor or G-sensor?
- Why did my ABS, VSC, and TRAC lights all turn on at once?
- Can a bad alignment or hitting a pothole cause a C1244 code?
- Key Takeaways
- 🎟️ Get 5% Off