
OBD-II Code C1249: A Comprehensive Guide to the Stop Lamp Switch Circuit Fault
The Ultimate Resource to Outrank All Others: What C1249 Means, Why It Triggers, and Exactly How to Fix It
- Code C1249 disables your ABS and stability control systems because the computer cannot detect when you press the brake pedal.
- Replacing the brake light switch resolves this code in over 80% of cases and typically costs between $15 and $75 for the part.
- Check your brake lights immediately; if they do not illuminate, you are at a high risk for a rear-end collision and should not drive.
- Inspect the 10A or 15A 'STOP' fuse before buying any parts, as a blown fuse is the second most common cause of this fault.
- Owners of 2006-2015 Hyundai and Kia models must check their VIN for NHTSA Campaign 13V114000, which provides a free dealer replacement for a defective switch.
What Does C1249 Mean?

Code C1249 means your car's Anti-lock Brake System (ABS) control module detects an open circuit or malfunction in the brake light switch. Located on the brake pedal bracket, this switch tells the ABS, stability control (VSC), and engine control module (ECU) that you are braking. When this signal is lost, these safety systems disable themselves as a precaution, triggering dashboard warning lights.
Technical definition: The official SAE/OBD-II definition is "Stop Lamp Switch Circuit Open" or "Stop Light Switch Circuit Malfunction". This indicates the skid control ECU or ABS module detects an open signal input line, an open ground circuit, or an implausible signal from the brake light switch for a specified duration (e.g., 0.3 seconds).
Can I Drive With C1249?
Yes, But With Caution. You can physically drive the vehicle, but it is a severe safety hazard. Your brake lights are often inoperative, making you invisible to following drivers when you slow down, which dramatically increases the risk of a rear-end collision. Driving with this fault leads to traffic citations and places you at-fault in an accident. Your ABS and stability control systems are disabled, reducing vehicle control in emergency situations. Diagnose and repair the issue immediately.
Common Causes

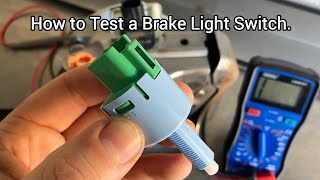
- Faulty Brake Light Switch (Very Common) — This is the primary cause. This small mechanical part contains internal electrical contacts that wear out, get dirty, or break from constant use, preventing a clean signal. 🎬 Watch: A quick guide on how to test your switch.
- Blown 'Stop Lamp' Fuse (Common) — A dedicated fuse protects the brake light circuit. A short circuit or overload blows this fuse, cutting power to the entire circuit and triggering the C1249 code.
- Misadjusted Brake Light Switch (Common) — The switch must be positioned precisely to activate at the correct pedal travel. An incorrectly installed switch or a worn stopper pad sends an out-of-sync signal, causing a fault.
- Burnt Out Brake Light Bulb(s) (Less Common) — The control module monitors the circuit's expected resistance. A burnt-out bulb creates an open circuit, which the ECU interprets as a switch fault.
- Wiring or Connector Issue (Less Common) — Wires leading to the switch fray, break, or corrode near the connector or firewall. Loose connector pins also create an open circuit.
- Low System Voltage / Weak Battery (Less Common) — A failing battery or alternator causes low system voltage. Sensitive ABS modules misinterpret this voltage drop as a circuit fault, triggering C1249 alongside code C1241.
- Aftermarket LED Bulb Issues (Rare) — Installing aftermarket LED bulbs without a load resistor alters circuit resistance. The ABS module sees this incorrect resistance as an open circuit.
- Faulty ABS Control Module (Very Rare) — If the switch, wiring, and fuses test perfectly, the ABS module's internal circuitry has failed. This is an expensive, last-resort repair.
Symptoms

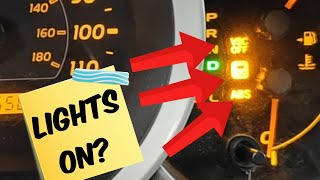
- ABS and Stability Control (VSC/TRAC) Lights Illuminated — These systems rely on the brake switch signal to function. When the signal is lost, they deactivate and illuminate their respective warning lights. 🎬 See how a new switch fixes VSC and ABS lights.
- Brake Lights Inoperative or Stuck On — A direct and dangerous symptom. The brake lights fail to illuminate when you press the pedal, or they remain on continuously even when your foot is off the brake.
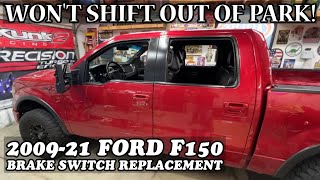
- Cannot Shift Out of Park — Most automatic vehicles use a shift interlock requiring a brake pedal signal to release the shifter from Park. A faulty switch traps the shifter.
- Cruise Control Inoperative — Cruise control disables itself if the ECU cannot get a reliable signal from the brake switch, as it needs to disengage instantly when you brake.
- Intermittent Warning Lights — Warning lights come on and go off unpredictably. This points to an intermittent failure in the switch or a loose connection affected by bumps or temperature changes.
Diagnostic Flowchart
Tap your situation to follow the diagnostic path that matches what you're seeing on this code.
Common Fixes & Costs
- Replace Brake Light Switch
— Parts: $15-$75, Labor: $60-$140, ~0.8 hr book time
(DIY)
: OEM [{'part_number': '84340-69025', 'price': '$45-$65', 'notes': 'Very common, fits many models.'}] (Alt: {"brand": "Standard Motor Products (SMP)", "notes": "Cross-reference specific OEM number. Example: SLS493"})
: OEM [{'part_number': 'GL3Z-13480-A', 'price': '$35-$60', 'notes': 'Common switch for many modern Fords.'}] (Alt: {"brand": "Motorcraft", "part_number": "SW7810", "price": "$30-$50", "notes": "Ford's own aftermarket brand."})
: OEM [{'part_number': '93810-3K000', 'price': '$12-$20', 'notes': 'Widely used switch, subject to recall.'}] (Alt: {"brand": "Febi Bilstein", "part_number": "170512", "price": "$10-$18", "notes": "Common aftermarket alternative."}) - Replace Blown Fuse — Parts: $1-$5, Labor: $0, ~0.1 hr book time (DIY)
- Replace Brake Light Bulb — Parts: $2-$10, Labor: $0-$20, ~0.2 hr book time (DIY)
- Adjust Brake Light Switch — Parts: $0-$10, Labor: $25-$50, ~0.3 hr book time (DIY)
- Repair Damaged Wiring or Connector — Parts: $5-$30, Labor: $125-$250, ~1.5 hr book time (Intermediate)
- Clean Brake Light Switch Contacts — Parts: $0-$5, Labor: $0-$50, ~0.5 hr book time (DIY)
- Replace ABS Control Module — Parts: $800-$1500+, Labor: $150-$250, ~1.8 hr book time (Professional)
Used vs. New Parts: Buying Guide
When a used part is worth it: Buying a used brake light switch rarely makes sense. The part is a high-wear item with a low cost for a new replacement.
Donor-vehicle mileage cap: roughly under 20000 miles for the part to have meaningful remaining life.
Donor quality checklist:
- Source from a low-mileage, collision-damaged donor.
- Ensure the part number is an exact match.
- Inspect the plastic for brittleness and the connector pins for corrosion.
Decision logic:
- If The part is a brake light switch for any common vehicle. → Buy new. The cost of a new part ($15-$75) is too low to justify the risk of a used one.
- If Budget is the absolute primary concern and the new part is unusually expensive. → A used part is a temporary, high-risk option. Expect a significantly shorter service life.
Warranty tradeoff: Used parts have a 30-90 day warranty. New aftermarket parts carry a 1-year to limited lifetime warranty. The longevity of a new part is worth the price difference.
Worst-case if a used part fails: $100-$200 if a used switch fails shortly after install, requiring repeat labor costs.
What Happens If You Wait — Timeline
- Immediate: ABS and VSC warning lights illuminate. Code C1249 is stored. Cruise control is disabled. (MPG impact: 0%% · Added cost: $0)
- 1-4 weeks: The driver cannot shift out of Park without the manual override. Brake lights fail, creating a severe safety hazard. (MPG impact: 0%% · Added cost: $75 - $250 (Traffic citation for inoperative equipment))
- 1-6 months: The vehicle fails state safety inspections. The risk of a rear-end collision remains extremely high. (MPG impact: 0%% · Added cost: $50 - $200 (Failed inspection fees))
- 6+ months: A rear-end collision occurs due to inoperative brake lights, or the disabled ABS system fails to assist in an emergency maneuver. (MPG impact: 0%% · Added cost: $500 - $10,000+ (Insurance deductible and liability costs))
Cost of Not Fixing It
- Immediate: Extreme safety risk. Brake lights fail, dramatically increasing the chance of a rear-end collision. ABS and Stability Control are disabled. (Added cost: Varies (Traffic citation, insurance deductible, liability in an accident))
- Ongoing: Failed safety inspection in states checking ABS lights. Inability to use cruise control or shift out of Park without the manual override. (Added cost: $50 - $200+ (Failed inspection fees))
- Long-Term: The primary cost is the persistent safety hazard and inconvenience. A faulty brake light switch does not cause escalating damage to other major components. (Added cost: Negligible direct mechanical cost, but immense potential cost from an accident.)
Diagnosis Steps

- Verify Brake Light Operation
Have an assistant stand behind the vehicle while you press and release the brake pedal. Confirm if the lights work correctly, are stuck on, or do not work at all. This simple check provides a crucial diagnostic clue.
Tools: An assistant or a reflective surface (Beginner) - Inspect the 'Stop Lamp' Fuse
Consult your owner's manual to locate the fuse box. Find the fuse labeled 'STOP' or 'Stop Lamp'. Remove it and visually inspect the metal strip inside. If broken, replace it with a fuse of the exact same amperage.
Tools: Owner's manual, fuse puller (Beginner) - Check Scan Tool Live Data
Connect an OBD-II scanner and view the live data stream for the ABS module. Find the parameter for the 'Stop Lamp SW'. It must read 'OFF' with the pedal released and change to 'ON' the instant you press the pedal. If it is stuck, the circuit has a fault.
Tools: OBD-II Scan Tool with ABS Live Data (Intermediate) - Visually Inspect the Brake Light Switch
Look under the dashboard above the brake pedal arm. Ensure the switch is securely mounted and the connector is fully seated. Check for a missing plastic stopper on the pedal arm that contacts the switch plunger.
Tools: Flashlight (Beginner) - Test the Switch for Continuity
Disconnect the switch's electrical connector. Set a multimeter to continuity. For a 4-pin switch, one pair of terminals has continuity when the plunger is out (pedal pressed) and high resistance when the plunger is in (pedal released). The other pair works in reverse.
Tools: Multimeter, vehicle service manual (Intermediate) - Check for Power at the Connector
Turn the ignition ON. Set your multimeter to DC Volts. Probe the terminals on the wiring harness connector. One terminal must show battery voltage (~12V). If no voltage is present, the issue is upstream in the wiring or fuse block.
Tools: Multimeter (Intermediate) - Inspect Wiring Harness for Damage
Meticulously inspect the wiring harness between the switch and the ABS module. Look for chafing, breaks, or corrosion, especially where the harness passes through the firewall or bends near the connector.
Tools: Flashlight, trim removal tools (Intermediate) - Perform Voltage Drop Test at ABS Module
Locate the brake switch signal input pin on the ABS module connector. Back-probe this pin with your multimeter positive lead and ground the negative lead. With the ignition on, you must see low voltage (<1.5V) with the pedal released, jumping to near battery voltage (8-14V) when pressed.
Tools: Multimeter, back-probe kit, wiring diagrams (Professional)
When This Code Triggers (Freeze-Frame Conditions)
- DTC Status: Confirmed (Code is a hard fault, returns immediately after clearing.)
- Ignition Voltage: 9.5V - 17.2V (The fault is checked when the ignition is on and voltage is within the normal operating range.)
- Stop Light Switch (Live Data): OFF (The code sets when the module detects an open circuit while the switch is expected to be OFF.)
- Vehicle Speed: Any (The fault is detected when the vehicle is stationary or while driving.)
Related Codes
- C1223 — ABS Control System Malfunction. This generic code indicates the ABS system is disabled. C1249 is often the specific, underlying cause.
- P0504 — Brake Switch 'A'/'B' Correlation. Set by the PCM when the two separate circuits within a modern brake switch send conflicting signals. It definitively points to an internal switch failure.
- P0571 — Brake Switch 'A' Circuit Malfunction. This is the generic powertrain ('P') equivalent of the chassis ('C') code C1249. Diagnosing one typically resolves both.
- C1241 — Low or High Power Supply Voltage. Appears alongside C1249 if the root cause is a weak battery or failing alternator.
Climate & Environmental Factors
- Cold Weather: Low temperatures cause the plastic and metal components within a failing brake light switch to contract, leading to intermittent open connections. The C1249 code appears more frequently during winter or on cold starts.
How to Talk to a Mechanic About This Code
Say this: "I have an ABS light on and a C1249 code. I'd like to schedule a diagnostic. Based on my research, this is often caused by the brake light switch, its adjustment, or a fuse. Please start the diagnosis there before investigating the more expensive ABS module."
This signals to the shop that you are an informed customer. It directs them to the most common and least expensive fixes first, preventing them from immediately quoting a costly ABS module replacement.
Avoid saying:
- 'My ABS light is on, can you fix it?'
- 'Just do whatever it takes to fix it.'
- 'I think I need a new ABS computer.'
Questions to ask before authorizing the repair:
- Did you check the 'STOP' fuse?
- Did you use a scan tool to watch the live data from the brake switch to see if it changes from 'ON' to 'OFF'?
- Did you physically inspect the switch, its connector, and the plastic stopper on the brake pedal arm?
- If you are recommending a part other than the brake light switch, can you explain how you ruled the switch out?
Where to Take It: Dealer vs Independent vs Chain
- Dealer:
Recommended only if your vehicle is under a recall or warranty for this specific issue.
Best for: Vehicles under warranty., Hyundai/Kia models covered by the stop lamp switch recall.
Downsides: Significantly higher labor rates and part costs compared to independent shops., Quicker to recommend replacing a whole assembly rather than a smaller component. (Typical cost: +50% vs. baseline) - Independent Shop:
Best fit for most situations. An independent shop offers the best balance of expertise and value for this common repair.
Best for: Out-of-warranty vehicles where cost is a factor., Experienced independent technicians diagnose and fix this common code efficiently.
Downsides: Quality and diagnostic capabilities vary, so choose a shop with ASE-certified technicians. (Typical cost: +0% vs. baseline) - Chain Shop:
Acceptable with caution. Chain shops handle simple switch replacements, but independent shops are better for complex electrical diagnostics.
Best for: Simple, clear-cut part replacements like a fuse or a visually broken switch.
Downsides: Technician skill varies widely., Higher risk of misdiagnosis or upsells due to commission-based pay structures. (Typical cost: -10% vs. baseline)
When to Walk Away From the Repair
The C1249 repair is never expensive enough to justify walking away. Base this decision on the sum of all required repairs relative to the vehicle's value.
- Car worth $5000, fix is $200: Fix it. The repair cost is less than 5% of the vehicle's value and resolves a critical safety issue.
- Car worth $2000, fix is $200: Fix it. Even on a low-value car, this is an inexpensive repair that makes the vehicle safe to drive and sell.
- Car worth $3000, fix is $2000: Walk away. The C1249 fix is cheap, but if the car needs an additional $1,800 in other repairs, the total cost is too high.
What Scan Tool You Need for This Code
Minimum: A scanner that reads and clears Anti-lock Brake System (ABS) codes and displays live data for the ABS module.
A basic $30 code reader only checks engine codes and cannot see chassis codes like C1249. You must access the ABS module to view the live status of the brake switch.
Budget: BlueDriver Bluetooth Pro (~$100) — Pairs with your smartphone to read/clear ABS codes and view live data streams to confirm the brake switch signal.
Mid-range: Autel MaxiCOM MK808Z / Topdon ArtiDiag800BT (~$300-400) — Tablet-based scanners providing full-system diagnostics, including ABS live data, making the diagnostic process quicker.
Professional: Autel MS906 Pro / Launch X431 Series (~$500-1200) — Offers full bidirectional control to test components directly. These professional-grade tools provide the most comprehensive data.
How to Clear the Code After You Fix It
- Fix the underlying mechanical or electrical issue.
- Use an OBD-II scan tool capable of reading ABS codes to clear the fault from the ABS control module.
- Perform a short test drive involving several stops to allow the ABS module to self-test.
Drive cycle (~15 minutes): After clearing the code, drive for 10-15 minutes at a mix of city and highway speeds, applying the brakes normally. If the repair was successful, the ABS light remains off.
Readiness monitors affected: This is a chassis code ('C') and does not directly affect emissions readiness monitors.
Watch out for:
- Disconnecting the battery is not a reliable way to clear ABS codes.
- If the root cause is not fixed, the code returns immediately after being cleared.
- A basic code reader that only communicates with the powertrain control module (PCM) cannot clear chassis codes like C1249.
Will This Fail Emissions / State Inspection?
No — by itself this code doesn't fail OBD inspection (but it can keep readiness monitors from setting, which causes a separate fail).
- California: An illuminated ABS light does NOT cause a failure of the California Smog Check. The test only concerns emissions-related faults.
- New York: An illuminated ABS warning light IS grounds for failing the annual safety inspection in New York.
- Texas: An illuminated ABS light does NOT cause a failure of the Texas safety inspection.
Most Commonly Affected Vehicles
- Toyota Camry, Sienna, Prius, Tacoma, RAV4, Land Cruiser (2002-2015) — Extremely common. Almost always caused by a faulty stop lamp switch (Part #84340-69025). Triggers ABS, VSC, and TRAC lights together.
- Lexus IS250, RX330, RX350, LS430 (2004-2013) — Identical to Toyota, this code is a hallmark of a failed stop lamp switch, causing the VSC and ABS lights to illuminate.
- Ford F-150, Explorer, Mustang (2000-2014) — Ford calls this the Brake Pedal Position (BPP) switch. Failure is very common. Part numbers vary significantly by year range.
- Honda Accord, Civic, CR-V, Odyssey (2003-2014) — A faulty brake light switch is a frequent cause for ABS and VSA lights. On 2022+ Civic models, C1249 indicates an internal malfunction in the Electric Vacuum Pump Control Unit.
- Hyundai / Kia Sonata, Elantra, Optima, Sorento (2006-2015) — The stop lamp switch was subject to a massive recall campaign (NHTSA campaign 13V114000). Always check for open recalls.
- Subaru BRZ, Impreza, Forester (2013-2017) — On 2013-2014 BRZ models, TSB 06-44-12R provides a specific procedure for checking master cylinder pressure to determine if switch adjustment is needed.
- Chevrolet / GMC Silverado, Sierra, Equinox, Malibu (2004-2014) — Often caused by a faulty brake light switch or chafed wiring near the pedal assembly. A failure sometimes affects transmission behavior.
- Nissan Altima, Sentra, Titan, Frontier (2005-2016) — A failing brake light switch frequently causes the inability to shift out of park alongside the ABS/VDC warning lights.
Manufacturer-Specific Notes
- Toyota/Lexus: C1249 almost guarantees the simultaneous illumination of the ABS, VSC, and TRAC warning lights. The cause is the stop lamp switch over 95% of the time.
- Subaru: TSB 06-44-12R for the BRZ notes that 'riding' the brake triggers a C1249 if the switch is slightly misadjusted. The fix is a precise adjustment based on master cylinder pressure.
- Hyundai/Kia: The stop lamp switch was subject to a major safety recall (NHTSA Campaign ID: 13V114000) covering over 1.7 million vehicles. Always check for an open recall using your VIN.
- Various: Installing aftermarket LED brake light bulbs without a load resistor inadvertently triggers a C1249 code. The ABS module misinterprets the low resistance as an open circuit.
Real Owner Stories
2006 Lexus IS250 with ABS/VSC lights
The VSC, ABS, and brake warning lights came on intermittently, then stayed on constantly. A diagnostic scan revealed codes C1249 and C1223.
What they tried:
- The owner confirmed the brake lights were working, causing initial confusion.
- Based on forum advice, they suspected the dual-circuit brake light switch, where the ECU circuit fails while the light circuit works.
Outcome: The owner replaced the brake light switch for $83. After installation and clearing the codes, the warning lights did not return.
Lesson: Do not rule out the brake light switch even if your brake lights work. Modern switches have multiple circuits, and the one communicating with the ABS module fails independently.
2005 Toyota Tacoma with intermittent C1249
The ABS and brake warning lights appeared in cold weather. A scan showed code C1249. The lights turned off after the vehicle warmed up or hit a bump.
What they tried:
- The owner tested the battery and alternator, which were good.
- They noticed turning on the headlights triggered the ABS light.
- An electrical inspection revealed a brake light bulb shorting out internally.
Outcome: Replacing the faulty brake light bulb resolved the short circuit. This stabilized the circuit voltage, and the C1249 code disappeared.
Lesson: An intermittent C1249 points to a problem elsewhere in the circuit, not just the switch. A single faulty bulb causes a system-wide fault.
2006 Tacoma after installing aftermarket LED brake lights
Immediately after replacing the stock third brake light with an LED unit, the ABS light came on. A scan showed code C1249, and cruise control stopped working.
What they tried:
- The owner initially thought the new LED light was defective.
- The code appeared specifically after using a turn signal.
Outcome: The owner installed a load resistor in parallel with the new LED brake light. This corrected the circuit's resistance, resolving the C1249 code.
Lesson: When switching to LED bulbs, the vehicle's computer interprets the lower resistance as an open circuit. Always use LEDs with built-in resistors or add them to the circuit.
2009 Hyundai Elantra with multiple electrical issues
The owner experienced intermittent failure of the brake lights, the ESC warning light was on, and they were unable to shift out of Park.
What they tried:
- The owner prepared to diagnose the brake light switch and wiring.
- Before paying for a repair, they checked for recalls using the vehicle's VIN.
Outcome: The owner discovered their vehicle was covered under a massive safety recall for a defective stop lamp switch (NHTSA Campaign 13V114000). A dealer replaced the switch free of charge.
Lesson: For many Hyundai and Kia models from 2006-2015, C1249 symptoms link directly to a known defect. Always check for open safety recalls before paying for this repair.
How to Prevent This Code From Triggering
- Periodically inspect the brake pedal stopper pad (Every 30,000 miles) — This plastic pad contacts the switch plunger and crumbles over time, causing the switch to hyper-extend and trigger C1249.
- Apply dielectric grease to the switch connector (When replacing the switch) — Dielectric grease blocks moisture and prevents corrosion that causes open circuits.
- Avoid 'riding' the brake pedal (Daily) — Resting your foot on the pedal causes constant micro-actuations, prematurely wearing the switch's internal contacts.
- Use high-quality OEM or OE-equivalent replacement switches (When replacing) — Cheap aftermarket switches use inferior contacts that fail quickly. Invest in Denso, Motorcraft, or OEM parts.
- Clean electrical connectors during major service (Every 60,000 miles) — Use electronics-safe contact cleaner to remove dust and grime, preventing resistance issues.
Frequently Asked Questions
Is it safe to drive with code C1249?
No. Your brake lights are likely inoperative, creating a severe risk of being rear-ended. Additionally, your ABS and stability control systems are offline, compromising your safety in an emergency stop.
How much does it cost to fix C1249?
Replacing a faulty brake light switch costs between $80 and $150 at a repair shop. If you do it yourself, the part typically costs between $15 and $75.
Can I fix a C1249 code myself?
Yes, replacing the brake light switch is a straightforward DIY repair requiring basic hand tools and 30-60 minutes. The switch is located above the brake pedal and twists or unbolts easily.
My brake lights work fine, so why do I have a C1249 code?
Modern brake switches contain two separate internal circuits. One circuit operates the brake lights, while the other sends a signal to the ABS computer. The computer circuit fails independently, triggering the code while the lights continue to work.
What is the most common misdiagnosis for C1249?
Replacing the expensive ABS control module without thoroughly testing the $20 brake light switch first. The ABS warning light points toward the ABS system, but the root cause is almost always the switch.
Will clearing the code fix the problem?
No. C1249 indicates a hard electrical fault. The ABS module re-runs its self-test immediately, and the code returns the moment you press the brake pedal.
Can cold weather cause a C1249 code?
Yes. Low temperatures cause the plastic and metal components inside a failing switch to contract, leading to intermittent open connections.
What's the difference between brake switch codes C1249 and P0504?
C1249 is a Chassis code from the ABS module indicating an open circuit or missing signal. P0504 is a Powertrain code indicating the engine computer receives conflicting signals from the switch's two internal circuits. Both point to a faulty brake switch.
Key Takeaways
- Code C1249 disables your ABS and stability control systems because the computer cannot detect when you press the brake pedal.
- Replacing the brake light switch resolves this code in over 80% of cases and typically costs between $15 and $75 for the part.
- Check your brake lights immediately; if they do not illuminate, you are at a high risk for a rear-end collision and should not drive.
- Inspect the 10A or 15A 'STOP' fuse before buying any parts, as a blown fuse is the second most common cause of this fault.
- Owners of 2006-2015 Hyundai and Kia models must check their VIN for NHTSA Campaign 13V114000, which provides a free dealer replacement for a defective switch.
Helpful Videos


Shop the Parts Behind C1249
Below are the parts most often responsible for code C1249, ranked by how frequently each one is the actual culprit (per the diagnosis above). Tap any to see what we have for your vehicle.


The information in this article is provided for general reference and educational purposes only. Vehicle specifications, procedures, and part compatibility can vary by production date, trim level, and region. Always consult your vehicle's factory service manual and verify part numbers before purchasing or performing repairs. Safety-critical components such as airbags, seat belts, and braking systems should be installed by a qualified professional.
- 🧭 Diagnostic Flowchart
- 🎬 Helpful Videos
- 🛍️ Shop This Part
- What Does C1249 Mean?
- Can I Drive With C1249?
- Common Causes
- Symptoms
- Common Fixes & Costs
- Used vs. New Parts: Buying Guide
- What Happens If You Wait — Timeline
- Cost of Not Fixing It
- Diagnosis Steps
- When This Code Triggers (Freeze-Frame Conditions)
- Related Codes
- Climate & Environmental Factors
- How to Talk to a Mechanic About This Code
- Where to Take It: Dealer vs Independent vs Chain
- When to Walk Away From the Repair
- What Scan Tool You Need for This Code
- How to Clear the Code After You Fix It
- Will This Fail Emissions / State Inspection?
- Most Commonly Affected Vehicles
- Manufacturer-Specific Notes
- Real Owner Stories
- 2006 Lexus IS250 with ABS/VSC lights
- 2005 Toyota Tacoma with intermittent C1249
- 2006 Tacoma after installing aftermarket LED brake lights
- 2009 Hyundai Elantra with multiple electrical issues
- How to Prevent This Code From Triggering
- Frequently Asked Questions
- Is it safe to drive with code C1249?
- How much does it cost to fix C1249?
- Can I fix a C1249 code myself?
- My brake lights work fine, so why do I have a C1249 code?
- What is the most common misdiagnosis for C1249?
- Will clearing the code fix the problem?
- Can cold weather cause a C1249 code?
- What's the difference between brake switch codes C1249 and P0504?
- Key Takeaways
- 🎟️ Get 5% Off