
C1256 on 2011-2015 Lexus RX HYBRID: Accumulator Low Pressure & Brake Booster Failure Guide
Code C1256 on a 2011-2015 Lexus RX Hybrid indicates 'Accumulator Low Pressure' and almost always means the entire brake booster and master cylinder assembly has failed internally. This is a known issue documented in TSBs and a now-expired Warranty Enhancement Program (20LE03). It is a critical, expensive repair, often costing $2,500-$4,000 at a dealership.
- C1256 on your RX Hybrid is a critical safety code that should be addressed immediately.
- The cause is almost certainly a failed brake booster/actuator assembly, a known issue for this vehicle.
- Do not drive the vehicle. You risk a sudden loss of braking power.
- The repair is very expensive, requiring a full replacement of the assembly and specialized bleeding procedures.
- Due to the safety-critical nature of this part, using a new OEM replacement from a qualified professional is strongly recommended over used or remanufactured parts.
What's Unique About the 2011-2015 Lexus RX HYBRID
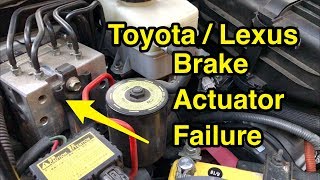
Unlike conventional cars that use a vacuum brake booster, the RX Hybrid uses a sophisticated Electronically Controlled Brake (ECB) system. This integrated unit, containing the pump, accumulator, and master cylinder, is a widely documented failure point. The issue of internal leaks causing code C1256 is so prevalent that Lexus issued Technical Service Bulletins (TSBs) and a Warranty Enhancement Program (code 20LE03) to address the problem, acknowledging the specific weakness in this component. The failure disables regenerative braking, which can lead to an overly discharged hybrid battery and trigger additional battery-related fault codes.
Diagnostic Flowchart
Tap your situation to follow the diagnostic path that matches what you're seeing on this vehicle.
Symptoms You May Notice
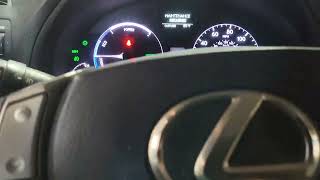
- Multiple warning lights on the dashboard, including BRAKE (often red or yellow), ABS, VSC, and TRAC.
- A "Check VSC" message displayed on the information screen.
- A loud or frequent buzzing/clicking noise from the engine bay (specifically the driver's side), which is the brake booster pump running excessively (e.g., every 15-30 seconds) to try and build pressure.
- A long, persistent high-pitched beeping or alarm sound inside the cabin, indicating a critical brake system fault.
- A change in brake pedal feel, which may feel soft, spongy, or require significantly more effort to stop the vehicle.
- A 'barking' or 'chirping' sound from the actuator when the brake pedal is moderately pressed.
- Replacing only the brake booster pump. The failure is almost always within the integrated actuator assembly, which includes the pump, accumulator, and master cylinder. Replacing just one part of it is not feasible or effective.
- Ignoring the code due to intermittent symptoms. The problem will not resolve itself and will lead to a critical brake system failure.
- Flushing the brake fluid. While regular fluid flushes are good maintenance, a flush will not fix an internal leak in the actuator. Some owners have tried this without success.
Most Likely Causes
- Internal Failure of the Brake Booster & Master Cylinder Assembly 🔴 High Probability → Shop Power Brake Booster As documented in Lexus TSB #L-SB-0033-20, this specific assembly is prone to small internal brake fluid leaks or other malfunctions, leading to a loss of accumulator pressure. This is the most common failure by a wide margin.
How to confirm: A professional technician will confirm by reading the C1256 code, often found with C1391 ('Abnormal Leak in Accumulator'). Using a scan tool like Techstream, they can monitor the accumulator pressure sensor data in the Data List. A rapid drop in pressure with the pump off confirms the internal leak. The pump cycling on every 15-30 seconds at idle is also a strong indicator.
Typical fix: The entire brake booster and master cylinder assembly must be replaced as a single unit. The unit is not designed to be serviced internally.
Est. part cost: $1200-$2200
Rare But Worth Checking
- Wiring Harness or Connector Issue: While much less common than actuator failure, a damaged wire or loose connector to the brake booster pump or pressure sensor could theoretically cause this code. A visual inspection of the wiring is a quick check before condemning the expensive actuator.
- Failed Brake Booster Pump Motor Relay: → Shop Power Brake Booster A stuck or failed relay for the pump motor can cause the pump to run excessively or not at all, leading to pressure-related codes like C1252 and C1253, which can accompany C1256. This is an inexpensive part to check before replacing the entire assembly.
Diagnosis Steps
- Confirm the presence of code C1256 and any other related codes (C1391, C1252, C1253) using a high-quality OBD-II scanner capable of reading Lexus-specific chassis codes.
- Listen for the brake pump motor with the vehicle in 'Ready' mode and the brake pedal not depressed. If it runs every 15-30 seconds, it's a very strong sign of a pressure leak.
- Visually inspect the brake booster assembly (driver's side of the engine bay) and surrounding lines for any obvious external fluid leaks.
- Check the brake fluid level in the reservoir. A low level could indicate a leak, but the failure is often internal and won't show a drop in the reservoir level.
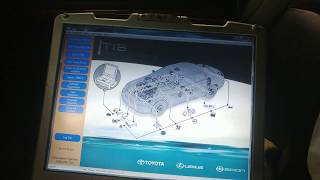
- For professional diagnosis: Use Toyota Techstream software to access the Chassis/ABS/VSC system. Navigate to the Data List and monitor the 'Accumulator Pressure Sensor' value. Observe how quickly the pressure drops after the pump stops. A rapid decline confirms an internal leak.
- For DIY diagnosis without Techstream: The combination of C1256/C1391 codes and a frequently cycling pump is near-certain confirmation of a failed actuator assembly.
- After replacement, the system MUST be bled using the 'Air Bleeding' utility in Techstream. This involves specific steps like 'Zero Down Accumulator Pressure' and 'ECB Invalid' to do it correctly and safely. 🎬 See how to use Techstream software to bleed the ABS system.
Parts You'll Likely Need
- Brake Booster and Master Cylinder Assembly
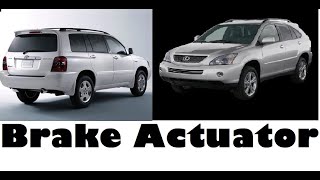
(OEM #44050-48320)— This is the complete unit that fails internally, causing the low pressure condition. It is replaced as a single assembly. 🎬 Watch this walkthrough of the brake actuator replacement process. Part numbers can be superseded; always verify with a VIN. This part is also referred to as the 'Brake Actuator Assembly'.
Trusted brands: Lexus (OEM), Aisin, Cardone (Remanufactured)
OEM price range: $1300-$2200
Aftermarket price range: $900-$1500
Related Codes That Often Appear With This One
- C1391 — This code means 'Abnormal Leak in Accumulator' and directly points to the same internal leak that causes the C1256 low-pressure condition. They are almost always seen together and are listed in the same TSBs.
- C1252 — This code means 'Brake Booster Pump Motor On Time Abnormally Long'. It sets because the pump is running constantly to compensate for the pressure loss from the internal leak, which is the root cause of C1256.
- C1253 — This code indicates a 'Pump Motor Relay Malfunction'. It can be triggered as a consequence of the pump motor running excessively due to the low accumulator pressure.
- P0A80 — This code means 'Replace Hybrid Battery Pack'. When the braking system fails and sets a C-code, regenerative braking is disabled. This prevents the hybrid battery from being charged during deceleration, which can lead to an overly discharged battery and trigger battery-related codes. It is recommended to fix the brake issue first.
Technical Service Bulletins (TSBs) & Recalls
- L-SB-0033-20: Notes that warning lights and DTCs C1391, C1252, C1256, or C1253 may be caused by an internal brake fluid leak in the brake booster assembly. Specifies part number 44050-48320 for the repair.
- 20LE03: A Customer Support Program (a form of warranty extension) that acknowledges internal malfunctions of the Brake Booster Assembly will store DTCs C1391, C1252, C1256 or C1253 and require replacement of the unit. The primary coverage for this program expired on Dec 31, 2021.
Platform-Specific Known Issues
- Lexus issued Technical Service Bulletin L-SB-0033-20, which directly addresses DTCs C1391, C1252, C1256, or C1253 being caused by a small internal brake fluid leak inside the brake booster assembly for 2010-2012 RX 450h models.
- Lexus issued Customer Support Program 20LE03, which extended the warranty for this specific failure. The primary coverage ended on December 31, 2021, but it serves as official acknowledgment of the defect.
- Owner experiences on forums like ClubLexus detail dealer quotes ranging from $3,200 to over $4,000 for this repair. Some owners have successfully negotiated assistance from Lexus corporate even after the warranty expired, though this is not guaranteed.
Mechanic-Grade Diagnostic Values
- Brake Booster Pump Motor Resistance — expected: 0.16 to 0.20 Ω at 68°F (20°C). Failure: Resistance outside of this range indicates a faulty pump motor.
- Accumulator Pressure (Techstream Data List) — expected: Pressure should hold steady after the pump cycles off.. Failure: A rapid drop in the 'ACC pressure sensor' value on the Techstream data list after the pump stops indicates an internal leak.
- Auxiliary Battery Voltage — expected: 11 to 14 V. Failure: Voltage below 9.5V can cause the Skid Control ECU to malfunction and potentially store C1256 along with other voltage-related codes like C1241.
Hidden / Shadow Codes Worth Checking
- C1256 / 141: Indicates accumulator pressure is less than 14.62 MPa for 120 seconds after system start, or braking was attempted when pressure was below 12.45 MPa. (see via Toyota/Lexus Techstream software can read these detailed sub-codes (also called information codes or detail codes).)
- C1256 / 143: Indicates that a wheel cylinder pressure sensor value was lower than the target value for at least 0.5 seconds when accumulator pressure was already low (<14.62 MPa). (see via Toyota/Lexus Techstream software can read these detailed sub-codes (also called information codes or detail codes).)
Scan Tool Commands That Help
- Techstream: Data List / Active Test — Used to monitor live data from the accumulator pressure sensor to confirm a leak. The Active Test for the solenoid valve can also be used to check component function under specific conditions (vehicle stopped, parking brake on).
- Techstream: Air Bleeding Utility — This is a mandatory service function required after replacing the brake actuator assembly. It guides the technician through a specific sequence to safely and completely remove air from the high-pressure ECB system. Performing a manual bleed is not possible and dangerous.
- Techstream: Initialization and Calibration of Linear Solenoid Valve — This function must be performed after replacing the brake actuator assembly (or the Skid Control ECU) to ensure the new components are calibrated to the system.
Wiring & Ground Locations
- Main Body ECU — Located within the passenger compartment, typically behind the glove box or part of the central junction block.. The Main Body ECU is part of the communication network (including CAN lines) that connects various control units. A wiring diagram shows it communicates with the combination meter and other systems involved in displaying warnings originating from the Skid Control ECU.
- Skid Control ECU Connector — The Skid Control ECU is integrated into the brake actuator assembly itself in the driver's side of the engine bay.. All sensor inputs (like accumulator pressure) and motor control outputs for the ECB system pass through this main connector. A poor connection or corrosion here could cause various brake system faults, though it's much less common than internal actuator failure.
OEM Part Supersession History
Multiple older part numbers→44050-48320— The original brake actuator assemblies were prone to internal leaks. The superseding part number is the updated version with countermeasures to address the failure.
Heads up: TSB L-SB-0033-20 lists previous part numbers like 04008-26448 and 47070-48060 being replaced by the newer 44050-48320 assembly, indicating an update to the component. Always confirm the latest part number with a VIN.
Helpful Videos
We Have This Part in Stock


The information in this article is provided for general reference and educational purposes only. Vehicle specifications, procedures, and part compatibility can vary by production date, trim level, and region. Always consult your vehicle's factory service manual and verify part numbers before purchasing or performing repairs. Safety-critical components such as airbags, seat belts, and braking systems should be installed by a qualified professional.
- Lexus RX HYBRID:
- 🧭 Diagnostic Flowchart
- 🎬 Helpful Videos
- 🛍️ Shop This Part
- What's Unique About the 2011-2015 Lexus RX HYBRID
- Symptoms You May Notice
- Most Likely Causes
- Rare But Worth Checking
- Diagnosis Steps
- Parts You'll Likely Need
- Related Codes That Often Appear With This One
- Technical Service Bulletins (TSBs) & Recalls
- Platform-Specific Known Issues
- Mechanic-Grade Diagnostic Values
- Hidden / Shadow Codes Worth Checking
- Scan Tool Commands That Help
- Wiring & Ground Locations
- OEM Part Supersession History
- 🎟️ Get 5% Off