
OBD-II Code C1286: Steering Sensor Bias, Brake Booster, or Yaw Sensor Fault
The Ultimate Guide to What C1286 Means, Why It Triggers, and How to Fix It
- Code C1286 indicates a steering sensor fault on GM, a brake booster failure on Jaguar, or a yaw sensor issue on Hyundai/Kia, requiring make-specific diagnosis.
- For GM vehicles, verify the steering sensor's center voltage is exactly 2.5V before replacing parts; a reading near 0.2V or 4.9V proves the steering shaft is installed 360 degrees backward.
- On Jaguar models, C1286 signals a mechanical brake booster failure, causing a dangerously hard brake pedal and requiring immediate replacement of the $450+ booster assembly.
- Driving with an active C1286 code disables Electronic Stability Control (ESC) or power braking, increasing the risk of a fatal rollover by up to 90% during emergency maneuvers.
What Does C1286 Mean?

Code C1286 is a manufacturer-specific code with three distinct meanings. For General Motors vehicles, it indicates the Electronic Brake Control Module (EBCM) detected a problem with the steering wheel position sensor's 'center' or 'bias' value. For Jaguar, it points directly to a mechanical failure inside the power brake booster. On Hyundai and Kia, it indicates a fault with the yaw rate and acceleration sensor, which is crucial for stability control.
Technical definition: Manufacturers define C1286 as either "Steering Sensor Bias Malfunction", "Booster Mechanical Failure", or "Yaw Rate and Acceleration Sensor Fault." The 'Bias Malfunction' on GM vehicles means the sensor's learned center position shifted dramatically (e.g., more than +/- 30 degrees), prompting the computer to flag a fault and disable the stability system.
Can I Drive With C1286?
Yes, But With Caution. You can drive, but it carries significant risk. If the cause is a failed brake booster (common on Jaguar), your stopping distance increases dangerously and the pedal becomes extremely hard to press. If it is a steering sensor fault (common on GM), your primary brakes work, but Electronic Stability Control (ESC) is disabled, increasing the risk of losing control during emergency maneuvers.
Common Causes

- Steering Shaft 360 Degrees Out of Phase (Very Common) — A frequent mistake during repairs involving the steering shaft (header or clutch installs) is reconnecting it 360 degrees off from its original position. The sensor is fine, but its readings are completely inverted.
- Faulty Steering Wheel Position Sensor (Very Common) — The most frequent hardware cause on GM vehicles. The sensor, which uses magnetism or resistance to report the steering wheel's exact angle, fails internally or wears out.
- Failed Power Brake Booster (Common) — The primary cause on Jaguar models. The booster suffers a mechanical fault (often a torn internal diaphragm) and can no longer provide power assist using engine vacuum.
- Faulty Yaw Rate Sensor (Common) — The primary cause on Hyundai and Kia models. The sensor that measures the vehicle's rotational axis fails, sending irrational data to the stability control module.
- Improper Steering Sensor Calibration (Common) — If the steering column, rack, or suspension components were recently repaired or an alignment was performed, the sensor was likely not recalibrated. The computer sees a mismatch between the physical steering angle and the sensor report.
- Damaged Wiring or Water Intrusion (Less Common) — A loose connector, rubbed wire, or moisture entering key electrical connectors causes short circuits or signal degradation. On C5 Corvettes, the C102 connector in the engine bay is highly vulnerable.
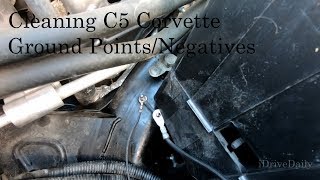
- Faulty or Poorly Seated EBCM Ground Connection (Rare) — A bad ground connection for the Electronic Brake Control Module (EBCM) causes phantom codes like C1286. This is a heavily documented issue on C5 Corvettes. 🎬 Watch: How to clean C5 Corvette ground points and negatives.
- Faulty Electronic Brake Control Module (EBCM) (Rare) — The control module processing the signals fails internally. This is a last resort diagnosis after verifying all components, wiring, and grounds.
Symptoms

- Traction Control or Stability System Warning Light — A "Service Active Handling," "Service Traction Control," or "ESC OFF" message appears on the dashboard.
- Stiff or Hard Brake Pedal — If the cause is a failed brake booster, the brake pedal becomes extremely difficult to press, requiring immense leg strength.
- Increased Stopping Distance — A direct consequence of a failed brake booster; the vehicle takes significantly longer to stop.
- Hissing Noise From Brake Pedal Area — A torn diaphragm in a vacuum brake booster causes a distinct hissing sound when pressing the brake pedal.
- Cruise Control Inoperative — A fault in the stability control system prevents the cruise control from engaging as a safety precaution.
- Engine Stumbling or Stalling When Braking (also visible on scanner) — A massive vacuum leak from a failed brake booster leans out the air-fuel mixture, causing the engine to run rough or stall during braking.
Diagnostic Flowchart
Tap your situation to follow the diagnostic path that matches what you're seeing on this code.
Common Fixes & Costs
- Re-index Steering Shaft — Parts: $0, Labor: $100 - $250, ~1.2 hr book time (Intermediate)
- Recalibrate Steering Wheel Position Sensor — Parts: $0, Labor: $100 - $200, ~0.8 hr book time (Professional)
- Replace Steering Wheel Position Sensor — Parts: $150 - $400, Labor: $300 - $500, ~2.5 hr book time (Professional)
- Replace Power Brake Booster — Parts: $450 - $1600, Labor: $220 - $450, ~2.2 hr book time (Intermediate)
- Replace Yaw Rate Sensor — Parts: $900 - $1400, Labor: $60 - $150, ~1 hr book time (Intermediate)
DIY vs Professional
- Replace Steering Wheel Position Sensor (GM) 🟢 Beginner
Tools: Socket set, torque wrench, trim removal tools, steering wheel puller, multimeter. - Replace Power Brake Booster (Jaguar) 🟢 Beginner
Tools: Socket set, flare nut wrenches, pliers, vacuum pump for bleeding brakes. - Replace Yaw Rate Sensor (Hyundai/Kia) 🟢 Beginner
Tools: Basic socket set, trim removal tools.
Used vs. New Parts: Buying Guide
When a used part is worth it: For expensive parts like a Jaguar brake booster ($1500+ new) or a Hyundai yaw sensor ($900+ new), a used part from a low-mileage, accident-damaged vehicle is a cost-effective option. For the GM steering sensor, buy new aftermarket or NOS (New Old Stock).
Donor-vehicle mileage cap: roughly under 75000 miles for the part to have meaningful remaining life.
Donor quality checklist:
- Verify the OEM part number EXACTLY matches your original part, especially for Jaguar boosters.
- Inspect the brake booster vacuum port for brake fluid, indicating the donor vehicle had a leaking master cylinder that destroyed the booster.
- Avoid electronic sensors from flood-damaged vehicles; moisture guarantees premature failure.
- Require at least a 90-day warranty from the seller.
Decision logic:
- If Part is a GM steering position sensor → Buy new aftermarket or NOS. The labor is too intensive to risk a used part failing early.
- If Part is a Jaguar brake booster or Hyundai yaw sensor → Purchase a warrantied, inspected used part if the new OEM cost is prohibitive.
- If Part is available as a quality remanufactured unit (e.g., Cardone, ATE) → Choose this as the optimal compromise between new OEM cost and used part risk.
Warranty tradeoff: Used parts typically carry a 30-90 day warranty. New aftermarket parts offer 1-year to lifetime warranties. New OEM parts carry a 1-2 year warranty.
Worst-case if a used part fails: $300-600 if a used part fails shortly after installation, requiring a second labor charge and replacement part.
What Happens If You Wait — Timeline
- Immediate (GM/Hyundai - Sensor Failure): Code sets and 'Service ESC' light illuminates. Electronic Stability Control is disabled. Base braking remains functional. (MPG impact: 0%% · Added cost: $0 (Immediate cost is a significant reduction in vehicle safety))
- Immediate to 1 month (Jaguar - Booster Failure): Brake pedal becomes hard to press and stopping distance increases significantly. A hissing noise occurs when braking. (MPG impact: 0-5%% · Added cost: $0 (Immediate cost is a high risk of a brake-related accident))
- 1-4 months (Jaguar - Booster Failure): The vacuum leak causes the engine to run lean. Symptoms include rough idle, stumbling, and stalling when brakes are applied. (MPG impact: 5-15%% · Added cost: $50-200 in wasted fuel. The lean condition stresses the catalytic converter.)
- 4+ months (Jaguar - Booster Failure): Sustained lean operation destroys the catalytic converter. Heavy force on the hard brake pedal causes master cylinder seals to fail. (MPG impact: 10-20%% · Added cost: $1500 - $3200 (Cost to replace a catalytic converter and master cylinder).)
Cost of Not Fixing It
- Immediate: For GM/Hyundai: Loss of Electronic Stability Control (ESC), increasing the risk of a single-vehicle loss-of-control accident by over 40%. For Jaguar: Severely increased braking effort and stopping distance. (Added cost: N/A (Safety Risk))
- 0-3 months: For Jaguar: A significant vacuum leak from the booster causes a lean air-fuel mixture, leading to rough idling, engine stalling when braking, and catalytic converter damage. (Added cost: $1200 - $2500 (Catalytic converter replacement))
- Ongoing: Continued driving with a failed brake booster puts extreme strain on the master cylinder, causing premature seal failure. The active warning light also causes automatic failure of state safety inspections. (Added cost: $300 - $700 (Master cylinder replacement))
Diagnosis Steps
- Identify Your Vehicle's System
Determine if your vehicle uses C1286 for a steering system fault (GM), a brake booster fault (Jaguar), or a yaw sensor fault (Hyundai/Kia). This dictates your entire diagnostic path.
Tools: Internet access (Beginner) - Scan for All Trouble Codes
Use an OBD-II scanner capable of reading Chassis (C) codes. Codes C1287 or C1281 confirm a steering sensor issue. C1214 points directly to the EBCM.
Tools: OBD-II Scanner (with ABS/Chassis capability) (Beginner) - [PRO TIP] Test Steering Position Sensor Voltage (GM)
Back-probe the sensor's signal wire (often light blue). With the ignition on and wheels perfectly straight, voltage must be between 2.4V and 2.6V. A reading near 0.2V or 4.9V proves the steering shaft is 360 degrees out of phase. Erratic voltage indicates a failed sensor.
Tools: Digital Multimeter, Back-probe kit (Advanced) - Perform Brake Booster Functional Test (Jaguar)
With the engine off, pump the brake pedal 5 times to deplete vacuum. Hold firm pressure on the pedal and start the engine. The pedal must drop approximately 1 inch. If it remains hard, the booster or vacuum supply failed.
Tools: None (Intermediate) - Analyze Live Sensor Data with a Scan Tool (Hyundai/Kia)
View live data for 'Steering Angle', 'Yaw Rate', and 'Lateral Accelerometer'. Drive slowly and make gentle turns. Unresponsive or irrational yaw data confirms a failed sensor.
Tools: Advanced Scan Tool (Advanced) - Inspect Steering Sensor Wiring and Connectors
Visually inspect the wiring at the base of the steering column. On C5 Corvettes, inspect connector C102 in the engine bay for severe corrosion or water damage.
Tools: Flashlight (Intermediate) - [PRO TIP] Check EBCM Grounds (GM)
Locate the EBCM ground point on the chassis. Disassemble it, clean all contact surfaces to bare metal, apply dielectric grease, and re-secure tightly to eliminate phantom codes.
Tools: Socket set, wire brush, dielectric grease (Advanced) - Inspect Fuses and Relays
Check the engine bay and cabin fuse boxes for blown fuses related to the ABS, traction control, or stability control systems.
Tools: Owner's manual, fuse puller (Beginner) - [PRO TIP] Test Brake Booster Vacuum Supply
Disconnect the vacuum hose from the brake booster and attach a vacuum gauge. A healthy engine supplies 18-21 inHg of vacuum at idle. Low vacuum indicates a hose leak or engine issue, not a booster failure.
Tools: Vacuum gauge, pliers (Advanced) - Test Steering Position Sensor Resistance (GM)
Disconnect the sensor and connect an ohmmeter to the signal leads. As you turn the steering wheel, resistance must change smoothly. An open circuit or infinite resistance confirms sensor failure.
Tools: Digital Multimeter (Advanced)
When This Code Triggers (Freeze-Frame Conditions)
- Vehicle Speed: 18-62 mph (30-100 km/h) (Sets during steady driving after exceeding a speed threshold, allowing the EBCM to perform its self-centering routine for the steering sensor.)
- Steering Wheel Angle: Near 0 degrees (Logs when the EBCM attempts to calibrate the sensor's center position while the vehicle drives straight.)
- Ignition Cycle Status: At Startup (Sets immediately at startup if the steering sensor's bias value was out of range during the previous ignition cycle.)
- System Status: Active Handling Not Active (Identified during normal driving, immediately leading to the disabling of the Active Handling/ESC system.)
Related Codes
- C1287 — Appears with C1286 on GM vehicles. C1286 relates to the sensor's static center position, while C1287 relates to the dynamic signal. If both appear, the steering position sensor is the culprit.
- C1285 — On Jaguar, C1286 indicates a MECHANICAL booster failure, while C1285 indicates an ELECTRICAL 'Booster Solenoid Circuit Failure'.
- C1214 — Indicates a 'Solenoid Valve Relay Contact or Coil Circuit Open', pointing directly to a fault within the EBCM. If present with C1286, the EBCM is the prime suspect.
- C1281 — Means 'VSES Sensors Uncorrelated'. Indicates the stability system receives conflicting data, often caused by the same faulty steering sensor data triggering C1286.
Climate & Environmental Factors
- High Humidity / Water Exposure: Accelerates corrosion on critical electrical connections, such as the EBCM ground point or the C102 connector on C5 Corvettes, leading to intermittent phantom C1286 codes.
- Cold Weather: Extreme cold causes materials in older sensors or the brake booster diaphragm to become brittle, leading to cracks and mechanical failure.
- Road Salt (Corrosion): Salt degrades the brake booster housing on Jaguars, causing it to rust through and fail. It also attacks EBCM ground points, disrupting electrical signals.
How to Talk to a Mechanic About This Code
Say this: "I have a C1286 code on my [Vehicle Make/Model] and need a diagnostic. Based on my research, I believe the issue is with the [select one: 'steering position sensor system' for GM, 'brake booster' for Jaguar, 'yaw rate sensor' for Hyundai/Kia]. Please start the diagnosis there."
This signals you are an informed customer. It directs the technician to the most likely cause, saving diagnostic time and preventing broad inspections that lead to unnecessary parts.
Avoid saying:
- 'My traction control light is on.' (Too vague, omits the critical code)
- 'Just fix whatever is wrong.' (Invites unnecessary part replacements)
- 'The internet said it's the sensor.' (Instead, state the likely system and ask for a specific test)
Questions to ask before authorizing the repair:
- For GM: Did you check the steering sensor's center voltage, and is it near 2.5V? Have you confirmed the EBCM ground is clean?
- For Jaguar: Did the brake booster fail the vacuum functional test? Is the vacuum supply from the engine confirmed good?
- For Hyundai/Kia: Can you show me the live scan tool data indicating the yaw rate sensor is unresponsive?
- Will you provide a written estimate with a clear breakdown of parts and labor before starting?
- What is the warranty on the parts and labor for this specific repair?
Where to Take It: Dealer vs Independent vs Chain
- Dealer:
A strong but expensive option for Jaguar and Hyundai. For out-of-warranty GM vehicles, a specialized independent shop is better.
Best for: Vehicles under warranty, Jaguar and Hyundai/Kia repairs requiring proprietary GDS scanners, Complex electronic issues requiring factory-trained technicians
Downsides: Highest labor rates, often 1.5-2x an independent shop., May recommend replacing an entire assembly when a smaller component fix suffices. (Typical cost: +50% vs. baseline) - Independent Shop:
Best overall fit for GM vehicles. Choose a shop specializing in your vehicle's brand with advanced diagnostic tools.
Best for: Out-of-warranty vehicles, especially GM models like the Corvette., Owners seeking better value and a direct relationship with their mechanic.
Downsides: Diagnostic capabilities vary widely. You must vet the shop for ASE certifications and modern chassis system experience. (Typical cost: +0% vs. baseline) - Chain Shop:
AVOID. This code requires nuanced diagnosis beyond the scope of chain shops. The risk of misdiagnosis is extremely high.
Best for: Simple maintenance like oil changes or tires.
Downsides: Technician skill is highly variable., Lack the advanced diagnostic tools needed for complex chassis codes like C1286. (Typical cost: -10% vs. baseline)
When to Walk Away From the Repair
If the total estimated repair cost for the C1286 fault exceeds 40-50% of your car's current private-party value, seriously consider selling the vehicle as-is.
- Car worth $15000, fix is $850: Fix it. The repair cost is a small fraction of the car's value (e.g., 2002 Corvette with a steering sensor issue).
- Car worth $3800, fix is $2200: Walk away. The repair cost is nearly 60% of the vehicle's value (e.g., 2004 Jaguar S-Type with a failed brake booster).
- Car worth $5000, fix is $1500: Borderline. The repair is 30% of the car's value. Get a second opinion and explore used part options (e.g., 2008 Hyundai Santa Fe with a yaw sensor fault).
What Scan Tool You Need for This Code
Minimum: A scanner that reads Chassis (ABS/SRS) trouble codes and displays live sensor data. A basic engine-only code reader will NOT see the C1286 code.
A $20 engine code reader is useless. You must see the specific 'C' code and view live data for the steering angle and yaw rate sensors.
Budget: XTOOL A30D / MUCAR BT200 (~$90) — These Bluetooth dongles offer full system scanning, including ABS/Chassis codes and live data graphing, sufficient for initial diagnosis.
Mid-range: Foxwell NT630 Plus / Autel AutoLink AL619 (~$150) — These handheld units read ABS codes, graph live data, and perform the 'Steering Angle Sensor (SAS) Recalibration' required after replacement.
Professional: Autel MaxiCOM MK808 / XTOOL D7 (~$450-600) — Provides full bidirectional control to test components, performs SAS calibration, and offers dealership-level diagnostic depth.
How to Clear the Code After You Fix It
- Use an OBD-II scan tool with Chassis (C-code) capability to clear the code.
- Perform a steering angle sensor recalibration if the sensor or related components were replaced.
- Perform the specific drive cycle to allow the EBCM to re-learn the sensor's center position.
Drive cycle (~15 minutes): Start the vehicle and drive in a straight line on a level surface at a speed above 18 mph (30 km/h) for several minutes. This allows the EBCM to run its centering routine. If the code does not return after 15 minutes of mixed driving, the repair is successful.
Readiness monitors affected: This is a chassis code and does not affect emissions readiness monitors.
Watch out for:
- Disconnecting the battery will not clear this chassis code; a capable scan tool is mandatory.
- If the root cause is not fixed, the code returns as soon as the EBCM runs its self-test, often within minutes.
- Forgetting to perform a steering angle sensor recalibration after an alignment guarantees the code will return.
Will This Fail Emissions / State Inspection?
Yes — this code typically fails an OBD-II emissions inspection.
- California: An active chassis-related warning light (ABS, Traction Control, Stability Control) is grounds for a safety inspection failure.
- New York: The NYS vehicle safety inspection requires ABS and stability control systems to function correctly. An illuminated warning light results in automatic failure.
- Texas: An illuminated ABS or stability control light is cause for failure on commercial vehicles. For non-commercial vehicles, the primary brake warning light is a failure item.
Most Commonly Affected Vehicles

- Chevrolet Corvette (C5) (1997-2004) — The most common vehicle for the 'Steering Sensor Bias Malfunction'. Known issues include faulty EBCM grounds, water intrusion in connector C102, and mis-indexed steering shafts.
- Jaguar S-Type (1999-2008) — Frequently experiences the 'Booster Mechanical Failure' definition. Repair is very expensive, with OEM boosters costing over $1,500.
- Hyundai Santa Fe (2007-2012) — C1286 points to a failure of the expensive Yaw Rate and Acceleration Sensor (Part # 95690-2B100).
- Chevrolet Monte Carlo (2000-2007) — Sets the C1286 code related to the steering and Magnasteer system, sharing diagnostics with the Corvette.
- GMC Jimmy (1995-2005) — Displays this code as a 'phantom' fault, usually traced to EBCM ground or wiring issues.
- Pontiac Grand Prix (1997-2003) — Shares a similar platform and stability system with other affected GM vehicles.
- Ford Windstar (1999-2003) — A generic ABS/Traction control fault requiring broader diagnostics, including wheel speed sensor inputs.
- Kia Sorento / Sportage (2003-2013) — Similar to Hyundai, logs a C1286 pointing to a yaw rate sensor failure.
Manufacturer-Specific Notes
- General Motors (Chevrolet/Pontiac/GMC): The code points to the Steering Wheel Position Sensor system. A common misdiagnosis is replacing the sensor when the steering shaft was reinstalled 360 degrees out of phase. Many early C5 Corvette sensors are discontinued.
- Jaguar: The code specifically means 'Booster Mechanical Failure' and is a direct indicator of a problem with the power brake booster, not the steering system.
- Hyundai/Kia: C1286 relates to the Yaw Rate / Acceleration sensor assembly. Diagnosis requires an advanced scan tool to monitor live sensor data to avoid replacing a $900 part unnecessarily.
- Ford: C1286 is a less specific ABS/Traction Control fault requiring a holistic system diagnosis, starting with wheel speed sensor signals.
Real Owner Stories
2002 Corvette C5 after header installation
Immediately after a DIY header installation, the 'Service Active Handling' message appeared with codes C1286 and C1287.
What they tried:
- The owner first suspected a damaged steering position sensor or a bad EBCM ground.
Outcome: Forum members identified the cause: the steering shaft was reconnected 360 degrees out of phase. The owner disconnected the steering shaft, rotated the wheel one full turn, and reconnected it. The codes did not return.
Lesson: If C1286 appears immediately after a repair involving the steering column or rack, the cause is a mis-indexed steering shaft. This is a free fix, whereas replacing the sensor is expensive.
Jaguar S-Type with 110K miles
Owner experienced a very hard brake pedal, a hissing noise from the footwell when braking, and engine stalling when coming to a stop. Code C1286 was present.
What they tried:
- Initial checks for vacuum leaks on hoses revealed nothing obvious.
Outcome: The symptoms pointed directly to a Jaguar brake booster failure. The internal diaphragm tore, causing a massive vacuum leak. The owner replaced the brake booster, restoring normal brake feel and engine operation.
Lesson: On a Jaguar, C1286 combined with a hard brake pedal and hissing noise is a textbook brake booster failure. Focus entirely on testing and replacing the booster.
1999 C5 Corvette with intermittent 'Service Active Handling' light
The owner received intermittent C1286 and C1287 codes. The warning appeared randomly. Restarting the car temporarily cleared the message.
What they tried:
- Cleaned wheel speed sensors and checked tire pressures.
- Inspected wiring at the EBCM.
- Considered replacing the expensive steering position sensor.
Outcome: The owner checked the main EBCM ground connection point on the chassis frame. They disassembled it, sanded the contact points to bare metal, and re-secured it. The intermittent codes permanently resolved.
Lesson: For intermittent C1286 codes on C5 Corvettes, a poor EBCM ground is the primary culprit. Always clean the main ground point thoroughly before replacing expensive components.
How to Prevent This Code From Triggering
- Clean EBCM and other critical ground points (Every 5 years or if electrical issues appear) — On vehicles like the C5 Corvette, a corroded EBCM ground causes phantom C1286 codes. Cleaning to bare metal ensures a stable voltage reference.
- Apply dielectric grease to key connectors (When servicing related components) — Applying dielectric grease to connectors seals out moisture, preventing corrosion and intermittent signal faults.
- Flush brake fluid regularly (Every 2-3 years) — Contaminated brake fluid causes master cylinder seals to fail. A leaking master cylinder allows fluid into the brake booster, destroying its internal diaphragm.
- Ensure proper procedure during alignments and repairs (During relevant service) — Insist shops perform a steering angle sensor recalibration after alignments. Lock the steering wheel before disconnecting the steering shaft to prevent 360-degree phase errors.
Frequently Asked Questions
Can I fix code C1286 myself?
Simple checks like fuses and visual inspections are DIY-friendly. Replacing a brake booster or yaw rate sensor are intermediate jobs. Replacing a steering position sensor requires removing the steering column and airbag, which you must leave to a professional if you lack SRS experience.
My shop wants to replace the steering sensor, but I just had other work done. Could it be something else?
Yes. If you had recent work requiring steering shaft disconnection (clutch job, header install, alignment), the shaft was likely reconnected 360 degrees out of phase. The fix is re-indexing the shaft, not replacing the sensor.
What does 'Steering Sensor Bias Malfunction' mean in simple terms?
It means the car's computer lost its 'center' reference for the steering wheel. It cannot determine when you are driving straight. Consequently, it disables the stability control system for safety.
Will clearing the code fix the problem?
No. Clearing the code is a diagnostic step, not a fix. The code returns as soon as the computer runs its self-test and detects the hard fault again.
I've heard C1286 can be a 'phantom code'. What does that mean?
On vehicles like the C5 Corvette, C1286 appears without a clear part failure. This traces to intermittent issues like a poor EBCM ground connection or water intrusion in a connector. Cleaning the ground often resolves this 'phantom' code.
I just had my car aligned and now I have this code. Is it related?
Yes. During an alignment, the steering wheel must be held perfectly centered. If the shop failed to perform a steering angle sensor recalibration afterward, the sensor's stored center is incorrect, triggering the code.
What does 'Service Active Handling' mean?
'Active Handling' is GM's electronic stability control (ESC) system. This message means the computer detected a fault in a required sensor and disabled the system for safety.
How much does it cost to diagnose a C1286 code?
Most repair shops charge a diagnostic fee ranging from $120 to $200. This includes reading codes with an advanced scanner, checking live sensor data, and performing initial system inspections.
Key Takeaways
- Code C1286 indicates a steering sensor fault on GM, a brake booster failure on Jaguar, or a yaw sensor issue on Hyundai/Kia, requiring make-specific diagnosis.
- For GM vehicles, verify the steering sensor's center voltage is exactly 2.5V before replacing parts; a reading near 0.2V or 4.9V proves the steering shaft is installed 360 degrees backward.
- On Jaguar models, C1286 signals a mechanical brake booster failure, causing a dangerously hard brake pedal and requiring immediate replacement of the $450+ booster assembly.
- Driving with an active C1286 code disables Electronic Stability Control (ESC) or power braking, increasing the risk of a fatal rollover by up to 90% during emergency maneuvers.
Helpful Videos
Shop the Parts Behind C1286
Below are the parts most often responsible for code C1286, ranked by how frequently each one is the actual culprit (per the diagnosis above). Tap any to see what we have for your vehicle.


The information in this article is provided for general reference and educational purposes only. Vehicle specifications, procedures, and part compatibility can vary by production date, trim level, and region. Always consult your vehicle's factory service manual and verify part numbers before purchasing or performing repairs. Safety-critical components such as airbags, seat belts, and braking systems should be installed by a qualified professional.
- 🧭 Diagnostic Flowchart
- 🎬 Helpful Videos
- 🛍️ Shop This Part
- What Does C1286 Mean?
- Can I Drive With C1286?
- Common Causes
- Symptoms
- Common Fixes & Costs
- DIY vs Professional
- Used vs. New Parts: Buying Guide
- What Happens If You Wait — Timeline
- Cost of Not Fixing It
- Diagnosis Steps
- When This Code Triggers (Freeze-Frame Conditions)
- Related Codes
- Climate & Environmental Factors
- How to Talk to a Mechanic About This Code
- Where to Take It: Dealer vs Independent vs Chain
- When to Walk Away From the Repair
- What Scan Tool You Need for This Code
- How to Clear the Code After You Fix It
- Will This Fail Emissions / State Inspection?
- Most Commonly Affected Vehicles
- Manufacturer-Specific Notes
- Real Owner Stories
- 2002 Corvette C5 after header installation
- Jaguar S-Type with 110K miles
- 1999 C5 Corvette with intermittent 'Service Active Handling' light
- How to Prevent This Code From Triggering
- Frequently Asked Questions
- Can I fix code C1286 myself?
- My shop wants to replace the steering sensor, but I just had other work done. Could it be something else?
- What does 'Steering Sensor Bias Malfunction' mean in simple terms?
- Will clearing the code fix the problem?
- I've heard C1286 can be a 'phantom code'. What does that mean?
- I just had my car aligned and now I have this code. Is it related?
- What does 'Service Active Handling' mean?
- How much does it cost to diagnose a C1286 code?
- Key Takeaways
- 🎟️ Get 5% Off