
OBD-II Code C1319: Stroke Simulator Solenoid Malfunction
The Ultimate Guide to C1319: What it means for Toyota, Lexus, Hyundai, and Nissan, and How to Fix It
- Code C1319 signals a critical brake failure on Toyota and Lexus hybrids, but indicates a minor TPMS or infotainment issue on Hyundai and Nissan vehicles.
- Do not drive a Toyota or Lexus with an active C1319 code, as power braking is completely disabled and stopping distances increase dangerously.
- Replacing a failed brake actuator assembly is the most common fix for Toyota and Lexus models, costing between $1,400 and $2,800 for parts and labor.
- Diagnose the exact electrical fault by reading sub-codes 71 through 74 and testing the stroke simulator solenoid for the required 21.45 to 23.15 Ω resistance.
- Finalize any brake actuator repair by performing a mandatory electronic brake bleed using a bidirectional scan tool to restore system function.
What Does C1319 Mean?
On Toyota and Lexus hybrids, code C1319 indicates an electrical failure in the brake stroke simulator solenoid, monitored by the Skid Control ECU. This solenoid creates normal brake pedal feel and manages the blend between regenerative and hydraulic braking. When it fails, the system disables power brakes and regenerative charging, resulting in a stiff pedal and multiple dashboard warnings. On Hyundai and Nissan vehicles, this code is unrelated to brakes and indicates minor TPMS, infotainment, or module communication errors.
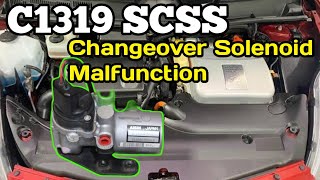
Technical definition: The SAE/ISO definition for C1319 on Toyota/Lexus is "SCSS (Stroke Simulator Solenoid) Changeover Solenoid Malfunction." The Skid Control ECU detects an open circuit, short to power, short to ground, or overcurrent in the solenoid circuit for 0.05 seconds or more. It is typically accompanied by a sub-code (71, 72, 73, or 74) 🎬 Watch: Detailed breakdown of the SCSS solenoid malfunction code. pinpointing the exact electrical fault.
Can I Drive With C1319?
No — Do Not Drive. Do not drive. On Toyota and Lexus vehicles, this code triggers a fail-safe mode that disables power-assisted braking. Stopping distances increase dangerously, requiring maximum leg force on the pedal. Tow the vehicle to a repair facility immediately to prevent a collision.
Common Causes
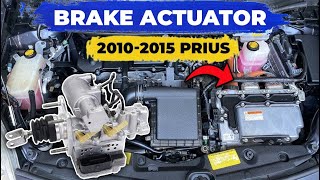
- Failed Brake Actuator Assembly (Very Common) — The stroke simulator solenoid is integrated into the brake actuator assembly. Internal failure of the solenoid's coil windings or a hydraulic leak causes this code on Toyota and Lexus hybrids.
- Low 12-Volt Battery Voltage (Common) — A weak 12-volt auxiliary battery provides unstable voltage to control modules, triggering false C1319 codes and other random electronic faults.
- Faulty Skid Control ECU (Less Common) — The Skid Control ECU commands the stroke simulator. Internal circuit failures prevent it from controlling or reading the solenoid, triggering the code even if the actuator is functional.
- Wiring Harness or Connector Damage (Less Common) — Wires between the Skid Control ECU and brake actuator fray, corrode, or suffer rodent damage, creating an open or short circuit.
- Sticking Brake Caliper (Rare) — A seized brake caliper causes erratic braking behavior, confusing the Skid Control ECU into setting protective fault codes like C1319.
- Failed ABS Main Relay (Rare) — A failed or corroded ABS main relay cuts power to the actuator, mimicking an open solenoid circuit.
Symptoms
- Hard brake pedal — The brake pedal becomes extremely stiff, requiring maximum leg effort to slow the vehicle.
- Increased stopping distance — Loss of power assist drastically increases the distance required to stop, creating a severe safety hazard.
- Multiple dashboard warning lights — The dashboard illuminates with the red 'BRAKE' light, ABS, VSC, and the master warning triangle.
- Loud, repetitive beeping alarm — A constant, loud warning alarm sounds inside the cabin when the brake pedal is pressed, indicating critical brake failure.
- No regenerative braking — The hybrid battery stops charging during deceleration because regenerative braking is disabled.
Diagnostic Flowchart
Tap your situation to follow the diagnostic path that matches what you're seeing on this code.
Common Fixes & Costs
- Replace 12-Volt Auxiliary Battery — Parts: $150-$250, Labor: $0-$50, ~0.5 hr book time (DIY)
- Replace Brake Actuator Assembly — Parts: $800-$1800, Labor: $600-$1000, ~5.8 hr book time (Professional)
- Replace Skid Control ECU — Parts: $200-$600, Labor: $200-$400, ~2.5 hr book time (Intermediate)
- Repair Wiring Harness — Parts: $10-$50, Labor: $150-$500, ~2.0 hr book time (Professional)
- Replace Incorrect TPMS Sensor (Hyundai) — Parts: $50-$100, Labor: $50-$100, ~0.8 hr book time (Intermediate)
Used vs. New Parts: Buying Guide
When a used part is worth it: A used brake actuator is a high-risk, budget-driven choice for vehicles over 150k miles where a new OEM part exceeds the car's value.
Donor-vehicle mileage cap: roughly under 80000 miles for the part to have meaningful remaining life.
Donor quality checklist:
- Verify donor mileage; lower is always better.
- Ensure the donor vehicle was not scrapped due to brake failure.
- Match the part number exactly.
- Purchase from a recycler offering at least a 90-day warranty.
Decision logic:
- If Vehicle is under 100K miles and you plan to keep it for 2+ years → Buy a new OEM part. Reliability and warranty justify the cost.
- If Vehicle is over 150K miles and budget is the primary concern → A used part is viable but risky; prepare for potential premature failure.
- If A remanufactured part with a 1-year warranty is available → This offers a strong compromise between new OEM cost and used part risk.
Warranty tradeoff: Used parts offer 30-90 day warranties. Remanufactured parts offer 1-year warranties. New OEM parts carry a 12-month/12,000-mile warranty.
Worst-case if a used part fails: $700-$1200 if a used part fails, requiring a second labor charge and replacement part.
What Happens If You Wait — Timeline
- Immediate (0 seconds): ECU detects electrical fault. Brake warning lights illuminate, buzzer sounds, and system enters fail-safe mode. (MPG impact: 0%% · Added cost: $0)
- First drive attempt: Hard brake pedal requires extreme force. Stopping distances increase dangerously. Regenerative braking is disabled. (MPG impact: 5-10%% · Added cost: High risk of at-fault collision ($1,000s). No progressive mechanical damage occurs.)
- Days of continued driving: Disabled regenerative braking discharges the hybrid battery, potentially triggering secondary battery codes (e.g., P0A80). (MPG impact: 5-10%% · Added cost: $100-$300 for towing when driving becomes too unsafe.)
- Weeks+: Vehicle remains undrivable. The underlying fault does not cause further component damage while parked. (MPG impact: N/A% · Added cost: $0)
Cost of Not Fixing It
- Immediate: Extreme safety risk. The vehicle has limited, unassisted manual braking. Stopping distances are severely increased, risking a collision. (Added cost: Cost of an at-fault accident, including vehicle damage and liability.)
- Short-Term (Days to Weeks): Complete brake failure strands the vehicle, requiring a tow to a repair facility. (Added cost: $100-$300 for towing services.)
- Long-Term: The vehicle remains unsafe to operate. No progressive damage occurs to other components while parked. (Added cost: N/A)
Diagnosis Steps
- Check the 12V Battery
Measure the 12-volt auxiliary battery with the car off. Voltage below 12.4V triggers false codes and requires immediate battery replacement.
Tools: Multimeter (Beginner) - Read and Analyze Info Codes
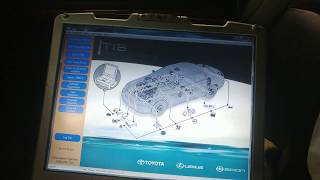
Use a bidirectional OBD-II scanner to read freeze frame data and sub-codes. Code 71 indicates a short to power, 72 a current leak, 73 an open circuit, and 74 an overcurrent.
Tools: Advanced OBD-II Scanner (Intermediate) - Test Stroke Simulator Solenoid Resistance
Disconnect the brake actuator connector. Measure resistance between the BSR and SCSS pins. A reading outside the 21.45–23.15 Ω range confirms internal solenoid failure.
Tools: Multimeter (Intermediate) - Perform Active Test
Command the stroke simulator solenoid ON and OFF using a bidirectional scan tool. Listen for an audible click from the actuator to verify mechanical response.
Tools: Advanced OBD-II Scanner (Advanced) - Inspect Wiring and Connectors
Visually inspect the harness between the brake actuator and Skid Control ECU for corrosion, chafing, or rodent damage.
Tools: Flashlight (Beginner) - Check for Harness Shorts
Disconnect the actuator and ECU. Measure continuity between the solenoid wires and chassis ground. Readings below 10 kΩ indicate a short circuit.
Tools: Multimeter (Advanced) - Perform a Physical Brake Inspection
Inspect all four brake rotors. A rusty rotor that pads do not clean indicates a seized caliper causing system imbalance.
Tools: Jack, Jack Stands, Flashlight (Beginner)
When This Code Triggers (Freeze-Frame Conditions)
- Vehicle Speed: 0 mph (The fault is detected during the initial system self-test immediately after turning the ignition ON.)
- Brake Pedal Status: Off (The ECU continuously monitors circuit integrity, setting the code even without pedal input.)
- System Voltage: 11.5-14.0V (The fault check runs whenever the ignition is on and sufficient voltage reaches the ECU.)
- Time Since Ignition On: < 5 seconds (The code sets almost instantly after startup if the electrical fault is present.)
Related Codes
- C1256 — Indicates low brake accumulator pressure. Paired with C1319, it confirms complete failure of the brake actuator assembly.
- C1391 — Indicates an abnormal accumulator leak. Seeing C1391 with C1319 guarantees the entire actuator assembly requires replacement.
- C1241 — Indicates low/high power supply voltage. Diagnose the 12V battery first; C1319 is likely a false code triggered by unstable voltage.
- U0129 — Indicates lost communication with the brake module. Points to a failing Skid Control ECU or major wiring harness failure.
Climate & Environmental Factors
- Cold Climates / Road Salt: Road salt accelerates rust on undercarriage components, seizing calipers and corroding wiring connectors, triggering secondary C1319 faults.
- High Humidity / Coastal Regions: Salty, humid air degrades wiring harness integrity, creating open or short circuits that trigger the C1319 code.
How to Talk to a Mechanic About This Code
Say this: "I have a Toyota/Lexus with a C1319 code and brake warning lights. The car has a hard pedal and is in fail-safe mode. Please check the stroke simulator solenoid resistance and the wiring from the Skid Control ECU before quoting a full actuator replacement."
Signals you understand the code's specific nature. Directs the shop to perform logical diagnosis rather than defaulting to expensive part replacement.
Avoid saying:
- 'My brake light is on, can you check it?'
- 'The car is beeping and the brakes feel weird.'
- 'Just fix whatever is wrong, I need it back ASAP.'
Questions to ask before authorizing the repair:
- What was the resistance reading on the stroke simulator solenoid?
- Have you confirmed the wiring harness between the ECU and the actuator is intact?
- Does your estimate include the mandatory electronic brake bleed with a bidirectional scan tool?
- What is the warranty on the replacement part and labor?
- If using a used part, do I pay for labor again if it fails prematurely?
Where to Take It: Dealer vs Independent vs Chain
- Dealer:
Best for: Vehicles covered under Toyota's brake actuator warranty enhancement program (ZJB/ZLG)., Owners prioritizing guaranteed fixes with OEM parts.
Downsides: Highest labor rates and part costs., Unwilling to install customer-supplied or used parts. (Typical cost: +75% vs. baseline) - Independent Shop:
Best fit for most out-of-warranty cases, but ONLY if you find a qualified hybrid specialist.
Best for: Out-of-warranty vehicles where the owner is cost-sensitive., Shops specializing in Toyota/Lexus hybrids with bidirectional scan tools capable of electronic ABS bleeds.
Downsides: General mechanics without hybrid brake experience pose a major risk., Requires vetting the shop's specific experience and tool capabilities. (Typical cost: +0% vs. baseline) - Chain Shop:
AVOID. This repair is far outside the scope of a typical chain shop's capabilities.
Best for: Simple maintenance like oil changes and tires.
Downsides: Technicians lack specialized tools and experience for complex hybrid brake repairs., High risk of improper diagnosis or failed repair. (Typical cost: -10% vs. baseline)
When to Walk Away From the Repair
If the repair cost exceeds 50% of the vehicle's value, sell or trade it in.
- Car worth $4000, fix is $2800: Walk away. The repair cost is 70% of the vehicle's value.
- Car worth $12000, fix is $2800: Fix it. The repair cost is 23% of the car's value and restores a critical safety system.
- Car worth $3000, fix is $950: Borderline. Using a used part costs ~32% of the car's value. A reasonable gamble if the car is otherwise solid.
What Scan Tool You Need for This Code
Minimum: A bidirectional scan tool capable of performing the manufacturer-specific electronic brake bleed procedure.
Basic scanners cannot read C-prefix codes or perform the mandatory electronic brake bleed required after part replacement.
Budget: Mini-VCI J2534 Cable with Techstream Software (~$35) — Provides full bidirectional control and ABS bleed functions. Software installation is difficult and unreliable.
Mid-range: Foxwell NT510 Elite / Autel MaxiCOM MK808 (~$160-350) — Best options for advanced DIYers. Confirmed bidirectional capability for Toyota/Lexus ABS bleeds. User-friendly.
Professional: Autel MP808TS / Innova CarScan Pro 5610 (~$500-900) — Professional-grade tools offering full bidirectional control, fast operation, and extensive service functions.
Rent vs buy: Buy. Part store rental scanners cannot perform the bidirectional ABS bleed function required for this repair.
How to Clear the Code After You Fix It
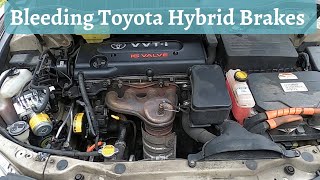
- Perform the mandatory electronic brake bleed procedure using a bidirectional scan tool (e.g., Toyota Techstream).
- Clear the C1319 and related fault codes using the scan tool.
- Perform a zero-point calibration of the yaw rate and deceleration sensors if the Skid Control ECU was replaced.
- Test drive the vehicle to confirm warning lights remain off.
Drive cycle (~30 minutes): Perform a cold start, idle for 3 minutes, drive 15 minutes in mixed city/highway conditions (steady 55-65 mph), and coast down to set readiness monitors.
Readiness monitors affected: Catalyst (CAT), Evaporative System (EVAP), Oxygen (O2) Sensor
Before emissions retest: drive at least 100 miles to fully set monitors.
Watch out for:
- Clearing the code with a generic scanner fails; the code returns instantly because it is a hard fault.
- Skipping the electronic brake bleed prevents the system from working and guarantees the code returns.
- Disconnecting the 12V battery resets emissions readiness monitors, requiring a full drive cycle before a smog test.
Will This Fail Emissions / State Inspection?
Yes — this code typically fails an OBD-II emissions inspection.
- California: Automatic failure. Illuminated 'BRAKE' or 'ABS' lights fail the visual inspection, and the active DTC fails the OBD-II scan.
- New York: Automatic failure. Illuminated ABS and brake warning lights fail the mandatory safety inspection.
- Texas: Automatic failure. An illuminated brake warning lamp fails the state safety inspection.
Most Commonly Affected Vehicles
- Toyota Prius (2004-2015) — Gen 2 and Gen 3 Prius models are highly prone to brake actuator failure. Toyota issued warranty enhancements and recalls for specific years.
- Lexus RX400h / RX450h (2006-2015) — These hybrid SUVs experience frequent actuator failures. A warranty enhancement program (ZLG) covered 2006-2008 RX400h models.
- Toyota Highlander Hybrid (2006-2013) — Shares braking components with other Toyota hybrids, making it susceptible to stroke simulator faults.
- Lexus LS460 / LS600h (2007-2017) — Features a sophisticated brake-by-wire system where the actuator assembly is a known failure point.
- Toyota Camry Hybrid (2007-2011) — Early Camry Hybrids experience actuator failures leading to code C1319.
- Hyundai Santa Fe, Elantra (2007-2020) — C1319 is NOT a brake code on Hyundais. It indicates 'Sensor 3 Wrong Type Installed' (TPMS) or a navigation backlight issue.
- Nissan Various (2005-2015) — C1319 indicates 'INSTR Module Error', a communication problem between the instrument cluster and engine computer, unrelated to brakes.
- Other Manufacturers Various (1996-Present) — C1319 is an unassigned or manufacturer-specific code for Ford, GM, BMW, and VW, requiring a factory scan tool to interpret.
Manufacturer-Specific Notes
- Toyota/Lexus: Toyota issued Warranty Enhancement Programs (ZJB/ZLG) extending actuator coverage to 10 years/150,000 miles. Repair strictly requires a scan tool for the electronic brake bleed.
- Hyundai: C1319 means 'Navigation Display Head Backlighting Performance' or 'Sensor 3 Wrong Type Installed' (TPMS), completely unrelated to brakes.
- Nissan: C1319 is defined as 'INSTR Module Error,' pointing to a communication fault between the instrument cluster and transmission.
- Ford/GM/VW/BMW: C1319 is not a standard SAE code. It requires a factory-level scan tool to diagnose manufacturer-specific meanings.
Real Owner Stories
2006 Lexus RX400h at 142k miles with multiple brake warnings.
Dashboard illuminated with BRAKE, ABS, VSC, and a red triangle warning. The only code present was C1319.
Outcome: The dealership found the vehicle pulling to one side during braking due to a sticking caliper. Repairing the mechanical imbalance resolved the electronic fault code.
Lesson: Perform a physical brake inspection before assuming electronic failure. Seized calipers confuse complex electronics and trigger fault codes.
2005 Toyota Prius at 300k miles with C1319 and a rusty rotor.
Project car with C1319, no power brakes, and a rusty right front brake rotor.
Outcome: The seized caliper caused a mechanical imbalance, triggering the C1319 electronic fault code.
Lesson: A single rusty brake rotor strongly indicates a seized caliper. Address mechanical faults before replacing expensive electronic modules.
2008 Toyota Prius at 170k miles with C1319 and a $2,700 dealer quote.
Quoted $2,700 by the dealer to replace the brake actuator, exceeding the car's value.
Outcome: Highlights the financial dilemma of high-cost OEM repairs on older vehicles, pushing owners toward riskier used parts.
Lesson: Weigh repair costs against vehicle value. Used parts are viable for older cars but carry significant risks of premature failure.
2012 Hyundai Santa Fe with C1319 after getting new tires.
TPMS warning light and code C1319 appeared immediately after installing new tires and sensors.
Outcome: C1319 on Hyundai means 'Sensor 3 Wrong Type Installed'. The shop installed an incompatible sensor. Replacing it with an OEM sensor resolved the issue.
Lesson: Verify code definitions for your specific manufacturer. On Hyundai, C1319 is a minor TPMS issue, not a brake failure.
How to Prevent This Code From Triggering
- Perform a brake fluid flush. (Every 3 years or 30,000 miles.) — Removes moisture that lowers boiling points and corrodes internal actuator solenoids and seals.
- Maintain a healthy 12V auxiliary battery. (Test annually after 3 years of service.) — Provides stable voltage to control modules, preventing false fault codes.
- Perform regular physical brake inspections. (Every 15,000 miles or annually.) — Catches seized caliper pins early, preventing mechanical drag that confuses the Skid Control ECU.
- Listen for changes in the brake pump sound. (During every drive.) — A pump running frequently (every 15-30 seconds) while stopped indicates an internal leak and impending actuator failure.
Frequently Asked Questions
Is it safe to drive my car with code C1319?
No. Power braking is disabled, requiring extreme leg force and drastically increasing stopping distances. Tow the vehicle to a repair shop immediately.
Why are so many warning lights on with just one code?
The brake control system manages ABS, traction control, and stability control. A critical fault like C1319 disables all related systems, illuminating their respective warning lights.
Can I just clear the code and keep driving?
No. C1319 is a hard code indicating hardware failure. The code and symptoms return instantly after the system performs its next self-check.
Why is the repair for a Toyota/Lexus so expensive?
Replacing the brake actuator assembly requires a $1,000+ OEM part and intensive labor. The job also mandates a complex electronic brake bleed procedure using a specialized scan tool.
What are common misdiagnosis mistakes for C1319?
Mechanics often blame the expensive actuator without testing the 12V battery or checking for seized brake calipers. Failing to perform the electronic brake bleed after replacement is another major error.
I replaced the actuator myself, but the code and beeping alarm are still there. What did I do wrong?
You failed to complete the mandatory electronic brake bleed procedure. A bidirectional scan tool is required to cycle the ABS pump and purge air. Without this, the system remains in fail-safe mode.
My car is a Hyundai and I have code C1319. Do I have a brake problem?
No. On Hyundai vehicles, C1319 points to a navigation screen backlight issue or an incorrect TPMS sensor. It is completely unrelated to the braking system.
Wasn't there a recall for this problem on the Prius?
Toyota issued a warranty extension (ZJB) for Gen 2 Prius actuators, but not a full recall. A separate safety recall (13V-235) covered brake booster pumps on 2010 models.
Key Takeaways
- Code C1319 signals a critical brake failure on Toyota and Lexus hybrids, but indicates a minor TPMS or infotainment issue on Hyundai and Nissan vehicles.
- Do not drive a Toyota or Lexus with an active C1319 code, as power braking is completely disabled and stopping distances increase dangerously.
- Replacing a failed brake actuator assembly is the most common fix for Toyota and Lexus models, costing between $1,400 and $2,800 for parts and labor.
- Diagnose the exact electrical fault by reading sub-codes 71 through 74 and testing the stroke simulator solenoid for the required 21.45 to 23.15 Ω resistance.
- Finalize any brake actuator repair by performing a mandatory electronic brake bleed using a bidirectional scan tool to restore system function.
Helpful Videos
Shop the Parts Behind C1319
Below are the parts most often responsible for code C1319, ranked by how frequently each one is the actual culprit (per the diagnosis above). Tap any to see what we have for your vehicle.


The information in this article is provided for general reference and educational purposes only. Vehicle specifications, procedures, and part compatibility can vary by production date, trim level, and region. Always consult your vehicle's factory service manual and verify part numbers before purchasing or performing repairs. Safety-critical components such as airbags, seat belts, and braking systems should be installed by a qualified professional.
- 🧭 Diagnostic Flowchart
- 🎬 Helpful Videos
- 🛍️ Shop This Part
- What Does C1319 Mean?
- Can I Drive With C1319?
- Common Causes
- Symptoms
- Common Fixes & Costs
- Used vs. New Parts: Buying Guide
- What Happens If You Wait — Timeline
- Cost of Not Fixing It
- Diagnosis Steps
- When This Code Triggers (Freeze-Frame Conditions)
- Related Codes
- Climate & Environmental Factors
- How to Talk to a Mechanic About This Code
- Where to Take It: Dealer vs Independent vs Chain
- When to Walk Away From the Repair
- What Scan Tool You Need for This Code
- How to Clear the Code After You Fix It
- Will This Fail Emissions / State Inspection?
- Most Commonly Affected Vehicles
- Manufacturer-Specific Notes
- Real Owner Stories
- 2006 Lexus RX400h at 142k miles with multiple brake warnings.
- 2005 Toyota Prius at 300k miles with C1319 and a rusty rotor.
- 2008 Toyota Prius at 170k miles with C1319 and a $2,700 dealer quote.
- 2012 Hyundai Santa Fe with C1319 after getting new tires.
- How to Prevent This Code From Triggering
- Frequently Asked Questions
- Is it safe to drive my car with code C1319?
- Why are so many warning lights on with just one code?
- Can I just clear the code and keep driving?
- Why is the repair for a Toyota/Lexus so expensive?
- What are common misdiagnosis mistakes for C1319?
- I replaced the actuator myself, but the code and beeping alarm are still there. What did I do wrong?
- My car is a Hyundai and I have code C1319. Do I have a brake problem?
- Wasn't there a recall for this problem on the Prius?
- Key Takeaways
- 🎟️ Get 5% Off