
OBD-II Code C1357: ABS Hydraulic Circuit Malfunction
What C1357 means, why it triggers, and how to fix it
- Code C1357 indicates a critical failure in the ABS hydraulic control unit, instantly disabling your anti-lock brakes, traction control, and stability control.
- Replacing a failed ABS module costs between $800 and $3,000, but sending your existing unit to a specialized repair service cuts that cost to under $400.
- You can drive with a C1357 code, but your wheels will lock up during panic stops, requiring you to double your following distance to prevent skidding.
- Diagnose related codes first; a $50 faulty wheel speed sensor (code C0200) often tricks the computer into logging a false C1357 hydraulic failure.
- If you hear the ABS pump buzzing after turning off the engine, pull the 40A ABS fuse immediately to prevent a dead battery and a $1,000 burnt-out pump motor.
What Does C1357 Mean?
Code C1357 indicates a malfunction in the hydraulic portion of the Anti-Lock Brake System (ABS). The ABS uses a motorized pump and solenoid valves to pulse brake pressure and prevent wheel lockup. This code triggers when the vehicle's computer detects a failure in this pump, a stuck valve, or a loss of hydraulic pressure.
Technical definition: The SAE/ISO definition for C1357 varies by manufacturer. On Toyota/Lexus, it means "Decreasing Pressure Solenoid Malfunction," pointing to a failed brake actuator. On Ford/Lincoln, it indicates a general "Hydraulic Circuit Failure" in the ABS Control Unit. On Hyundai/Kia models with Smart Cruise Control, it signifies an "SCC deceleration plausibility error"—a software logic fault, not a physical hydraulic failure.
Can I Drive With C1357?
Yes, But With Caution. Yes, but with extreme caution. Your primary hydraulic brakes function normally, but the anti-lock (ABS), traction control, and stability control systems are disabled. Your wheels will lock up and skid during hard braking, doubling your stopping distance. Do not drive if the brake pedal feels spongy or if you hear a constant buzzing from the ABS pump, as this risks a sudden loss of all braking assistance.
Common Causes
- Internal ABS Module/Actuator Failure (Very Common) — The ABS module fails internally due to a broken solder joint on the circuit board, a burnt-out pump motor, or a stuck solenoid valve. This requires module repair or replacement.
- Low System/Battery Voltage (Common) — The ABS module is highly sensitive to voltage drops. A weak battery causes the module to fail its startup self-test, logging a false C1357 code.
- Low or Contaminated Brake Fluid (Common) — Low fluid allows air into the ABS pump, triggering a fault. Old, moisture-rich brake fluid corrodes the delicate internal seals and solenoids inside the ABS module.
- Damaged Wiring or Corroded Connectors (Common) — Heat, vibration, or road salt damages the wiring harness connecting to the ABS module. Moisture intrusion causes green corrosion on the connector pins, breaking the electrical circuit.
- Erratic Wheel Speed Sensor Data (Less Common) — A failing wheel speed sensor sends erratic signals to the ABS module. The computer misinterprets this bad data as a hydraulic pressure failure, setting a C1357 code alongside a wheel speed sensor code.
- Faulty Brake Pressure Sensor (Less Common) — The ABS system relies on pressure sensors to measure braking force. A failed sensor provides incorrect readings, forcing the computer to set a hydraulic fault code.
- Software/Calibration Mismatch (Rare) — On vehicles where C1357 relates to Smart Cruise Control (SCC), incorrect or outdated software in the ABS or SCC modules triggers the code.
- Bad Brake Light Switch (Rare) — A failed brake light switch sends conflicting pedal application data to the ABS module, occasionally resulting in a hydraulic system fault code.
Symptoms
- ABS, Traction, and Stability Warning Lights On — The amber 'ABS' light illuminates alongside the traction and stability control lights, as a single hydraulic fault disables all three interconnected safety systems.
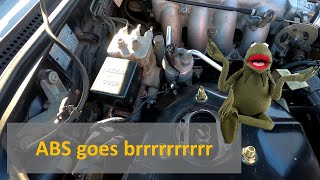
- ABS Pump Motor Runs Constantly — A buzzing or humming sound emits from the engine bay and continues even after turning the car off. This indicates a short circuit forcing the ABS pump motor to stay on. 🎬 Watch: How to diagnose an ABS pump that won't stop running.
- Wheels Lock Up During Hard Braking — Without ABS intervention, slamming on the brakes causes the wheels to lock and skid, increasing stopping distance and eliminating steering control.
- Brake Pedal Feels Hard or Spongy — The brake pedal requires significantly more effort to push, or it feels soft and travels closer to the floorboard than normal.
- Cruise Control Inoperative — The vehicle disables cruise control as a safety precaution when it detects any fault in the braking system.
Diagnostic Flowchart
Tap your situation to follow the diagnostic path that matches what you're seeing on this code.
Common Fixes & Costs
- Replace ABS Module / Hydraulic Control Unit
— Parts: $600-$2500, Labor: $150-$500, ~4.5 hr book time
(Professional)
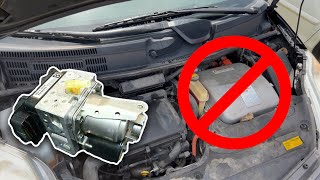
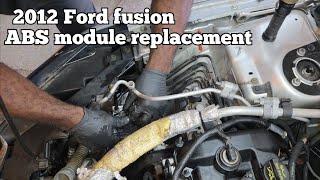
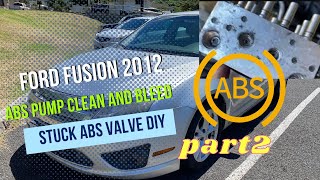
2010-2012 Ford Fusion: OEM AE5Z-2C219-F, BE5C-2C405-BA (Alt: Cardone 12-4403 (Reman), Dorman 599-786 (Reman))
2004-2009 Toyota Prius: OEM 44500-47141, 44510-47050 (Alt: Cardone 12-4118 (Reman), Dorman 599-933 (Reman))
2011-2012 Ford F-150: OEM BL3Z-2C405-J, CL3Z-2C219-B (Alt: Bosch 0265951889 (Module only), Cardone 12-4468 (Reman)) - Repair/Remanufacture Existing ABS Module — Parts: $150-$300, Labor: $150-$300, ~2 hr book time (Intermediate)
- Flush Brake Fluid — Parts: $15-$30, Labor: $100-$150, ~1 hr book time (DIY)
- Repair Wiring or Connector — Parts: $10-$50, Labor: $100-$300, ~2.5 hr book time (Intermediate)
- Replace Brake Pressure Sensor — Parts: $255-$287, Labor: $85-$286, ~1.5 hr book time (Intermediate)
DIY vs Professional
- Replace ABS Module / Hydraulic Control Unit — Beginner:
- Repair/Remanufacture Existing ABS Module — Beginner:
- Flush Brake Fluid — Beginner:
- Repair Wiring or Connector — Beginner:
Used vs. New Parts: Buying Guide
When a used part is worth it: A used ABS module is a budget-conscious option for vehicles over 15 years old where a new part exceeds the car's value. Source from a reputable seller providing donor mileage and a warranty.
Donor-vehicle mileage cap: roughly under 100000 miles for the part to have meaningful remaining life.
Donor quality checklist:
- Match the part number exactly; modules for different trim levels or drivetrains (AWD vs FWD) do not interchange.
- Source from a vehicle in a dry climate to avoid internal corrosion.
- Ensure the seller offers at least a 90-day warranty.
- Confirm you have access to a shop capable of VIN programming the used module.
Decision logic:
- If A reputable remanufacturing service (like UpFix or ModuleMaster) supports your specific module → Choose remanufacturing. It costs under $300, requires no VIN programming, and often includes a lifetime warranty.
- If The vehicle is less than 10 years old and budget allows → Buy a new OEM unit for maximum reliability and dealer warranty coverage.
- If The vehicle is over 15 years old and remanufacturing is unavailable → Buy a used part with an exact part number match.
Warranty tradeoff: Used parts offer 30-90 days. Remanufactured parts offer 1-year to lifetime warranties. New OEM parts carry a 12-month/12,000-mile warranty.
Worst-case if a used part fails: $300-$600 for repeat labor and fluid costs if a used part is dead on arrival.
What Happens If You Wait — Timeline
- 0-1 week: Intermittent ABS/Traction Control lights appear during startup, then go out. The fault is temporary, triggered by voltage fluctuations or temperature changes. (MPG impact: 0%% · Added cost: $0)
- 1 week - 2 months: The ABS warning light stays on permanently. ABS, traction, and stability control are disabled. The risk of an accident in adverse conditions increases significantly. (MPG impact: 0%% · Added cost: $0 (unless an accident occurs))
- 2-4 months (if pump motor is affected): The internal failure shorts the pump motor relay. The ABS pump runs constantly, draining the battery overnight. (MPG impact: 0%% · Added cost: $150-$400 for a new battery and tow.)
- 4+ months (if pump continues running): The constantly running ABS pump motor overheats and burns out. A $200 electronic repair becomes a mandatory $1,500 replacement of the entire ABS assembly. (MPG impact: 0%% · Added cost: $1000-$2500 for a new ABS assembly.)
Cost of Not Fixing It
- Immediate: Total loss of ABS, traction control, and stability control, drastically increasing the risk of skidding and collision in an emergency stop. (Added cost: Up to total loss of vehicle and/or insurance deductible in an accident.)
- 0-7 Days: If the ABS pump motor is stuck running, it drains the battery overnight. Repeated deep cycling permanently destroys the battery. (Added cost: $150-$400 for a replacement battery.)
- 1-4 Weeks: A constantly running ABS pump motor overheats and burns out, turning a $200 electronic repair into a mandatory $1,500 replacement of the entire hydraulic assembly. (Added cost: $1000-$2500 in additional parts cost.)
Diagnosis Steps
- Read the Trouble Codes
Use an advanced OBD-II scanner to confirm C1357. Look for related codes. If a wheel speed sensor code (C0xxx) or communication code (Uxxxx) is present, diagnose those first, as they trigger false C1357 codes.
Tools: Advanced OBD-II Scanner (Beginner) - Check Fuses for the ABS System
Locate the fuses for the ABS module and pump motor (often 40A and 10A) in the engine bay fuse box. A blown fuse confirms an electrical short in the pump or wiring.
Tools: Fuse Puller or Pliers (Beginner) - Inspect Brake Fluid Level and Condition
Check the brake fluid reservoir. Fluid must be between the 'MIN' and 'MAX' lines. Dark brown or black fluid indicates severe contamination that destroys internal ABS seals.
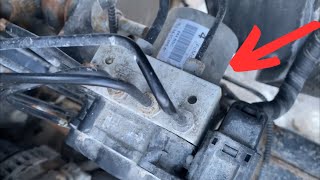
Tools: Flashlight (Beginner) - Visually Inspect the ABS Module and Wiring
Locate the ABS module. Inspect the brake lines for leaks. Unplug the main electrical connector and check for green/white corrosion on the pins or damaged wires.
Tools: Flashlight (Beginner) - Test the Brake Light Switch
Have an assistant stand behind the car while you press the brake pedal. Confirm the brake lights activate instantly. A faulty switch sends bad data to the ABS module.
Tools: An assistant (Beginner) - Test for Power and Ground at the ABS Module
Disconnect the ABS module connector. Using a multimeter and wiring diagram, verify battery voltage (12.0-12.6V) and a solid ground (less than 0.1 Ω resistance) on the correct pins.
Tools: Multimeter, Vehicle Wiring Diagram (Advanced) - Monitor Live Data PIDs
Use a scan tool to monitor live ABS data. Verify individual wheel speed sensors read consistently while driving. On Toyota hybrids, verify the accumulator pressure sensor reaches 2.9-3.5 MPa (420-507 PSI) after the pump cycles.
Tools: Advanced Bi-Directional Scanner (Advanced) - Pro Tip: Perform a Voltage Drop Test
Command the ABS pump motor ON using a bi-directional scanner. Measure the voltage at the ABS module's main power and ground terminals. A drop exceeding 0.5 volts indicates high circuit resistance.
Tools: Bi-Directional Scanner, Multimeter (Professional) - Pro Tip: Check Solenoid Resistance (Toyota/Lexus)
Disconnect the brake actuator connector. Measure resistance between the specified solenoid pins (e.g., SLRFL) per the service manual. A reading outside the 5.1-5.7 Ω range confirms an internal solenoid failure.
Tools: Multimeter, Vehicle Service Manual (Professional)
When This Code Triggers (Freeze-Frame Conditions)
- Vehicle Speed: 0-10 mph or 40-65 mph (Sets during the initial 5 mph self-test at startup. On SCC-equipped cars, it sets at highway speeds when the system expects a deceleration response that fails to occur.)
- Module Voltage: 11.5-14.5V (A logged value below 11V confirms a battery or charging system issue is the root cause, rather than a failed ABS module.)
- Brake Pedal Status: OFF / Not Applied (Self-test failures log when the brakes are untouched. SCC plausibility faults log when the system attempts automatic braking without driver input.)
- Engine RPM: 700-900 RPM (Idle) or 1500-2500 RPM (Cruise) (Correlates directly with vehicle speed, indicating whether the fault occurred during startup or steady-state driving.)
Related Codes
- C1256 — Indicates 'Accumulator Low Pressure' on Toyota hybrids. If the ABS pump runs continuously but pressure fails to build, C1256 confirms an internal leak, while C1357 is a secondary code.
- C1391 — Means 'Abnormal Leak of Accumulator Pressure.' If present with C1357 on a Prius, C1391 is the definitive code confirming a failed brake actuator assembly.
- C0200 — Indicates a 'Front Right Wheel Speed Sensor Circuit' fault. Diagnose this first. A faulty wheel speed sensor sends erratic signals, tricking the ABS module into logging a false C1357.
- U0121 — Means 'Lost Communication With Anti-Lock Brake System Module.' With U0121, the ABS module is completely offline. Fix the power/ground issue causing U0121 before diagnosing any C-codes.
Climate & Environmental Factors
- Cold Weather: Extreme cold causes temporary voltage drops from the battery, triggering false ABS codes at startup. The light often turns off once the vehicle warms up and voltage stabilizes.
- Humidity and Moisture: High humidity and driving through deep puddles force water into the ABS module connector, causing pin corrosion. Brake fluid absorbs atmospheric moisture, leading to internal corrosion of the hydraulic unit.
- Road Salt and De-icing Agents: Road salt dramatically accelerates the corrosion of the ABS module's electrical connector, wiring harness, and the external aluminum hydraulic block.
How to Talk to a Mechanic About This Code
Say this: "I have an ABS light on and my scanner shows code C1357. Before replacing the whole ABS module, please check for related wheel speed sensor codes, inspect the connector for corrosion, and test the main power and ground to the module."
This directs the mechanic to perform a thorough diagnosis instead of jumping to the most expensive conclusion, saving you diagnostic time and preventing unnecessary parts replacement.
Avoid saying:
- 'My ABS light is on, can you fix it?'
- 'Just replace the ABS module.'
- 'Do whatever you think is best.'
Questions to ask before authorizing the repair:
- Were there any other codes stored with the C1357, like for a wheel speed sensor or communication?
- Did you find good power and ground at the module connector?
- Can we send my existing module out for repair to save money?
- Does the replacement module require programming, and is that included in the quote?
- What is the warranty on the part and the labor?
Where to Take It: Dealer vs Independent vs Chain
- Dealer:
Best for: Vehicles under warranty, Complex cases on Toyota/Lexus hybrids requiring specific brake bleeding procedures, When a new module requires VIN programming that an independent shop cannot perform.
Downsides: Highest cost for parts and labor, often double an independent shop., Dealers default to replacing the entire expensive assembly rather than exploring mail-in repair options. (Typical cost: +75% vs. baseline) - Independent Shop:
Best overall fit. Take it to a shop equipped with a bi-directional scanner. They can diagnose the root cause, handle removal/reinstallation for a repaired module, and perform an automated bleed.
Best for: Out-of-warranty vehicles where cost is a major factor., Diagnosing common failures on domestic vehicles (e.g., Ford, GM)., Shops that specialize in electronics or partner with ABS module remanufacturers.
Downsides: Diagnostic capabilities vary; ensure the shop has an advanced, bi-directional scan tool., May lack the software to program a new module on certain models. (Typical cost: +0% vs. baseline) - Chain Shop:
AVOID for diagnosis and repair of C1357. Their business model is not set up for complex electronic diagnostics.
Best for: Simple preventative maintenance like a standard brake fluid flush.
Downsides: Not equipped for advanced electronic diagnostics., Technicians lack specific experience, leading to misdiagnosis., Unlikely to have the bi-directional scan tools needed for proper bleeding and programming. (Typical cost: -10% vs. baseline)
When to Walk Away From the Repair
If the estimated repair cost for the ABS system exceeds 50% of the car's private-party value, seriously consider selling the car as-is.
- Car worth $5000, fix is $2800: Walk away. The repair cost is over half the car's value. Put the money toward a replacement vehicle.
- Car worth $15000, fix is $2200: Fix it. The repair cost is well under the 50% threshold and restores a critical safety system.
- Car worth $3500, fix is $300: Fix it. Using a mail-in repair service keeps the cost low relative to the car's value, making it safe and sellable.
What Scan Tool You Need for This Code
Minimum: A scanner that reads and clears ABS (Chassis) fault codes. A basic engine-only code reader will NOT see C1357.
A cheap OBD-II reader cannot connect to the ABS module. You need a tool that explicitly supports ABS/SRS diagnostics.
Budget: BlueDriver Pro Scan Tool (~$100) — Reads and clears ABS codes and displays live data for wheel speed sensors. Great for DIY diagnosis, but lacks bi-directional control for an automated bleed.
Mid-range: Foxwell NT510 Elite / NT630 Plus (~$180) — Provides full system diagnostics and bi-directional control. Allows you to perform the 'automated bleed' required after replacing the module.
Professional: Autel MaxiCOM MK808 / MaxiCheck MX808 (~$450) — Offers full bi-directional control, automated bleeding, and performs VIN programming/initialization for new modules on many vehicles.
Rent vs buy: Auto parts stores offer free code reading services, but to perform a proper diagnosis (viewing live data) or the final repair (ABS bleed), you must buy a capable scanner.
How to Clear the Code After You Fix It
- Use an advanced OBD-II scan tool to clear chassis (C-prefix) codes from the ABS module.
- Perform the manufacturer-specific automated brake bleeding and system initialization procedure using a bi-directional scanner.
- Test drive the vehicle, performing several hard stops from 40 mph to force the ABS module to run its self-test.
Drive cycle (~15 minutes): Start the vehicle and idle for 1 minute. Accelerate to over 40 mph, then come to a complete stop. Repeat 5 times. The ABS light remains off if the repair is successful.
Readiness monitors affected: None. Chassis codes do not affect emissions readiness monitors.
Watch out for:
- Disconnecting the battery does not clear a C1357 code from the ABS module's non-volatile memory.
- Failing to perform the electronic brake bleed procedure after replacing a module prevents the system from working and immediately triggers new codes.
Will This Fail Emissions / State Inspection?
No — by itself this code doesn't fail OBD inspection (but it can keep readiness monitors from setting, which causes a separate fail).
- California: Passes emissions (smog) testing. California fails vehicles for an illuminated Check Engine Light, but ignores the ABS light.
- New York: Fails the state safety inspection. New York law explicitly mandates an inspection failure for an illuminated ABS warning light.
- Texas: Passes the state safety inspection. Texas criteria state an illuminated ABS lamp is not a cause for rejection, provided the base brakes pass a performance test.
Most Commonly Affected Vehicles
- Ford Fusion (2010-2012) — Widely known for premature failure of the ABS Hydraulic Control Unit (HCU). A recall (16S29) addressed sticking hydraulic valves, but C1357 often indicates a separate electronic failure.
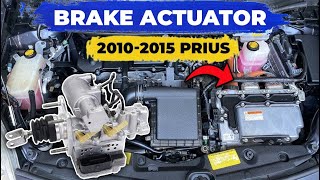
- Toyota Prius (2004-2009) — Prone to failure of the brake actuator assembly. Toyota issued an expired Warranty Enhancement Program (ZG1) for this. Replacement requires a specialized scan tool for the bleeding procedure.
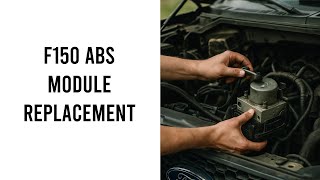
- Ford F-150 (2009-2014) — Frequently experience ABS module failures. The electronic module separates from the hydraulic block (using an E6 Torx socket), making it an ideal candidate for mail-in repair services.
- Hyundai Sonata (2011-2019) — On models with Smart Cruise Control (SCC), C1357 indicates a 'deceleration plausibility error'—a logic fault, not a direct hydraulic failure.
- Kia Optima (2011-2020) — Shares a platform with the Hyundai Sonata; C1357 on SCC-equipped models points to a logic/sensor conflict.
- Lincoln Town Car (2005-2011) — Failures are common due to age and heat exposure in the engine bay, sharing the ABS module design with the Ford Crown Victoria.
- Ford Escape (2008-2012) — ABS control module replacement is a common repair, typically due to an internal electronics failure.
- Subaru Outback (2010-2014) — Code appears due to an internal hydraulic control valve malfunction within the ABS unit.
Manufacturer-Specific Notes
- Toyota / Lexus: C1357 almost always means 'Decreasing Pressure Solenoid Malfunction,' pointing directly to a failed brake actuator assembly. Repairs often exceed $2,000 and require a computerized bleeding procedure.
- Ford / Lincoln / Mercury: The code points to an internal failure of the Hydraulic Control Unit (HCU). On many trucks, the electronic module separates from the hydraulic block, allowing for cheap mail-in repairs without bleeding brakes.
- Hyundai / Kia: In vehicles with Smart Cruise Control (SCC), C1357 means 'Deceleration Plausibility Error.' This is a software logic fault where braking performance doesn't match SCC expectations, requiring sensor diagnosis, not a new ABS pump.
- General Motors (GM): Triggers when the ABS module detects an internal fault during its 5 mph self-test, illuminating the ABS and Brake warning lights simultaneously.
Real Owner Stories
2005 Toyota Prius at 110K miles with intermittent lights
While stopped at a light, the brake pedal moved slightly and the ABS, VSC, and Brake warning lights illuminated. The pedal felt harder to push. The lights went off after restarting but returned intermittently.
What they tried:
- Took to an independent shop which read code C1357 but lacked the tools to diagnose further.
- Owner cleared the code to see if it returned.
Outcome: The failure was the brake actuator. The owner was quoted $2,500 for actuator replacement at the dealer, but found a hybrid specialist to install an OEM part for $1,500 total.
Lesson: On a Gen 2 Prius, intermittent warning lights with C1357 point to an impending brake actuator failure. The problem will not resolve itself.
2018 Ford F-150 with a dead battery
The truck battery died after sitting for two days. The owner identified a parasitic draw spiking to 4A every 60 seconds, tracking it to the ABS module.
What they tried:
- Swapped in a used ABS module, but the battery drain persisted.
- Inspected the original module's circuit board for visible damage but found none.
Outcome: The root cause was a short circuit within the electronic parking brake (EPB) switch on the dashboard. This faulty switch constantly sent a 'wake up' signal to the ABS module. Replacing the $40 EPB switch solved the parasitic draw.
Lesson: A parasitic draw from the ABS module is sometimes caused by another component telling it to stay awake. Check related inputs before condemning the module.
2007 Toyota Prius with ABS pump cycling after car is off
After turning the car off, the ABS accumulator pump continued to cycle on and off. The owner had to disconnect the 12V battery to stop it. No ABS codes were present.
What they tried:
- Verified brake fluid was full.
- Confirmed the 12V battery was healthy.
Outcome: A pump that cycles constantly when the car is off points to a severe internal leak in the actuator. The lack of codes suggested a control-side issue. The owner replaced the brake actuator assembly, resolving the leak and the cycling pump.
Lesson: An ABS pump running with the car off is an emergency that drains the battery and destroys the pump. Pull the ABS fuse immediately.
How to Prevent This Code From Triggering
- Flush brake fluid every 2 years or 30,000 miles (Every 2-3 years) — Brake fluid absorbs moisture from the air. This moisture causes internal corrosion of the delicate solenoids inside the ABS module, a leading cause of failure.
- Use a scan tool to cycle the ABS pump during the brake fluid flush (During every flush) — A standard bleed does not circulate fluid through the ABS pump. Activating the pump with a scanner expels contaminated fluid from the hydraulic unit.
- Maintain a healthy battery and charging system (Ongoing) — ABS modules are sensitive to low voltage. A weak battery causes the module to fail its startup self-test, logging false codes.
- Protect the module from moisture and heat (As needed) — Excessive moisture from deep puddles causes corrosion on the electrical connector. Ensure weather seals on the connector are intact.
Frequently Asked Questions
What are the most common misdiagnosis mistakes for C1357?
The biggest mistake is replacing the expensive ABS module when a cheaper component, like a faulty wheel speed sensor, is the real cause. On Hyundai/Kia models, mechanics mistakenly replace the hydraulic pump when the code actually indicates a software logic error with the Smart Cruise Control.
My C1357 code went away on its own. Am I in the clear?
No. An intermittent code points to an emerging problem, like a failing solder joint inside the module or a corroded connector. While the system works for now, the fault will return permanently, usually when you need the safety systems most.
Can a bad wheel bearing cause code C1357?
Not directly. A bad wheel bearing damages the wheel speed sensor, which sets a specific C0200-series code, but it does not cause a C1357 hydraulic fault on its own.
Is it better to repair my ABS module or replace it?
Repairing the electronic portion of your existing module via a mail-in service is significantly cheaper ($150-$300) and avoids the need for dealer programming. Replacement is a guaranteed fix but costs upwards of $1,500.
Will flushing the brake fluid fix code C1357?
No. If the code is already set, the internal damage to the solenoids or pump motor is already done. However, flushing the fluid is mandatory when installing a new module to prevent immediate damage.
Do I need to program a new ABS module?
Yes. A new ABS module must be programmed to your car's specific VIN using a dealer-level scan tool. Remanufacturing your original module avoids this requirement.
What happens if I ignore code C1357?
You lose ABS, traction control, and stability control. In an emergency stop, your wheels will lock up, causing you to skid and lose steering control.
Can I replace just the electronic part of the ABS module?
On many Ford and GM models, yes. You unbolt the electronic control unit from the hydraulic pump block with a few Torx screws, avoiding the need to open brake lines. On vehicles like the Toyota Prius, the unit is a single integrated assembly that cannot be separated.
Key Takeaways
- Code C1357 indicates a critical failure in the ABS hydraulic control unit, instantly disabling your anti-lock brakes, traction control, and stability control.
- Replacing a failed ABS module costs between $800 and $3,000, but sending your existing unit to a specialized repair service cuts that cost to under $400.
- You can drive with a C1357 code, but your wheels will lock up during panic stops, requiring you to double your following distance to prevent skidding.
- Diagnose related codes first; a $50 faulty wheel speed sensor (code C0200) often tricks the computer into logging a false C1357 hydraulic failure.
- If you hear the ABS pump buzzing after turning off the engine, pull the 40A ABS fuse immediately to prevent a dead battery and a $1,000 burnt-out pump motor.
Helpful Videos


Shop the Parts Behind C1357
Below are the parts most often responsible for code C1357, ranked by how frequently each one is the actual culprit (per the diagnosis above). Tap any to see what we have for your vehicle.


The information in this article is provided for general reference and educational purposes only. Vehicle specifications, procedures, and part compatibility can vary by production date, trim level, and region. Always consult your vehicle's factory service manual and verify part numbers before purchasing or performing repairs. Safety-critical components such as airbags, seat belts, and braking systems should be installed by a qualified professional.
- 🧭 Diagnostic Flowchart
- 🎬 Helpful Videos
- 🛍️ Shop This Part
- What Does C1357 Mean?
- Can I Drive With C1357?
- Common Causes
- Symptoms
- Common Fixes & Costs
- DIY vs Professional
- Used vs. New Parts: Buying Guide
- What Happens If You Wait — Timeline
- Cost of Not Fixing It
- Diagnosis Steps
- When This Code Triggers (Freeze-Frame Conditions)
- Related Codes
- Climate & Environmental Factors
- How to Talk to a Mechanic About This Code
- Where to Take It: Dealer vs Independent vs Chain
- When to Walk Away From the Repair
- What Scan Tool You Need for This Code
- How to Clear the Code After You Fix It
- Will This Fail Emissions / State Inspection?
- Most Commonly Affected Vehicles
- Manufacturer-Specific Notes
- Real Owner Stories
- 2005 Toyota Prius at 110K miles with intermittent lights
- 2018 Ford F-150 with a dead battery
- 2007 Toyota Prius with ABS pump cycling after car is off
- How to Prevent This Code From Triggering
- Frequently Asked Questions
- What are the most common misdiagnosis mistakes for C1357?
- My C1357 code went away on its own. Am I in the clear?
- Can a bad wheel bearing cause code C1357?
- Is it better to repair my ABS module or replace it?
- Will flushing the brake fluid fix code C1357?
- Do I need to program a new ABS module?
- What happens if I ignore code C1357?
- Can I replace just the electronic part of the ABS module?
- Key Takeaways
- 🎟️ Get 5% Off