
OBD-II Code C1378: Brake System Backup Power Communication Failure
What C1378 means, why it triggers, and how to fix it
- Code C1378 indicates a communication failure between the brake computer and its backup power capacitor, immediately disabling ABS and VSC safety systems.
- This fault is almost exclusive to 2004-2015 Toyota and Lexus hybrids, specifically targeting the Prius, Camry, RX, and Highlander.
- Always verify 12V battery health (>12.4V) and ensure the trunk-mounted capacitor module is securely bolted to the chassis before authorizing expensive module replacements.
- Advanced diagnosis requires a Toyota-specific scanner to read INF sub-codes (112 or 113), which pinpoint the exact wire causing the communication failure.
- Your base hydraulic brakes will still function, but driving without ABS and stability control increases the risk of skidding and wheel lock-up during emergency stops.
What Does C1378 Mean?
Code C1378 signifies that the main computer for your anti-lock brakes (the Skid Control ECU) has lost communication with its backup power source. This backup power is a capacitor module (Brake Control Power Supply) designed to provide stable voltage to the brake system if the vehicle's main 12-volt battery falters. When the Skid Control ECU cannot communicate with this capacitor for a set period, it disables the ABS and stability systems as a safety precaution and illuminates multiple warning lights.
Technical definition: The official SAE/ISO definition for C1378 is a Capacitor Communication Circuit Malfunction. This indicates the Skid Control ECU detected a fault in the communication lines (labeled ENA and FAIL) connecting it to the Brake Control Power Supply module. The 'ENA' line sends charge permit signals to the capacitor, while the 'FAIL' line sends status signals back to the ECU. The code triggers when the ECU detects an open circuit, a short, or receives invalid signals.
Can I Drive With C1378?
Yes, But With Caution. Yes, but with extreme caution and only for a short distance to reach a repair shop. Your primary hydraulic brakes will function, but your Anti-lock Braking System (ABS), Vehicle Stability Control (VSC), and Traction Control (TRAC) are disabled. This significantly increases the risk of wheel lock-up and skidding during hard braking or evasive maneuvers.
Common Causes
- Improper Grounding or Disconnected Capacitor Module (Very Common) — The brake capacitor module requires a solid ground connection to the vehicle's chassis to communicate. A frequent error after a DIY 12V battery replacement is plugging the module in but failing to bolt it down securely. This leaves the ground circuit open and immediately triggers C1378.
- Failing 12-Volt Auxiliary Battery (Common) — A weak 12V battery causes low voltage (below 9.5V) throughout the car's electrical system, triggering communication codes like C1378 as modules fail to operate correctly. This often sets code C1241 alongside C1378.
- Faulty Brake Control Power Supply (Capacitor Module) (Common) — The capacitor module itself fails internally over time. While a C1377 code more directly points to an internal capacitor failure, a faulty module also disrupts communication and causes a C1378 code.
- Damaged Wiring Harness or Connectors (Common) — The ENA and FAIL communication wires are thin and easily damaged, corroded, or shorted. Connectors become loose or have terminals deform, especially after unrelated repairs in the trunk or from hidden rear-end accident damage.
- Blown ABS Fuse (Less Common) — A blown fuse for the ABS or brake control system cuts power to the modules, causing a communication loss. On many Toyota models, a blown 'ABS MAIN3' fuse is the culprit.
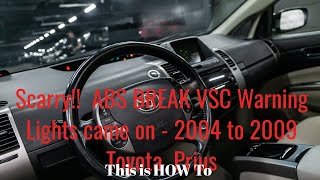
- Faulty Skid Control ECU (ABS Module) (Rare) — In rare instances, the main ABS computer fails and cannot process or send signals on the ENA/FAIL lines. This is the least common and most expensive cause. 🎬 See this walkthrough for fixing Prius ABS and VSC errors
Symptoms
- ABS Light On — The Anti-lock Braking System warning light illuminates on the dashboard.
- Brake System Warning Light On — A red or yellow general brake system warning light illuminates, indicating a fault in the braking system.
- VSC/Traction Control Light On — The Vehicle Stability Control or Traction Control (TRAC) light illuminates, indicating the system is inactive.
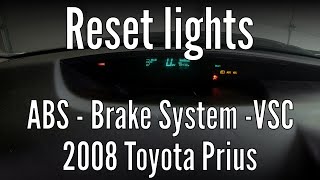
- Master Warning Light On — A red warning triangle or master caution light illuminates, signaling multiple active warnings. 🎬 Watch: How to reset ABS and VSC warning lights
- Check Hybrid System Message — On hybrid models, this fault occurs concurrently with other system errors, displaying a 'Check Hybrid System' message.
Diagnostic Flowchart
Tap your situation to follow the diagnostic path that matches what you're seeing on this code.
Common Fixes & Costs
- Secure Loose Connector or Ground Bolt — Parts: $0, Labor: $50-$150, ~0.5 hr book time (DIY)
- Replace 12V Auxiliary Battery
— Parts: $200-$300, Labor: $50-$100, ~0.8 hr book time
(DIY)
Toyota Prius (2004-2009): OEM (Alt: Optima, Deka, ACDelco) - Replace Brake Control Power Supply Module
— Parts: $250-$600, Labor: $100-$200, ~1.2 hr book time
(Intermediate)
Toyota Prius (2004-2009): OEM (Alt: Dorman, Cardone (Remanufactured))
Lexus RX400h (2006-2008): OEM (Alt: OEM required) - Repair Damaged Wiring Harness — Parts: $20-$100, Labor: $250-$800, ~2.5 hr book time (Professional)
- Replace Skid Control ECU (ABS Module)
— Parts: $1000-$2500, Labor: $200-$450, ~5.5 hr book time
(Professional)
Toyota Prius (2004-2009): OEM (Alt: Cardone (Remanufactured))
DIY vs Professional
- Secure Loose Connector or Ground Bolt — Beginner:
- Replace 12V Auxiliary Battery — Beginner:
- Replace Brake Control Power Supply Module — Beginner:
- Repair Damaged Wiring Harness — Beginner:
- Replace Skid Control ECU (ABS Module) — Beginner:
Used vs. New Parts: Buying Guide
When a used part is worth it: For the Brake Control Power Supply (capacitor), a used part from a low-mileage donor car is a cost-effective choice. For the complex ABS Actuator/ECU, buying used is a significant gamble due to high labor costs for installation.
Donor-vehicle mileage cap: roughly under 80000 miles for the part to have meaningful remaining life.
Donor quality checklist:
- Verify the part number matches exactly.
- For the ABS actuator, avoid parts from vehicles with high mileage or from regions with heavy road salt use.
- Ensure the seller offers at least a 90-day warranty and a good return policy.
Decision logic:
- If The part is the Brake Control Power Supply (capacitor) and budget is a concern → A used part from a reputable recycler is a viable option.
- If The part is the ABS Actuator and the vehicle's value justifies the cost → Buy a new OEM part. The reliability and warranty outweigh the savings of a used part given the high labor cost.
- If The vehicle is very old with high mileage (>200k miles) → A low-cost used ABS actuator is an option, but understand it is a high-risk repair.
Warranty tradeoff: Used parts typically have a 30-90 day warranty. New aftermarket parts offer 1-year to limited lifetime warranties. New OEM parts carry a 12-month/12,000-mile warranty if installed by a professional.
Worst-case if a used part fails: $800-$1500 if a used ABS actuator fails after the warranty period, requiring you to pay for the part and 4-7 hours of labor a second time.
What Happens If You Wait — Timeline
- Immediate: Code C1378 is set. ABS, VSC, and TRAC warning lights illuminate on the dashboard. These safety systems are immediately disabled. (MPG impact: 0%% · Added cost: $0 (Safety risk is the primary 'cost'))
- First Drive: The vehicle's base hydraulic brakes function, but there is a significantly increased risk of wheel lock-up and skidding in a panic stop or on slippery surfaces. (MPG impact: 0%% · Added cost: $0 (Potential cost of an at-fault accident due to loss of safety systems))
- 0-12 months: The vehicle automatically fails any state safety inspection that checks for an illuminated ABS or brake warning light. This prevents legal registration. (MPG impact: 0%% · Added cost: $50-$200 (Cost of failed inspection and potential fines))
- Long Term: No direct mechanical damage occurs from this specific code. The primary consequence remains the ongoing safety risk and inability to pass inspections. (MPG impact: 0%% · Added cost: Potentially thousands in liability if an accident occurs where ABS/VSC could have prevented it.)
Cost of Not Fixing It
- Immediate: ABS, VSC, and TRAC systems are disabled. Increased risk of wheel lock-up and skidding in emergency braking or slippery conditions. (Added cost: N/A (Safety risk))
- 0-6 months: Continued driving without key safety systems significantly increases the risk of an accident. The vehicle fails any state safety inspection. (Added cost: Potential cost of an at-fault accident.)
- 6+ months: No direct mechanical damage is caused by ignoring this code. The primary cost remains the elevated safety risk and inability to pass inspections. (Added cost: Cost of inspection failure and potential accident.)
Diagnosis Steps
- Check the 12V Battery and Charging System
Verify the health of the 12V auxiliary battery. Use a multimeter to check the voltage with the car off (must be >12.4V) and running (13.7-14.7V). A weak battery is a primary cause of communication codes. A voltage drop below 10V during startup triggers this fault.
Tools: Multimeter (Beginner) - Visually Inspect the Brake Capacitor Module and Connectors
Locate the brake control power supply (capacitor). On hybrids like the Prius, it is in the trunk near the 12V battery. Ensure its electrical connector is firmly plugged in and the module is bolted down tightly to the chassis for a proper ground. Check for corrosion.
Tools: Flashlight, 10mm socket (Beginner) - Inspect System Fuses
Check the vehicle's fuse boxes for any fuses related to the ABS, VSC, or brake systems. On a Toyota Prius, a blown 'ABS MAIN3' fuse is a known culprit. Visually inspect the fuse for a broken filament.
Tools: Fuse puller or needle-nose pliers (Beginner) - Scan for Detailed Sub-Codes (INF Codes)
Use an advanced OBD-II scanner (like Toyota Techstream) capable of reading manufacturer-specific codes. C1378 stores a detailed Information Code (INF code). INF 112 points to a problem with the FAIL line circuit, while INF 113 points to the ENA line circuit.
Tools: Advanced OBD-II Scanner (e.g., Toyota Techstream) (Intermediate) - Check for Voltage at the Capacitor Connector
Disconnect the capacitor module connector. With the ignition ON (Ready mode for hybrids), use a multimeter to check for battery voltage at the IG1 power supply pin in the harness connector. The specified voltage is between 10-14V. No voltage indicates a power supply issue.
Tools: Multimeter, vehicle-specific wiring diagram (Intermediate) - Test Wiring Harness for Continuity and Shorts
Disconnect the connectors from the Skid Control ECU and the Brake Capacitor Module. Using a multimeter in Ohms mode, check for continuity on the ENA and FAIL wires between the two plugs (must be <1 Ω). Then, check for a short by measuring resistance between each wire and a chassis ground (must be >10 kΩ).
Tools: Multimeter, vehicle-specific wiring diagram (Advanced) - [PRO TIP] Check Communication Waveform with an Oscilloscope
For definitive diagnosis, back-probe the ENA and FAIL terminals at the Skid Control ECU connector with an oscilloscope. A functioning system shows a specific 5V square wave pattern on each line. A flat line confirms a communication breakdown and isolates the fault to the wiring or a module.
Tools: Oscilloscope, back-probe pins, wiring diagram (Professional)
When This Code Triggers (Freeze-Frame Conditions)
- System Voltage: 9.5-14.0V (The fault is checked continuously as long as system voltage is above the minimum threshold (approx. 9.5V).)
- Vehicle Speed: 0 MPH or higher (The code sets at ignition ON (0 MPH) or while driving, as soon as the communication failure is detected for a set time.)
- Ignition Status: ON / READY (The system self-test that detects this fault runs as soon as the vehicle is powered on.)
- Time Since Fault Detection: 12+ seconds (The ECU must detect a continuous communication loss for a specific duration before it logs the C1378 code.)
Related Codes
- C1377 — Frequently appears with C1378. C1377 points to an internal 'Capacitor Malfunction', while C1378 points to the communication circuit. If you replace the capacitor to fix C1377 but C1378 remains, the new module is not grounded correctly.
- C1241 — Indicates 'Low or High Power Supply Voltage' to the Skid Control ECU. This is a major clue that the root cause is a failing 12V battery. C1241 is the cause, and C1378 is the effect. Always diagnose C1241 first.
- C1256 — Indicates 'Accumulator Low Pressure' in the main brake actuator. A severe electrical fault causing C1241 and C1378 starves the system of power, leading to secondary pressure-related codes like C1256.
- U0129 — A generic code for 'Lost Communication With Brake System Control Module'. Seeing U0129 alongside C1378 indicates a widespread electrical or network issue affecting the entire brake control module.
Climate & Environmental Factors
- High Humidity / Salt: In regions with high humidity or heavy road salt use, moisture penetrates wiring connectors or electronic module seals. This accelerates corrosion, creating high resistance or short circuits on the sensitive ENA/FAIL communication lines.
- Extreme Heat Cycles: Repeated temperature swings from hot to cold cause thermal stress on the internal circuit boards of the Skid Control ECU and capacitor module. This leads to microscopic cracks in solder joints, eventually causing an open circuit.
How to Talk to a Mechanic About This Code
Say this: "I have a C1378 code on my Toyota/Lexus and multiple brake warning lights are on. I'd like to schedule a diagnostic. Based on my research, the most common causes are simple, so please start by checking the 12V battery, and ensuring the brake capacitor module in the trunk is properly plugged in and grounded before looking at more complex issues."
This signals to the shop that you are an informed consumer. It directs them to check the most frequent, low-cost fixes first, preventing them from immediately quoting an expensive and often unnecessary repair like a full wiring harness replacement.
Avoid saying:
- 'My brake light is on, can you look at it?'
- 'Just fix whatever is wrong.'
- 'The car is acting weird, I don't know what's happening.'
Questions to ask before authorizing the repair:
- Did you test the 12V battery and what were its voltage and load test results?
- Did you physically inspect the brake capacitor in the trunk to confirm it's bolted down tightly and the connector is secure?
- If you are recommending a part replacement, what specific electrical test (continuity, voltage, resistance) failed?
- Can you show me the damaged part or the test result that confirms it's faulty?
- What is the warranty on the proposed repair, for both parts and labor?
Where to Take It: Dealer vs Independent vs Chain
- Dealer:
A safe but very expensive option. Use if you've exhausted other options or if money is no object.
Best for: Complex wiring issues that require manufacturer-specific diagrams and tools.
Downsides: Highest labor rates., Defaults to expensive, wholesale solutions like replacing an entire harness for a single broken wire. (Typical cost: +75% vs. baseline) - Independent Shop:
Best overall fit. An independent hybrid specialist has likely seen this exact code dozens of times and knows to check the simple, common failures first.
Best for: Out-of-warranty Toyota/Lexus vehicles., Shops that specialize in Japanese or hybrid vehicles.
Downsides: Quality and expertise vary; a shop not familiar with hybrids may misdiagnose the issue. (Typical cost: +0% vs. baseline) - Chain Shop:
AVOID. The risk of an incorrect diagnosis is extremely high. This is not a simple brake job; it's a specific electronic communication fault.
Best for: Selling you a 12V battery, which might be the fix.
Downsides: Technicians lack specific knowledge of this Toyota-specific system., High risk of misdiagnosis and being sold unnecessary parts., They almost certainly will not have the advanced scanner needed to read INF sub-codes. (Typical cost: -10% vs. baseline)
When to Walk Away From the Repair
If the worst-case repair cost (e.g., a new ABS actuator at ~$3,500) exceeds 50% of the car's private-party value, seriously consider selling the car as-is or trading it in.
- Car worth $4500, fix is $3500: Walk away. The repair cost is not justified by the vehicle's value. Sell as a 'mechanic's special' or trade it in, disclosing the issue.
- Car worth $10000, fix is $650: Fix it. The repair is a small fraction of the car's value.
- Car worth $3000, fix is $150: Fix it. This is a cheap repair that restores significant safety and value to the car.
What Scan Tool You Need for This Code
Minimum: A scanner that reads and clears manufacturer-specific ABS/VSC codes. A basic engine-only code reader will not see C1378.
A generic OBD-II reader from a parts store only reads 'P' (powertrain) codes and cannot access the 'C' (chassis) codes stored in the ABS module.
Budget: BlueDriver Pro Scan Tool (~$100) — Reads and clears enhanced codes for Toyota, including chassis codes like C1378. It allows you to confirm the code and see if simple fixes resolve it. It likely cannot read the deeper INF sub-codes.
Mid-range: Foxwell NT510 Elite for Toyota (~$180) — Provides OE-level diagnostics for Toyota/Lexus. It reads manufacturer-specific codes from all modules, views live data, and performs active tests. This is the minimum for a serious DIY diagnosis.
Professional: Toyota Techstream Software with Mini-VCI or J2534 Cable (~$50-500) — This is the factory software. It is the only guaranteed way to read the critical INF sub-codes (112 or 113) that pinpoint which specific wire in the communication circuit failed. It also allows for system initialization if the Skid Control ECU is replaced.
Rent vs buy: Most free rental scanners from auto parts stores are too basic and will not read ABS codes. For this specific code, a DIYer must buy at least a budget-pick scanner capable of reading enhanced Toyota codes.
How to Clear the Code After You Fix It
- Ensure all connectors are secure and modules are properly grounded.
- Reconnect the 12V battery if it was disconnected for the repair.
- Use an OBD-II scan tool to erase the DTC from the ABS/VSC/TRC system memory.
Drive cycle (~20 minutes): This is a continuous monitor code; no specific drive cycle is needed to clear it. Once the fault is repaired, clearing the code with a scan tool is sufficient. The warning lights extinguish and do not return after restarting the vehicle.
Readiness monitors affected: This code does not directly affect emissions readiness monitors like the Catalyst or O2 sensor monitors.
Before emissions retest: drive at least 50 miles to fully set monitors.
Watch out for:
- Simply disconnecting the 12V battery will not reliably clear this code from the ABS module's memory.
- If the root cause (e.g., bad ground, broken wire) is not fixed, the code and warning lights reappear almost immediately after being cleared.
Will This Fail Emissions / State Inspection?
Yes — this code typically fails an OBD-II emissions inspection.
- California: An active C1378 code with an illuminated Malfunction Indicator Lamp (like the 'BRAKE' light) causes an automatic failure of the OBD-II portion of the smog inspection.
- New York: An illuminated ABS warning light is grounds for safety inspection failure in New York.
- Texas: For vehicles requiring a safety inspection, an illuminated brake warning lamp is a specific failure criterion.
Most Commonly Affected Vehicles
- Toyota Prius (2004-2009) — Extremely common on the Gen 2 Prius. The capacitor module is in the trunk near the 12V battery. Improper grounding after battery service is a leading cause.
- Lexus RX400h (2006-2008) — Shares hybrid and braking technology with Toyota, making it highly susceptible. The diagnostic procedure is nearly identical to the Prius.
- Toyota Highlander Hybrid (2006-2013) — Uses a similar brake-by-wire system with a backup capacitor, leading to the same potential for C1378 faults.
- Lexus RX450h (2010-2015) — The issue persists in this generation. The code sometimes appears after a 'Check Hybrid System' warning related to other communication issues.
- Toyota Camry Hybrid (2007-2011) — Utilizes a similar capacitor backup system for its brakes and logs the C1378 code for the same communication circuit failures.
- Lexus GS450h (2007-2011) — The GS hybrid sedan is affected; diagnostic steps involving checking the harness between the Skid Control ECU and capacitor module apply.
- Toyota Prius C (2012-2019) — While less frequent than in the Gen 2 Prius, the Prius C logs C1378, often triggered by a low voltage event from a failing 12V battery.
- Lexus ES300h (2013-2018) — As a sibling to the Camry Hybrid, it shares the underlying brake system architecture and exhibits this code.
Manufacturer-Specific Notes
- Toyota/Lexus: This code is almost exclusive to Toyota and Lexus hybrid models from the mid-2000s to late-2010s. Their specific brake-by-wire architecture relies on this external capacitor communication circuit.
- Toyota: On the Gen 2 Prius, the most common 'fix' is simply bolting down the capacitor module in the trunk. Many owners replace the 12V battery and forget to secure the module, leaving it ungrounded and causing an immediate C1378 code.
- Lexus: On models like the RX400h and RX450h, the Skid Control ECU is located under the dashboard on the driver's side, making harness testing difficult. Accessing the ECU connectors requires removing lower dash panels.
Real Owner Stories
2006 Toyota Prius with 50k miles
Warning lights appeared on the dash of a recently purchased used Prius. The owner noticed the driver's side fender didn't line up correctly, suggesting a prior accident.
Outcome: An independent specialist found the electrical connector for the brake capacitor unit in the trunk was simply unplugged. They plugged it in, clearing the code. Total cost: $30 service fee.
Lesson: Always check the absolute simplest physical causes first. A multi-thousand dollar quote is sometimes resolved by checking for a loose connector or ground bolt.
2005 Toyota Prius with unknown mileage
The owner drove with the brake warning light on for 8 years. A dealership found codes C1377 and C1378, diagnosing an internal short in the Brake Control Power Supply Module (BCPSM).
Outcome: After swapping in a known-good BCPSM and only plugging in the connector, C1378 persisted. The owner realized the module must be physically bolted to the chassis to be grounded. After properly installing it, all codes cleared.
Lesson: Code C1378 specifically relates to communication. If it appears after replacing the capacitor module, the new module is not properly grounded. It must be bolted down securely.
2006 Lexus RX400h with multiple warning lights
The ABS, PS, red triangle, 'Check AWD', 'Check Hybrid System', and 'Check VSC' lights illuminated. A Lexus dealer diagnosed code C1378 and recommended replacing the ABS block relay and anti-skid control module.
Outcome: The root cause was a failing 12V battery. After replacing the battery with an OEM part, the error codes cleared and did not return.
Lesson: A weak 12V battery causes low voltage conditions that trigger numerous error codes. Before agreeing to expensive module replacements, have the 12V battery professionally tested.
How to Prevent This Code From Triggering
- Periodically test the 12V auxiliary battery (Every 6 months) — A weak 12V battery is a primary cause of low-voltage conditions that trigger communication codes like C1378. Replace batteries that are 4-5 years old as a preventive measure.
- Apply dielectric grease to critical connectors (When servicing nearby components) — Applying non-conductive dielectric grease to connector seals helps keep moisture out. This prevents corrosion that causes shorts or open circuits on sensitive communication lines.
- Ensure proper service procedures are followed (During any DIY or professional repair) — Human error is a major cause of C1378. Always double-check that any removed module is bolted down securely for ground and that all electrical connectors are fully seated.
- Keep battery terminals and ground points clean (Annually) — Corrosion on battery terminals or chassis ground points creates unwanted resistance, leading to voltage drops and communication errors. Clean terminals with a wire brush.
- Use a battery tender for long-term storage (If parking the vehicle for 30+ days) — Hybrid vehicle 12V batteries drain during long periods of inactivity. A smart trickle charger maintains the battery's state of charge, preventing voltage drops that trigger faults.
Frequently Asked Questions
Can I just clear the C1378 code and keep driving?
You can clear the code, but it will return immediately. This is a 'hard fault' that the system continuously monitors. Clearing the code does not resolve the underlying electrical or communication problem.
Why did my ABS, Brake, and VSC lights all come on at once?
These safety systems are managed by the Skid Control ECU. When it detects a critical communication failure like C1378, it shuts down all related functions and illuminates their warning lights to inform you they are offline.
I just replaced the Brake Capacitor and still have code C1378. What did I do wrong?
This is a very common issue. The C1378 code is a communication failure, most often caused by failing to properly ground the new capacitor module. It must be securely bolted to the vehicle's metal chassis, not just plugged in.
A mechanic quoted me thousands to fix code C1378. Is that right?
A worst-case scenario involving a full wiring harness or brake actuator replacement costs thousands. However, the actual cause is often a simple fix, like a forgotten connector. Always insist on diagnosing simple physical connections and the 12V battery first.
I just replaced my 12V battery and now this code appeared. Why?
The brake capacitor module, located next to the 12V battery in many hybrids, was likely not bolted back down correctly (improper ground) or its electrical connector was not plugged back in securely during the battery replacement.
What's the difference between C1377 and C1378?
C1377 means the capacitor module itself has an internal failure. C1378 means the communication circuit to the capacitor module is broken. If C1378 persists after replacing the module, it points directly to a wiring or grounding issue.
Where is the Skid Control ECU located?
On many Toyota Prius and Lexus RX models, the Skid Control ECU is located under the driver's side dashboard, often high up and difficult to access. The capacitor module, however, is almost always in the trunk near the 12V battery.
Key Takeaways
- Code C1378 indicates a communication failure between the brake computer and its backup power capacitor, immediately disabling ABS and VSC safety systems.
- This fault is almost exclusive to 2004-2015 Toyota and Lexus hybrids, specifically targeting the Prius, Camry, RX, and Highlander.
- Always verify 12V battery health (>12.4V) and ensure the trunk-mounted capacitor module is securely bolted to the chassis before authorizing expensive module replacements.
- Advanced diagnosis requires a Toyota-specific scanner to read INF sub-codes (112 or 113), which pinpoint the exact wire causing the communication failure.
- Your base hydraulic brakes will still function, but driving without ABS and stability control increases the risk of skidding and wheel lock-up during emergency stops.
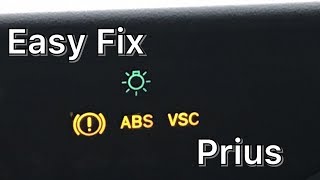
Helpful Videos
Shop the Parts Behind C1378
Below are the parts most often responsible for code C1378, ranked by how frequently each one is the actual culprit (per the diagnosis above). Tap any to see what we have for your vehicle.


The information in this article is provided for general reference and educational purposes only. Vehicle specifications, procedures, and part compatibility can vary by production date, trim level, and region. Always consult your vehicle's factory service manual and verify part numbers before purchasing or performing repairs. Safety-critical components such as airbags, seat belts, and braking systems should be installed by a qualified professional.
- 🧭 Diagnostic Flowchart
- 🎬 Helpful Videos
- 🛍️ Shop This Part
- What Does C1378 Mean?
- Can I Drive With C1378?
- Common Causes
- Symptoms
- Common Fixes & Costs
- DIY vs Professional
- Used vs. New Parts: Buying Guide
- What Happens If You Wait — Timeline
- Cost of Not Fixing It
- Diagnosis Steps
- When This Code Triggers (Freeze-Frame Conditions)
- Related Codes
- Climate & Environmental Factors
- How to Talk to a Mechanic About This Code
- Where to Take It: Dealer vs Independent vs Chain
- When to Walk Away From the Repair
- What Scan Tool You Need for This Code
- How to Clear the Code After You Fix It
- Will This Fail Emissions / State Inspection?
- Most Commonly Affected Vehicles
- Manufacturer-Specific Notes
- Real Owner Stories
- 2006 Toyota Prius with 50k miles
- 2005 Toyota Prius with unknown mileage
- 2006 Lexus RX400h with multiple warning lights
- How to Prevent This Code From Triggering
- Frequently Asked Questions
- Can I just clear the C1378 code and keep driving?
- Why did my ABS, Brake, and VSC lights all come on at once?
- I just replaced the Brake Capacitor and still have code C1378. What did I do wrong?
- A mechanic quoted me thousands to fix code C1378. Is that right?
- I just replaced my 12V battery and now this code appeared. Why?
- What's the difference between C1377 and C1378?
- Where is the Skid Control ECU located?
- Key Takeaways
- 🎟️ Get 5% Off