
OBD-II Code C1404: A Comprehensive Guide for Professionals and DIYers
What C1404 means, manufacturer-specific definitions, and how to achieve a permanent fix
- C1404 indicates a left rear wheel speed sensor circuit failure on most vehicles, disabling ABS and traction control.
- On Dodge, Ram, and Jeep vehicles, C1404 means a failed transfer case position sensor, requiring 4WD system diagnosis instead of wheel sensors.
- Diagnose before replacing parts by using a scan tool to monitor live wheel speed data and a multimeter to test circuit resistance.
- Driving with C1404 increases emergency stopping distances by up to 30% due to disabled ABS, making immediate repair critical for safety.
What Does C1404 Mean?
C1404 is a chassis diagnostic trouble code (DTC) indicating a malfunction in a critical sensor circuit. For most vehicles, this points to the left rear (driver's side rear) wheel speed sensor circuit. This sensor reports its wheel's rotational speed to the ABS and Engine Control Modules. When the signal is lost, erratic, or mismatched, the computer disables the ABS, traction, and stability control systems as a safety precaution.
Technical definition: The SAE/ISO definition for C1404 is "Malfunction in Rear Speed Sensor LH Circuit". The Skid Control ECU detects the left rear wheel speed sensor signal is missing or erratic above 6 mph. For Dodge, Ram, and Jeep, this code means "Transfer Case Range Position Sensor Circuit Low", indicating a short circuit in the 4WD system's position sensor.
Can I Drive With C1404?
Yes, But With Caution. Yes, you can drive, but your Anti-lock Braking System (ABS), Traction Control (TCS), and Vehicle Stability Control (VSC) are disabled. Your standard hydraulic brakes still function. However, in an emergency stop on wet or loose surfaces, your wheels will lock up, increasing stopping distance by 30% or more and causing a loss of steering control. Repair this promptly to restore critical safety systems.
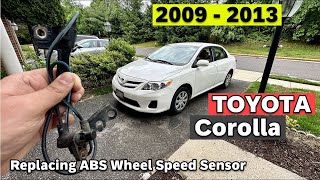
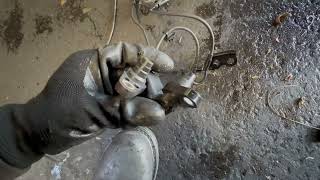
🎬 Watch: A quick walkthrough on replacing the rear ABS sensor.Common Causes
- Defective Left Rear Wheel Speed Sensor (Very Common) — Internal electronics break down from age, heat cycles, and moisture intrusion, leading to a complete loss of signal or erratic readings.
- Damaged or Corroded Wiring/Connectors (Very Common) — The wiring harness is exposed to water, road salt, and debris. Wires fray, break, chafe against the chassis, or connector pins corrode, creating an open or short circuit.
- Failed Transfer Case Position Sensor (Dodge/Ram/Jeep) (Common) — On these specific brands, C1404 points exclusively to the 4WD position sensor on the transfer case failing internally, causing a permanent 'circuit low' condition.
- Failed Wheel Hub Bearing Assembly (Common) — A failing bearing develops excessive play (wobble), altering the distance between the sensor and the integrated tone ring, causing a faulty signal. Metal shavings also contaminate the magnetic sensor tip.
- Contaminated or Damaged Sensor Tone Ring (Common) — The sensor reads a notched or magnetic ring. If cracked by rust buildup, covered in metallic debris, or missing a tooth, the sensor cannot generate a clean signal.
- Low Battery Voltage (Less Common) — The ABS control module requires stable voltage. A weak battery (below 12.4V) or failing alternator causes voltage drops that trigger false electronic codes.
- Faulty ABS/VSC Control Module (Rare) — The ABS computer rarely fails. This is a common misdiagnosis and is only considered after exhaustively testing the sensor, wiring, tone ring, and power supply.
Symptoms
- ABS Light On — The Anti-lock Braking System (ABS) warning light illuminates on the instrument cluster.
- Traction or Stability Control Light On — The Traction Control System (TCS) or Vehicle Stability Control (VSC) warning light turns on, as these systems depend on wheel speed sensors.
- Service 4WD Light On (Dodge/Ram/Jeep) — Indicates a fault in the transfer case control system, disabling 4WD.
- ABS and Traction Control Inoperative — Wheels lock up during hard stops or spin on slippery surfaces. The brake pedal feels different during panic braking.
- Inaccurate Speedometer — On models where rear wheel speed sensors contribute to the vehicle speed reading, the speedometer behaves erratically or reads zero.
Diagnostic Flowchart
Tap your situation to follow the diagnostic path that matches what you're seeing on this code.
Common Fixes & Costs
- Replace Left Rear Wheel Speed Sensor
— Parts: $40-$180, Labor: $100-$200, ~1.2 hr book time
(DIY)
: OEM
: OEM - Replace Transfer Case Position Sensor (Dodge/Ram/Jeep)
— Parts: $50-$250, Labor: $100-$150, ~0.8 hr book time
(DIY)
: OEM - Repair Damaged Wiring or Connector Pigtail — Parts: $15-$40, Labor: $125-$250, ~1.5 hr book time (Intermediate)
- Replace Left Rear Wheel Hub Bearing Assembly — Parts: $120-$400, Labor: $200-$350, ~2 hr book time (Professional)
- Clean Sensor Tip and Tone Ring — Parts: $5-$15, Labor: $75-$125, ~0.8 hr book time (DIY)
DIY vs Professional
- Replace Left Rear Wheel Speed Sensor — Beginner:
- Replace Transfer Case Position Sensor (Dodge/Ram/Jeep) — Beginner:
- Repair Damaged Wiring or Connector Pigtail — Beginner:
- Replace Left Rear Wheel Hub Bearing Assembly — Beginner:
- Clean Sensor Tip and Tone Ring — Beginner:
Used vs. New Parts: Buying Guide
When a used part is worth it: Buying used electronic parts like wheel speed sensors is not recommended due to high failure rates. A used part only makes sense if the vehicle is over 15 years old, new parts are unavailable, and the seller offers a guarantee.
Donor-vehicle mileage cap: roughly under 50000 miles for the part to have meaningful remaining life.
Donor quality checklist:
- Verify the exact part number match.
- Inspect the connector for green or white corrosion.
- For used hub assemblies, ensure zero play or roughness in the bearing.
- Avoid parts from Rust Belt vehicles.
Decision logic:
- If The part is an electronic sensor (wheel speed or transfer case position). → Buy a new OEM or high-quality aftermarket part. Labor costs negate any initial savings.
- If The part is a complete hub bearing assembly. → Buy new. A used hub has unknown wear, and bearing failure is a major safety risk.
- If Vehicle is over 15 years old and repaired on a minimal budget. → A used part from a low-mileage donor vehicle is a viable risk.
Warranty tradeoff: Used parts have a 30-day warranty. New aftermarket parts offer 1-year to lifetime warranties. New OEM parts carry a 1-year warranty.
Worst-case if a used part fails: $200-$400 if a used sensor fails, requiring a second labor charge and a new part.
What Happens If You Wait — Timeline
- 0-2 weeks: ABS/TCS lights are on. Safety systems are disabled. If the cause is a bearing, a faint humming noise begins. (Added cost: $0)
- 2 weeks - 3 months: If the root cause is a failing wheel bearing, the humming noise progresses to a noticeable grinding sound that gets louder with speed. The wheel develops a slight wobble. (Added cost: $0-$50)
- 3-6 months: Severe wheel bearing failure. The grinding noise is constant. The wheel has significant play, causing vibration in the steering wheel. Excess heat damages brake components. (Added cost: $200-$500)
- 6+ months: Catastrophic bearing failure. The bearing completely collapses, causing the wheel to seize or detach from the vehicle. (Added cost: $1000-$2500+)
Cost of Not Fixing It
- Immediate: ABS, Traction Control, and Stability Control systems are disabled. The risk of wheel lock-up, skidding, and loss of vehicle control increases significantly. (Added cost: N/A)
- 1-6 months: If the root cause is a failing wheel bearing, continued driving leads to complete bearing failure, causing the wheel to wobble or seize. (Added cost: $500-$1500)
- 6+ months: Underlying issues like wiring corrosion or a failing bearing worsen, making eventual diagnosis and repair more difficult and costly. (Added cost: N/A)
Diagnosis Steps
- Confirm Code and Research TSBs
Use an OBD-II scanner capable of reading 'C' (Chassis) codes to verify C1404. Check for manufacturer Technical Service Bulletins (TSBs) for your specific year, make, and model.
Tools: OBD-II Scanner (ABS/Chassis capable) (Beginner) - Analyze Live Data with a Scan Tool
Connect an advanced scan tool and select wheel speed sensor data PIDs. Drive slowly (under 15 mph) in a straight line. If the Left Rear (LR) sensor reads 0 mph or is erratic while others read correctly, the fault is in that circuit.
Tools: Advanced OBD-II Scanner with Live Data (Intermediate) - Visual Inspection of Sensor, Wiring, and Tone Ring
Safely raise the vehicle. Locate the left rear wheel speed sensor. Inspect the wiring harness for breaks, chafing, or melted plastic. Unplug the connector and inspect for green/white corrosion. Visually inspect the tone ring for cracks or heavy rust.
Tools: Jack, Jack Stands, Flashlight (Beginner) - Check for Wheel Bearing Play
Grasp the left rear tire at the 12 and 6 o'clock positions. Attempt to rock the wheel in and out. Any perceptible play or grinding noise indicates a worn wheel bearing, a likely cause of the code.
Tools: Jack, Jack Stands (Intermediate) - Verify Battery and System Voltage
Use a multimeter to check battery voltage; it must be at least 12.4V with the engine off and 13.7-14.7V running. Clean corrosion from terminals.
Tools: Digital Multimeter, Battery Terminal Cleaner (Beginner) - Test Sensor Signal and Resistance
Set a multimeter to AC Volts (passive sensors) or DC Volts (active sensors). Back-probe the signal wire and spin the wheel. A good sensor generates a rising AC voltage or toggling DC square wave. For passive sensors, measure resistance across the pins and compare it to the known-good right rear sensor (should be within 5-10%).
Tools: Digital Multimeter, Back-probe Kit (Advanced) - Check Circuit Integrity
Disconnect the sensor and ABS module connectors. Check for continuity on the power and signal wires (<1 Ohm). Check for a short to ground by measuring resistance between each wire and a clean chassis ground (should be 'OL').
Tools: Digital Multimeter, Vehicle-specific Wiring Diagram (Advanced) - Test Dodge/Ram Transfer Case Sensor Circuit
Disconnect the transfer case position sensor. With ignition on, check for a 5V reference on the supply wire. If 5V is present, the sensor is faulty. If not, check for a short to ground on the supply wire or an open circuit between the connector and the control module.
Tools: Digital Multimeter, Vehicle-specific Wiring Diagram (Advanced)
When This Code Triggers (Freeze-Frame Conditions)
- Vehicle Speed: 15-55 mph (Sets when the vehicle is in motion above a low-speed threshold (e.g., 6-10 mph), as the ABS module expects a valid signal from all four wheels.)
- Brake Pedal Status: Off (Detected during steady driving without brake application, as the module continuously compares wheel speeds.)
- System Voltage: 13.5-14.5V (Occurs when the charging system operates normally, ruling out low voltage as the primary cause.)
- Engine RPM: 1200-2500 RPM (Consistent with cruising speeds where a signal discrepancy becomes obvious to the control module.)
Related Codes
- C1403 — Identical code but for the right (RH) rear wheel speed sensor. The diagnostic procedure is identical.
- C1241 — Indicates low or high battery voltage supply to the ABS module. Diagnose the charging system first, as a weak battery is the root cause.
- C1405 (Dodge/Ram) — Relates to the transfer case position sensor circuit. C1404 indicates a short, while C1405 indicates an open circuit. Both point to the 4WD system.
- C1407 (Toyota) — Points to a general rear speed sensor malfunction, reinforcing that the fault lies within a rear wheel speed sensor circuit.
Climate & Environmental Factors
- Road Salt / Corrosion: In regions with winter road salting, wiring and connectors are highly susceptible to corrosion, leading to open or short circuits. Salt accelerates 'rust jacking' under the tone ring, causing it to crack.
- Moisture and Water Intrusion: High humidity, frequent car washes, or deep water allows moisture to penetrate failing wire insulation or poorly sealed connectors, causing shorts.
How to Talk to a Mechanic About This Code
Say this: "I have a C1404 code and my [ABS light / Service 4WD light] is on. For my [Toyota/Ford/etc.], please check the live data from the left rear wheel speed sensor and inspect the wiring. For my [Dodge/Ram], please focus on the transfer case position sensor circuit."
This immediately tells the shop you know the code's specific meaning for your vehicle. It directs them to the most likely cause, preventing a costly, broad diagnosis.
Avoid saying:
- 'My ABS light is on, can you just fix it?'
- 'I'm not sure what's wrong, just do whatever it takes.'
- 'A guy online said it's the ABS module.'
Questions to ask before authorizing the repair:
- Did you watch the live wheel speed data while driving to confirm the left rear sensor was dropping out?
- Did you test the wiring for continuity and shorts to ground?
- Is there any play in the wheel bearing?
- (For Dodge/Ram) Did you test for the 5V reference at the transfer case sensor?
- What is the warranty on the recommended part and your labor?
Where to Take It: Dealer vs Independent vs Chain
- Dealer:
A good option for warranty work, but the most expensive choice for an out-of-warranty vehicle.
Best for: Vehicles under warranty or with a known recall/TSB., Complex electrical issues where an independent shop has failed.
Downsides: Highest labor rates and part costs., Defaults to replacing entire assemblies when only a sensor is needed. (Typical cost: +50% vs. baseline) - Independent Shop:
Best choice for most situations. A competent independent shop has the tools and experience to diagnose and repair a C1404 code effectively.
Best for: Out-of-warranty vehicles where cost is a factor., Diagnosing common failures like sensors, wiring, and wheel bearings.
Downsides: Quality and diagnostic capabilities vary widely., May lack the latest manufacturer software updates. (Typical cost: +0% vs. baseline) - Chain Shop:
Use with caution. Acceptable if you are certain a simple sensor swap is the fix, but risky for an initial diagnosis.
Best for: Simple, clear-cut repairs like replacing an easily accessible wheel speed sensor.
Downsides: Technician skill is inconsistent., Lacks advanced diagnostic tools to differentiate between a bad sensor, wiring fault, or bad bearing. (Typical cost: -10% vs. baseline)
When to Walk Away From the Repair
If the estimated repair cost exceeds 50% of the car's private-party value, seriously consider selling or trading it in as-is.
- Car worth $4000, fix is $700: Fix it. The repair cost is 17.5% of the vehicle's value and restores a critical safety feature.
- Car worth $2500, fix is $1500: Walk away. The repair cost is 60% of the car's value. Selling the car 'as-is' is more economical.
- Car worth $10000, fix is $450: Fix it. This is a minor cost relative to the car's value and increases resale value.
What Scan Tool You Need for This Code
Minimum: A scanner that reads Chassis ('C') codes and displays live data for all four wheel speed sensors.
A basic $20 code reader only checks engine codes ('P' codes) and cannot see the C1404 code or diagnose ABS issues.
Budget: BlueDriver Pro Scan Tool (~$100) — Connects to your smartphone via Bluetooth. Reads ABS codes, clears them, and displays live data graphing for all wheel speed sensors.
Mid-range: Foxwell NT604 Elite / Autel AutoLink AL619 (~$150) — Dedicated handheld units that diagnose core systems (Engine, Transmission, ABS, SRS). They provide live data and are faster than Bluetooth dongles.
Professional: Autel MaxiCOM MK808S / XTOOL D7W (~$400-600) — Professional-level tablets offering full-system diagnostics, extensive live data, and bidirectional controls to actively test components.
Rent vs buy: Free scanner loaner programs at auto parts stores use basic readers that cannot access ABS codes. Buying a tool like the BlueDriver pays for itself by avoiding a single diagnostic fee.
How to Clear the Code After You Fix It
- Use an OBD-II scan tool to erase the chassis fault codes.
- Perform a specific drive cycle to allow the ABS module to self-test.
- Check for pending or current codes after the drive cycle.
Drive cycle (~20 minutes): 1) Cold start (engine off for several hours). 2) Idle for 2-3 minutes. 3) Drive at city speeds (25-40 mph) with several complete stops. 4) Accelerate onto a highway and maintain 55-60 mph for at least 5 miles. 5) Return to city speeds. The ABS light remains off if the repair is successful.
Readiness monitors affected: This is a chassis code ('C') and does not affect emissions readiness monitors ('P' codes).
Before emissions retest: drive at least 50 miles to fully set monitors.
Watch out for:
- Disconnecting the battery does not clear the code from the ABS module's memory and resets emissions monitors.
- The code returns immediately upon driving if the underlying fault remains.
- Failing to perform a complete drive cycle causes the light to stay off temporarily but return later.
Will This Fail Emissions / State Inspection?
No — by itself this code doesn't fail OBD inspection (but it can keep readiness monitors from setting, which causes a separate fail).
- California: An ABS light does NOT cause a smog check failure. However, for a salvage vehicle needing a Vehicle Safety Systems Inspection, a non-functional ABS system causes a failure.
- New York: An illuminated ABS light does not fail the emissions or safety inspection, provided the standard service brakes work correctly.
- Texas: An illuminated ABS light is explicitly listed as NOT being a cause for rejection in the state safety inspection.
Most Commonly Affected Vehicles
- Toyota Corolla (2009-2019) — Extremely common failure. The rear wheel speed sensor or the entire hub bearing assembly are the usual culprits.
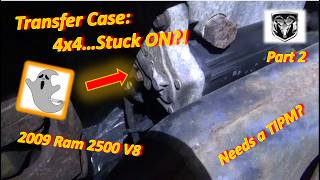
- Dodge / Ram 1500 / 2500 / 3500 (2006-2018) — CRITICAL: C1404 means 'Transfer Case Range Position Sensor Circuit Low'. It is NOT a wheel speed sensor issue. Replace the transfer case sensor or repair a chafed wiring harness.
- Ford Escape (2013-2019) — Known for rear ABS sensor failures, wiring issues, and tone rings that crack due to rust buildup.
- Toyota Highlander (2008-2013) — Rear speed sensor wiring and connectors are frequent failure points due to corrosion.
- Lexus RX350 / RX450h (2010-2015) — Prone to rear wheel speed sensor and wiring failures due to exposure and corrosion.
- Hyundai Santa Fe (2010-2018) — Frequently experiences ABS light illumination due to failed wheel speed sensors or damaged wiring.
- Subaru Outback / Legacy (2010-2019) — Rear wheel speed sensor failure is a documented issue requiring sensor replacement.
Manufacturer-Specific Notes
- Dodge / Ram / Jeep: C1404 exclusively means 'Transfer Case Range Position Sensor Circuit Low'. It has nothing to do with wheel speed. The cause is almost always a failed sensor on the transfer case or a short in its wiring harness.
- Toyota / Lexus: The rear speed sensor tone ring is integrated into the sealed wheel hub assembly. If the tone ring is damaged, the entire hub assembly must be replaced.
- Ford: Rear tone rings crack due to rust jacking. Sensor wiring harnesses are a common failure point and are sold as a separate, replaceable part.
Real Owner Stories
2016 Ram 2500 with 53k miles
Service 4x4 light came on intermittently. Code C1404 was stored. 4WD system seemed to function correctly.
What they tried:
- Dealer suggested replacing the transfer case shift motor for over $1000. Owner replaced it himself, but the light returned.
- Owner checked basic connections and wiring.
- Another owner found a chafed wire in the main harness resting on a metal line clamp near the airbox.
Outcome: The final solution was locating and repairing a shorted wire in the harness.
Lesson: On Dodge/Ram trucks, C1404 is a transfer case issue. Do not replace expensive parts without exhaustively inspecting the wiring harness for chafing and shorts.
2007 Toyota Highlander FWD
ABS, TRAC, and VSC lights came on intermittently. Codes C1404 and C1403 were present.
What they tried:
- Cleared codes, but they returned. Live data appeared normal.
- Visual inspection of the rear wheel speed sensor harness connectors revealed significant green corrosion.
Outcome: Corrosion infiltrated the left rear sensor. The fix required replacing both rear wiring harnesses and the entire left rear wheel bearing assembly, as rust made it impossible to separate the old sensor.
Lesson: In rust-prone areas, intermittent sensor codes are caused by connector corrosion. Unplug and inspect connectors for green residue. Be prepared for a sensor replacement to escalate into a hub replacement if components are seized.
2010 Toyota Corolla with multiple ABS codes
ABS, VSC, and Brake lights came on. Scan showed C1404, C1241 (Low Voltage), and other rear sensor codes.
What they tried:
- Visually inspected the wheel hub and replaced the sensor.
- All codes cleared except for C1404.
Outcome: The presence of the C1241 low voltage code is a critical clue. The problem is an underlying electrical issue like a bad battery or failing alternator causing multiple codes to appear.
Lesson: When multiple electronic codes appear, especially a 'low voltage' code like C1241, diagnose the battery and charging system first. A healthy electrical system is the foundation for all other diagnoses.
How to Prevent This Code From Triggering
- Apply Dielectric Grease to Connector Seals (Whenever a sensor is replaced or disconnected.) — Dielectric grease seals out moisture and oxygen, preventing water from entering and causing corrosion. Apply to the rubber gasket, not the electrical pins.
- Regularly Wash Underbody, Especially in Winter (Monthly in 'Rust Belt' regions.) — Road salt and de-icing brines are extremely corrosive. Washing the undercarriage removes corrosive agents before they damage wiring and tone rings.
- Inspect Wiring During Tire Rotations (Every 5,000-7,500 miles.) — Visually inspect the ABS sensor wire for chafing, cracking, or improper routing. Securing a loose wire prevents it from rubbing through and causing a short.
- Address Noisy Wheel Bearings Immediately (As soon as a humming/grinding noise is heard.) — A humming noise is a classic sign of a failing wheel bearing. Excessive play damages the integrated ABS sensor and triggers a C1404 code. Early replacement prevents collateral damage.
Frequently Asked Questions
What is the most common fix for code C1404?
For most cars, the fix is replacing the left rear wheel speed sensor or repairing its wiring. For Dodge, Ram, or Jeep vehicles, the fix is replacing the transfer case position sensor. Always diagnose before replacing parts.
My truck is a Ram 1500 and I have code C1404. Is it the wheel sensor?
No. On Dodge, Ram, and Jeep vehicles, C1404 definitively points to a problem with the transfer case position sensor, not a wheel speed sensor. Focus your diagnosis entirely on the 4WD system components.
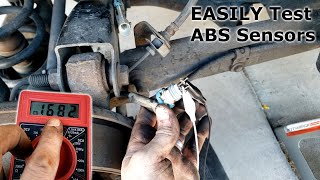
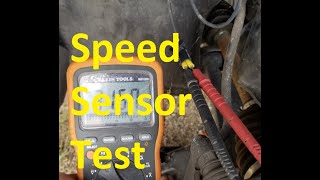
How do you test a wheel speed sensor?
Test a wheel speed sensor using a multimeter set to AC Volts (passive sensors) or DC Volts (active sensors). While spinning the wheel, a good passive sensor produces a rising AC voltage, and an active sensor shows a toggling DC voltage. For the most accurate results, use an oscilloscope to verify a clean square wave signal.
What is the difference between C1404 and C1405 on a Dodge Ram?
Both codes point to the transfer case position sensor circuit. C1404 (Circuit Low) means the signal wire is shorted to ground. C1405 (Circuit High) means the signal wire has an open circuit or is shorted to power.
Can a bad battery cause the C1404 code?
Yes. The ABS control module is highly sensitive to voltage drops. A weak battery, failing alternator, or poor terminal connections cause unstable power, triggering false sensor codes like C1404.
I was told I need a new ABS module. Could it be something else?
Yes, blaming the expensive ABS control module is a frequent misdiagnosis. A faulty wheel speed sensor, damaged wire, or cracked tone ring are far more common and significantly cheaper to fix. Exhaustively rule out these components before condemning the module.
Can a bad wheel alignment cause an ABS light or C1404 code?
No, a bad wheel alignment itself does not cause a C1404 code. This code is triggered by an electrical fault in the sensor circuit. However, a severely worn wheel bearing affects alignment and causes the code by disrupting the sensor signal.
Is it expensive to fix code C1404?
It is typically a moderately priced repair ranging from $140 to $400 for a wheel speed sensor or transfer case sensor replacement. If the entire wheel hub bearing assembly requires replacement, expect to pay between $450 and $700 per wheel. Diagnosing and repairing a wiring short usually costs $150 to $250.
Key Takeaways
- C1404 indicates a left rear wheel speed sensor circuit failure on most vehicles, disabling ABS and traction control.
- On Dodge, Ram, and Jeep vehicles, C1404 means a failed transfer case position sensor, requiring 4WD system diagnosis instead of wheel sensors.
- Diagnose before replacing parts by using a scan tool to monitor live wheel speed data and a multimeter to test circuit resistance.
- Driving with C1404 increases emergency stopping distances by up to 30% due to disabled ABS, making immediate repair critical for safety.
Helpful Videos
Shop the Parts Behind C1404
Below are the parts most often responsible for code C1404, ranked by how frequently each one is the actual culprit (per the diagnosis above). Tap any to see what we have for your vehicle.


The information in this article is provided for general reference and educational purposes only. Vehicle specifications, procedures, and part compatibility can vary by production date, trim level, and region. Always consult your vehicle's factory service manual and verify part numbers before purchasing or performing repairs. Safety-critical components such as airbags, seat belts, and braking systems should be installed by a qualified professional.
- 🧭 Diagnostic Flowchart
- 🎬 Helpful Videos
- 🛍️ Shop This Part
- What Does C1404 Mean?
- Can I Drive With C1404?
- Common Causes
- Symptoms
- Common Fixes & Costs
- DIY vs Professional
- Used vs. New Parts: Buying Guide
- What Happens If You Wait — Timeline
- Cost of Not Fixing It
- Diagnosis Steps
- When This Code Triggers (Freeze-Frame Conditions)
- Related Codes
- Climate & Environmental Factors
- How to Talk to a Mechanic About This Code
- Where to Take It: Dealer vs Independent vs Chain
- When to Walk Away From the Repair
- What Scan Tool You Need for This Code
- How to Clear the Code After You Fix It
- Will This Fail Emissions / State Inspection?
- Most Commonly Affected Vehicles
- Manufacturer-Specific Notes
- Real Owner Stories
- 2016 Ram 2500 with 53k miles
- 2007 Toyota Highlander FWD
- 2010 Toyota Corolla with multiple ABS codes
- How to Prevent This Code From Triggering
- Frequently Asked Questions
- What is the most common fix for code C1404?
- My truck is a Ram 1500 and I have code C1404. Is it the wheel sensor?
- How do you test a wheel speed sensor?
- What is the difference between C1404 and C1405 on a Dodge Ram?
- Can a bad battery cause the C1404 code?
- I was told I need a new ABS module. Could it be something else?
- Can a bad wheel alignment cause an ABS light or C1404 code?
- Is it expensive to fix code C1404?
- Key Takeaways
- 🎟️ Get 5% Off