
OBD-II Code C1465: Front Left Wheel Speed Sensor Circuit Malfunction
What C1465 means, why it triggers, and how to fix it
- Code C1465 indicates a failure in the front left wheel speed sensor circuit, immediately disabling your ABS, traction control, and stability control.
- Inspect the exposed wiring harness in the wheel well first; chafed wires or rodent damage cause over 50% of these faults, saving you the cost of an unnecessary $200 sensor.
- Do not replace the sensor if your scanner also shows code C1241; test your 12V battery first, as voltage drops below 9.5V trigger false ABS codes.
- Driving with C1465 increases stopping distances significantly on wet roads due to locked wheels, making immediate repair a critical safety priority.
- On General Motors trucks (2007-2013), C1465 often points to a 4WD front axle disconnect fault rather than a wheel speed sensor, requiring a manufacturer-specific scanner to verify.
What Does C1465 Mean?
C1465 means the Skid Control ECU detects a fault in the front left wheel speed sensor's electrical circuit. This sensor monitors how fast the wheel spins. Without a reliable signal, the computer disables ABS and traction control as a fail-safe and triggers dashboard warning lights.
Technical definition: The SAE/ISO definition for C1465 is "Front Speed Sensor LH Circuit Malfunction". The Skid Control ECU sets this code when it detects an open circuit, a short circuit, or a missing signal (reading 0 mph while other wheels rotate) from the front left speed sensor at speeds above 6 mph (10 km/h).
Can I Drive With C1465?
Yes, But With Caution. Yes, but your Anti-lock Braking System (ABS), Traction Control, and Stability Control systems are disabled. In an emergency stop, your wheels will lock up, causing skidding and loss of steering control. Stopping distances increase significantly on wet or slippery surfaces. While driving won't cause immediate mechanical damage, the high accident risk requires prompt repair.
Common Causes
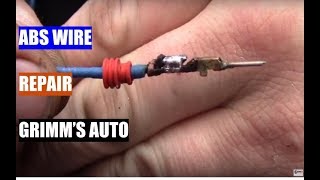
- Damaged Wiring Harness or Connector (Very Common) — Road debris, water, salt, and rodents frequently damage the exposed wiring in the wheel well. Water intrusion from pressure washing or a loose, corroded connector also disrupts the signal. This is the most frequent culprit, often failing before the sensor itself.
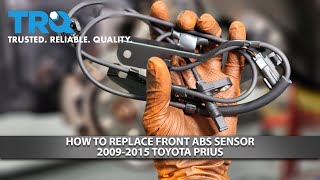
- Failed Front Left Wheel Speed Sensor (Common) — The sensor fails internally due to age, extreme heat cycles from the brakes, and constant suspension vibration. It is a standard wear-and-tear item. 🎬 Watch: Step-by-step guide to replacing the front ABS sensor.
- Contaminated or Damaged Tone Ring (Less Common) — The sensor reads a toothed magnetic ring on the axle or wheel hub. Rust, cracks, or metallic debris (often from a failing wheel bearing) block the magnetic signal, causing the sensor to report zero speed.
- Failing Wheel Hub / Bearing Assembly (Less Common) — A worn wheel bearing creates excessive physical play. This wobble changes the precise air gap between the sensor and the tone ring, leading to an erratic or lost signal.
- Low Battery Voltage (Rare) — A weak 12V battery dropping below 9.5V during engine cranking triggers false ABS faults. This almost always sets a C1241 (Low Battery Positive Voltage) code alongside the C1465.
- Improper Installation or Poor Alignment (Rare) — Recent suspension work can leave wires improperly routed. The wire rubs against the tire, axle, or suspension components, eventually wearing through the insulation and causing a short circuit.
- Faulty ABS/Skid Control Module (Very Rare) — The computer module receiving the signal has failed internally. Consider this only after exhaustively testing the wiring harness and sensor with a multimeter.
Symptoms
- ABS, Traction, and Brake Warning Lights Illuminated — The ABS, Traction/Stability Control (VSC/TRAC), and sometimes the red 'BRAKE' lights illuminate simultaneously and stay on. This is the immediate visual indicator of the fail-safe mode.
- ABS and Traction Control Disabled — During hard braking or acceleration on slick surfaces, the wheels lock up and skid. The brake pedal does not pulsate as it normally does when ABS activates.
- Inaccurate or Inoperative Speedometer — On specific vehicles (like certain Toyota models), the front left wheel speed sensor provides the primary data for the speedometer. A faulty circuit causes the speedometer to read incorrectly or drop to zero.
- Pre-Collision System (PCS) Disabled — Vehicles equipped with advanced driver-assistance systems (ADAS) disable the Pre-Collision System when wheel speed data is lost, triggering a separate dashboard warning message.
Diagnostic Flowchart
Tap your situation to follow the diagnostic path that matches what you're seeing on this code.
Common Fixes & Costs
- Repair Damaged Wiring or Replace Pigtail
— Parts: $15-$100, Labor: $100-$250, ~1.5 hr book time
(Intermediate)
Toyota Prius (2010-2015): OEM N/A (Alt: Standard Motor Products S2825, Dorman 645-940) - Replace Front Left Wheel Speed Sensor
— Parts: $60-$300, Labor: $100-$170, ~1.2 hr book time
(DIY)
Toyota Prius (2010-2015): OEM 89543-47030 (Alt: Denso 5S12921, Standard Motor Products ALS2331)
Toyota Tundra (2014-2021): OEM 89543-0C020 (Alt: Denso 5S8683, NTK AB1756) - Clean Tone Ring and Sensor Mounting Surface — Parts: $5-$15, Labor: $100-$150, ~1.0 hr book time (Intermediate)
- Replace Front Wheel Hub & Bearing Assembly — Parts: $150-$400, Labor: $200-$350, ~2.5 hr book time (Professional)
DIY vs Professional
- Replace Front Left Wheel Speed Sensor — Beginner: Yes
Tools: Jack, jack stands, lug wrench, 10mm socket, torque wrench, safety glasses. - Repair Damaged Wiring / Replace Pigtail — Beginner: No
Tools: Soldering iron, heat shrink tubing, wire strippers, multimeter. - Clean Tone Ring — Beginner: Yes
Tools: Brake cleaner, wire brush, flashlight. - Replace Front Wheel Hub & Bearing Assembly — Beginner: No
Tools: Axle nut socket, high-torque impact wrench, torque wrench, hub puller, slide hammer.
Used vs. New Parts: Buying Guide
When a used part is worth it: Buying a used wheel speed sensor is not recommended. The minimal cost savings do not justify the risk of installing a part near the end of its lifespan. A used wiring harness pigtail is acceptable if your original connector is destroyed.
Donor-vehicle mileage cap: roughly under 40000 miles for the part to have meaningful remaining life.
Donor quality checklist:
- Ensure the OEM part number matches exactly.
- Inspect the wiring for brittleness, cracking, or previous splice repairs.
- Avoid parts from rust-belt donors, as internal corrosion is guaranteed.
Decision logic:
- If A new aftermarket sensor from a reputable brand (Denso, NTK) is under $100. → Buy new. The warranty and reliability outweigh the $30 savings of a used part.
- If The choice is between a $20 no-name Amazon sensor and a $30 OEM used part. → The OEM used part is more reliable than ultra-cheap aftermarket electronics.
Warranty tradeoff: Used parts offer 30-day warranties. Quality new aftermarket parts offer 1-year to lifetime warranties. OEM new parts carry a 12-month warranty.
Worst-case if a used part fails: $100-$170 in wasted labor if a used part fails immediately.
What Happens If You Wait — Timeline
- Immediate: ABS, Traction Control, and Stability Control disable. The vehicle reverts to standard, unassisted braking. (MPG impact: 0%% · Added cost: $0)
- 0-3 months: Driving carries a significant safety risk. Panic stops result in locked wheels and skidding. If the speedometer is dead, speeding tickets are a risk. (MPG impact: 0%% · Added cost: $150+ (Potential speeding ticket))
- 3-6 months: If a bad wheel bearing caused the code, continued driving destroys the bearing completely, causing grinding noises and damaging the steering knuckle. (MPG impact: 2%% · Added cost: $400-$800 (Cost to replace hub and spindle))
- 6+ months: The electrical fault causes no further mechanical damage, but the immeasurable risk of an accident due to disabled safety systems remains constant. (MPG impact: 0%% · Added cost: Thousands in potential accident liability.)
Cost of Not Fixing It
- Immediate: Loss of ABS, traction control, and stability control. High risk of skidding and loss of steering during emergency braking. (Added cost: $0 (but severe safety risk))
- 0-6 months: If the speedometer is dead, you risk speeding tickets. Continued driving on a bad wheel bearing destroys the hub assembly. (Added cost: $150+ (ticket) or $400-$800 (hub failure))
- 6+ months: The electrical fault causes no progressive mechanical damage, but the risk of an accident due to disabled safety systems remains constant. (Added cost: Thousands in potential accident liability.)
Diagnosis Steps
- Read the Trouble Codes
Use an OBD-II scanner capable of reading ABS/Chassis codes to confirm C1465. Note any accompanying codes like C1331 (Open Circuit), C1272 (Low Signal), or C1241 (Low Voltage) to narrow the diagnostic focus.
Tools: OBD-II Scanner (with ABS capability) (Beginner) - Monitor Live Data
Use an advanced scan tool to display live data from the ABS module. Drive slowly and watch the front left wheel speed. A constant 0 mph reading while other wheels show speed confirms a hard fault in that specific circuit.
Tools: Advanced OBD-II Scanner (Intermediate) - Visually Inspect the Wiring and Connector
Safely raise the front left of the vehicle. Trace the wire from the wheel hub into the engine bay. Look for chafing against the axle, melted insulation, or rodent damage. Unplug the connector and check for green corrosion or bent pins.
Tools: Jack, Jack Stands, Flashlight (Beginner) - Inspect the Wheel Speed Sensor and Tone Ring
Remove the 10mm bolt holding the sensor. Pull the sensor out and inspect the magnetic tip for metallic debris. Look inside the mounting hole to ensure the tone ring is not heavily rusted, cracked, or missing teeth.
Tools: Socket Set, Flashlight, Brake Cleaner (Intermediate) - Check for Wheel Bearing Play
With the wheel off the ground, grab the tire at 12 and 6 o'clock and push/pull aggressively. Significant play or a clunking noise indicates a bad wheel bearing, which alters the sensor air gap and causes the code.
Tools: Jack, Jack Stands (Intermediate) - Test Harness for Power (Active Sensors)
For modern 2-wire active sensors, verify power first. Disconnect the sensor, turn the ignition ON (engine off), and measure DC voltage at the harness connector. You must see a 5V or 12V reference voltage. No voltage means the wiring or ABS module is faulty.
Tools: Multimeter, Back-probe pins (Advanced) - Test Harness Continuity and Shorts
Disconnect the sensor and the ABS module. Set the multimeter to Ohms (Ω). Check for continuity on the wires between the connectors (< 1.0 Ω). Then, test each wire against a chassis ground (should read OL/infinite). An open or short requires wiring repair.
Tools: Multimeter, Vehicle-Specific Wiring Diagram (Advanced) - Test Sensor Resistance (Passive Sensors Only)
For older, passive sensors, measure resistance across the sensor's two pins. A good reading is 800-2,000 Ω. A reading of OL or near 0 Ω indicates a failed sensor. Do NOT perform this on active sensors, as it damages them.
Tools: Multimeter (Advanced) - Test Sensor AC Voltage Output (Passive Sensors Only)
Connect a multimeter set to AC Volts across the passive sensor's pins. Spin the wheel by hand at one revolution per second. You must see 0.5V to 1.0V AC. No voltage indicates a dead sensor or a ruined tone ring.
Tools: Multimeter (Advanced) - Analyze the Waveform with an Oscilloscope
Connect an oscilloscope to the signal wire. Spinning the wheel produces a clean, repeating square wave (active) or sine wave (passive). A missing or noisy waveform definitively proves a bad sensor or tone ring.
Tools: Oscilloscope, Back-probe connectors (Professional)
When This Code Triggers (Freeze-Frame Conditions)
- Vehicle Speed: > 6 mph (10 km/h) (The code sets when the vehicle is moving and the computer detects one sensor reporting 0 mph while others show speed.)
- System Voltage: 10-14V (If voltage drops below 9.5V during cranking, it triggers this code alongside C1241.)
- Steering Angle: Any (Faults often trigger during a turn when a chafed wire makes intermittent contact with the metal chassis.)
Related Codes
- C1464 — Identical code for the opposite side: 'Front Speed Sensor RH Circuit'. Having both C1464 and C1465 points to a shared wiring issue, rodent damage, or a low 12V battery.
- C1331 — 'Open in Front Speed Sensor LH Circuit'. This highly specific code guarantees a broken wire, unplugged connector, or dead sensor. Focus entirely on continuity testing.
- C1272 — 'Low Output Signal'. Indicates a weak signal rather than a broken circuit. Caused by a dirty sensor tip, rusty tone ring, or a failing wheel bearing.
- C1241 — 'Low Battery Positive Voltage'. Triggers when ABS module voltage drops below 9.5V. Always test and replace a weak 12V battery before diagnosing ABS sensors.
Climate & Environmental Factors
- Cold Weather, Snow & Ice: Packed snow and ice physically block the sensor's view of the tone ring, causing a temporary fault. The freeze-thaw cycle forces moisture into electrical connectors, creating intermittent open circuits.
- Road Salt & Humidity: Salt accelerates corrosion on the sensor wiring, connector pins, and the tone ring. This causes permanent open circuits or rusts the tone ring until it delaminates and ruins the magnetic signal.
- Extreme Cold: Sub-zero temperatures cause plastic wire insulation to become brittle and crack. This exposes the copper wire to moisture, leading to rapid corrosion and circuit failure.
How to Talk to a Mechanic About This Code
Say this: "I have an ABS light on and my scanner shows code C1465 for the front left wheel speed sensor circuit. Since the wiring harness is a common failure point, please start by visually inspecting the wire from the sensor up into the wheel well for chafing or rodent damage before quoting a new sensor."
This proves you understand the common failure modes. It directs the technician to perform a low-cost visual inspection first, preventing them from immediately quoting a $300 sensor replacement when a $100 wiring repair is the true fix.
Avoid saying:
- 'My ABS light is on, can you fix it?' (Too vague; invites the shop to start with the most expensive fix).
- 'I need a new ABS sensor.' (Forces the shop to replace the part without diagnosis, wasting your money if the wiring is broken).
- 'Just do whatever it takes to turn the light off.' (Gives the shop a blank check).
Questions to ask before authorizing the repair:
- Did you find a specific failure, like a broken wire, or did the sensor itself fail a multimeter test?
- If the wiring is damaged, is a spot repair possible or do I need a new harness pigtail?
- If you recommend a new sensor, did you confirm the wiring has good continuity and power?
- Can you show me the damaged part or a picture of the chafed wire?
Where to Take It: Dealer vs Independent vs Chain
- Dealer:
Recommended only if under warranty or if you own a GM truck where the code definition is ambiguous.
Best for: Vehicles under warranty., Confirming if the code has a different meaning on non-Toyota brands (GM, Ford).
Downsides: Highest labor rates ($150-$250/hr)., Defaults to replacing entire assemblies (hub + sensor) rather than spot-repairing wires. (Typical cost: +50% vs. baseline) - Independent Shop:
Best fit. A reputable independent shop easily diagnoses a wheel speed sensor circuit, checks the wiring, and performs spot repairs.
Best for: Out-of-warranty vehicles., Diagnosing and repairing electrical faults cost-effectively.
Downsides: Quality varies; choose a shop with ASE-certified technicians. (Typical cost: +0% vs. baseline) - Chain Shop:
Avoid for initial diagnosis. They are quick to replace the sensor without testing the circuit, leading to repeat visits.
Best for: Simple, routine maintenance.
Downsides: Technicians often lack electrical diagnostic experience., High pressure to upsell unnecessary parts. (Typical cost: -10% vs. baseline)
When to Walk Away From the Repair
If the estimated repair cost exceeds 40-50% of your car's private-party value, consider selling the vehicle. However, because this disables critical safety systems, repairing it is highly advised if you intend to keep driving it.
- Car worth $3500, fix is $650: Fix it. The repair restores a critical safety feature and keeps the car roadworthy.
- Car worth $4000, fix is $2100: Walk away. A $2,100 bill (likely a sensor, hub, and deferred maintenance) exceeds 50% of the car's value. Put this money toward a reliable replacement.
- Car worth $15000, fix is $550: Fix it. This is a minor repair cost compared to the vehicle's high value.
What Scan Tool You Need for This Code
Minimum: A scanner that reads and clears Anti-lock Braking System (ABS) codes. A basic $20 engine-only reader cannot see C1465.
C1465 is a 'C' (Chassis) code stored in the ABS module, not the engine computer. You need a scanner that accesses the ABS module and displays live data to watch wheel speeds in real-time.
Budget: Innova CarScan Reader 5110 or Foxwell NT630 Plus (~$80-130) — Reads and clears ABS codes, confirming C1465 is the issue. This is the minimum tool required to self-diagnose.
Mid-range: BlueDriver Pro or Autel AutoLink AL619 (~$100-150) — Reads ABS codes and displays live data. You can watch the speed of all four wheels on your smartphone as you drive, instantly confirming the front left sensor is dead.
Professional: Autel MaxiCOM MK808 or Innova 5610 (~$350-550) — Provides full-system diagnostics, bidirectional controls to test ABS pump valves, and access to detailed repair procedures directly on the tool.
Rent vs buy: Auto parts stores scan codes for free, but often only read engine codes. Call ahead to ensure they read ABS codes. If you do your own maintenance, buying a $100 scanner with ABS live data is mandatory.
How to Clear the Code After You Fix It
- Ensure the wiring repair or sensor installation is complete.
- Use an OBD-II scan tool capable of accessing the ABS module to clear the chassis codes.
- Perform a test drive exceeding 10 mph to confirm the ABS light remains off.
Drive cycle (~10 minutes): Start the vehicle and drive for 5-10 minutes, ensuring you exceed 10 mph. The ABS light remains off if the repair was successful. Complex drive cycles are not required for ABS codes.
Readiness monitors affected: None. This is a chassis code and does not affect emissions readiness monitors.
Watch out for:
- Using a basic $20 code reader that only accesses engine codes, leaving the ABS light on.
- Disconnecting the battery, which fails to clear hard codes from the ABS module's non-volatile memory.
- Replacing the sensor without fixing the broken wire, causing the code to return instantly.
Will This Fail Emissions / State Inspection?
No — by itself this code doesn't fail OBD inspection (but it can keep readiness monitors from setting, which causes a separate fail).
- California: An ABS light does NOT cause a failure of the emissions-only smog check. As long as the Check Engine Light is off, you pass.
- New York: An illuminated ABS warning light IS grounds for failure of the annual safety inspection. The vehicle is rejected until repaired.
- Texas: An ABS light does NOT cause a failure for emissions testing. For commercial vehicles requiring safety inspections, an ABS light passes, but a red 'Brake' light fails.
Most Commonly Affected Vehicles
- Toyota Prius (2010-2015) — Extremely common. Failures are frequently caused by rodent damage to the wiring harness or chafing of the wire in the wheel well.
- Toyota Tundra (2014-2021) — Prone to this code, often appearing with C1331. Wiring harness connectors and the sensors themselves are frequent failure points.
- Toyota Highlander (2008-2013) — Highly susceptible to wheel speed sensor circuit faults due to wiring stress and corrosion.
- Lexus RX Series (RX350/RX450h) (2010-2015) — Shares a platform with the Highlander, making it prone to the exact same sensor and wiring harness failures.
- Toyota Prius v (2012-2017) — Owners frequently report ABS lights with C1465. Successful fixes heavily favor repairing rubbed-through wiring over sensor replacement.
- Chevrolet / GMC Silverado / Sierra (2007-2013) — CRITICAL NOTE: On these GM trucks, C1465 often defines as 'Front Axle Disconnect Control Circuit High' relating to the 4WD system, NOT the wheel speed sensor. Verify with a GM scanner.
- Hyundai / Kia Sonata / Optima (2011-2015) — Instances of C1465 appear on these models, with diagnosis focusing heavily on sensor failure and connector corrosion.
- Subaru Outback / Forester (2010-2014) — Appears frequently due to wire harness damage near the suspension components caused by steering stress over time.
Manufacturer-Specific Notes
- Toyota / Lexus: This code is exceptionally common and almost always relates to the front left wheel speed sensor circuit. The wiring harness fails more frequently than the sensor itself.
- General Motors (Chevrolet / GMC): On popular trucks like the Silverado, C1465 points to a fault in the 4WD system's front axle disconnect circuit, not the wheel speed sensor. This causes massive diagnostic confusion.
- Dodge / Chrysler / Jeep: On Stellantis vehicles, C1465 means 'Lost Communication with Rear Active Stabilizer ECU' or similar. Diagnosis is entirely unrelated to wheel speed.
- Ford: Older Ford definitions list C1465 as 'Damper High Side Front Circuit Short To Battery', relating to electronic suspension. Always verify the definition with a brand-specific scanner.
- Toyota / Lexus: Toyota issued warranty extensions for the Brake Actuator Assembly on models like the Prius. While a faulty actuator causes multiple brake lights, it does NOT cause a C1465 circuit code.
Real Owner Stories
2012 Toyota Prius V with ABS/Traction Lights
ABS and traction control lights appeared suddenly. A scan confirmed code C1465.
What they tried:
- Removed the wheel to inspect the sensor.
- Discovered the sensor's wire had rubbed against a suspension component, severing the internal copper strands.
Outcome: Instead of buying a $300 sensor, the owner cut, soldered, and heat-shrunk the broken wires. After clearing the codes, the lights stayed off, providing a permanent fix for under $10.
Lesson: Always perform a visual inspection of the wiring harness before buying parts. Chafed wires are the true root cause in a massive percentage of C1465 cases.
2014 Prius Plug-in with C1464 and C1465
ABS, brake, and stability control lights illuminated, and the speedometer died. Codes showed faults for both front wheel speed sensors.
What they tried:
- Replaced the 12V battery, which did not solve the problem.
- Took the car to the dealership, which replaced both front sensors.
Outcome: The dealership found rodent damage to the main wiring harness connector under the wheel well cover. The owner realized tracing the wiring further up would have revealed the true issue, saving the cost of two unnecessary sensors.
Lesson: When multiple sensor codes appear simultaneously, suspect a systemic issue like a shared wiring harness failure or rodent damage rather than simultaneous component failures.
2014 Prius V with Intermittent ABS Lights
Warning lights triggered immediately after using a high-pressure car wash.
What they tried:
- Unplugged the connector in the wheel well and dried it.
- Removed the sensor and sprayed brake cleaner into the mounting hole.
Outcome: The lights remained on initially, but after a 10-minute test drive to allow residual moisture to evaporate, the lights turned off permanently.
Lesson: If the code appears after a car wash or heavy rain, water intrusion is likely. Drying the connector and driving the vehicle often resolves the temporary short circuit.
How to Prevent This Code From Triggering
- Clean Wheel Speed Sensors and Tone Rings (During every brake job) — Brake dust and metallic shavings accumulate on the magnetic sensor tip, obstructing the signal. Cleaning with brake cleaner maintains a sharp reading.
- Inspect and Secure Wiring Harness (Annually) — Ensures the sensor wire remains clipped into its retainers and away from moving suspension parts, preventing the chafing that causes 50% of these codes.
- Apply Dielectric Grease to Connectors (Whenever disconnected) — Blocks moisture and prevents the green corrosion that ruins electrical pins in wet or salty climates.
- Maintain Healthy Brake Fluid (Flush every 2 years) — Moisture-contaminated brake fluid destroys the sensitive hydraulic valves inside the ABS module, leading to catastrophic system failure.
Frequently Asked Questions
I replaced the sensor but the C1465 code came back. What now?
If a new sensor fails to clear the code, the fault lies in the wiring harness between the sensor and the ABS module. Perform a continuity and short-to-ground test on the wires to locate the break. Also, verify the new sensor is seated correctly and the wheel bearing lacks excessive play.
Can a bad 12V battery cause code C1465?
Yes. A weak battery causes voltage drops during startup, glitching sensitive electronics like the ABS module. This typically triggers code C1241 alongside C1465, so test your battery before replacing ABS parts.
Can I just clean the ABS sensor to fix code C1465?
Yes, if the sensor tip is covered in metallic debris, cleaning it with brake cleaner restores the signal. This is a great first step for intermittent codes. However, hard open/short circuit codes usually require wiring repair or sensor replacement.
What is the most common misdiagnosis for C1465?
The most common mistake is replacing the wheel speed sensor without inspecting the wiring harness. Chafed wires or corroded connectors cause the majority of C1465 codes. A 5-minute visual inspection saves hundreds of dollars in unnecessary parts.
Why did my ABS, traction control, and brake lights all come on at once?
These systems rely on real-time data from all four wheel speed sensors. When the computer loses the front left signal, it disables the dependent safety systems to prevent unpredictable braking. The multiple lights are a standard fail-safe design.
How much does it cost to fix code C1465?
A simple wiring repair costs $100-$250 at a shop. Replacing the sensor ranges from $160 to $470 depending on OEM vs. aftermarket parts. If a failing wheel bearing caused the sensor damage, expect a $350-$750 repair bill.
Do I need to replace the wheel bearing with the speed sensor?
Only replace the wheel bearing if it makes a grinding noise or has excessive physical play. However, if your vehicle integrates the tone ring or the speed sensor directly into the sealed hub assembly, you must replace the entire unit if those components fail.
Key Takeaways
- Code C1465 indicates a failure in the front left wheel speed sensor circuit, immediately disabling your ABS, traction control, and stability control.
- Inspect the exposed wiring harness in the wheel well first; chafed wires or rodent damage cause over 50% of these faults, saving you the cost of an unnecessary $200 sensor.
- Do not replace the sensor if your scanner also shows code C1241; test your 12V battery first, as voltage drops below 9.5V trigger false ABS codes.
- Driving with C1465 increases stopping distances significantly on wet roads due to locked wheels, making immediate repair a critical safety priority.
- On General Motors trucks (2007-2013), C1465 often points to a 4WD front axle disconnect fault rather than a wheel speed sensor, requiring a manufacturer-specific scanner to verify.
Helpful Videos
Shop the Parts Behind C1465
Below are the parts most often responsible for code C1465, ranked by how frequently each one is the actual culprit (per the diagnosis above). Tap any to see what we have for your vehicle.


The information in this article is provided for general reference and educational purposes only. Vehicle specifications, procedures, and part compatibility can vary by production date, trim level, and region. Always consult your vehicle's factory service manual and verify part numbers before purchasing or performing repairs. Safety-critical components such as airbags, seat belts, and braking systems should be installed by a qualified professional.
- 🧭 Diagnostic Flowchart
- 🎬 Helpful Videos
- 🛍️ Shop This Part
- What Does C1465 Mean?
- Can I Drive With C1465?
- Common Causes
- Symptoms
- Common Fixes & Costs
- DIY vs Professional
- Used vs. New Parts: Buying Guide
- What Happens If You Wait — Timeline
- Cost of Not Fixing It
- Diagnosis Steps
- When This Code Triggers (Freeze-Frame Conditions)
- Related Codes
- Climate & Environmental Factors
- How to Talk to a Mechanic About This Code
- Where to Take It: Dealer vs Independent vs Chain
- When to Walk Away From the Repair
- What Scan Tool You Need for This Code
- How to Clear the Code After You Fix It
- Will This Fail Emissions / State Inspection?
- Most Commonly Affected Vehicles
- Manufacturer-Specific Notes
- Real Owner Stories
- 2012 Toyota Prius V with ABS/Traction Lights
- 2014 Prius Plug-in with C1464 and C1465
- 2014 Prius V with Intermittent ABS Lights
- How to Prevent This Code From Triggering
- Frequently Asked Questions
- I replaced the sensor but the C1465 code came back. What now?
- Can a bad 12V battery cause code C1465?
- Can I just clean the ABS sensor to fix code C1465?
- What is the most common misdiagnosis for C1465?
- Why did my ABS, traction control, and brake lights all come on at once?
- How much does it cost to fix code C1465?
- Do I need to replace the wheel bearing with the speed sensor?
- Key Takeaways
- 🎟️ Get 5% Off