
OBD-II Code C1606: Control Module Internal or Communication Error
What C1606 means, why it triggers, and how to fix it
- Use an advanced 'all-system' OBD-II scanner to identify the specific module (e.g., ABS, SRS, EPS) storing the C1606 code, as basic $20 readers cannot access these safety systems.
- Test your battery voltage first; a resting voltage below 12.4V frequently causes modules to fail their startup self-test and log a false C1606 error.
- Check for Technical Service Bulletins (TSBs) before replacing parts, as Hyundai, Kia, and GM resolve over 50% of these specific codes with a 1.5-hour dealership software update.
- Do not drive the vehicle, as C1606 indicates a primary safety system failure that increases braking distance by up to 30% or disables airbags entirely.
What Does C1606 Mean?
C1606 is a manufacturer-specific code signaling an internal software, hardware, or communication error within an electronic control module. The vehicle's main computer detected that a key module—such as airbags (SRS), anti-lock brakes (ABS), or electric power steering (EPS)—failed an internal self-test. The exact meaning depends on your vehicle's make and the specific system logging the fault.
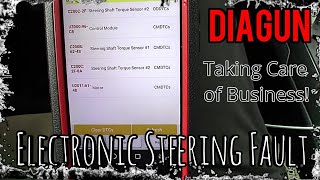
Technical definition: Manufacturers define C1606 based on the affected system. Common definitions include ECU Software Error, CAN Communication Error, Occupant Classification System (OCS) Malfunction, or Electric Power Steering (EPS) Fault. On Hyundai/Kia models, it often pairs with a sub-code like C160649, indicating a front view camera software failure.
Can I Drive With C1606?
No — Do Not Drive. Driving is not recommended. This code indicates a critical fault in a primary safety system. An ABS fault increases braking distance by 15-30% on slick surfaces. An Electric Power Steering (EPS) fault makes steering extremely heavy at low speeds, while an airbag (SRS) or ADAS camera fault disables those safety systems entirely.
Common Causes
- Low Battery Voltage or Poor Ground Connection (Very Common) — Control modules require stable voltage. A weak battery, corroded terminals, or a faulty chassis ground causes a module to fail its startup self-test and incorrectly report an internal fault.
- Control Module Software Glitch or Corruption (Very Common) — The module's software contains a bug or corruption. Manufacturers like Hyundai, Kia, and GM issue numerous Technical Service Bulletins (TSBs) to resolve this with a dealership software update.
- Faulty Front View Camera (ADAS) (Common) — The forward-facing camera used for lane-keeping and emergency braking suffers an internal hardware or software failure. This triggers several TSBs for recent Hyundai and Kia models, often logging C1606 alongside C1604.
- Faulty Occupant Classification System (OCS) Sensor Mat (Common) — The passenger seat sensor mat, which detects weight to enable the airbag, fails. This frequent issue on Hyundai and Kia models illuminates the airbag light and stores C1606 in the SRS module.
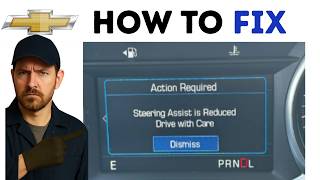
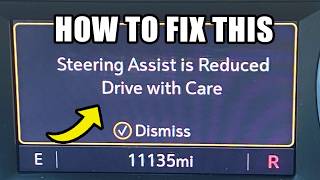
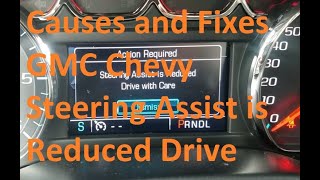
- Faulty Electric Power Steering (EPS) Module or Motor (Common) — The EPS control module or motor suffers an internal failure. This known issue on Nissan, Ford, and GM models triggers a 'Service Power Steering' message and makes steering extremely heavy. 🎬 Watch: How to fix the Steering Assist is Reduced message
- Defective Anti-Lock Brake System (ABS) Module (Less Common) — The electronic module controlling anti-lock brakes and traction control fails internally. This disables the ABS and stability control systems, common on older Ford and GM vehicles.
- Damaged Wiring or Poor Electrical Connections (Less Common) — Corroded connectors, spread pins, or damaged wires interrupt power, ground, or CAN bus data signals. This causes the module to report an internal fault when the circuit is the actual problem.
- CAN Bus Communication Failure (Rare) — A fault on the CAN bus network (like a shorted wire pair) prevents a module from communicating during startup, logging a C1606 internal error as a secondary fault.
Symptoms
- Airbag Warning Light On — The most common symptom when the fault lies with the Occupant Classification System (OCS) in the passenger seat.
- Power Steering Warning Light On and Heavy Steering — A 'Service Power Steering' or 'Steering Assist is Reduced' message appears, and the steering becomes very difficult to turn at low speeds.
- ADAS Features Disabled Warning Message — A warning message like 'Check LKAS' or 'FCA System Disabled' appears when the front camera or another ADAS module fails.
- ABS and/or Traction Control Light On — Illuminates when the code relates to a failure in the ABS control module, indicating the systems are disabled.
- Intermittent Loss of Features — The affected system works correctly on some drives but fails on others, indicating a developing module failure, loose connection, or software bug.
Diagnostic Flowchart
Tap your situation to follow the diagnostic path that matches what you're seeing on this code.
Common Fixes & Costs
- Update Control Module Software — Parts: $0, Labor: $120-$250, ~1.5 hr book time (Professional)
- Repair Ground Connection or Wiring Harness — Parts: $10-$50, Labor: $150-$500, ~2.5 hr book time (Intermediate)
- Replace Front View Camera Assembly
— Parts: $500-$900, Labor: $350-$800 (Includes mandatory ADAS calibration), ~2.5 hr book time
(Professional)
Hyundai Elantra (2018-2020): OEM 99211-F2000 (Alt: N/A)
Hyundai Santa Fe (2019-2020): OEM 99211-S2000 (Alt: N/A) - Replace Electric Power Steering Module/Assembly
— Parts: $400-$1500, Labor: $250-$600, ~3.0 hr book time
(Professional)
Ford Explorer (2011-2013): OEM DB5Z-3504-AE (Alt: Cardone 22-256)
Nissan Sentra (2013-2014): OEM 48810-3SG1A (Alt: Cardone 22-267) - Replace Occupant Classification System (OCS) Sensor Mat — Parts: $250-$600, Labor: $200-$350, ~3.0 hr book time (Professional)
- Replace ABS Control Module
— Parts: $300-$1400, Labor: $150-$250, ~1.8 hr book time
(Professional)
Ford Explorer (2011-2012): OEM CB5Z-2C219-C (Alt: Dorman Remanufactured)
Used vs. New Parts: Buying Guide
When a used part is worth it: For vehicles older than 10 years where a new module is discontinued or prohibitively expensive, provided the module does not require VIN-locking.
Donor-vehicle mileage cap: roughly under 100000 miles for the part to have meaningful remaining life.
Donor quality checklist:
- Match the part number EXACTLY. Different trim levels use different modules.
- For ADAS cameras, verify the donor vehicle did not have a front-end collision.
- Ensure the seller offers a functional warranty (typically 30-90 days).
- Avoid parts from flood-damaged vehicles.
Decision logic:
- If The part is an Airbag (SRS) or ADAS camera module → Strongly favor new OEM parts. Used modules are frequently VIN-locked and unusable.
- If The part is an ABS or EPS module for a vehicle older than 2010 → A used part is a viable option, but confirm if programming is needed.
- If A Technical Service Bulletin (TSB) or recall exists for the part → Buy a new part to ensure you get the latest hardware/software revision.
Warranty tradeoff: Used parts have a 30-90 day warranty covering only the part. New aftermarket parts offer 1-year warranties. New OEM parts carry a 1-2 year warranty, often including labor if installed at a dealership.
Worst-case if a used part fails: $500-$1500 if a used module is non-programmable or fails after installation, requiring repeat labor.
What Happens If You Wait — Timeline
- Immediate: Code C1606 sets, and a critical warning light illuminates. The corresponding safety system is immediately disabled by the vehicle's main computer as a fail-safe. (MPG impact: 0%% · Added cost: $0)
- 0-1 week of continued driving: The primary risk is an accident. Driving without ABS leads to skidding during panic stops. Driving without power steering increases crash risk in low-speed maneuvers. (MPG impact: 0%% · Added cost: $200-$800 (Potential cost of replacing flat-spotted tires or minor body damage).)
- 1 week - 3 months: The vehicle fails state safety inspections. Continued driving normalizes the risk, making the driver more likely to be caught off-guard during an emergency. (MPG impact: 0%% · Added cost: $50-$200 (Cost of failed inspection fees and re-testing).)
- 3+ months: No direct progressive mechanical damage occurs. The cost manifests entirely in the elevated safety risk and the certainty of failing inspections. (MPG impact: 0%% · Added cost: Potentially catastrophic (Cost of a major accident due to loss of control).)
Cost of Not Fixing It
- Immediate: Failure of a primary safety system, significantly increasing the risk of an accident or severe injury. (Added cost: N/A)
- 1-6 months: Continued driving with a disabled safety system leads to secondary damage during emergencies, such as flat-spotting tires during a panic stop without ABS. (Added cost: $200-$800 (Tire replacement))
- 6+ months: Ignoring the warning light leads to failing mandatory state safety inspections. (Added cost: $50-$200 (Failed inspection fees and re-testing))
Diagnosis Steps
- Identify the Affected Module
Use an advanced OBD-II scanner to read manufacturer-specific codes from all modules (SRS, ABS, EPS, BCM). A basic code reader will not work. The scanner identifies which specific module stored the C1606 code, dictating the entire diagnostic path.
Tools: Advanced OBD-II Scanner (Beginner) - Test Battery System and Perform Hard Reset
Perform a hard reset by disconnecting both battery terminals and holding them together for 60 seconds to drain residual power. Reconnect and test the battery. A healthy battery shows 12.4V+ with the engine off and 13.7V-14.7V running. Low voltage is the primary cause of false module faults.
Tools: Wrench Set, Digital Multimeter (Beginner) - Check for Technical Service Bulletins (TSBs) and Recalls
Search online for your vehicle's make, model, year, and 'C1606 TSB'. Manufacturers frequently release bulletins for this code pointing to a known software update or warranty extension.
Tools: Internet Access (Beginner) - Inspect Module Power and Ground Circuits
Using a wiring diagram, identify the power and ground pins on the affected module's connector. Verify battery voltage at the power pin. Switch the multimeter to Ohms and check the ground pin to a clean chassis ground; resistance must be under 1.0 Ohm.
Tools: Digital Multimeter, Vehicle-Specific Wiring Diagram (Advanced) - Check CAN Bus Network Integrity
With the battery disconnected, measure resistance between CAN High (Pin 6) and CAN Low (Pin 14) at the DLC port. A healthy network reads 60 Ohms. 120 Ohms indicates an open circuit; 0 Ohms indicates a short.
Tools: Digital Multimeter (Advanced) - Perform OCS Zero Point Calibration (If Applicable)
If the code is in the SRS module and relates to the Occupant Classification System, recalibrate the system using a high-end scan tool and a completely empty passenger seat.
Tools: Advanced OBD-II Scanner with Calibration Functions (Advanced) - Analyze CAN Bus Signal with Oscilloscope
Back-probe the CAN High and CAN Low wires at the module connector. CAN High toggles between 2.5V and 3.5V; CAN Low toggles between 2.5V and 1.5V. Distorted signals indicate wiring problems or a corrupted bus.
Tools: Oscilloscope, Back-Probe Pins (Professional) - Module Replacement and Programming
If all circuit and software checks pass, replace the module. New modules for critical systems (SRS, ABS, EPS, ADAS) must be programmed and calibrated with a factory-level scan tool to recognize the vehicle's VIN.
Tools: Mechanic's Tool Set, Factory Scan Tool (Professional)
When This Code Triggers (Freeze-Frame Conditions)
- System State: Self-Test on Startup (The code sets immediately after turning the ignition switch to 'ON'. The module fails its internal self-check, storing the code instantly before the engine starts.)
- Battery Voltage: Below 11.5V or Fluctuating (During engine cranking, a weak battery causes a momentary voltage drop, preventing the module from initializing correctly and flagging a false internal error.)
- Vehicle Speed: 0 mph (The fault is detected when the vehicle is stationary during its power-on self-test (POST) routine.)
- Time After Ignition On: < 5 seconds (The module fails its internal check almost immediately. The initial fault is logged at key-on.)
Related Codes
- C1604 — This 'Hardware Error' code frequently partners with C1606 'Software Error' in Hyundai/Kia front cameras. Together, they confirm the component failed internally and requires replacement.
- C1616 — Indicates a CAN Bus Communication Error. A module with an internal C1606 fault stops communicating, causing healthy modules to log C1616 because they lost contact with the faulty unit.
- B1448 — A specific code for an OCS Mat Defect. C1606 from the SRS module is a general error flag; B1448 stored alongside it specifies the passenger seat mat is sending a bad signal.
- P0606 — The generic powertrain equivalent for 'ECM/PCM Processor Fault'. C1606 is set by chassis/body modules (ABS, SRS, EPS), while P0606 is set exclusively by the Engine Control Module.
Climate & Environmental Factors
- Road Salt (Winter Climates): Salt spray acts as an electrolyte, accelerating corrosion on underbody wiring harnesses and module ground points. This increases electrical resistance, triggering intermittent C1606 codes.
- Low Temperatures: Extreme cold reduces battery cranking power. The resulting voltage dip during startup causes sensitive electronic modules to fail their initial self-test and log a false internal error.
- High Humidity: Persistent humidity penetrates aging seals on exterior components like ADAS cameras, leading to internal circuit board corrosion and hardware failure.
How to Talk to a Mechanic About This Code
Say this: "I have a C1606 code and a [specific warning light] on. I need a diagnostic to identify which specific module is storing the code. Please also check for any related TSBs or software updates for my vehicle."
This signals you understand C1606 requires precise diagnosis. It directs the technician to follow a logical process and check for cheaper software fixes before recommending expensive hardware.
Avoid saying:
- 'Just fix whatever's wrong'
- 'My airbag light is on, can you look at it?'
- 'Whatever you recommend'
Questions to ask before authorizing the repair:
- Which specific module stored the C1606 code?
- Before condemning the module, did you verify it has proper power and ground?
- Did you find any Technical Service Bulletins or recalls related to this code?
- Does the new part require programming or calibration, and is that cost included in the estimate?
Where to Take It: Dealer vs Independent vs Chain
- Dealer:
Recommended. The dealer is the safest option for C1606, as many fixes involve proprietary software updates, programming, or ADAS calibration.
Best for: Vehicles under warranty or covered by a recall/extended warranty., Repairs requiring manufacturer-specific software updates., Complex ADAS camera replacements requiring proprietary calibration.
Downsides: Highest labor rates., Defaults to replacing entire assemblies when a smaller component suffices. (Typical cost: +50% vs. baseline) - Independent Shop:
Viable with caution. Choose a top-tier independent shop that specializes in your vehicle's brand and can prove they have factory-level diagnostic tools.
Best for: Out-of-warranty vehicles where the cause is a known mechanical issue., Diagnosing basic electrical issues like bad grounds or testing battery voltage.
Downsides: May lack expensive, vehicle-specific tools for module programming or ADAS calibration., Quality and diagnostic capability vary widely. (Typical cost: +0% vs. baseline) - Chain Shop:
AVOID. Chain shops lack the specialized tools and training required for this safety-critical electronic issue.
Best for: Simple tasks like battery testing or replacement.
Downsides: Not equipped for module-level diagnostics, programming, or calibration., Technicians lack training for complex electrical fault finding. (Typical cost: -10% vs. baseline)
When to Walk Away From the Repair
If the estimated repair cost exceeds 40-50% of the car's private-party value, seriously consider selling or trading in the vehicle instead of repairing it.
- Car worth $3500, fix is $2200: Walk away. The repair cost is over 60% of the car's value.
- Car worth $15000, fix is $1400: Fix it. The repair cost is less than 10% of the vehicle's value and restores a critical safety function.
- Car worth $6000, fix is $250: Fix it immediately. A low-cost software update is a tiny fraction of the car's value.
What Scan Tool You Need for This Code
Minimum: A scanner that reads manufacturer-specific codes from ALL vehicle systems, including ABS, SRS, EPS, and BCM.
A basic $20-$50 code reader only communicates with the engine. It cannot see, read, or clear a C1606 code stored in chassis modules.
Budget: BlueDriver Pro or XTool A30M (~$100) — These Bluetooth dongles pair with a smartphone app to read and clear codes from all modules, allowing you to identify the source of the C1606.
Mid-range: Innova 5610 or Foxwell NT530 (~$300) — Adds bidirectional controls to test components directly and includes special functions like Steering Angle Sensor calibration.
Professional: Autel MaxiCOM MK808 / MK808Z or Launch X431 series (~$500-1200) — Provides OEM-level functions required for final repair steps like programming a new module to the vehicle's VIN or performing static ADAS camera calibration.
Rent vs buy: Renting is NOT a viable option. Free loaner tools at auto parts stores are basic OBD-II readers that cannot access ABS or SRS modules. You must buy an all-system scanner.
How to Clear the Code After You Fix It
- Perform the specific repair (e.g., replace module, update software).
- Reconnect the battery if it was disconnected.
- Use an advanced OBD-II scan tool to clear the code from the specific module (e.g., ABS, EPS, SRS).
- Turn the ignition off, wait 15 seconds, then turn it back on.
- Observe if the warning light for the affected system turns off.
Drive cycle (~10 minutes): A formal drive cycle is not required. The fault clears during the module's power-on self-test. A short 10-minute test drive with normal operation of the affected system verifies the fix.
Readiness monitors affected: None. C-codes do not affect emissions readiness monitors.
Watch out for:
- Using a basic code reader that cannot access or clear codes from chassis modules.
- Clearing the code without performing a repair. The code returns on the next key cycle.
- Forgetting to perform a required calibration or programming step after replacing a module.
Will This Fail Emissions / State Inspection?
No — by itself this code doesn't fail OBD inspection (but it can keep readiness monitors from setting, which causes a separate fail).
- California: C1606 won't fail the OBD-II emissions portion, but the associated warning light causes a failure of the overall vehicle safety inspection.
- New York: An illuminated ABS or Airbag warning light is cause for an automatic failure of the annual safety inspection.
- Texas: In counties requiring it, the annual safety inspection includes checking for illuminated ABS and airbag warning lights. The presence of either light constitutes a failure.
Most Commonly Affected Vehicles
- Hyundai Elantra, Santa Fe (2018-2020) — Highly prone to Front View Camera failures causing C1606 and C1604. Covered by TSB 20-BE-006H-1. Requires camera replacement and recalibration.
- Kia Telluride, Forte, Sportage, Soul, Niro (2016-2021) — Subject to TSB ELE231 Rev 2 for an internal chip concern in the Front View Camera, causing C160449 and C160649. Fix is camera replacement and variant coding.
- Nissan Sentra, Juke, Rogue, NV200, Versa (2010-2021) — Commonly experiences C1606 due to Electric Power Steering (EPS) motor or control unit failure. Often requires replacing the entire steering column assembly.
- Ford Explorer (2011-2013) — A known Power Steering Control Module (PSCM) issue causes loss of steering assist. Covered by Safety Recall 14S06 and extended coverage program 15N01.
- Chevrolet / GMC Silverado 1500, Sierra 1500 (2014-2014) — Subject to Safety Recall 17276 for a temporary loss of power steering assist. The fix is a no-cost EPS module software reprogram.
- Chevrolet / GMC Silverado, Sierra, Tahoe, Suburban, Yukon (2015-2023) — Prone to 'Steering Assist is Reduced' messages. TSB 20-NA-113 addresses software issues, but poor battery ground cables are the most common underlying cause.
- Hyundai Sonata, Santa Fe, Genesis (2005-2012) — Sets C1606 for various ECU software errors, including the headlamp leveling system or smart cruise control module, indicating incomplete coding.
- Volkswagen Golf, Jetta (MK5/MK6) (2006-2015) — A fault in the ABS system prevents the Steering Angle Sensor from calibrating, triggering secondary C1606 faults in the steering module.
Manufacturer-Specific Notes
- Hyundai / Kia: Frequently relates to a software or hardware failure in the Front View Camera (TSBs ELE231, 20-BE-006H-1) or the passenger seat Occupant Classification Sensor. Always check for TSBs first.
- Nissan: On the Sentra, Juke, and Rogue, C1606 points directly to a fault within the Electric Power Steering (EPS) motor or control unit, often requiring a complete steering column assembly replacement.
- Ford: Often an internal fault code for the ABS control module or the Power Steering Control Module (PSCM). Check for Safety Recall 14S06 on 2011-2013 Explorers.
- GM (Chevrolet / GMC): Presents as a 'Service Power Steering' message. Recall 17276 involves a software update. On later models, faulty battery ground cables are the most common cause for false EPS codes.
Real Owner Stories
2017 Hyundai Elantra Limited at 54k miles
Multiple ADAS warning lights appeared. The dealer found code C160646 and quoted $1200 for a second camera replacement, claiming the previous warranty repair expired.
Outcome: Hyundai approved a second warranty replacement of the camera at no cost.
Lesson: For recurring failures of a known issue, escalate with dealership management and corporate for a 'goodwill' repair.
2012 Chevy Cruze with 'Service Power Steering' message
The 'Service Power Steering' light illuminated, and the car was difficult to start.
Outcome: Tightening the 8mm nut restored full 12-volt power. The power steering immediately started working, and the warning light turned off.
Lesson: Always check the basics first. Ensure battery terminals and main power distribution connections are clean and tight before suspecting module failure.
2011 Chevy Cruze with complete power steering failure
The electric power steering failed completely. A scan tool could not communicate with the power steering module.
Outcome: The owner replaced the entire power steering rack assembly and hired a shop to program the new module to the car's VIN.
Lesson: A leak from an unrelated part causes catastrophic failure of electronic modules located below it. Confirm programming requirements before starting repairs.
2021 Nissan NV200 with no power steering
The 'PS' light was on with heavy steering. The only code was C1606 in the power steering module.
Outcome: The owner installed a used module and performed a steering angle sensor reset by turning the wheel lock-to-lock, restoring normal operation.
Lesson: If power and ground enter a module but output is missing, the module is faulty. Used modules are cost-effective if programming isn't strictly required.
How to Prevent This Code From Triggering
- Maintain Battery and Connections (Every 6 months) — Clean battery terminals and ensure tight connections. Low voltage or high resistance from corrosion is a leading cause of false module self-test failures.
- Apply Dielectric Grease to Critical Connectors (When servicing a component) — Applying dielectric grease to exposed connectors seals out moisture and prevents pin corrosion, stopping intermittent signals in humid or salt-belt climates.
- Address Fluid Leaks Promptly (As needed) — Leaks from coolant hoses or clogged sunroof drains drip onto sensitive electronics below, causing short-circuits and module failure.
- Use a Battery Tender/Maintainer (For vehicles stored for 2+ weeks) — Using a battery maintainer ensures modules receive stable voltage upon startup, preventing false C1606 codes due to low-voltage self-test failures.
Frequently Asked Questions
Is it safe to drive with code C1606?
No. The code signifies a failure in a critical safety system. You risk a sudden loss of power steering, increased braking distance due to disabled ABS, or non-deployment of airbags in a crash.
Will clearing the C1606 code fix the problem?
No. Clearing the code only erases the message temporarily. The module verifies the internal fault on every startup, so the code returns immediately until repaired.
Can I just replace the fuse for the module?
Checking the fuse is a good first step, but rarely the cause. C1606 indicates an internal module fault, not a blown fuse. If the fuse blew, the module wouldn't communicate with the scanner at all.
What are common misdiagnosis mistakes for C1606?
The biggest mistake is replacing the module without testing the battery and ground connections first. Low voltage triggers false internal errors. Ignoring related systems, like a bad ABS sensor confusing the steering module, is another common error.
My mechanic says the new module needs programming. Is this true?
Yes. Modules for airbags (SRS), anti-lock brakes (ABS), power steering (EPS), and ADAS are programmed to the specific vehicle's VIN. A new module will not function until calibrated using a factory-level scan tool.
Can I use a secondhand or used module?
Sometimes, but it's risky. Many modern modules are 'locked' to the original vehicle's VIN and cannot be reprogrammed, making them unusable. Always research compatibility for your specific vehicle and module before purchasing a used part.
My airbag light is on with a C1606. Will my airbags still deploy in a crash?
Assume they will NOT deploy. When the airbag warning light illuminates, the entire Supplemental Restraint System (SRS) disables as a fail-safe to prevent accidental deployment.
Key Takeaways
- Use an advanced 'all-system' OBD-II scanner to identify the specific module (e.g., ABS, SRS, EPS) storing the C1606 code, as basic $20 readers cannot access these safety systems.
- Test your battery voltage first; a resting voltage below 12.4V frequently causes modules to fail their startup self-test and log a false C1606 error.
- Check for Technical Service Bulletins (TSBs) before replacing parts, as Hyundai, Kia, and GM resolve over 50% of these specific codes with a 1.5-hour dealership software update.
- Do not drive the vehicle, as C1606 indicates a primary safety system failure that increases braking distance by up to 30% or disables airbags entirely.
Helpful Videos

Shop the Parts Behind C1606
Below are the parts most often responsible for code C1606, ranked by how frequently each one is the actual culprit (per the diagnosis above). Tap any to see what we have for your vehicle.


The information in this article is provided for general reference and educational purposes only. Vehicle specifications, procedures, and part compatibility can vary by production date, trim level, and region. Always consult your vehicle's factory service manual and verify part numbers before purchasing or performing repairs. Safety-critical components such as airbags, seat belts, and braking systems should be installed by a qualified professional.
- 🧭 Diagnostic Flowchart
- 🎬 Helpful Videos
- 🛍️ Shop This Part
- What Does C1606 Mean?
- Can I Drive With C1606?
- Common Causes
- Symptoms
- Common Fixes & Costs
- Used vs. New Parts: Buying Guide
- What Happens If You Wait — Timeline
- Cost of Not Fixing It
- Diagnosis Steps
- When This Code Triggers (Freeze-Frame Conditions)
- Related Codes
- Climate & Environmental Factors
- How to Talk to a Mechanic About This Code
- Where to Take It: Dealer vs Independent vs Chain
- When to Walk Away From the Repair
- What Scan Tool You Need for This Code
- How to Clear the Code After You Fix It
- Will This Fail Emissions / State Inspection?
- Most Commonly Affected Vehicles
- Manufacturer-Specific Notes
- Real Owner Stories
- 2017 Hyundai Elantra Limited at 54k miles
- 2012 Chevy Cruze with 'Service Power Steering' message
- 2011 Chevy Cruze with complete power steering failure
- 2021 Nissan NV200 with no power steering
- How to Prevent This Code From Triggering
- Frequently Asked Questions
- Is it safe to drive with code C1606?
- Will clearing the C1606 code fix the problem?
- Can I just replace the fuse for the module?
- What are common misdiagnosis mistakes for C1606?
- My mechanic says the new module needs programming. Is this true?
- Can I use a secondhand or used module?
- My airbag light is on with a C1606. Will my airbags still deploy in a crash?
- Key Takeaways
- 🎟️ Get 5% Off