
OBD-II Code C1735: Ride Height Sensor Circuit Malfunction
What C1735 means, why it triggers, and how to fix it
- Code C1735 indicates a failed ride height sensor or circuit, most commonly located at the right rear wheel on air suspension vehicles.
- Manufacturer definitions vary: Nissan uses C1735 for an 'Ignition Signal' fault, while Lexus and Toyota use it to flag a failed exhaust solenoid.
- The top three physical causes are a seized sensor, a snapped plastic linkage arm, or corroded wiring inside the wheel well.
- Driving with C1735 ruins tires within 3 months and burns out the $1,000+ air compressor within 6 months due to constant overworking.
What Does C1735 Mean?
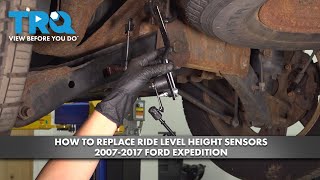
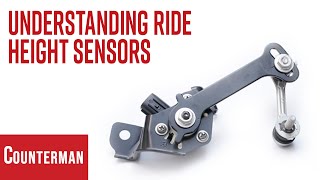
Code C1735 indicates the vehicle's computer detects a circuit malfunction in a ride height sensor, usually at the right rear wheel. These sensors monitor suspension height. 🎬 Watch: Understanding how ride height sensors work. When one fails, the computer cannot level the vehicle, causing severe ride and handling issues.
Technical definition: The SAE/OBD-II definition for C1735 varies by manufacturer. For Ford and Lincoln, it means 'Right Rear Height Sensor Circuit Failure'. For Toyota and Lexus, it indicates an 'Air Suspension Exhaust Solenoid Circuit' fault. For Nissan, it flags an 'Ignition Signal' mismatch. This guide focuses on the primary air suspension definitions.
Can I Drive With C1735?
Yes, But With Caution. You can drive, but avoid long trips or high speeds. A bad sensor makes the vehicle unstable, compromises handling, and increases braking distances. Continued driving causes excessive tire wear and strains the air compressor, leading to expensive secondary repairs.
Common Causes
- Failed Ride Height Sensor (Very Common) — Internal electronics fail from moisture intrusion, or the unit seizes from corrosion and stops moving with the suspension.
- Broken or Disconnected Sensor Linkage Arm (Common) — The small plastic or metal linkage connecting the sensor to the control arm becomes brittle and snaps after hitting a pothole.
- Damaged or Corroded Wiring/Connector (Common) — Wheel well exposure causes electrical connector pins to corrode (forming a green crust) or wires to break, interrupting the 5V signal.
- Air Leak in Suspension System (Common) — Cracks in rubber air springs cause leaks. The compressor runs excessively, triggering height-related faults like C1735 as it fails to maintain pressure.
- Failed Exhaust Solenoid (Lexus/Toyota) (Less Common) — On Lexus and Toyota models, C1735 directly implicates a failed exhaust solenoid integrated into the air compressor assembly.
- Suspension Control Module Software Glitch (Less Common) — Ram trucks often require an Air Suspension Control Module (ASCM) software update to fix logic errors that falsely trigger sensor codes in cold weather. 🎬 See how to fix Ram air suspension software issues.
- Low or Weak Battery (Less Common) — A failing battery causes low voltage during startup, triggering random error codes across modules, including C1735.
- Faulty Suspension Control Module (Rare) — The computer module that reads the sensor fails internally, preventing it from receiving signals from a perfectly good sensor.
Symptoms
- Suspension Warning Light is On — A 'Check Air Suspension' or 'Service Leveling System' message appears on the dashboard.
- Uneven Ride Height — One corner of the vehicle is stuck sitting much lower or higher than the others, causing a visible sag or lean.
- Air Compressor Runs Constantly or Not at All — Incorrect sensor data forces the air compressor to run continuously to level the vehicle, or shut down completely to prevent damage.
- Poor Ride Quality — The ride feels unusually stiff, bouncy, or harsh. The vehicle bottoms out over minor bumps.
- Nose Dive When Braking or Swaying When Turning — The front end dips excessively during braking, and the vehicle feels unstable and sways when cornering.
- Uneven or Premature Tire Wear — Improper ride height alters wheel alignment, causing 'cupping' or excessive wear on the inner or outer tire edges.
- Implausible Sensor Voltage (scan-tool only — no driver-felt sign) — Scan tool data shows the affected sensor voltage stuck at 0V or 5V, or failing to change when the suspension is bounced.
Diagnostic Flowchart
Tap your situation to follow the diagnostic path that matches what you're seeing on this code.
Common Fixes & Costs
- Replace Ride Height Sensor
— Parts: $60-$400, Labor: $90-$200, ~0.8 hr book time
(DIY)
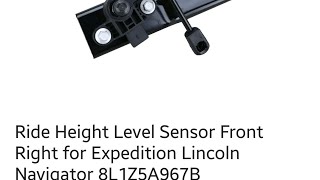
Ford Expedition / Lincoln Navigator (2007-2017, Right Rear): OEM 8L1Z-5A967-A (Alt: Dorman 924-261)
Ram 1500 (2013-2019, Front): OEM 68217432AB (Alt: Arnott RH-3570) - Replace Sensor Linkage Arm
— Parts: $20-$60, Labor: $50-$100, ~0.5 hr book time
(DIY)
Lexus GX470 / Toyota Land Cruiser (Rear): OEM 48906-60010 (Alt: Dorman 926-787) - Repair or Replace Wiring/Connector
— Parts: $15-$50, Labor: $100-$200, ~1.2 hr book time
(Intermediate)
Ford/Lincoln (Common 3-pin): OEM WPT-1578 (Alt: Dorman 645-323) - Replace Air Spring (Air Bag)
— Parts: $200-$800, Labor: $150-$300, ~1.5 hr book time
(Intermediate)
Ram 1500 (2013-2019, Front Right): OEM 68318300AG (Alt: Arnott AS-3082) - Replace Air Suspension Compressor — Parts: $300-$1200, Labor: $150-$300, ~1.5 hr book time (Intermediate)
DIY vs Professional
- Replace Ride Height Sensor / Linkage — Beginner: Yes
Tools: Basic hand tools (socket set, wrenches), penetrating oil, safety glasses. - Repair or Replace Wiring/Connector — Beginner: No
Tools: Soldering iron or quality crimp tool, wire strippers, heat shrink tubing, multimeter. - Replace Air Spring (Air Bag) — Beginner: No
Tools: Jack stands, floor jack, socket set, wrenches, airline disconnect tool.
Used vs. New Parts: Buying Guide
When a used part is worth it: A used OEM sensor from a low-mileage, non-corroded donor vehicle is cost-effective if the new OEM part exceeds $300. It is generally superior to a cheap, unbranded aftermarket part.
Donor-vehicle mileage cap: roughly under 70000 miles for the part to have meaningful remaining life.
Donor quality checklist:
- Verify the part comes from a vehicle in a dry, salt-free region.
- Ensure the part number matches exactly.
- Check for intact wiring pigtails and a freely moving linkage arm.
Decision logic:
- If Vehicle is newer and the new OEM part is under $200 → Buy new OEM or a reputable aftermarket brand (Arnott, Dorman) for reliability and warranty.
- If Budget is the primary concern and the new part is over $300 → A used OEM sensor is a reasonable risk.
- If The failure is the plastic linkage arm only → Buy an aftermarket linkage kit, which is inexpensive and sold separately.
Warranty tradeoff: Used parts carry a 30-90 day warranty. New aftermarket parts offer 1-year to limited lifetime warranties. New OEM parts carry a 1-2 year warranty.
Worst-case if a used part fails: $150-$300 if a used sensor fails shortly after installation, requiring repeat labor and a new part.
What Happens If You Wait — Timeline
- 0-1 month: Code C1735 sets, and the 'Service Suspension' light illuminates. The affected corner sticks at an incorrect height, or the system defaults to a stiff safe mode. Handling degrades. (MPG impact: 0-2%% · Added cost: $0)
- 1-4 months: Incorrect ride height alters wheel alignment. Tires wear unevenly on the inner or outer edges. The vehicle feels unstable during braking or cornering. (MPG impact: 2-5%% · Added cost: $300-$800 for a new pair of tires and an alignment.)
- 3-9 months: The air compressor runs excessively to compensate for bad sensor data or a leak. The compressor motor overheats and its internal dryer saturates. (MPG impact: 3-7%% · Added cost: $800-$2,000 for a replacement compressor assembly.)
- 9+ months: The compressor burns out completely. The suspension cannot raise itself and rests on the bump stops, making the vehicle undriveable. Chronic bad alignment destroys ball joints and control arm bushings. (MPG impact: 5-10%% · Added cost: $1,500-$3,500+ for replacing the compressor, original failed part, tires, and damaged suspension components.)
Cost of Not Fixing It
- 0-3 months: Incorrect suspension height ruins wheel alignment angles, causing rapid and uneven tire wear. Handling and braking degrade. (Added cost: $300-$800 for a pair of prematurely worn tires and a wheel alignment.)
- 3-12 months: The air suspension compressor burns out from running constantly to compensate for a bad sensor signal or system leak. (Added cost: $800-$2000 for a new air compressor assembly and labor.)
- 6+ months: A collapsed corner puts severe stress on the corresponding air strut, control arm bushings, and ball joints, destroying them. (Added cost: $500-$2500+ for replacing additional damaged struts and control arms.)
Diagnosis Steps
- Read the Trouble Codes
Use an OBD-II scanner capable of reading Chassis (C) codes to confirm C1735. Note any codes for other corners, compressor faults, or communication errors.
Tools: OBD-II Scanner (Beginner) - Perform a Visual Inspection
Inspect the ride height sensor at the affected corner. Look for a snapped linkage arm, frayed wires, or green corrosion inside the electrical connector. Check the rubber air spring for visible cracks.
Tools: Flashlight, Safety Glasses (Beginner) - Inspect Live Sensor Data
Use an advanced scan tool to read live data PIDs for 'Ride Height Sensor Voltage'. Compare all four sensors. The faulty sensor will stick at a specific value (e.g., 0V or 5V) or fail to change smoothly as you bounce the vehicle.
Tools: Advanced OBD-II Scanner (Intermediate) - Test the Sensor's Range of Motion
With the live data screen active, disconnect the sensor's linkage arm. Manually move the arm through its full range. If the voltage jumps erratically or stays static, the sensor is bad. If it moves smoothly, the linkage or air spring is the issue.
Tools: Pry Tool, Advanced OBD-II Scanner (Intermediate) - Perform a Leak Test
Mix soap and water in a spray bottle and coat the air springs and lines. Bubbles indicate a leak. A leak prevents the corner from reaching target height, triggering a timeout code like C1735.
Tools: Spray Bottle, Soapy Water (Intermediate) - Check for Power and Ground at Sensor
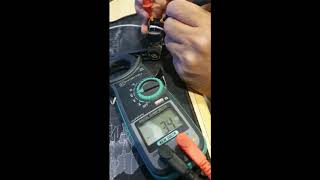
Unplug the sensor. Set a multimeter to DC Volts. With the ignition on, probe the connector terminals. You need a 5-volt reference on one pin and a solid ground (near 0V) on another. If missing, trace the wiring harness.
Tools: Multimeter (Advanced) - Check Signal Wire Voltage Sweep
With the sensor plugged in and ignition on, back-probe the signal wire. Bounce the vehicle corner. Voltage must sweep smoothly between ~0.5V and ~4.5V. If stuck or erratic despite good power/ground, the sensor failed internally.
Tools: Multimeter with back-probes (Advanced) - Check Related Fuses and Relays
Consult the owner's manual for suspension control module and air compressor fuses. A blown fuse disables the system, though it rarely triggers a single-corner sensor code.
Tools: Owner's Manual, Fuse Puller (Beginner) - Test Exhaust Solenoid Resistance (Lexus/Toyota)
For Lexus/Toyota models, locate the exhaust solenoid on the compressor assembly. Disconnect it and measure resistance across the terminals. It must read between 10 and 14 Ohms. If outside this range, replace the compressor assembly.
Tools: Multimeter (Advanced)
When This Code Triggers (Freeze-Frame Conditions)
- System Status: Active/Requesting Adjustment (Logs when the suspension module actively tries to raise or lower the vehicle but receives an implausible signal.)
- Vehicle Speed: 0-15 mph (Faults set at low speeds or startup when the system performs its initial height check.)
- Sensor Voltage: Stuck at <0.5V or >4.8V (Shows the faulty sensor's voltage at the extreme end of its range, indicating an open or shorted circuit.)
- Battery Voltage: 11.5-14.5V (Typically normal, but a low voltage drop during engine crank triggers false codes across modules.)
Related Codes
- C1728 — Indicates a 'Serial communication link malfunction'. If present with C1735, diagnose the network issue first, as it causes false sensor readings.
- C1760 — A Lexus/Toyota code for 'Exhaust Solenoid Valve Malfunction'. If you have C1735 and C1760, the compressor assembly's exhaust solenoid is definitively failed.
- C1736 / C1737 / C1738 — Ford codes for 'Corner Down/Up Timeout'. The system failed to adjust height in time. Often caused by a major air leak or weak compressor rather than the sensor.
- U0222 / U0223 — Communication codes. On late-model GM SUVs, lost communication with door modules prevents the suspension from verifying door status, disabling the system.
Climate & Environmental Factors
- Cold Weather / Freezing Temperatures: Moisture inside the air suspension system freezes, causing blockages and preventing height adjustments. Cold also makes rubber air springs brittle, accelerating cracks and leaks.
- High Humidity / Wet Climates: Saturates the air suspension dryer's desiccant faster. Once saturated, moisture enters the system, leading to internal valve corrosion and winter freezing issues.
- Road Salt (Salt Belt Regions): Accelerates corrosion of underbody components. Sensor connectors, wiring, and moving linkage parts seize or lose electrical continuity from salt exposure.
How to Talk to a Mechanic About This Code
Say this: "I have an air suspension warning light and a C1735 code. My vehicle is sagging on one corner. I'd like to schedule a diagnostic to test the ride height sensor, its wiring, and the linkage for that corner before replacing any major components."
This directs the technician to the most common, cheapest failures first. It prevents a shop from immediately quoting an expensive air strut or compressor replacement without proper diagnosis.
Avoid saying:
- 'My suspension is broken, fix it.'
- 'The car is bouncy, can you check it out?'
- 'Just do whatever you think is best.'
Questions to ask before authorizing the repair:
- Did you test the sensor's voltage output and range of motion with a scan tool?
- Did you confirm the sensor has good power and ground at the connector?
- Did you inspect for an air leak with soapy water, or is the linkage arm just broken?
- What is the price difference between an OEM sensor and a quality aftermarket one like Arnott or Dorman?
- Does this repair require a ride height calibration on my specific vehicle?
Where to Take It: Dealer vs Independent vs Chain
- Dealer:
Best for: Vehicles under warranty., Complex manufacturer-specific issues, like a required software update for a Ram or diagnosing an exhaust solenoid fault on a Lexus., Newer, high-end vehicles where specialized tools for calibration are mandatory (e.g., Audi, Land Rover).
Downsides: Highest labor rates, often 1.5-2x more than independent shops., Defaults to replacing larger, more expensive assemblies instead of repairing a smaller component like wiring. (Typical cost: +50% vs. baseline) - Independent Shop:
Best fit for most scenarios. An experienced independent shop easily diagnoses and repairs the most common causes of C1735 (sensor, wiring, linkage, air leak) at a much lower cost than a dealer.
Best for: Out-of-warranty vehicles where cost is a major factor., Common, well-documented failures like a bad sensor or linkage on a Ford Expedition., Owners who want a trusted, long-term relationship with their mechanic.
Downsides: Quality and expertise vary; look for ASE certifications and good reviews., May lack the latest dealer-specific calibration tools for all brands. (Typical cost: +0% vs. baseline) - Chain Shop:
Use with caution. Acceptable for a straightforward sensor replacement you have already diagnosed, but avoid for initial diagnosis of the air suspension system.
Best for: Simple, pre-diagnosed part replacement if you are confident the sensor itself is the only issue.
Downsides: Technician skill varies widely., High pressure to upsell; a C1735 diagnosis easily turns into a quote for four new air struts and a compressor., Lacks advanced diagnostic tools to differentiate between a sensor, wiring, or module fault. (Typical cost: -10% vs. baseline)
When to Walk Away From the Repair
If the total estimated repair cost for the air suspension system exceeds 40-50% of the vehicle's current private-party value, seriously consider alternatives to a standard repair.
- Car worth $5000, fix is $2800: Walk away or convert. The repair cost is over 50% of the car's value. Instead of paying for a complex OEM-style repair, consider a more reliable and cheaper coil spring conversion kit.
- Car worth $18000, fix is $1200: Fix it. The repair cost for a new air spring or sensor is well below the threshold and is a reasonable investment to maintain the vehicle's function and value.
- Car worth $3000, fix is $1800: Walk away. The repair cost is a significant percentage of the vehicle's low value. It's not economically sound to proceed.
What Scan Tool You Need for This Code
Minimum: A scanner that reads Chassis (C) codes and displays live sensor data for the suspension module.
A basic $20 code reader only shows Powertrain (P) codes and won't see C1735. Without live data, you cannot watch the sensor's voltage as the suspension moves, forcing you to guess at the problem.
Budget: BlueDriver Pro Scan Tool (~$100) — Connects to your smartphone and reads Chassis (C) codes. It displays live data streams from the suspension control module, allowing you to graph the voltage of all four ride height sensors to identify the faulty one.
Mid-range: Foxwell NT510 Elite / Thinkcar ThinkScan 689BT (~$150) — Offers bidirectional controls. This allows you to command the air compressor to turn on or open specific valves, which is extremely helpful for testing the compressor and checking for leaks.
Professional: Autel MaxiCOM MK808 / MaxiDAS DS808 (~$500-800) — Provides full bidirectional control and includes the special function for 'Suspension Calibration'. This is mandatory for many Land Rover, Audi, Mercedes-Benz, and Ram vehicles after replacing a sensor.
Rent vs buy: Most auto parts store loaner tools are basic code readers that cannot view live suspension data. For a one-time diagnosis, buying a budget pick like the BlueDriver is more effective than renting. Buy a mid-range or pro tool only if you plan to perform your own repairs frequently or own a vehicle requiring calibration.
How to Clear the Code After You Fix It
- Use an OBD-II scan tool to clear the C1735 fault code from the Suspension Control Module.
- If the battery was disconnected, reconnect it and reset the steering angle sensor by turning the wheel lock-to-lock.
- Cycle the ignition off and on, then start the vehicle.
- Command the suspension to go from its lowest to highest setting, and back to normal, to verify functionality.
Drive cycle (~20 minutes): A specific drive cycle is not required for Chassis (C) codes. The system self-tests upon startup. A 20-minute drive with mixed speeds allows the suspension to make dynamic adjustments and confirm the repair.
Readiness monitors affected: Not applicable. Readiness monitors track emissions (P) codes.
Watch out for:
- Clearing the code without fixing the mechanical issue causes the code to return immediately.
- Forgetting to cycle the suspension through its height settings to confirm the compressor and valves operate.
- Skipping the mandatory ride height calibration on advanced vehicles (Land Rover, Audi, Ram) after sensor replacement.
Will This Fail Emissions / State Inspection?
No — by itself this code doesn't fail OBD inspection (but it can keep readiness monitors from setting, which causes a separate fail).
- California: Chassis (C) codes do not affect emissions testing. However, if the suspension warning light is on, inspectors may refuse to test the vehicle on safety grounds.
- New York: NYS inspection includes a suspension check. A visibly sagging or malfunctioning suspension fails the safety inspection portion.
- Texas: The annual safety inspection checks for broken springs or struts. A C1735 code resulting in a collapsed suspension corner fails the safety inspection.
Most Commonly Affected Vehicles
- Ford Expedition (2003-2017) — Notorious for ride height sensor failures due to poor weather sealing. The linkage arm frequently snaps.
- Lincoln Navigator (2003-2017) — Shares the Expedition's air suspension platform and suffers identical sensor and linkage failures.
- Lexus LS430 / GX470 (2001-2009) — C1735 specifically points to an 'Exhaust solenoid malfunction' inside the compressor assembly, requiring full unit replacement.
- Ram 1500 (2013-2019) — Prone to sensor faults and air leaks in freezing weather. TSB 08-127-23 addresses software updates for the ASCM to prevent false sensor codes.
- Toyota Sequoia (2001-2007) — Similar to Lexus, this code flags a malfunction of the exhaust solenoid on the compressor assembly.
- Nissan Armada / Titan / Xterra (2004-2015) — C1735 is an 'Ignition Signal' fault, not suspension-related. The Body Control Module (BCM) detects a mismatch between direct power and CAN bus ignition status.
- Cadillac / GMC Escalade / Yukon (2007-2020) — Prone to leaky air shocks and burned-out compressors. They exhibit identical sagging symptoms and 'Service Suspension System' warnings.
- Audi A6 / Allroad (2005-2018) — Frequently experience height sensor failures from corroded wiring, forcing the system into a stiff default safe mode.
Manufacturer-Specific Notes
- Nissan / Infiniti: C1735 means 'Ignition Signal' fault. The Body Control Module (BCM) sees a mismatch between direct power and CAN bus ignition status. Check the BCM, ignition switch, and battery terminals.
- Ford / Lincoln: A failed height sensor shuts down the compressor as a safety measure, causing the vehicle to sag. The plastic sensor linkage arm is the most common failure point.
- Lexus / Toyota: C1735 defines an 'Exhaust solenoid malfunction'. Because the solenoid is integrated into the compressor/dryer assembly, a failure requires replacing the entire compressor unit.
- Ram: Air suspension faults spike in cold weather due to freezing moisture. Pulling the ASCM fuse for 5 minutes can temporarily reset the system. TSB 08-127-23 provides a permanent software fix.
Real Owner Stories
2016 Ram 1500 with 62,000 km in a cold climate
Air suspension failed with the front end dropped after a cold snap. The system had previously failed under warranty and the compressor was replaced. It began acting up intermittently before failing completely.
Outcome: Frustrated with repeat failures, the owner replaced the entire air suspension system with a traditional coil spring conversion kit for $2,300, providing a permanent cold-climate solution.
Lesson: On Ram 1500s in cold climates, C1735 or sagging is often moisture freezing in the system, which destroys the compressor. A coil conversion is more cost-effective long-term than replacing expensive air components.
2008 Nissan Titan with a no-start condition
Vehicle would not crank, accompanied by flickering dashboard lights and codes C1735, C1163, and U1000.
Outcome: On a Nissan, C1735 is an 'Ignition Signal' fault, not air suspension. The root cause was a faulty Body Control Module (BCM) preventing the starter relay from getting power.
Lesson: Always verify the code definition for your specific manufacturer. Chasing suspension parts on a Nissan with C1735 is a complete misdiagnosis.
2005 Lexus GX470 with rear suspension sagging
The rear dropped intermittently while driving, correcting only after restarting. The issue worsened in cold weather, triggering C1713 (rear sensor) and C1735 (exhaust solenoid).
Outcome: C1735 on this Lexus correctly identified an 'Exhaust Solenoid Valve Circuit' malfunction. Because Lexus does not sell the solenoid separately, it required a full compressor replacement.
Lesson: On a Lexus/Toyota, C1735 points directly to the compressor's exhaust solenoid. A faulty solenoid causes erratic behavior easily misread as a sensor issue.
Audi Allroad with suspension warning light after hitting a pothole
The suspension warning light appeared immediately after a hard impact with a pothole. The car sat unevenly.
Outcome: The owner replaced only the broken linkage arm (Dorman 926-787). After clearing codes, the system functioned normally without replacing the expensive sensor.
Lesson: If the fault appears directly after a bump, perform a visual inspection first. The linkage arm is designed to break under stress and is cheap to replace.
How to Prevent This Code From Triggering
- Wash the undercarriage monthly in winter (Monthly in 'Salt Belt' regions) — Removes road salt that accelerates corrosion on the sensor body, linkage, and electrical connectors, preventing seizure and signal loss.
- Visually inspect air suspension components (Every 6 months or during oil changes) — Allows early detection of cracks in rubber air springs or a loose sensor linkage before they cause a catastrophic failure or burn out the compressor.
- Cycle the suspension height settings (Monthly) — Cycling through adjustable height modes ensures the sensor linkage and internal contacts move through their full range, preventing seizure.
- Fix air leaks immediately (As soon as symptoms (hissing, sagging) appear) — The number one killer of air compressors is overworking to compensate for a leak. Fixing a small leak is far cheaper than replacing a burned-out compressor.
- Drain the air tank (if equipped) (Every 3-6 months) — Removes accumulated moisture, preventing internal valve corrosion and winter freezing blockages.
Frequently Asked Questions
Can I replace just one ride height sensor?
Yes, you only need to replace the specific sensor that failed. The others operate independently and do not require simultaneous replacement.
Do I need to calibrate the new sensor?
Most Ford and Lincoln vehicles do not require calibration after a sensor replacement. However, Ram, Land Rover, and Lexus models require a ride height calibration using a bidirectional scan tool. This ensures the vehicle sits perfectly level.
What's the difference between a ride height sensor and a leveling sensor?
These terms are interchangeable. Both refer to the sensor measuring the distance between the vehicle's frame and suspension to determine height.
Can a bad ride height sensor cause a 'Service 4x4' light?
Indirectly, yes. A CAN bus communication error can affect multiple modules simultaneously. If a network code like C1728 accompanies C1735, the root cause is the network, triggering warnings for both suspension and 4x4 systems.
Can a leak in an air bag cause a C1735 code?
Yes. A leaking air spring prevents the system from reaching its target height. The control module interprets this failure as a sensor or exhaust valve problem, logging C1735.
Can a bad ride height sensor affect my headlights?
Yes. Auto-leveling headlights use input from the ride height sensors. If a bad sensor causes the rear to sag, headlights aim too high and blind oncoming traffic. If the rear is stuck high, headlights aim too low.
Will a bad sensor drain my car battery?
Yes. If a faulty sensor or air leak forces the compressor to run continuously after the engine shuts off, it will drain the battery.
Why did my air suspension fail in cold weather?
Cold temperatures make rubber air springs brittle, causing cracks and leaks. Moisture inside the air lines also freezes, blocking valves or damaging the compressor. Ram 1500 trucks are particularly notorious for cold-weather software and freezing issues.
Key Takeaways
- Code C1735 indicates a failed ride height sensor or circuit, most commonly located at the right rear wheel on air suspension vehicles.
- Manufacturer definitions vary: Nissan uses C1735 for an 'Ignition Signal' fault, while Lexus and Toyota use it to flag a failed exhaust solenoid.
- The top three physical causes are a seized sensor, a snapped plastic linkage arm, or corroded wiring inside the wheel well.
- Driving with C1735 ruins tires within 3 months and burns out the $1,000+ air compressor within 6 months due to constant overworking.
Helpful Videos
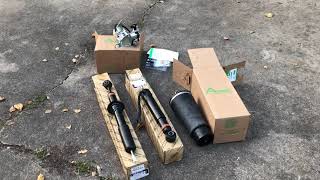

Shop the Parts Behind C1735
Below are the parts most often responsible for code C1735, ranked by how frequently each one is the actual culprit (per the diagnosis above). Tap any to see what we have for your vehicle.


The information in this article is provided for general reference and educational purposes only. Vehicle specifications, procedures, and part compatibility can vary by production date, trim level, and region. Always consult your vehicle's factory service manual and verify part numbers before purchasing or performing repairs. Safety-critical components such as airbags, seat belts, and braking systems should be installed by a qualified professional.
- 🧭 Diagnostic Flowchart
- 🎬 Helpful Videos
- 🛍️ Shop This Part
- What Does C1735 Mean?
- Can I Drive With C1735?
- Common Causes
- Symptoms
- Common Fixes & Costs
- DIY vs Professional
- Used vs. New Parts: Buying Guide
- What Happens If You Wait — Timeline
- Cost of Not Fixing It
- Diagnosis Steps
- When This Code Triggers (Freeze-Frame Conditions)
- Related Codes
- Climate & Environmental Factors
- How to Talk to a Mechanic About This Code
- Where to Take It: Dealer vs Independent vs Chain
- When to Walk Away From the Repair
- What Scan Tool You Need for This Code
- How to Clear the Code After You Fix It
- Will This Fail Emissions / State Inspection?
- Most Commonly Affected Vehicles
- Manufacturer-Specific Notes
- Real Owner Stories
- 2016 Ram 1500 with 62,000 km in a cold climate
- 2008 Nissan Titan with a no-start condition
- 2005 Lexus GX470 with rear suspension sagging
- Audi Allroad with suspension warning light after hitting a pothole
- How to Prevent This Code From Triggering
- Frequently Asked Questions
- Can I replace just one ride height sensor?
- Do I need to calibrate the new sensor?
- What's the difference between a ride height sensor and a leveling sensor?
- Can a bad ride height sensor cause a 'Service 4x4' light?
- Can a leak in an air bag cause a C1735 code?
- Can a bad ride height sensor affect my headlights?
- Will a bad sensor drain my car battery?
- Why did my air suspension fail in cold weather?
- Key Takeaways
- 🎟️ Get 5% Off