
OBD-II Code C2130: Brake Lamp Relay Circuit Error
The Ultimate 2026 Guide: What C2130 means, why it triggers, and how to fix it for good.
- On 2010-2017 Hyundai and Kia models, fix code C2130 instantly by swapping the $15 HAC/DBC relay in the engine fuse box.
- Never drive with code C2130; it disables your brake lights, increasing your risk of a rear-end collision by 30% and risking a $150+ traffic ticket.
- If you drive a Subaru, Nissan, or Ford, check the $25 brake light switch at the pedal before assuming the relay is bad.
- Always check the 10A or 15A 'Stop Lamp' fuse first; a blown fuse cuts power to the relay and triggers this code immediately.
- On 2003-2009 Mercedes-Benz E-Class vehicles, C2130 indicates a catastrophic $2,000+ failure of the SBC hydraulic brake unit, requiring professional replacement.
What Does C2130 Mean?

Code C2130 indicates the Hydraulic Electronic Control Unit (HECU) or ABS module detected an electrical fault in the brake lamp relay circuit. This electro-mechanical switch turns the brake lights on and off. Driver-assist systems like Hill-start Assist Control (HAC) and Downhill Brake Control (DBC) use this relay to activate brake lights independently of the pedal. If the HECU commands the relay and doesn't see the expected voltage change within 500 to 600 milliseconds, it stores code C2130.
Technical definition: The SAE/OBD-II definition for C2130 varies by manufacturer. Hyundai and Kia define it as 'Brake Lamp Relay Error'. 🎬 Watch: Diagnosing code C2130 on a Kia Optima. Mercedes-Benz defines it as a severe 'Hydraulic unit internal fault'. Some scan tools erroneously display 'Left Rear Power Window Position Information Error' for older Hyundais due to software glitches.
Can I Drive With C2130?
No — Do Not Drive. Driving with code C2130 is illegal in most jurisdictions. The primary symptom is non-functional brake lights, creating a severe safety hazard. Studies show rear-end collisions account for nearly 30% of injury-causing accidents, and a dead center brake light increases this risk by 40%. A related fault also engages the transmission shift lock, trapping your car in 'Park'. 🎬 See how to release a shifter stuck in park. Repair this immediately.
Common Causes

- Faulty Brake Lamp Relay (HAC/DBC Relay) (Very Common) — The relay is the most frequent failure point. Its internal mechanical contacts wear out, corrode, or the coil fails, preventing power from reaching the brake lights.
- Blown 'Stop Lamp' Fuse (Common) — A blown fuse in the brake light or Electronic Stability Control (ESC) circuit cuts power to the relay. Fuses blow due to short circuits from incorrect bulbs or chafed wiring.
- Faulty Brake Light Switch (Common) — A failing brake light switch sends erratic signals the HECU misinterprets as a relay circuit fault, especially on Subaru, Nissan, and Ford models.
- Degraded Pedal Assembly Components (Less Common) — On Nissan and older Hyundai/Kia models, plastic stoppers on the brake pedal arm break apart. This prevents the brake light switch from engaging, causing lights to stay on or fail completely.
- Corroded or Damaged Wiring/Connectors (Less Common) — Wiring and connectors in the relay socket, HECU, or tail lights corrode or suffer rodent damage, causing open or short circuits.
- Incorrect Bulb Installation (Rare) — Installing a single-filament bulb in a dual-filament socket creates a short circuit when braking. This instantly blows the stop lamp fuse and triggers C2130.
- Poor Ground Connection (Rare) — The brake light circuit requires a solid chassis ground. A corroded or loose ground wire creates high resistance, disabling the lights.
- Failing Hydraulic Electronic Control Unit (HECU/ABS Module) (Rare) — The control module monitoring the relay suffers an internal fault. This is the primary diagnosis for C2130 on Mercedes-Benz models with Sensotronic Brake Control (SBC).
Symptoms

- Brake lights do not work — The most direct and dangerous symptom is the complete failure of the brake lights to illuminate when the brake pedal is pressed.
- Unable to shift out of 'Park' — Most automatic vehicles have a shift interlock requiring a signal from the brake switch to release the gear selector. A fault in this circuit leaves you stranded.
- Hill-start Assist or Downhill Brake Control is disabled — As a fail-safe, the vehicle's computer disables related safety systems like HAC and DBC when it detects this fault.
- Brake lights are stuck on — A failure of the brake light switch or a missing pedal stopper causes the brake lights to remain on, draining the battery.
- Cruise control is inoperative — The cruise control system relies on the brake switch signal to disengage. If this signal is faulty, the system disables itself.
- ABS, ESC, or DBC warning light on (also visible on scanner) — Because the brake system is compromised, the Anti-lock Brake System (ABS), Electronic Stability Control (ESC), or Downhill Brake Control (DBC) warning light illuminates.
- Check Engine Light is on (also visible on scanner) — While primarily a chassis code, this fault triggers the main Check Engine Light if the issue is intermittent.
Diagnostic Flowchart
Tap your situation to follow the diagnostic path that matches what you're seeing on this code.
Common Fixes & Costs
- Replace Brake Lamp Relay (HAC/DBC Relay) — Parts: $10-$30, Labor: $20-$40, ~0.2 hr book time (DIY)
- Replace Brake Light Switch — Parts: $15-$50, Labor: $60-$150, ~1 hr book time (DIY)
- Replace Blown Fuse and Inspect Circuit — Parts: $1-$5, Labor: $0-$100, ~0.5 hr book time (DIY)
- Repair Wiring or Ground Connection — Parts: $5-$50, Labor: $120-$400, ~2 hr book time (Professional)
- Replace ABS/HECU Module — Parts: $600-$2,500, Labor: $150-$300, ~2.5 hr book time (Professional)
DIY vs Professional
- Replace Brake Lamp Relay 🟢 Beginner
Tools: None, or needle-nose pliers. - Replace Brake Light Switch 🟢 Beginner
Tools: Basic hand tools (socket set, screwdrivers), flashlight. - Replace Blown Fuse 🟢 Beginner
Tools: Fuse puller or small pliers. - Repair Wiring or Ground 🟢 Beginner
Tools: Multimeter, wire strippers, crimpers, soldering iron, heat shrink, wiring diagrams. - Replace ABS/HECU Module 🟢 Beginner
Tools: Professional scan tool for programming, flare nut wrenches, brake bleeding equipment.
Used vs. New Parts: Buying Guide
When a used part is worth it: For the most common fix (brake relay), new is always better as it's an inexpensive part. A used part only makes sense for a high-cost component like an ABS/HECU module on an older, high-mileage vehicle where budget is the primary concern.
Donor-vehicle mileage cap: roughly under 100000 miles for the part to have meaningful remaining life.
Donor quality checklist:
- For an ABS module, match the part number exactly. Even a slight variation is incompatible.
- Verify the donor vehicle was not scrapped for a related brake or electrical system failure.
- Be aware that a used ABS module requires reprogramming to your vehicle's VIN by a dealer or specialized shop.
Decision logic:
- If Part is a relay or switch (under $75 new) → Always buy new. The small savings on a used part aren't worth the risk of premature failure and repeat labor.
- If Part is an ABS/HECU module and the vehicle is over 10 years old or 150K miles → A used or professionally rebuilt module is a reasonable choice to save money, but prefer a rebuilt unit with a warranty.
- If Part is an ABS/HECU module and vehicle is newer or low-mileage → Buy a new or rebuilt OEM module. The safety-critical nature of the part justifies the higher cost.
Warranty tradeoff: Used parts from a junkyard typically offer a 30-90 day warranty at best and do not cover labor. Aftermarket new parts offer 1-year to limited lifetime warranties. A professionally rebuilt ABS module often comes with a 1-year or longer warranty.
Worst-case if a used part fails: $300-$500 if a used ABS module is dead on arrival or fails shortly after, covering repeat labor and reprogramming fees.
What Happens If You Wait — Timeline
- Immediate (First Drive): Brake lights are inoperative. ABS, ESC, and Brake warning lights illuminate. Hill Start Assist and Cruise Control are disabled. (MPG impact: 0%% · Added cost: $75-$500+ in potential traffic fines for faulty safety equipment. Extremely high risk of a rear-end collision.)
- 0-2 Days: Vehicle becomes stranded. The fault in the brake switch circuit prevents the shift interlock solenoid from disengaging, trapping the gear selector in 'Park'. (MPG impact: 0%% · Added cost: $100-$250 for a tow to a repair shop.)
- 1-7+ Days (If lights are stuck ON): If the failure mode causes the brake lights to remain on constantly, the battery drains completely, often overnight. This leads to a no-start condition. (MPG impact: 0%% · Added cost: $150-$300 for a new battery and installation, as deep-cycling a standard lead-acid battery permanently damages it.)
- Weeks to Months (Intermittent Fault): If the fault is intermittent, repeated electrical surges and drops from the faulty circuit place stress on the HECU/ABS module, contributing to premature failure of the control unit itself. (MPG impact: 0%% · Added cost: $800-$2,500+ if the HECU/ABS module is damaged and requires replacement.)
Cost of Not Fixing It
- Immediate: No brake lights. This is a major safety hazard, significantly increasing the risk of a rear-end collision. It results in a failed vehicle safety inspection and a traffic ticket in most jurisdictions. (Added cost: $150-$500+ (Traffic fine) | $2,000+ (Insurance deductible for at-fault accident))
- 0-1 Week: Vehicle becomes stranded. A related fault in the brake switch circuit prevents the gear selector from shifting out of 'Park' or prevents the engine from starting. (Added cost: $100-$250 (Towing service))
- 1+ Week: Battery drain and related electrical issues. If the fault causes the brake lights to stick ON, it drains the battery, requiring a jump start or a new battery. (Added cost: $150-$300 (New battery and/or roadside assistance))
Diagnosis Steps

- Confirm the Symptom
With the ignition on (engine off), have a helper stand behind the vehicle. Press and release the brake pedal several times. Confirm whether the brake lights illuminate, fail to illuminate, or stay on.
Tools: A helper (Beginner) - Inspect All Related Fuses
Consult your owner's manual to locate the fuse boxes. Inspect all fuses labeled 'Stop Lamp', 'Brake', 'ESC', 'ABS', or 'HAC/DBC'. Use a multimeter on the continuity setting for a reliable test. Replace any blown fuses.
Tools: Owner's manual, fuse puller, multimeter (Beginner) - Locate and Swap the Relay
Find the brake lamp relay, often labeled 'HAC Relay' or 'DBC Relay', in the engine compartment fuse box. Swap it with an identical relay from a non-critical circuit (e.g., horn). If the brake lights now work, the original relay is faulty.
Tools: Owner's manual, needle-nose pliers (Beginner) - Inspect Brake Pedal Assembly
Look under the dashboard at the top of the brake pedal arm. Check the brake light switch for proper alignment. Look for broken pieces of plastic on the floor mat, which are the remains of a disintegrated stopper.
Tools: Flashlight (Intermediate) - Test the Relay Socket for Power
With the relay removed and ignition on, use a multimeter to test the terminals in the relay socket. You should find one terminal with constant 12V+ (pin 30), one that receives 12V+ when the brake pedal is pressed (pin 86), and one with a good ground (pin 85). If you are missing power or ground, you have a circuit issue before the relay.
Tools: Multimeter, vehicle-specific wiring diagram (Intermediate) - [PRO TIP] Test the Relay with a Multimeter
Remove the relay. Check the coil resistance between pins 85 and 86; a healthy relay reads between 50 and 120 ohms. Apply 12V power and a ground to terminals 85 and 86. You should hear a distinct 'click'. While energized, check for continuity between terminals 30 and 87. If the relay fails any of these checks, it is bad.
Tools: Multimeter, 12V power source (or vehicle battery), jumper wires (Advanced) - [ADVANCED] Analyze Scan Tool Live Data
Connect an OBD-II scanner and view live data PIDs related to the ABS/ESC module. Look for 'Brake Switch Status'. The value should change from 'Off' to 'On' the instant you press the brake pedal. If the status does not change, the problem is the brake light switch. If the status changes correctly but the lights don't work, the fault lies downstream in the relay or wiring.
Tools: OBD-II Scan Tool with Live Data capability (Advanced) - Inspect Wiring and Grounds
Visually trace the wiring harness from the fuse box back towards the tail lights and to the ABS module. Look for signs of chafing, melting, or rodent damage. Locate the main ground point for the tail light harness and ensure it is clean and tight.
Tools: Flashlight, basic hand tools (Intermediate) - [PRO TIP] Perform a Voltage Drop Test
If you have power but the lights are dim or not working, perform a voltage drop test. Connect the positive multimeter lead to the battery's positive terminal and the negative lead to the power pin at the brake light bulb socket (with the pedal pressed). A reading above 0.5V indicates excessive resistance. Repeat on the ground side; a reading over 0.2V indicates a poor ground connection.
Tools: Multimeter, long jumper leads (Advanced)
When This Code Triggers (Freeze-Frame Conditions)
- Vehicle Speed: 0-5 mph (During Hill-start Assist (HAC) activation from a stop on an incline.)
- Brake Pedal Status: OFF (When the HECU commands the lights on for HAC/DBC but the driver's foot is not on the brake.)
- System Voltage: 12.0-14.5V (Normal operating voltage; code sets on voltage mismatch, not low system voltage.)
- Time Since Fault Detection: 500-600 ms (The mismatch between the HECU command and the circuit's feedback voltage must persist for this duration to log the code.)
Related Codes
- C1513 — This code for 'Brake Switch Error' often appears with C2130. C1513 points specifically to the switch at the pedal (the input), while C2130 points to the relay circuit (the output). If scan tool live data shows the brake switch status doesn't change when you press the pedal, the fault is the switch.
- C1200-C1212 — These are wheel speed sensor fault codes. A bad wheel speed sensor disables the ABS/ESC system. Since the HECU controls both the ABS and the brake lamp relay, it logs C2130 as a secondary code. Fixing the primary wheel speed sensor fault resolves the C2130 code.
- C22CF — On Mercedes-Benz vehicles, this code for a hydraulic fault often appears with C2130. Both point to a failure within the complex SBC pump. Seeing both together strongly confirms the need to replace the SBC hydraulic unit.
- P0504 — This is a powertrain code for 'Brake Switch A/B Correlation'. It means the Engine Control Module (ECM) and the ABS module are receiving conflicting information from the two separate circuits within the brake light switch. This code points directly to a faulty switch.
Climate & Environmental Factors
- High Humidity / Heavy Rain: Moisture penetrates tail light assemblies, bulb sockets, and connectors, leading to corrosion. This creates high resistance or short circuits, blowing fuses or causing intermittent operation.
- Road Salt (Winter / Coastal Regions): Salt spray accelerates the degradation of wiring, chassis ground points, and relay/fuse box terminals. This is a leading cause of poor ground connections and circuit failures.
- Extreme Cold: Extreme cold makes plastic components like wiring insulation and connectors brittle and prone to cracking. It also causes the mechanical contacts inside an already failing relay to stick.
How to Talk to a Mechanic About This Code
Say this: "I have a C2130 code and my brake lights are not working. Based on my vehicle, I suspect it's either the brake lamp relay, the brake light switch, or a related fuse. I'd like to schedule a diagnostic to confirm the specific point of failure."
This signals you've done your research and understand the common causes. It focuses the mechanic on a specific system, reducing the chance of them suggesting unrelated, expensive repairs. It shows you are an informed consumer.
Avoid saying:
- 'My check engine light is on, can you fix it?' (This is too vague and invites a wide, potentially expensive, diagnostic process).
- 'Just fix whatever is wrong with the brakes.' (This gives the shop a blank check to replace multiple components without your pre-approval).
- 'I think it's the ABS computer, how much to replace it?' (Never suggest the most expensive fix first; let the diagnosis guide the repair).
Questions to ask before authorizing the repair:
- Can you confirm you tested the relay and the brake light switch individually?
- If the fuse was blown, did you identify the short circuit that caused it to blow?
- Can you show me the failed part before you replace it?
- Will you provide a written estimate with a clear breakdown of parts and labor costs before you begin the work?
- What is the warranty on the parts and the labor for this specific repair?
Where to Take It: Dealer vs Independent vs Chain
- Dealer:
Recommended for Mercedes-Benz or if the vehicle is under warranty. For common makes like Hyundai/Kia out of warranty, an independent shop is more cost-effective.
Best for: Vehicles under warranty., Mercedes-Benz models where C2130 often means a complex SBC unit failure., Complex electrical issues where access to manufacturer-specific diagnostic tools and wiring diagrams is critical.
Downsides: Highest labor rates, typically 1.5-2x more than independent shops., May recommend replacing an entire assembly when only a smaller component has failed., Service advisors are less familiar with the technical details than the mechanics themselves. (Typical cost: +50% vs. baseline) - Independent Shop:
Best fit for most C2130 repairs on common vehicles. An experienced independent mechanic diagnoses and fixes a faulty relay, switch, or wiring issue efficiently and affordably.
Best for: Out-of-warranty vehicles, especially common models like Hyundai, Kia, Ford, and Subaru where C2130 is a well-known issue., Straightforward part swaps like a relay, switch, or fuse., Building a long-term relationship with a trusted mechanic.
Downsides: Quality and expertise vary widely; vet shops based on reviews and ASE certifications., May lack the expensive, brand-specific diagnostic tools needed for very complex or rare failures. (Typical cost: +0% vs. baseline) - Chain Shop:
AVOID for C2130 diagnosis. While they replace a simple relay if you specifically ask for it, they are likely to misdiagnose the root cause or upsell you on a full, unnecessary brake job.
Best for: Simple, routine maintenance like oil changes or tire rotations.
Downsides: Technician skill varies dramatically., High pressure to upsell unnecessary services due to commission-based pay structures., Often lack the in-depth diagnostic capabilities for anything beyond basic part replacement. (Typical cost: -10% vs. baseline)
When to Walk Away From the Repair
If the estimated repair cost exceeds 40-50% of the car's private-party value, it's time to seriously consider selling or trading it in.
- Car worth $4000, fix is $2200: Walk away. The repair cost is over 50% of the car's value. This money is better put toward a replacement vehicle.
- Car worth $12000, fix is $450: Fix it. This is a relatively inexpensive repair that is well below the threshold and restores a critical safety function.
- Car worth $3000, fix is $2800: Walk away immediately. The repair cost is nearly the entire value of the car. This is a classic 'total loss' scenario for an owner.
What Scan Tool You Need for This Code
Minimum: A scanner that reads and clears codes from the ABS (Anti-lock Brake System) module. A basic engine-only code reader will NOT see the C2130 code.
The C2130 code is a chassis ('C') code stored in the ABS/ESC computer, not the engine computer (ECU). A $20 scanner that only reads powertrain ('P') codes shows 'No Codes Found,' leading you to believe there is no issue. You need a tool that accesses other vehicle systems.
Budget: BlueDriver Pro or Foxwell NT604 Elite (~$100) — Reads and clears ABS codes like C2130. Critically, it displays live data, allowing you to see the 'Brake Switch Status' change from 'On' to 'Off' as you press the pedal, which is essential for diagnosing a faulty switch vs. a relay.
Mid-range: Foxwell NT630 Plus or Autel MaxiCOM MK808 (~$150) — Includes all the functions of the budget pick, plus bidirectional controls. This allows you to command the brake light relay on and off directly from the scanner, providing a definitive test of the relay and its wiring. It also includes service functions like ABS brake bleeding.
Professional: Autel MaxiCOM MK900BT or Launch X431 Series (~$500-1200) — Offers full bidirectional control to test any component in the circuit. Provides access to manufacturer-specific codes and data, which is crucial for diagnosing complex issues or problems on European vehicles like Mercedes-Benz.
Rent vs buy: Most auto parts stores read your codes for free, but their basic scanners do not see ABS codes. For a C2130, invest in a budget pick scanner. If you only plan to use it once, their tool loaner program offers a capable scanner, but confirm it reads ABS codes before leaving the store.
How to Clear the Code After You Fix It
- Perform the physical repair (e.g., replace relay or switch).
- Use an OBD-II scan tool to erase the C2130 fault code from the ABS/ESC module.
- Perform a complete drive cycle to allow the vehicle's readiness monitors to run.
Drive cycle (~20 minutes): Start with a cold engine. Let it idle for 2-3 minutes. Drive in mixed city/stop-and-go traffic for 5-10 minutes, including several complete stops. Accelerate to a steady highway speed (around 55 mph) and maintain for 5-10 minutes. Safely coast to a lower speed without heavy braking. Park and turn off the engine.
Readiness monitors affected: Catalyst Monitor, Evaporative System (EVAP) Monitor, Oxygen (O2) Sensor Monitor
Before emissions retest: drive at least 50 miles to fully set monitors.
Watch out for:
- Disconnecting the battery clears the code but also erases all readiness monitors and adaptive memory, causing other issues.
- The code returns immediately if the underlying fault (bad relay, shorted wire) was not correctly repaired.
- Failure to complete a full drive cycle leaves readiness monitors 'incomplete', resulting in a failed emissions test.
Will This Fail Emissions / State Inspection?
Yes — this code typically fails an OBD-II emissions inspection.
- California: A vehicle automatically fails the safety portion of an inspection if any required lights, including all three brake lights, are non-operational. For salvaged vehicles, a specific 'Brake and Lamp Inspection' is required for re-titling.
- New York: An NYS inspection requires all stop lamps to be functional. An illuminated ABS warning light is an advisory, but the underlying C2130 code and non-functional lights cause a failure.
- Texas: A vehicle fails the annual safety inspection if the required stop lamps do not work when the brake is applied. While an ABS light being on is not a cause for failure, the inoperative brake lights are.
Most Commonly Affected Vehicles
- Hyundai Sonata (2011-2014) — Extremely common issue. The C2130 code is almost always caused by a failure of the Hill-start Assist Control (HAC) relay in the engine bay fuse box.
- Kia Optima (2011-2015) — Shares a platform with the Sonata. The fault is traced to the HAC relay, which serves as the brake lamp relay. A simple relay swap is the most common fix.
- Hyundai Tucson / ix35 (2010-2015) — On these SUVs, the code is specifically linked to the Downhill Brake Control (DBC) relay circuit. The relay is the primary failure point.
- Hyundai Accent (2012-2017) — Owners report the anti-skid (ESC) warning light appears with this code. The cause is typically a faulty HAC relay located in the main fuse box.
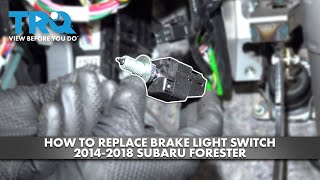
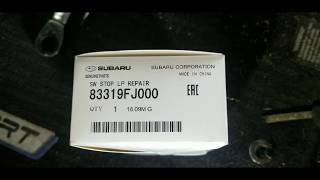
- Subaru Forester / Outback (2014-2018) — On these models, brake light failures and a cascade of warning lights are almost always caused by a faulty brake light switch, not a relay.
- Nissan Rogue / Juke (2009-2016) — Brake light issues are commonly traced to a faulty brake light switch or disintegrated plastic stopper grommets on the brake pedal arm.
- Ford Explorer / Police Interceptor Utility (2011-2019) — Brake light problems are often caused by a faulty brake light switch. Decommissioned police vehicles have complex aftermarket wiring modifications that cause issues.
- Mercedes-Benz E-Class (W211) (2003-2009) — This code is very serious on these models. It indicates an internal electrical fault within the Sensotronic Brake Control (SBC) hydraulic unit, requiring a costly replacement.
Manufacturer-Specific Notes
- Hyundai / Kia: The code is almost always tied to the Hill-start Assist (HAC) or Downhill Brake Control (DBC) relay, which also functions as the main brake lamp relay. The fix is overwhelmingly a simple and inexpensive relay replacement in the engine bay fuse box.
- Mercedes-Benz: This code is significantly more serious, pointing to an internal failure of the Sensotronic Brake Control (SBC) hydraulic unit. This is a complex, safety-critical, and expensive repair. Do not assume it is a simple relay issue on these vehicles.
- Subaru / Nissan / Ford: On many models from these brands, the root cause of brake light problems and associated warning lights is the brake light switch at the pedal, not a relay. Mechanical issues like switch misadjustment or worn plastic pedal stoppers are also common culprits.
- Toyota: Some brake system warnings on Toyota vehicles are not caused by hardware failure at all. For example, a 'Parking Brake Malfunction' message with code C0597 on some Corollas and RAV4s is due to a software glitch, fixed by a dealer-installed update.
Real Owner Stories
2011 Hyundai Sonata Hybrid with intermittent Check Engine Light
Owner of a 2011 Sonata Hybrid reported an intermittent check engine light. The car was otherwise in good shape. The code was identified as C2130.
What they tried:
- The owner sought advice on the importance and cost of the repair.
Outcome: The common consensus for this model is that C2130 points directly to the HAC (Hill-start Assist Control) relay in the engine bay fuse box. This is a simple, inexpensive plug-and-play part that also controls the brake lights.
Lesson: For 2011-2015 Hyundai/Kia models, C2130 is an extremely common and easy fix. Before pursuing expensive diagnostics, swap the HAC relay (Part No. 95225-38200) with an identical one in the fuse box.
2006 Hyundai Sonata with no brake lights
The owner's '06 Sonata had no brake lights, though the running lights worked. They had previously replaced the brake light switch for a similar issue.
What they tried:
- Replaced the brake light switch again, with no success.
- Checked and replaced a related fuse, which also did not solve the problem.
Outcome: A common issue on this specific Sonata model is that the tail light housing itself melts around the bulb, causing a bad connection or short. The fix was replacing the tail light assembly.
Lesson: If a new switch and fuse don't solve a brake light problem, inspect the bulb sockets and connectors for melting or corrosion. Design flaws often cause failures downstream from the switch and relay.
2021 Ford Explorer Hybrid with brake light failure after cleaning
After vacuuming the driver's footwell, the owner of a 2021 Explorer got an error message and discovered the brake lights were not working. A scanner confirmed a brake light switch code.
What they tried:
- The owner suspected they had damaged something while cleaning and checked the area near the top of the brake pedal.
Outcome: The owner found they had knocked the electrical connector off the brake light switch. Plugging it back in securely resolved the error and restored brake light function completely.
Lesson: If a fault appears immediately after working on or cleaning your vehicle, check that all electrical connectors in the area are fully seated before replacing parts.
Nissan with brake lights stuck on, causing a dead battery
The owner of a Nissan found their brake lights staying on constantly, even with the car off. They found small, broken pieces of plastic on the driver's side floor mat.
What they tried:
- The owner identified the problem as a disintegrated brake pedal stopper grommet.
Outcome: The broken plastic stopper prevented the brake pedal arm from pressing the plunger on the brake light switch to turn it off. The owner fashioned a temporary fix using a plastic bolt and nut, solving the problem.
Lesson: If your brake lights are stuck ON, look under the dash at the brake pedal arm. Finding small plastic bits on your floor mat is a classic sign that the brake pedal stopper has failed.
How to Prevent This Code From Triggering
- Apply Dielectric Grease to Relay and Bulb Connectors (Whenever replacing a relay, bulb, or connector.) — Dielectric grease is a non-conductive, silicone-based grease that seals out moisture and oxygen. Applying a thin coat prevents the corrosion that leads to high resistance and circuit faults.
- Clean Battery Terminals and Chassis Ground Points (Every 1-2 years or during battery replacement.) — Corrosion on battery terminals or main chassis ground straps creates voltage drops affecting sensitive electronics. Clean terminals with a baking soda solution and a wire brush.
- Periodically Inspect Fuse/Relay Box Seals (Annually, especially in wet or snowy climates.) — The rubber gasket sealing the engine bay fuse/relay box becomes brittle or dislodged, allowing water intrusion. This moisture directly causes corrosion on terminals, leading to failure.
- Use a Light Touch with Pressure Washers (During every car wash.) — Avoid spraying high-pressure water directly at tail light assemblies, firewall grommets, or under-hood fuse boxes. Pressure forces water past seals, causing shorts and long-term corrosion.
- Inspect Brake Pedal Stoppers (If you own a Nissan or Hyundai/Kia model over 10 years old.) — Small plastic or rubber stoppers on the brake pedal arm degrade and crumble. Periodically looking under the dash for signs of cracking prevents a future failure where brake lights get stuck on.
Frequently Asked Questions
Can I just replace the relay myself?
Yes. On Hyundai and Kia vehicles, the relay is a plug-and-play part in the engine bay fuse box. It is the easiest and cheapest repair to attempt and requires no special tools.
What is the difference between a brake light relay and a brake light switch?
The brake light switch is a sensor at the pedal that detects your foot input. The brake light relay is a heavy-duty electrical switch in the fuse box that sends high-amperage power to the bulbs. C2130 specifically targets the relay circuit.
Why do my brake lights matter for Hill-start Assist?
Hill-start Assist (HAC) and Downhill Brake Control (DBC) automatically apply the brakes. To warn drivers behind you, the system activates the brake lights using the same relay your foot pedal uses.
My brake lights are stuck ON, not off. Can this still be a C2130 issue?
Yes, though less common. Lights stuck on usually point to a mechanical issue at the pedal, like a misadjusted switch or a broken plastic stopper. This confuses the control module and sets a circuit code.
Why are my ABS and Traction Control lights on too?
The ABS/ESC control module (HECU) controls the brake lamp relay for features like HAC/DBC. When it detects a fault in this output circuit, it disables related safety systems and turns on their warning lights.
Is there a recall for the C2130 code?
Generally, no. While common on Hyundai/Kia models, it has not resulted in a formal safety recall for the relay itself. The relay repair is typically the owner's responsibility.
My brake lights work fine, but the code keeps coming back. What's wrong?
The fault is likely intermittent. The relay's internal contacts wear out and fail sporadically, or a loose connection only breaks over bumps. The fault must be actively occurring to diagnose it effectively with a multimeter.
Can a bad battery cause this code?
A weak battery causes bizarre electrical issues, but it is not a direct cause for C2130. This code points to a specific fault within the brake lamp relay circuit. Always ensure you have a healthy 12.4-12.6V battery before diagnosing electrical problems.
The mechanic quoted me over $2,000 for a C2130 on my Mercedes. Is that a rip-off?
Yes, that quote is accurate. On Mercedes-Benz vehicles with Sensotronic Brake Control (SBC), C2130 indicates an internal fault in the SBC hydraulic unit. This is a complex, expensive component critical for brake operation.
Key Takeaways
- On 2010-2017 Hyundai and Kia models, fix code C2130 instantly by swapping the $15 HAC/DBC relay in the engine fuse box.
- Never drive with code C2130; it disables your brake lights, increasing your risk of a rear-end collision by 30% and risking a $150+ traffic ticket.
- If you drive a Subaru, Nissan, or Ford, check the $25 brake light switch at the pedal before assuming the relay is bad.
- Always check the 10A or 15A 'Stop Lamp' fuse first; a blown fuse cuts power to the relay and triggers this code immediately.
- On 2003-2009 Mercedes-Benz E-Class vehicles, C2130 indicates a catastrophic $2,000+ failure of the SBC hydraulic brake unit, requiring professional replacement.
Helpful Videos

Shop the Parts Behind C2130
Below are the parts most often responsible for code C2130, ranked by how frequently each one is the actual culprit (per the diagnosis above). Tap any to see what we have for your vehicle.


The information in this article is provided for general reference and educational purposes only. Vehicle specifications, procedures, and part compatibility can vary by production date, trim level, and region. Always consult your vehicle's factory service manual and verify part numbers before purchasing or performing repairs. Safety-critical components such as airbags, seat belts, and braking systems should be installed by a qualified professional.
- 🧭 Diagnostic Flowchart
- 🎬 Helpful Videos
- 🛍️ Shop This Part
- What Does C2130 Mean?
- Can I Drive With C2130?
- Common Causes
- Symptoms
- Common Fixes & Costs
- DIY vs Professional
- Used vs. New Parts: Buying Guide
- What Happens If You Wait — Timeline
- Cost of Not Fixing It
- Diagnosis Steps
- When This Code Triggers (Freeze-Frame Conditions)
- Related Codes
- Climate & Environmental Factors
- How to Talk to a Mechanic About This Code
- Where to Take It: Dealer vs Independent vs Chain
- When to Walk Away From the Repair
- What Scan Tool You Need for This Code
- How to Clear the Code After You Fix It
- Will This Fail Emissions / State Inspection?
- Most Commonly Affected Vehicles
- Manufacturer-Specific Notes
- Real Owner Stories
- 2011 Hyundai Sonata Hybrid with intermittent Check Engine Light
- 2006 Hyundai Sonata with no brake lights
- 2021 Ford Explorer Hybrid with brake light failure after cleaning
- Nissan with brake lights stuck on, causing a dead battery
- How to Prevent This Code From Triggering
- Frequently Asked Questions
- Can I just replace the relay myself?
- What is the difference between a brake light relay and a brake light switch?
- Why do my brake lights matter for Hill-start Assist?
- My brake lights are stuck ON, not off. Can this still be a C2130 issue?
- Why are my ABS and Traction Control lights on too?
- Is there a recall for the C2130 code?
- My brake lights work fine, but the code keeps coming back. What's wrong?
- Can a bad battery cause this code?
- The mechanic quoted me over $2,000 for a C2130 on my Mercedes. Is that a rip-off?
- Key Takeaways
- 🎟️ Get 5% Off