
OBD-II Code C2204: Dynamics Sensor Internal Failure
What C2204 means, why it triggers, and how to fix it
- Code C2204 indicates a hard internal failure of the dynamics (yaw rate) sensor, requiring a $500 to $1,100 replacement in 80% of cases.
- Driving with C2204 is possible but disables ABS and Electronic Stability Control, increasing the risk of wheel lock-up and skidding during panic stops.
- Always test the sensor connector for a minimum 10V power supply and under 0.1V ground before condemning the $400+ sensor.
- Installing a new dynamics sensor requires a mandatory 'Zero Point Calibration' using a bi-directional scan tool to permanently clear the C2204 code.
What Does C2204 Mean?
Code C2204 means the Anti-Lock Brake System (ABS) module detected an internal failure in the Dynamics Sensor (also called a yaw rate or multi-axis acceleration sensor). This sensor acts as a gyroscope, measuring rotational speed (yaw) and lateral/longitudinal acceleration. If the sensor fails its internal self-test or outputs irrational data, the ABS module logs C2204 and disables stability and traction control.
Technical definition: The SAE/OBD-II definition for C2204 is "Dynamics Sensor Internal". The ABS control module sets this Diagnostic Trouble Code (DTC) when it detects a non-recoverable internal malfunction in the dynamics sensor. The module flags this failure when the sensor's output signal is missing, fails an internal checksum test, or provides an out-of-range value. The self-test runs continuously with the ignition on until the vehicle exceeds 12 mph (20 km/h).
Can I Drive With C2204?
Yes, But With Caution. Yes, but drive with extreme caution. Your primary brakes work, but Anti-lock Brakes (ABS), Electronic Stability Control (ESC), and Traction Control (TCS) are disabled. In a panic stop, your wheels will lock up, increasing stopping distance and causing loss of steering control. On wet surfaces, the risk of skidding is significantly higher. Repair the vehicle immediately to restore these safety features.
Common Causes
- Faulty Dynamics / Yaw Rate Sensor (Very Common) — The code specifically points to an 'internal' failure, making the sensor itself the primary culprit. The delicate micro-electromechanical systems (MEMS) inside the sensor fail due to age, heat cycles, or internal circuit board fractures from years of vibration.
- Water Intrusion and Connector Corrosion (Common) — Because the sensor sits under a seat or center console, spilled drinks, leaking sunroof drains, or wet climate moisture cause water intrusion. This corrodes the connector pins (appearing as green or white powder) or shorts the internal electronics.
- Damaged Wiring or Poor Connections (Common) — Road debris, improper repairs, or chafing damages the wiring harness leading to the sensor. A loose or damaged pin prevents the sensor from powering up, which the ABS module interprets as an internal sensor failure.
- Improper Sensor Installation or Mounting (Less Common) — The dynamics sensor must mount perfectly flat and securely to the vehicle floor. If the mounting bolts are loose, the bracket is bent, or it is installed backward, it outputs irrational data that triggers the internal fault code.
- ABS Module, CAN Bus, or Software Failure (Rare) — If the sensor and wiring test perfectly, the ABS module itself has failed, requires a software update, or is experiencing a network-wide CAN bus communication error. This is usually accompanied by C2200 or 'U' communication codes.
Symptoms
- ABS, Traction, and Stability Control Lights Illuminated — The ABS warning light and the Traction Control/ESC light (a car with squiggly lines) illuminate permanently on the dashboard.
- Stability/Traction Control Disabled — The vehicle's handling feels looser in sharp turns or on slippery surfaces because the electronic systems that prevent skidding are deactivated.
- Cruise Control Inoperative — Modern cruise control systems rely on a fully functional stability system. When C2204 is active, the vehicle disables cruise control as a safety precaution.
- Red Brake Warning Light Illuminated — In severe cases, the main red 'BRAKE' warning light illuminates alongside the ABS lights, indicating a total stability system shutdown.
Diagnostic Flowchart
Tap your situation to follow the diagnostic path that matches what you're seeing on this code.
Common Fixes & Costs
- Replace Dynamics / Yaw Rate Sensor — Parts: $350-$800, Labor: $150-$300, ~1.5 hr book time (Intermediate)
- Repair Damaged Wiring or Clean Connector — Parts: $10-$50, Labor: $120-$250, ~1.5 hr book time (Intermediate)
- Perform Yaw Rate Sensor Calibration — Parts: $0, Labor: $100-$180, ~0.8 hr book time (Professional)
- Tighten or Correct Sensor Mounting — Parts: $0, Labor: $75-$150, ~0.5 hr book time (DIY)
- Replace ABS Control Module — Parts: $600-$1500, Labor: $150-$300, ~2 hr book time (Professional)
Used vs. New Parts: Buying Guide
When a used part is worth it: Given the high cost of a new OEM dynamics sensor ($350-$800+), a used sensor from a reputable salvage yard is a cost-effective option for older vehicles. It makes sense only if the donor vehicle has low mileage and was not involved in a flood.
Donor-vehicle mileage cap: roughly under 80000 miles for the part to have meaningful remaining life.
Donor quality checklist:
- Verify the part number matches exactly, including any superseded numbers.
- Inspect the connector pins for any signs of corrosion or damage.
- Choose a part from a vehicle in a dry climate to minimize the risk of prior moisture damage.
- Ensure the seller offers at least a 30-90 day warranty or exchange policy.
Decision logic:
- If Vehicle is newer or has high value AND the part is available new → Buy new OEM. The reliability and warranty justify the cost for a critical safety component.
- If Budget is the primary concern AND you can verify the donor part's quality → A used part is a reasonable choice, but accept the risk of premature failure.
- If The part is known to be sensitive to moisture or electronic failure → Strongly favor a new part, as a used one carries a significant risk of having the same internal fault.
Warranty tradeoff: Used parts typically come with a 30-90 day exchange-only warranty. New OEM parts carry a 1-2 year warranty and offer significantly higher quality control.
Worst-case if a used part fails: $250-$450 if a used part is faulty, representing repeat labor for diagnosis, replacement, and calibration.
What Happens If You Wait — Timeline
- 0-1 week: Code C2204 is set, and the ABS/ESC/TCS warning lights illuminate. Safety systems are immediately disabled. The vehicle's base braking system remains functional. (MPG impact: 0%% · Added cost: $0)
- 1 week - 3 months: The risk of a loss-of-control accident in an emergency maneuver or on a slippery surface is persistently high. There is no progressive mechanical damage to the car itself. (MPG impact: 0%% · Added cost: $0, but the potential cost of an accident (insurance deductible, increased premiums) is significant.)
- 3-12 months: Continued operation normalizes the elevated risk. A driver forgets the systems are offline and fails to react appropriately during a panic stop. If the root cause was a water leak, moisture begins to corrode nearby wiring. (MPG impact: 0%% · Added cost: If corrosion spreads, repair costs increase by $200-$1000 to fix additional wiring or components.)
- 12+ months: The likelihood of a collision is statistically higher for vehicles with disabled ESC. In some states, the vehicle fails its annual safety inspection, preventing legal registration renewal. (MPG impact: 0%% · Added cost: Inability to pass state inspection renders the vehicle unusable on public roads.)
Cost of Not Fixing It
- Immediate: Loss of ABS, Traction Control, and Electronic Stability Control. Increased risk of skidding, loss of control, and collision in adverse weather or emergency braking situations. (Added cost: Potential for accident-related costs (deductible, insurance increase, injury).)
- 1-6 months: Continued elevated safety risk. Advanced cruise control or collision avoidance systems that rely on stability control data remain disabled. (Added cost: Negligible direct mechanical cost, but high potential cost from an accident.)
- 6+ months: Ignoring the warning light normalizes the risk, causing the driver to forget safety systems are offline. If the root cause is a water leak, moisture corrodes nearby wiring or modules. (Added cost: Potential for $200-$1000 in additional repairs if corrosion spreads to the ABS module or main wiring harness.)
Diagnosis Steps
- Verify the Code with an ABS-Capable Scan Tool
Connect an OBD-II scanner capable of reading ABS/Chassis codes. Confirm C2204 is active. Document any other codes. 'U' codes indicate communication issues, while C2200 points directly to a failed ABS module.
Tools: ABS-capable OBD-II Scanner (Beginner) - PRO TIP: Analyze Live Sensor Data
Access the ABS module's live data stream. Monitor 'Yaw Rate', 'Lateral Acceleration', and 'Longitudinal Acceleration'. Parked on level ground, these values must read 0 deg/s or 0 g. If values are stuck on a non-zero number, blank, or do not change smoothly when rocking the vehicle, the sensor has failed internally.
Tools: Advanced OBD-II Scanner with Live Data (Intermediate) - Perform a Visual Inspection of the Sensor Area
Locate the dynamics sensor (typically under the center console or front seats). Inspect for stained carpets, standing water, or corrosion. Verify the sensor is securely bolted down and the mounting bracket is perfectly flat.
Tools: Flashlight, Basic hand tools (sockets, trim removal tools) (Intermediate) - Inspect the Wiring and Connector
Unplug the sensor connector. Inspect the pins for green or white corrosion, moisture, or bent pins. Gently tug the wires at the back of the connector to ensure they are firmly seated. Clean any minor corrosion with contact cleaner.
Tools: Flashlight, Contact Cleaner, Pick tool (Beginner) - Check Power, Ground, and CAN Voltage
Using a multimeter and wiring diagram, test the sensor's harness connector with the ignition on. The supply pin must show battery voltage (above 10V), and the ground pin must show less than 0.1V. For CAN lines, expect ~2.6V for CAN High and ~2.4V for CAN Low. Missing power or a bad ground points to a wiring issue, not a failed sensor.
Tools: Multimeter, Vehicle-specific wiring diagram, Back-probe kit (Advanced) - ADVANCED: Check CAN Bus Resistance
Disconnect the vehicle's battery. Measure the resistance between the CAN High and CAN Low pins at the sensor connector. A healthy circuit reads exactly 60 ohms. A reading of 120 ohms indicates an open circuit; near 0 ohms indicates a short.
Tools: Multimeter, Vehicle-specific wiring diagram (Advanced) - Replace the Dynamics Sensor
If the sensor receives proper power and ground, the CAN bus is intact, and live data confirms a malfunction, replace the sensor with an OEM unit. Handle the new sensor carefully to avoid damaging its internal gyroscope.
Tools: Socket set, Trim removal tools (Intermediate) - Perform Sensor Calibration / Initialization
You must calibrate the new sensor using an advanced scan tool. Execute the 'Zero Point Calibration' or 'Yaw Rate Sensor Initialization' procedure to teach the ABS module the sensor's neutral position. Skipping this step guarantees the C2204 code will return.
Tools: Advanced OBD-II Scanner (with calibration/special function) (Advanced) - Clear Codes and Perform Verification Test Drive
Clear all DTCs. Drive the vehicle above 15 mph (25 km/h) and perform several slow left and right turns to allow the ABS module to complete its self-test. Re-scan to confirm C2204 has not returned.
Tools: ABS-capable OBD-II Scanner (Beginner)
When This Code Triggers (Freeze-Frame Conditions)
- Vehicle Speed: 0-12 mph (During initial self-test at key-on or low-speed driving)
- System Voltage: 11.5-14.5V (Normal battery voltage present during self-test)
- Ignition Status: ON (The fault is logged when the ignition is on and the ABS module is active)
- Time Since Key-On: 1-10 seconds (Fault is typically detected very shortly after the vehicle is started)
Related Codes
- C2200 — Indicates an 'Anti-Lock Brake Module Internal Failure'. A faulty ABS module falsely generates sensor codes. Diagnose C2200 first; replacing the ABS module usually clears both codes.
- U0125 — 'Lost Communication With Multi-axis Acceleration Sensor Module.' U0125 points specifically to a wiring or CAN bus network problem preventing communication. If you have U0125, the sensor itself is likely functional.
- C121A — 'Steering Angle Sensor Not Initialized.' This code appears with C2204 because the stability system receives conflicting data. Fix the C2204 fault first; C121A resolves itself after the dynamics sensor is calibrated.
- C2205 — 'Steering Angle Sensor Internal'. Triggered alongside C2204 on Chrysler products when the overall stability system is compromised. Resolve the primary C2204 fault before addressing C2205.
Climate & Environmental Factors
- High Humidity / Water Intrusion: High ambient humidity or direct water leaks (sunroof drains, spilled drinks) penetrate the sensor housing and electrical connectors. This moisture corrodes the delicate pins and internal circuit boards, causing short circuits that trigger the C2204 internal fault.
- Road Salt / Winter Conditions: Salt-laden moisture tracked into the vehicle on footwear melts and seeps into the carpet down to the floor pan. This highly corrosive environment rapidly degrades the sensor's connector and housing.
- Extreme Temperature Cycles: Repeated cycling from freezing cold to high heat stresses the electronic components and solder joints on the sensor's internal circuit board, leading to micro-fractures and eventual failure.
How to Talk to a Mechanic About This Code
Say this: "I have an ABS and stability control light on, and my scanner shows code C2204, 'Dynamics Sensor Internal Failure.' Before replacing the sensor, please verify it has proper power and ground, and check the connector for corrosion. Also, please confirm your shop can perform the zero-point calibration after replacement."
This directs the technician to perform a proper diagnosis to rule out a simple wiring issue before recommending an expensive part replacement. It also ensures the shop has the correct software to perform the mandatory calibration step.
Avoid saying:
- 'My ABS light is on, can you fix it?'
- 'The car is acting funny, just do whatever it takes.'
- 'I'm not sure what's wrong, just give me a call when you have an estimate.'
Questions to ask before authorizing the repair:
- Did you find power and ground at the sensor connector? What were the voltage readings?
- Was there any corrosion or moisture in the connector or on the sensor?
- Did you check the live data from the sensor? What did it show?
- Does the estimate include the cost to perform the zero-point calibration after the new sensor is installed?
- What is the warranty on the new sensor and the labor for this repair?
Where to Take It: Dealer vs Independent vs Chain
- Dealer:
A safe but expensive option. They are guaranteed to have the correct diagnostic tools and calibration software but will be the priciest choice for an out-of-warranty vehicle.
Best for: Vehicles under warranty., Complex cases where other modules are failing or manufacturer-specific software updates are needed., Owners who prioritize using OEM parts and a manufacturer-specific diagnostic process.
Downsides: Highest labor rates and part costs., Less willing to attempt a connector or wiring repair, favoring a full sensor replacement. (Typical cost: +50% vs. baseline) - Independent Shop:
Best fit for most owners. A well-equipped independent shop easily diagnoses and repairs a C2204 fault. Ensure they can perform a 'yaw rate sensor zero-point calibration' before committing.
Best for: Out-of-warranty vehicles where cost is a factor., Building a long-term relationship with a trusted mechanic., Getting a second opinion on a dealer's quote.
Downsides: Shop quality varies; you must verify they have an advanced scan tool capable of ABS diagnostics and calibration., Less experience with brand-specific quirks than a dealer. (Typical cost: +0% vs. baseline) - Chain Shop:
AVOID. While they might read the code, they are unlikely to have the specific tools to perform the mandatory sensor calibration. This increases the risk of an incomplete repair.
Best for: Simple, routine maintenance like oil changes and tires.
Downsides: Technician skill and diagnostic equipment are highly variable., Often lack the advanced scan tools required for sensor calibration., Business model pressures technicians toward quick parts replacement over nuanced diagnosis. (Typical cost: -10% vs. baseline)
When to Walk Away From the Repair
If the estimated repair cost for the C2204 fault exceeds 40-50% of your car's current private-party value, pause and consider your options, especially if the vehicle has other pending repair needs.
- Car worth $3500, fix is $1100: Borderline. The repair is a significant percentage of the car's value. Consider if the car is otherwise in excellent condition. If not, this is a good time to sell as-is.
- Car worth $15000, fix is $1100: Fix it. The repair cost is well below the threshold and restores a critical safety feature, preserving the vehicle's value and safety.
- Car worth $2000, fix is $1100: Walk away. The repair cost is over 50% of the car's value. It is not economically sensible to proceed.
What Scan Tool You Need for This Code
Minimum: A scan tool that reads and clears ABS/Chassis (C-prefix) trouble codes, views live ABS data streams, AND performs special service functions like 'Zero Point Calibration'.
A basic $50 engine code reader cannot see or clear ABS codes like C2204. More importantly, it cannot perform the mandatory calibration step required after the sensor is replaced. Skipping calibration causes the code to return immediately.
Budget: BlueDriver Pro Scan Tool (~$100) — Reads and clears ABS codes like C2204 and views live data. However, its ability to perform the required 'Zero Point Calibration' is not guaranteed across all vehicle makes. It is a great starting point for diagnosis but may not finish the job.
Mid-range: Foxwell NT510 Elite (~$180) — Provides full system diagnostics, including reading ABS codes and viewing live data. Crucially, it offers bi-directional control and service functions like 'Yaw Rate Sensor Calibration' for many makes. This is a strong choice for a serious DIYer.
Professional: Autel MaxiCOM MK808S / MK808BT (~$450-600) — Offers comprehensive, professional-level capabilities. It reliably reads/clears all codes, graphs live data, and has a dedicated service menu for ABS functions, including the 'Zero Point Calibration'. This tool is more than sufficient for this repair.
Rent vs buy: Auto parts stores lend basic code readers that CANNOT perform the necessary calibration for a C2204 fix. If you plan to do this repair yourself, you must buy a capable scanner. For a one-time fix, pay a shop for the post-repair calibration service ($100-$180).
How to Clear the Code After You Fix It
- Reconnect battery (if disconnected for repair)
- Use an ABS-capable OBD-II scan tool to clear the C2204 code
- Perform Zero Point Calibration of the new sensor
- Perform a verification drive cycle
Drive cycle (~5 minutes): After clearing the code and calibrating the sensor, start the vehicle. Drive straight ahead and exceed 15 mph (25 km/h) to allow the ABS module to complete its initialization test. Perform several slow left and right turns. Re-scan for codes to confirm the repair.
Readiness monitors affected: Not applicable for this chassis code
Watch out for:
- Using a basic code reader that cannot clear ABS/Chassis codes.
- Forgetting to perform the mandatory Zero Point Calibration after sensor replacement, causing the code to return instantly.
- Not driving the vehicle above 15 mph after clearing the code; the fault is only confirmed fixed after the ABS module runs its self-test at speed.
Will This Fail Emissions / State Inspection?
No — by itself this code doesn't fail OBD inspection (but it can keep readiness monitors from setting, which causes a separate fail).
- California: An illuminated ABS light will NOT cause a failure of the standard smog check. However, if the vehicle is being registered as 'salvaged', it must pass a Vehicle Safety Systems Inspection (VSSI), which an active ABS fault fails.
- New York: An illuminated ABS light is considered a safety defect and WILL cause the vehicle to fail the annual safety inspection.
- Texas: An illuminated ABS light will NOT cause a failure of the annual safety inspection. The inspection checks for service brake function but explicitly exempts the ABS warning light as a reason for rejection.
Most Commonly Affected Vehicles
- Dodge Magnum, Charger, Durango (2005-2010) — Extremely common on these LX/WK platform vehicles. The sensor is located under the center console. Part numbers supersede frequently; verify with VIN.
- Jeep Wrangler (JK), Grand Cherokee (WK) (2007-2018) — A frequent failure on the JK Wrangler due to water damage from leaks or off-roading. The sensor sits under the center console.
- Chrysler 300, Aspen (2005-2010) — Shares the same electronics as the Dodge Charger/Magnum, making it equally prone to this internal sensor failure.
- Dodge Ram 1500/2500/3500 (2009-2018) — The dynamics sensor is a known failure item, located under the driver's seat or center console. On some 2015-2016 models, C2204 defines as 'Steering Angle Sensor Internal Fault'.
- Mitsubishi Lancer, Outlander (2008-2015) — Defined as 'Internal abnormality in G and yaw rate sensor'. Service procedures emphasize checking CAN bus lines before sensor replacement.
- Hyundai/Kia Santa Fe, Genesis (2007-2012) — CRITICAL: On some Hyundai models, C2204 means 'CDC Actuator Failure', related to the Electronic Control Suspension, not the yaw rate sensor. Verify the code definition with a model-specific resource.
- Mercedes-Benz C-Class (W204) (2008-2015) — Commonly reported on the W204 platform. The sensor is located under the driver's seat carpet and requires seat removal to access.
- Nissan Murano, Rogue, Pathfinder (2010-2020) — Failures of the yaw rate sensor occur, though less frequently than on Chrysler products. Diagnosis must include checking for related TSBs.
Manufacturer-Specific Notes
- Chrysler/Dodge/Jeep/Ram: These brands consistently use C2204 to mean 'DYNAMICS SENSOR INTERNAL'. The diagnostic path leads to replacing the sensor after verifying power and ground. Calibration after replacement is strictly mandatory.
- Hyundai/Kia: On certain models (e.g., Santa Fe), C2204 means 'CDC Actuator Failure', related to the Electronic Control Suspension. It is essential to use a scan tool that provides manufacturer-specific code definitions.
- Mitsubishi: Mitsubishi defines this as an 'Internal abnormality in G and yaw rate sensor'. Their service literature places a strong emphasis on diagnosing the CAN bus lines first before condemning the sensor.
- Mercedes-Benz: On platforms like the W204, this code points directly to the yaw rate sensor located under the driver's seat (LHD) or passenger's seat (RHD). Replacement requires removing the seat and peeling back the carpet.
Real Owner Stories
2012 Jeep Wrangler JK at 110K miles
ABS and traction control lights illuminated after off-roading with water crossings. No other symptoms.
What they tried:
- Owner replaced the front left wheel speed sensor with no change.
- Took it to a shop, which pulled code C2204.
- Technician removed the center console and found damp carpet and green corrosion on the yaw rate sensor connector.
Outcome: The technician cleaned the connector pins with contact cleaner and a small brush, applied dielectric grease, and reconnected it. The code cleared and did not return. Total cost was 1.5 hours of labor ($180).
Lesson: On vehicles prone to water intrusion, always perform a thorough visual inspection for moisture or corrosion under the console before buying an expensive new sensor.
2008 Dodge Charger R/T at 135K miles
ABS/ESP lights became permanently lit. Cruise control stopped working.
What they tried:
- A basic scan tool showed no codes.
- A repair shop with an advanced scanner found an active C2204 code.
- The shop verified the sensor had 12V power and a solid ground, confirming the sensor itself had failed internally.
Outcome: The shop replaced the dynamics sensor with an OEM part ($550) and performed the zero-point calibration. Total repair cost was $850. The lights stayed off and cruise control function was restored.
Lesson: This code requires a scanner capable of reading the ABS module. If power and ground are good, the 'internal failure' definition is highly accurate, and the sensor must be replaced.
2015 Chrysler 300C at 80K miles
ABS, traction control, and blind spot monitoring warning lights all illuminated simultaneously.
What they tried:
- A shop diagnosed the car and found C2204 for the dynamics sensor and a 'U' code for lost communication with the blind spot module.
- The technician found a damaged wiring harness behind the rear bumper cover that had shorted, causing a network disruption.
Outcome: The shop repaired the damaged wires in the bumper harness and cleared all codes. The C2204 code did not return, proving the dynamics sensor was not faulty. The repair cost was $350.
Lesson: If multiple unrelated system lights appear at once, suspect a network or wiring issue. A communication code ('U' code) is a major clue that C2204 is a secondary symptom, not the root cause.
How to Prevent This Code From Triggering
- Periodically Inspect for Cabin Water Leaks (Every 6 months) — Check for damp carpets under floor mats, especially near the center console. Address clogged sunroof drains immediately to prevent water from reaching the sensor.
- Use High-Walled All-Weather Floor Mats (One-time purchase) — High-walled mats contain spilled drinks and melted snow, preventing liquids from soaking into the carpet and migrating to the low-lying sensor location.
- Apply Dielectric Grease During Any Related Service (As needed) — If the center console is removed for another repair, disconnect the yaw rate sensor connector and apply silicone dielectric grease to the seal to provide a long-term moisture barrier.
- Avoid Aggressive Interior Cleaning (During cleaning) — When shampooing carpets, avoid oversaturating the area around the center console. Excessive moisture forces past seals and into the sensor housing, leading to corrosion.
Frequently Asked Questions
What is a dynamics sensor and what does it do?
A dynamics sensor (or yaw rate sensor) is a small gyroscope that measures how fast your car is turning on a flat plane, as well as side-to-side and front-to-back acceleration. It is the primary sensor for the Electronic Stability Control (ESC) system, which helps prevent skids and loss of control.
What are the most common mistakes when diagnosing C2204?
The biggest mistake is replacing the expensive sensor without verifying power (over 10V) and ground (under 0.1V) at the connector. The second biggest mistake is failing to perform the mandatory zero-point calibration after installing a new sensor. Skipping calibration guarantees the code will return.
I replaced the dynamics sensor, but the C2204 code came back. What now?
If a new sensor doesn't fix the issue, you likely skipped the mandatory 'Zero Point Calibration' procedure using a bi-directional scan tool. Alternatively, there is an intermittent wiring issue you missed during inspection. In rare cases, the ABS control module itself is faulty.
Can I replace the dynamics sensor myself?
If you are comfortable removing interior trim like the center console or seats, you can physically replace the sensor. However, most vehicles require the new sensor to be calibrated with a professional-level scan tool. You will likely need a shop to perform the final software calibration.
How much does it cost to fix code C2204?
The total cost for a professional repair is typically between $500 and $1,100. The sensor itself costs $350 to $800, while labor for diagnosis, installation, and software calibration adds $150 to $300.
Will clearing the code make the warning lights go away?
You can clear the code, and the lights might stay off while the car is parked. However, because C2204 indicates a hard internal fault, the ABS module will re-run its self-test once you exceed 12 mph, immediately triggering the code and lights again.
Is a dynamics sensor the same as a wheel speed sensor?
No. A wheel speed sensor measures how fast a single wheel is spinning, while a dynamics sensor measures the rotational movement and g-forces of the entire vehicle. A bad wheel speed sensor sets a completely different code specific to that wheel's location.
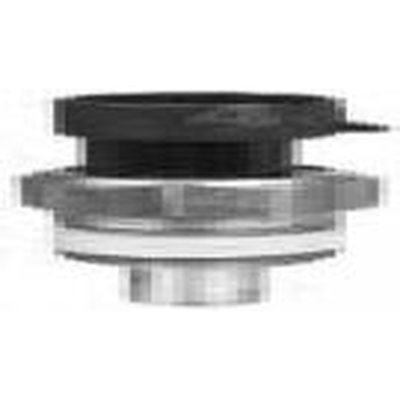
What does the dynamics sensor look like?
The dynamics sensor is a small, black or silver metal box, usually about 2-3 inches square. It features a multi-pin electrical connector and two or three bolt holes for mounting it perfectly flat to the vehicle's floor pan.
Can a bad alignment cause a C2204 code?
No, a bad wheel alignment will not directly cause a C2204 internal sensor fault. A severe alignment issue triggers the ESC light with a steering angle sensor code, but C2204 is strictly specific to the dynamics sensor's internal electronic integrity.
Key Takeaways
- Code C2204 indicates a hard internal failure of the dynamics (yaw rate) sensor, requiring a $500 to $1,100 replacement in 80% of cases.
- Driving with C2204 is possible but disables ABS and Electronic Stability Control, increasing the risk of wheel lock-up and skidding during panic stops.
- Always test the sensor connector for a minimum 10V power supply and under 0.1V ground before condemning the $400+ sensor.
- Installing a new dynamics sensor requires a mandatory 'Zero Point Calibration' using a bi-directional scan tool to permanently clear the C2204 code.
Shop the Parts Behind C2204
Below are the parts most often responsible for code C2204, ranked by how frequently each one is the actual culprit (per the diagnosis above). Tap any to see what we have for your vehicle.


The information in this article is provided for general reference and educational purposes only. Vehicle specifications, procedures, and part compatibility can vary by production date, trim level, and region. Always consult your vehicle's factory service manual and verify part numbers before purchasing or performing repairs. Safety-critical components such as airbags, seat belts, and braking systems should be installed by a qualified professional.
- 🧭 Diagnostic Flowchart
- 🛍️ Shop This Part
- What Does C2204 Mean?
- Can I Drive With C2204?
- Common Causes
- Symptoms
- Common Fixes & Costs
- Used vs. New Parts: Buying Guide
- What Happens If You Wait — Timeline
- Cost of Not Fixing It
- Diagnosis Steps
- When This Code Triggers (Freeze-Frame Conditions)
- Related Codes
- Climate & Environmental Factors
- How to Talk to a Mechanic About This Code
- Where to Take It: Dealer vs Independent vs Chain
- When to Walk Away From the Repair
- What Scan Tool You Need for This Code
- How to Clear the Code After You Fix It
- Will This Fail Emissions / State Inspection?
- Most Commonly Affected Vehicles
- Manufacturer-Specific Notes
- Real Owner Stories
- 2012 Jeep Wrangler JK at 110K miles
- 2008 Dodge Charger R/T at 135K miles
- 2015 Chrysler 300C at 80K miles
- How to Prevent This Code From Triggering
- Frequently Asked Questions
- What is a dynamics sensor and what does it do?
- What are the most common mistakes when diagnosing C2204?
- I replaced the dynamics sensor, but the C2204 code came back. What now?
- Can I replace the dynamics sensor myself?
- How much does it cost to fix code C2204?
- Will clearing the code make the warning lights go away?
- Is a dynamics sensor the same as a wheel speed sensor?
- What does the dynamics sensor look like?
- Can a bad alignment cause a C2204 code?
- Key Takeaways
- 🎟️ Get 5% Off