
OBD-II Code C2300: Actuator System Malfunction
What C2300 means, why it triggers, and how to fix it
- Test the 12-volt auxiliary battery first; a voltage drop below 9.0V is the leading cause of C2300 on Toyota and Lexus hybrids.
- Inspect the shift actuator's electrical connector for green or white corrosion before spending $1,100+ on a replacement actuator.
- Do not ignore a blinking 'P' light or intermittent shifting issues, as a total actuator failure will lock the transmission in Park and require a $150+ tow.
- Use a bi-directional scanner to perform an 'Active Test' on the actuator motor; standard $20 code readers cannot clear C2300 or pinpoint the exact failure.
What Does C2300 Mean?
Code C2300 indicates a malfunction in an actuator system. On Toyota and Lexus hybrids, it points to a failure in the electronic system that locks the transmission in Park. On Mitsubishi vehicles, it indicates a failed left electric parking brake actuator. On certain Jeeps, it flags a faulty Bluetooth antenna circuit.
Technical definition: C2300 is a manufacturer-specific code. For Toyota/Lexus, it means 'Actuator System Malfunction,' triggered when the transmission control ECU detects an open or short circuit in the shift control actuator assembly, often due to low 12V auxiliary battery voltage. For Mitsubishi, it means 'Left Actuator Malfunction,' indicating the left electric parking brake motor has failed or locked. For Jeep, it means 'Wireless Communication Antenna Circuit,' indicating a short or open in the Bluetooth antenna.
Can I Drive With C2300?
Yes, But With Caution. Yes, but driving is risky. The primary danger is becoming stranded when the system fails and locks the transmission in Park. If it fails while shifting into Park, the vehicle will roll away unless you firmly apply the manual parking brake. Diagnose this immediately to prevent being stranded or causing property damage.
Common Causes
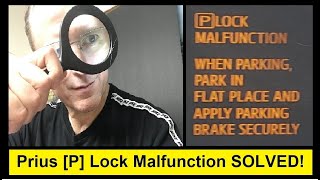
- Weak or Failing 12V Auxiliary Battery (Very Common) — In hybrid vehicles, the 12-volt battery powers the shifter and parking lock computers. If voltage drops below 9V during operation, the actuator system malfunctions and triggers this code, even if the actuator is perfectly fine. 🎬 Watch: How a bad 12V battery triggers P Lock errors.
- Corroded Connector Pins or Damaged Wiring (Very Common) — Water intrusion and age degrade the pins at the transmission actuator connector, turning them green or white and breaking the connection. Frayed or shorted wires between the ECU and actuator also interrupt the signal, frequently mimicking a failed actuator. 🎬 See how to diagnose and fix actuator wiring codes.
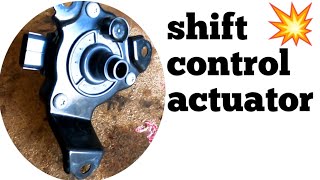
- Faulty Shift Control / Park Lock Actuator (Common) — The electric motor and sensor assembly that physically moves the transmission parking pawl fails. The internal three-phase motor burns out or the rotation angle sensor breaks, causing a direct mechanical malfunction.
- Faulty Transmission Control Module (ECU) (Less Common) — The computer controlling the actuator fails internally. This is rare and requires ruling out all battery, wiring, and actuator issues first.
- Blown Fuse or Faulty Relay (Uncommon) — The actuator circuit loses power if its dedicated fuse blows or the control relay (often labeled 'P CON MTR' or 'P-CON MAIN') fails.
- Faulty Bluetooth Antenna Circuit (Jeep only) (Uncommon) — On specific Jeep models, this code points to a short, open, or high resistance in the wireless communication antenna used for Bluetooth.
- Internal Transaxle Mechanical Failure (Rare) — A mechanical bind inside the transaxle assembly prevents the parking pawl from engaging smoothly. The control module interprets this physical resistance as an actuator system fault.
Symptoms
- Cannot Shift Into or Out of Park — The vehicle gets stuck in Park and refuses to shift into Drive or Reverse, or it fails to lock into Park when pressing the 'P' button.
- Blinking 'P' Light or Warning Message — The park button light blinks, and the dashboard displays messages like 'PARKING BRAKE SERVICE REQUIRED' or 'Shift to P when leaving vehicle'.
- Vehicle Will Not Start or Enter 'Ready' Mode — The vehicle prevents itself from starting or entering the 'Ready' state because it cannot confirm the transmission is safely locked in Park.
- Audible Clicking or Grinding — A repeated clicking, whirring, or grinding sound emits from the transaxle as the actuator motor attempts to move the parking pawl but fails.
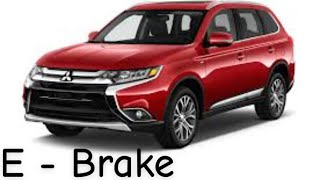
- Flashing Brake Warning Light (Mitsubishi) — The main brake warning light flashes, indicating a fault with the electric parking brake system.
- Bluetooth Not Working (Jeep only) — Phone pairing fails, Bluetooth connectivity drops, and a 'Phone' warning appears on the instrument cluster.
Diagnostic Flowchart
Tap your situation to follow the diagnostic path that matches what you're seeing on this code.
Common Fixes & Costs
- Replace 12V Auxiliary Battery — Parts: $200-$250, Labor: $75-$150, ~0.8 hr book time (DIY)
- Repair or Replace Wiring/Connector — Parts: $20-$50, Labor: $300-$450, ~3 hr book time (Intermediate)
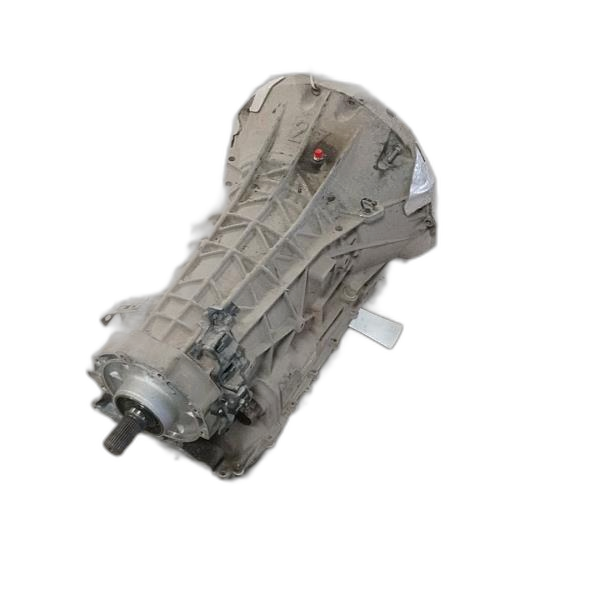
- Replace Shift Control Actuator (Toyota/Lexus) — Parts: $500-$700, Labor: $600-$900, ~5.5 hr book time (Professional)
- Replace Electric Parking Brake Actuator (Mitsubishi) — Parts: $200-$450, Labor: $200-$400, ~2 hr book time (Intermediate)
- Replace Transmission Control Module (ECU) — Parts: $400-$1000, Labor: $150-$300, ~2.5 hr book time (Professional)
- Replace Bluetooth Antenna (Jeep) — Parts: $50-$150, Labor: $100-$200, ~1.2 hr book time (DIY)
Used vs. New Parts: Buying Guide
When a used part is worth it: For the Shift Control Actuator, a used OEM part from a low-mileage vehicle is a reliable and cost-effective alternative to a new part on an older, high-mileage vehicle.
Donor-vehicle mileage cap: roughly under 80000 miles for the part to have meaningful remaining life.
Donor quality checklist:
- Verify the part number on the used unit EXACTLY matches your original part number.
- Purchase from a reputable seller offering a short-term warranty (30-90 days).
- Inspect the connector pins on the used part for any signs of corrosion or damage before purchasing.
Decision logic:
- If Vehicle is newer or has low mileage (<80K miles) → Buy a new OEM part to maximize reliability and get a longer warranty.
- If Budget is the primary concern and the vehicle is older (>150K miles) → A warrantied used part is a reasonable choice, but carries a risk of earlier failure.
- If The part is an aftermarket (e.g., Dorman) new unit → Consider this option if the price is significantly lower than OEM new and it comes with a good warranty.
Warranty tradeoff: Used parts typically offer a 30-90 day warranty covering only the part. New aftermarket parts offer a 1-year to limited lifetime warranty. New OEM parts carry a 12-month/12,000-mile warranty.
Worst-case if a used part fails: $600-$900 in duplicate labor if a used actuator fails after the warranty period.
What Happens If You Wait — Timeline
- 0-1 month: Intermittent failure to shift out of Park. Restarting the vehicle temporarily resolves it. (MPG impact: 0%% · Added cost: $0)
- 1-3 months: Frequent failure. High risk of being stranded in unsafe locations. (MPG impact: 0%% · Added cost: $150 (Tow truck).)
- 3+ months: Hard failure. The actuator motor burns out or wiring fails permanently. The vehicle is undrivable. (MPG impact: N/A% · Added cost: $1100-$1600 (Unavoidable repair).)
Cost of Not Fixing It
- Immediate: Intermittent failure to shift into or out of Park. You might get stuck at home, work, or in a parking lot at any time. (Added cost: $150 (Tow truck).)
- 1-3 months: Increased frequency of failure. Risk of roll-away if vehicle fails to lock in Park and parking brake is not applied. (Added cost: Potential for significant property damage or injury costs from a roll-away incident.)
- 3+ months: Total failure of the actuator system. The vehicle is permanently stuck in Park and undrivable. (Added cost: $1100-$1600 (Unavoidable repair).)
Diagnosis Steps
- Check the 12V Auxiliary Battery
Test the 12V auxiliary battery with a multimeter (must be >12.4V at rest). Use a scanner to view C2300 freeze frame data; if 'IG (+B) voltage' is under 9V, low voltage is the trigger.
Tools: Multimeter, OBD-II Scanner (Beginner) - Scan for All Trouble Codes
Read codes from all modules. If C2300 appears alongside C2304, C2305, or C2306, the fault is isolated to the actuator's internal motor windings or its direct wiring.
Tools: Advanced OBD-II Scanner (Beginner) - Inspect Wiring and Connectors
Unplug the wiring harness at the shift control actuator or electric parking brake. Inspect the connector for green/white corrosion, moisture, or bent pins. This is the most common physical failure point.
Tools: Flashlight (Intermediate) - Inspect Fuses and Relays
Locate the 'P CON MTR' or 'P-CON MAIN' fuse and relay. Visually inspect the fuse for a broken filament and test the relay with a multimeter for proper resistance.
Tools: Fuse puller, Multimeter (Beginner) - Perform Active Test with Advanced Scanner
Use a bi-directional scanner to command the actuator to operate. If the motor makes no noise, suspect a power delivery issue. If it makes noise but fails, suspect an internal actuator or transaxle issue.
Tools: Advanced Bi-Directional OBD-II Scanner (Advanced) - Test Actuator Circuit (Voltage)
Check for proper voltage and ground at the actuator's connector using a multimeter. For example, a Mitsubishi EPB requires 10-12V at the connector when the switch is pulled.
Tools: Multimeter, vehicle-specific wiring diagram (Advanced) - Test Actuator Rotation Angle Sensor
Disconnect the transmission control ECU with power OFF. Measure resistance between the sensor signal lines and voltage supply terminals (should be >10 kΩ). Out-of-spec readings indicate a failed internal sensor.
Tools: Multimeter, vehicle-specific service manual (Advanced) - Test the Control Module (ECU)
Back-probe the ECU connector to verify it sends the correct voltage signals to command the actuator. Perform this expert-level step only after verifying the battery, wiring, and actuator.
Tools: Multimeter, back-probe pins, service manual (Expert)
When This Code Triggers (Freeze-Frame Conditions)
- Vehicle State: Shifting Into or Out of Park (The fault is logged when the transmission control ECU commands the actuator and detects an abnormality.)
- Vehicle Speed: 0 mph (This fault occurs when the vehicle is stationary and the driver is attempting to engage or disengage the parking lock.)
- IG (+B) Voltage: < 9.0V (The ECU logs the fault when supply voltage drops too low during actuator operation.)
- Power Switch Status: ON (IG) (The code is detected when the power switch is in the 'ON' (Ignition) position.)
Related Codes
- C2304, C2305, C2306 — Specify an open or short circuit in the U, V, or W phase of the actuator's three-phase motor. Their presence isolates the fault directly to the actuator motor or its wiring.
- P3102 — Indicates a Transmission Control ECU Malfunction. Often triggered by wiring or actuator faults causing the ECU to report an error.
- P3000 — Battery Control System Malfunction. Usually points to the high-voltage battery, but severe 12V battery issues trigger it via communication errors.
Climate & Environmental Factors
- High Humidity / Heavy Rain: Drives water intrusion into the shift control actuator's electrical connector, causing rapid pin corrosion.
- Road Salt (Winter Climates): Accelerates corrosion of wiring connectors and the actuator housing mounted low on the transmission.
- Extreme Cold Weather: Drops the 12V auxiliary battery's output voltage below the 9V threshold, triggering the C2300 fault.
How to Talk to a Mechanic About This Code
Say this: "I have a C2300 code. Please test the 12-volt battery under load and physically inspect the shift actuator connector for corrosion before quoting a new actuator."
This directs the mechanic to check the two most common and cheapest-to-fix causes first, preventing them from immediately quoting an expensive actuator replacement without proper diagnosis.
Avoid saying:
- 'My car won't shift out of Park, just fix it.'
- 'My 'P' light is blinking, can you look at it?'
- 'I think I need a new transmission actuator.'
Questions to ask before authorizing the repair:
- What was the resting voltage and load test result for the 12V battery?
- Did you physically unplug the actuator connector and check the pins for corrosion or damage?
- If you are recommending an actuator replacement, did you perform an active test with a scan tool?
- Can you provide a printout of the freeze-frame data that was stored with the code?
- What is the warranty on the parts and labor for this repair?
Where to Take It: Dealer vs Independent vs Chain
- Dealer:
A reliable but expensive option. Good for a definitive diagnosis if you're willing to pay a premium.
Best for: Vehicles still under warranty., Complex cases where an independent shop has already failed to find the issue., Guaranteed use of OEM parts and manufacturer-specific tools like Toyota Techstream.
Downsides: Highest labor rates, often 1.5x to 2x more than independent shops., Quicker to replace an entire assembly rather than diagnose a smaller wiring fault. (Typical cost: +50% vs. baseline) - Independent Shop:
Best fit for most owners. An independent shop specializing in Toyota/Lexus hybrids offers expert service at a lower cost than the dealer.
Best for: Out-of-warranty vehicles, especially Toyota/Lexus hybrids., Shops that specialize in hybrids or your specific vehicle make., Getting better value with lower labor rates.
Downsides: Quality varies greatly; you must vet the shop's reputation., May not have the very latest dealer-level diagnostic software. (Typical cost: +0% vs. baseline) - Chain Shop:
AVOID. The diagnostic process requires specific expertise generally not found at a chain repair shop.
Best for: Simple, unrelated jobs like oil changes or new tires.
Downsides: Technicians lack specialized knowledge for hybrid-specific electronic faults., High pressure to upsell leads to misdiagnosis and unnecessary replacement of expensive parts., Unlikely to have the advanced bi-directional scanners needed for proper diagnosis. (Typical cost: -10% vs. baseline)
When to Walk Away From the Repair
If the estimated repair cost exceeds 40-50% of the car's private-party value, seriously consider selling or trading it in rather than repairing it.
- Car worth $6000, fix is $1600: Fix it. The repair cost is about 27% of the car's value, which is well below the walk-away threshold.
- Car worth $3000, fix is $1600: Walk away. The repair cost is over 53% of the car's value. It's not economically sensible to invest this much into an older vehicle.
- Car worth $12000, fix is $1600: Fix it. This is a relatively minor repair compared to the vehicle's total value.
What Scan Tool You Need for This Code
Minimum: A scanner that reads manufacturer-specific chassis codes and views freeze-frame data. For a full diagnosis, bi-directional control is needed.
A basic $20 scanner only reads Check Engine codes and misses 'C' (Chassis) codes entirely. To diagnose C2300, you must see freeze-frame data (battery voltage) and command the actuator with an 'Active Test', requiring a bi-directional tool.
Budget: BlueDriver Pro (~$99) — Reads enhanced codes (ABS, Transmission) for a clear definition of C2300. Views freeze-frame data to check battery voltage when the fault occurred.
Mid-range: XTOOL D7 or FOXWELL NT710 (~$200-350) — Provides full bi-directional control. Performs an 'Active Test' to command the park-lock actuator to move, confirming if the motor and wiring receive the signal from the ECU.
Professional: Autel MaxiCOM MK808BT or LAUNCH X431 Series (~$500-1200) — Offers full, dealer-level diagnostics. Features extensive bi-directional functions, ECU coding, and robust live data graphing for in-depth analysis.
Rent vs buy: Rent for free from AutoZone to read the basic code, but their loaner tools are not bi-directional. To diagnose and fix the issue yourself, buy a mid-range scanner with bi-directional capabilities.
How to Clear the Code After You Fix It
- Perform the physical repair (e.g., replace battery or actuator).
- Turn the vehicle completely off.
- Disconnect the 'P-CON MAIN' fuse or the negative 12V battery terminal for at least 60 seconds.
- Reconnect the fuse or battery terminal.
- Start the vehicle and confirm the warning message is gone and the code does not immediately return.
Drive cycle (~40 minutes): A general Toyota drive cycle to set readiness monitors involves several phases: 1) Cold start and idle for 5-10 minutes. 2) Drive at a steady 55-60 mph for 10-15 minutes. 3) Coast down (foot off pedals) for at least 15 seconds. 4) Drive in stop-and-go city traffic for 10-15 minutes. 5) Allow the vehicle to cool down completely (8+ hours) for the EVAP monitor to run.
Readiness monitors affected: This is a Chassis code and does not directly affect emissions readiness monitors like Catalyst or O2 Sensor., However, disconnecting the battery to clear the code WILL reset all readiness monitors to 'Not Ready' status.
Before emissions retest: drive at least 100 miles to fully set monitors.
Watch out for:
- Using a standard OBD-II scanner fails to clear the C2300 code on Toyota/Lexus vehicles; the battery or fuse disconnection method is required.
- Not performing a complete drive cycle after disconnecting the battery results in a failed emissions test due to 'Not Ready' monitors.
- If the underlying fault is not fixed, the code returns immediately after being cleared.
Will This Fail Emissions / State Inspection?
Yes — this code typically fails an OBD-II emissions inspection.
- California: A vehicle with an active C2300 code fails the OBD-II inspection. If the battery was disconnected to clear the code, all emissions readiness monitors reset, and the vehicle fails until a complete drive cycle is performed.
- New York: The NYS vehicle inspection includes an OBD-II scan. You cannot receive an inspection sticker with an active C2300 code.
- Texas: In counties requiring an emissions test, an active C2300 code causes the vehicle to fail the OBD-II scan.
Most Commonly Affected Vehicles
- Toyota Prius (2004-2015) — Extremely common on the 2nd and 3rd generation Prius due to the design of the electronic park-lock actuator system.
- Lexus CT200h (2011-2017) — Shares the same powertrain and electronic shift-by-wire system as the 3rd generation Toyota Prius.
- Toyota Prius V (2012-2017) — Uses a comparable shift-by-wire and park actuator system prone to the exact same failures.
- Mitsubishi Outlander (2013-2020) — C2300 specifically points to a failure of the left-side electric parking brake actuator.
- Toyota Highlander Hybrid (2006-2013) — Older models with electronic shifters experience this code due to vulnerability to low 12V battery voltage.
- Jeep Cherokee / Grand Cherokee (2014-2021) — C2300 indicates a 'Wireless Communication Antenna Circuit (Bluetooth)' fault, unrelated to the transmission.
- Ford Focus (2004-2011) — C2300 indicates an ABS/Traction control valve power supply circuit failure.
- Chevrolet Optra (2004-2007) — Refers to a generic actuator system malfunction.
- Hyundai Alcazar (2021-2024) — Points to a general actuator system fault.
Manufacturer-Specific Notes
- Toyota / Lexus: C2300 is persistent and cannot be cleared with standard scanners. Disconnect the 'P-CON MAIN' fuse or negative battery terminal for 60 seconds to clear the memory.
- Mitsubishi: C2300 exclusively flags a malfunction in the left-side electric parking brake actuator.
- Jeep: C2300 flags a fault in the Bluetooth antenna circuit, completely unrelated to the transmission or brakes.
Real Owner Stories
2012 Toyota Prius II with intermittent C2300
The owner replaced the 12V battery for an intermittent C2300, but the code returned the next day near the end of a road trip.
What they tried:
- Replaced the 12V auxiliary battery.
- Charged the new battery and drove the car successfully for a day.
Outcome: The actual culprit was corroded, broken pins in the transmission actuator wiring harness connector. Replacing the connector pigtail resolved it.
Lesson: Always inspect the physical wiring connector for corrosion before assuming a new battery or actuator will fix the issue. A bad connection perfectly mimics a dead battery.
2005 Toyota Prius with persistent P-Lock warnings
The owner ignored an intermittent 'Parking is abnormal' message for months until the car refused to shift into Drive. Codes P3102 and C2300 confirmed a park lock system failure.
What they tried:
- Restarted the car repeatedly to temporarily clear the warning and drive home.
Outcome: The combination of P3102 and C2300 indicated a hard fault in the park lock system reported by both the transmission and hybrid control ECUs.
Lesson: Intermittent electrical faults that worsen over time indicate a failing wire or corroded connector. Do not ignore recurring warnings, as they will eventually strand you.
2017 Mitsubishi Outlander with EPB error after brake job
After a rear brake job, the owner received a persistent 'Parking brake service required' message. The parking brake was stuck in maintenance mode.
What they tried:
- Manually retracted the parking brake motor by removing it and turning the internal hex socket.
- Tested the motor with direct voltage.
Outcome: Manually retracting the motor de-synchronized the EPB module. The system required a scan tool recalibration to clear the C2300 code.
Lesson: Always use a scan tool to put electronic parking brakes into 'service mode' before replacing pads to prevent module de-synchronization.
How to Prevent This Code From Triggering
- Regularly test the 12V auxiliary battery (Every 6 months) — A weak 12V battery is the leading cause of C2300 in hybrids. Replacing it every 3-5 years prevents the voltage drops that trigger the fault.
- Drive the vehicle regularly (At least 30 minutes once per week) — Short trips drain the 12V battery in a hybrid. Regular driving allows the hybrid system to fully recharge the 12V battery.
- Apply dielectric grease to the actuator connector (Whenever the connector is accessed) — Cleaning the pins and applying dielectric grease seals out water and prevents the corrosion that causes connection failures.
- Engage the parking brake before shifting to Park (Every time you park) — Setting the parking brake first allows the vehicle's weight to rest on the brakes, reducing mechanical stress on the transmission parking pawl.
Frequently Asked Questions
Why won't the C2300 code clear with my scanner?
On Toyota and Lexus models, C2300 is a persistent code that standard OBD-II scanners cannot clear. Turn the vehicle off and disconnect the 'P-CON MAIN' fuse or the negative 12V battery terminal for 60 seconds. This manually resets the transmission control module's memory.
I replaced my 12V battery but the C2300 code came back. What now?
The next most likely cause is a damaged wiring harness or connector at the shift actuator. Unplug the connector and inspect the pins for green or white corrosion. This physical connection failure perfectly mimics a dead battery.
What is the most common mistake when diagnosing C2300?
The biggest mistake is replacing the expensive shift actuator without testing the 12V battery under load or inspecting the wiring connector. Mechanics also frequently ignore accompanying codes like C2304, which pinpoint the exact electrical phase that failed.
Is it dangerous to drive with code C2300?
Yes, because the transmission can permanently lock in Park at any time, leaving you stranded. If the actuator fails while shifting into Park, the vehicle will roll away unless the manual parking brake is applied.
What's the difference between the hybrid battery and the 12V battery for this problem?
The high-voltage hybrid battery powers the electric drive motors, while the small 12V battery powers the computers and electronic shifter. A weak 12V battery causes the C2300 code by starving the actuator of voltage. The high-voltage battery is rarely involved.
Can I replace the shift actuator myself?
No, this is an advanced repair requiring specialized tools and significant disassembly. Accessing the top mounting bolt often requires going through the cabin firewall. Incorrectly seating the actuator gear requires redoing the entire job.
Will a C2300 code drain my battery?
A weak 12V battery usually causes the C2300 code, not the other way around. However, a severe short circuit in the actuator wiring can create a parasitic draw that drains a healthy battery overnight.
Can I just clear the C2300 code and keep driving?
The code will immediately return if the underlying electrical or mechanical fault remains. Ignoring it guarantees the vehicle will eventually lock in Park and require a tow.
Key Takeaways
- Test the 12-volt auxiliary battery first; a voltage drop below 9.0V is the leading cause of C2300 on Toyota and Lexus hybrids.
- Inspect the shift actuator's electrical connector for green or white corrosion before spending $1,100+ on a replacement actuator.
- Do not ignore a blinking 'P' light or intermittent shifting issues, as a total actuator failure will lock the transmission in Park and require a $150+ tow.
- Use a bi-directional scanner to perform an 'Active Test' on the actuator motor; standard $20 code readers cannot clear C2300 or pinpoint the exact failure.
Helpful Videos
Shop the Parts Behind C2300
Below are the parts most often responsible for code C2300, ranked by how frequently each one is the actual culprit (per the diagnosis above). Tap any to see what we have for your vehicle.


The information in this article is provided for general reference and educational purposes only. Vehicle specifications, procedures, and part compatibility can vary by production date, trim level, and region. Always consult your vehicle's factory service manual and verify part numbers before purchasing or performing repairs. Safety-critical components such as airbags, seat belts, and braking systems should be installed by a qualified professional.
- 🧭 Diagnostic Flowchart
- 🎬 Helpful Videos
- 🛍️ Shop This Part
- What Does C2300 Mean?
- Can I Drive With C2300?
- Common Causes
- Symptoms
- Common Fixes & Costs
- Used vs. New Parts: Buying Guide
- What Happens If You Wait — Timeline
- Cost of Not Fixing It
- Diagnosis Steps
- When This Code Triggers (Freeze-Frame Conditions)
- Related Codes
- Climate & Environmental Factors
- How to Talk to a Mechanic About This Code
- Where to Take It: Dealer vs Independent vs Chain
- When to Walk Away From the Repair
- What Scan Tool You Need for This Code
- How to Clear the Code After You Fix It
- Will This Fail Emissions / State Inspection?
- Most Commonly Affected Vehicles
- Manufacturer-Specific Notes
- Real Owner Stories
- 2012 Toyota Prius II with intermittent C2300
- 2005 Toyota Prius with persistent P-Lock warnings
- 2017 Mitsubishi Outlander with EPB error after brake job
- How to Prevent This Code From Triggering
- Frequently Asked Questions
- Why won't the C2300 code clear with my scanner?
- I replaced my 12V battery but the C2300 code came back. What now?
- What is the most common mistake when diagnosing C2300?
- Is it dangerous to drive with code C2300?
- What's the difference between the hybrid battery and the 12V battery for this problem?
- Can I replace the shift actuator myself?
- Will a C2300 code drain my battery?
- Can I just clear the C2300 code and keep driving?
- Key Takeaways
- 🎟️ Get 5% Off