
OBD-II Code C2315: In-Depth Guide to Communication Failure in Control Modules
What C2315 means, why it triggers, and how to fix it like a pro
- Code C2315 indicates a CAN bus communication failure between control modules, most frequently triggered by a weak 12-volt battery dropping below 12.4 volts.
- On 2010-2015 Toyota Prius models, this code almost always points to a faulty park position switch (OEM part 84540-47010) or its wiring.
- For Kia and Hyundai vehicles, a C2315 code accompanied by a clicking steering column requires replacing a $15 flexible steering coupler (P/N 56315-2K000-FFF).
- Never replace a Transmission Control Module (TCM) for this code until you verify the CAN bus network resistance reads exactly 60 ohms at the OBD-II port.
What Does C2315 Mean?
Code C2315 signifies a communication failure between two or more of your vehicle's essential computers. It typically indicates the Transmission Control Module (TCM) lost its connection with the Power Management Control ECU or Hybrid Vehicle Control ECU. Your car's computers constantly 'talk' over the CAN (Controller Area Network) bus; when this link breaks for even a second, this code stores and triggers warning lights.
Technical definition: C2315 is a manufacturer-specific code. For Toyota hybrids, it defines as 'Lost Communication With Vehicle Mode Status Check Sum Error' or 'HV System Malfunction.' This means the Transmission Control ECU lost communication with the Power Management Control ECU regarding the P (Park) position switch status. The fault logs when the Transmission Control ECU receives a malfunction signal for more than one second.
Can I Drive With C2315?
Yes, But With Caution. You can drive short distances, but we do not recommend it. The primary risk is the fault escalating, leaving you stranded if the vehicle refuses to start or shift into Park. On some Kia and Hyundai models, this fault causes a sudden loss of power steering, creating a severe safety hazard.
Common Causes
- Faulty or failing 12-volt battery (Very Common) — A weak, old, or improperly connected 12-volt battery is the leading cause. Low voltage creates electrical instability, causing unpredictable communication errors between modules. Always check the battery's health and connections first.
- Faulty Park Position Switch (Neutral Safety Switch) (Common) — This switch informs the vehicle's computers when the transmission is in Park. A faulty switch sends an incorrect or missing signal, triggering a communication error code between the modules responsible for shifting.
- Damaged CAN bus wiring or poor grounds (Common) — The twisted-pair CAN bus wires connecting the modules fray, corrode, or suffer rodent damage. Additionally, loose or rusted chassis ground straps cause severe voltage drops. Both issues create resistance that breaks network communication.
- Improperly installed aftermarket accessories (Common) — Aftermarket remote starters, alarms, or audio systems incorrectly tapped into the CAN bus wiring disrupt network communication by introducing electrical noise, causing a flood of error codes including C2315.
- Failing Control Module (TCM or Hybrid ECU) (Less Common) — If the Transmission Control Module or Hybrid Vehicle Control ECU fails internally, it stops sending or receiving messages correctly. Water intrusion from clogged sunroof drains or bad seals accelerates this failure.
- Software Glitch / Incomplete Updates (Rare) — Control module software contains bugs. Manufacturers release Technical Service Bulletins (TSBs) with software updates to fix known communication issues. A newly replaced module lacking proper programming also causes this code.
Symptoms
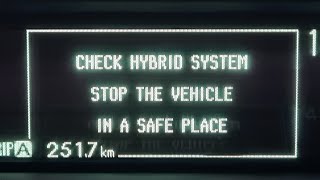
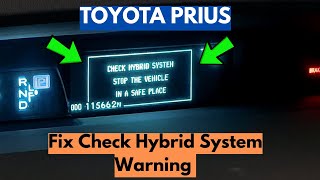
- Check Hybrid System warning light — This is the most common symptom on hybrid vehicles like the Toyota Prius, even though the issue rarely involves the main high-voltage hybrid battery.
- Inability to shift into Park or out of Park — The gear selector becomes unresponsive or refuses to select 'P'. You will often see a message like 'Park in a Flat Place and Apply Parking Brake Securely'.
- Multiple warning lights on the dashboard — The ABS, VSC, BRAKE, and Check Engine lights illuminate simultaneously, creating a 'Christmas tree' effect on the instrument cluster.
- Car won't start or is hard to start — If the vehicle's computers cannot confirm the transmission is safely in Park, they disable the ignition or hybrid system as a safety precaution.
- Loss of power steering assist — On certain Hyundai and Kia models, a CAN bus communication fault forces the Motor Driven Power Steering (MDPS) to shut down entirely.
- Hard brake pedal — On Toyota hybrids, this code appears alongside brake-related codes like C1391, indicating a systemic electrical issue affecting both the brake actuator and transmission control systems.
Diagnostic Flowchart
Tap your situation to follow the diagnostic path that matches what you're seeing on this code.
Common Fixes & Costs
- Replace 12-Volt Battery — Parts: $150-$350, Labor: $50-$100, ~0.5 hr book time (DIY)
- Replace Park Position / Neutral Safety Switch — Parts: $90-$280, Labor: $150-$250, ~1.5 hr book time (Intermediate)
- Replace Flexible Steering Coupler — Parts: $10-$30, Labor: $200-$500, ~2.5 hr book time (Intermediate)
- Repair Damaged Wiring Harness — Parts: $20-$100, Labor: $250-$1200+, ~8 hr book time (Professional)
- Remove or Repair Aftermarket Accessory — Parts: $0-$20, Labor: $150-$400, ~2 hr book time (Professional)
- Module Reprogramming or Software Update — Parts: $0, Labor: $100-$300, ~1.5 hr book time (Professional)
- Replace Control Module (TCM or ECU) — Parts: $300-$1500, Labor: $200-$500, ~3 hr book time (Professional)
DIY vs Professional
- Replace 12-Volt Battery 🟢 Beginner
Tools: Socket set/wrench, battery terminal cleaner, safety glasses. - Replace Park Position / Neutral Safety Switch 🟢 Beginner
Tools: Socket set, torque wrench, vehicle-specific repair manual. - Replace Flexible Steering Coupler 🟢 Beginner
Tools: Socket set, screwdrivers, trim removal tools, flashlight. - Repair Damaged Wiring Harness 🟢 Beginner
Tools: Soldering iron, heat shrink tubing, wire strippers, multimeter, wiring diagrams. - Replace Control Module (TCM/ECU) 🟢 Beginner
Tools: Professional scan tool for programming.
Used vs. New Parts: Buying Guide
When a used part is worth it: A used OEM switch from a low-mileage vehicle is a cost-effective alternative to a new aftermarket part, offering better fitment.
Donor-vehicle mileage cap: roughly under 80000 miles for the part to have meaningful remaining life.
Donor quality checklist:
- Verify the part number matches exactly.
- Inspect the connector pins for corrosion, bending, or water intrusion.
- Choose sellers who guarantee the part is tested and functional.
Decision logic:
- If The vehicle is newer and the budget allows → Buy a new OEM part for the highest reliability.
- If The budget is tight and the vehicle is older → A used OEM part is a better choice than a cheap aftermarket part due to superior quality control.
- If The part is for a common failure-prone model like a 3rd Gen Prius → Favor a new part, as a used part is likely near the end of its service life.
Warranty tradeoff: Used parts carry a 30-90 day warranty. New aftermarket parts offer 1-year to lifetime warranties. New OEM parts carry a 1-year warranty.
Worst-case if a used part fails: $200-$400 if a used switch fails shortly after installation, requiring repeat labor costs.
What Happens If You Wait — Timeline
- 0-2 weeks: Code appears, warning lights illuminate. The primary symptom is the inability to shift into Park or the car refusing to start. (MPG impact: 0%% · Added cost: $100-$300 (Potential cost for a tow if stranded).)
- 2 weeks - 3 months: If caused by a parasitic draw, the 12V battery repeatedly drains, causing sulfation and requiring premature replacement. (MPG impact: 0%% · Added cost: $150-$350 (Cost of premature battery replacement).)
- 1-6 months: On affected Kia/Hyundai models, continued driving with a worn steering coupler leads to a sudden and complete loss of power steering assist. (MPG impact: 0%% · Added cost: $1,000+ (Potential insurance deductible from an accident caused by steering failure).)
- 6+ months: Ignoring a wiring short or bad ground creates an unstable electrical environment. Voltage spikes damage expensive control modules like the main ECU or ABS. (MPG impact: 0-5%% · Added cost: $800-$2,500+ (Cost to diagnose and replace damaged control modules).)
Cost of Not Fixing It
- Immediate: You risk being stranded. The vehicle refuses to start or becomes stuck in Park at any time, requiring a tow. (Added cost: $100-$300 (for towing))
- 0-3 months: On affected Kia/Hyundai models, continued driving leads to a sudden loss of power steering, creating a severe safety hazard. (Added cost: $1000+ (accident deductible/repairs))
- 1-6 months: A persistent parasitic draw caused by a module that won't 'sleep' prematurely destroys the 12V battery. (Added cost: $150-$350)
- 6+ months: Ignoring underlying electrical issues like bad grounds causes voltage spikes that damage expensive control modules like the ECU or ABS controller. (Added cost: $800-$2000+)
Diagnosis Steps
- Check the 12-Volt Battery and Connections
Thoroughly inspect the 12-volt battery. Use a multimeter to ensure it holds at least 12.4 volts with the car off and over 13.2 volts when running. Clean and tighten the terminals. A weak battery is the absolute most common cause of communication codes.
Tools: Multimeter, battery terminal cleaner (Beginner) - Scan for All Codes in All Modules
Use a professional-grade OBD-II scanner to read manufacturer-specific codes from all vehicle modules (ABS, TCM, BCM). C2315 often appears with codes like P0851, P0852, or U-codes that pinpoint the exact area of failure.
Tools: Professional OBD-II Scanner (Beginner) - Test the Park Position Switch
Locate the switch on the transmission assembly. Back-probe the signal wire at the switch connector to verify it outputs the correct voltage or ground signal when in Park. Compare your readings against a vehicle-specific repair manual.
Tools: Multimeter, back-probe kit, repair manual (Advanced) - Inspect Wiring Harnesses and Grounds
Visually inspect the wiring harnesses connected to the transmission and the hybrid/power management ECU. Look for corrosion, chafing, or rodent damage. Locate the main chassis and module ground points, unbolt them, and wire-brush them to bare metal.
Tools: Flashlight, socket set, wire brush (Intermediate) - Check CAN Bus Resistance
Disconnect the 12V battery. On the OBD-II port, measure the resistance between Pin 6 (CAN High) and Pin 14 (CAN Low). A healthy network reads exactly 60 Ohms. A reading of 120 Ohms indicates a broken wire or an offline module. A reading near 0 Ohms indicates a short.
Tools: Multimeter (Advanced) - Inspect for Aftermarket Accessories
Trace the wiring of any aftermarket remote starters, alarms, or stereo systems. Poorly installed accessories spliced into CAN bus wires under the dash frequently cause network interference.
Tools: Flashlight, trim removal tools (Intermediate) - Perform a Targeted Parasitic Draw Test
If the battery dies overnight, a module is failing to 'sleep' and staying active on the CAN bus. Set a multimeter to measure amps in series with the battery. After 60 minutes, the draw must be below 85 milliamps. If higher, pull fuses one by one to identify the culprit.
Tools: Multimeter with 10A capability, fuse puller (Advanced) - Analyze CAN Bus Waveform with an Oscilloscope
Connect an oscilloscope to CAN High (Pin 6) and CAN Low (Pin 14). A healthy waveform shows two clean, mirror-image square waves. Distorted, noisy, or missing signals on either line point directly to a wiring fault, interference, or a bad module.
Tools: Automotive Oscilloscope (Professional)
When This Code Triggers (Freeze-Frame Conditions)
- System Voltage: 11.5V - 12.5V (During engine crank or immediately after, when a weak battery's voltage sags.)
- Vehicle Speed: 0 mph (When attempting to shift into or out of Park, or during vehicle startup.)
- Time Since Engine Start: 0-5 seconds (The fault logs immediately as control modules perform their initial 'handshake' on the CAN bus.)
- Ambient Temperature: Below 32°F (0°C) (Cold weather exacerbates weak batteries and increases resistance in marginal wiring connections.)
Related Codes
- P0851 / P0852 — These codes indicate a direct electrical fault in the Park/Neutral switch circuit. C2315 is the resulting communication error. If you have both, fix the P-code first, as it is the root cause.
- U0100 — Indicates a broad failure of the main engine computer to communicate. If seen with C2315, it points to a major network-wide failure. If you only see C2315, the problem is isolated to specific modules.
- C1391 — A serious brake system fault on Toyota hybrids. When seen with C2315, it strongly suggests a systemic electrical problem, like a failing 12V battery or bad chassis ground, is affecting multiple modules.
- P3102 — Indicates a 'P Position Signal Error' on older Toyota Hybrids. C2315 is the secondary code logged by the transmission ECU after the hybrid control ECU informs it of the P3102 fault.
Climate & Environmental Factors
- Cold Weather: Low temperatures reduce 12V battery efficiency and increase electrical resistance. This causes voltage to drop below the stable threshold required for module communication, triggering C2315 during startup.
- High Humidity and Moisture: Moisture penetrates weathered connector seals or damaged wire insulation, causing short circuits or pin corrosion that degrades CAN bus signal quality.
- Road Salt (Winter Climates): Corrosive salt brine attacks wiring harnesses, ground connections, and module casings. The resulting corrosion creates high resistance or open circuits, a primary cause of network codes in northern regions.
How to Talk to a Mechanic About This Code
Say this: "I have a C2315 communication code with multiple warning lights. Please start with a load test of the 12V battery and a charging system check. Also, check for any TSBs related to communication or network issues for my specific VIN."
This signals you have done your research and guides the mechanic toward a logical diagnosis, starting with the most common and cheapest fixes. It prevents them from immediately jumping to a costly module replacement.
Avoid saying:
- 'Just fix whatever's wrong'
- 'My dashboard is lit up like a Christmas tree, can you look at it?'
- 'I think the transmission computer is bad'
Questions to ask before authorizing the repair:
- What were the results of the battery and charging system tests?
- Did you check the CAN bus network resistance? What was the reading in Ohms?
- Before we replace the module, can you confirm that its power, ground, and network wiring have been tested and are good?
- Is this repair related to a known TSB, and what is your warranty on this specific repair?
Where to Take It: Dealer vs Independent vs Chain
- Dealer:
Best for: Vehicles still under warranty, Repairs requiring manufacturer-specific software updates or module programming, Known issues covered by a Technical Service Bulletin (TSB)
Downsides: Highest labor rates, Defaults to replacing entire assemblies rather than repairing a wire or connector (Typical cost: +50% vs. baseline) - Independent Shop:
Best fit. A skilled independent diagnostic specialist offers the best balance of expertise and value for this type of fault.
Best for: Out-of-warranty vehicles where cost is a factor, Shops with a strong reputation for electrical and diagnostic work (ASE L1 certification), Common, well-documented failures like the Kia/Hyundai steering coupler
Downsides: Diagnostic capability varies widely; vetting is crucial, Lacks access to the very latest software updates or programming tools (Typical cost: +0% vs. baseline) - Chain Shop:
Avoid for diagnosis. The risk of misdiagnosis and part-swapping is high for a complex network code like C2315.
Best for: Simple jobs like battery replacement (if you've already confirmed it's the cause)
Downsides: Technicians lack advanced diagnostic training for complex communication faults, High pressure to sell parts leads to misdiagnosis and unnecessary module replacement (Typical cost: -10% vs. baseline)
When to Walk Away From the Repair
If the repair cost exceeds 40% of the car's private-party value, seriously consider selling or trading in the vehicle instead of repairing it.
- Car worth $5000, fix is $2500: Walk away. The repair cost is 50% of the car's value, making it a poor investment.
- Car worth $15000, fix is $2000: Fix it. The repair is well below the threshold and makes economic sense.
- Car worth $3000, fix is $1800: Walk away. The repair cost is 60% of the car's value. Consider scrapping or selling as a 'mechanic special'.
What Scan Tool You Need for This Code
Minimum: A scanner that reads manufacturer-specific codes ('C' and 'U' codes) from ALL vehicle systems, including the Transmission (TCM), ABS, and Body Control Module (BCM).
A basic $20 code reader only checks for generic engine ('P') codes and will not see the C2315 code or related network faults. You will be completely blind to the actual problem.
Budget: TopDon TopScan / MUCAR BT200 Max (~$70) — These Bluetooth dongles pair with your smartphone and offer full-system scanning to read and clear codes from all modules. Some offer limited bidirectional tests.
Mid-range: Autel MaxiCOM MK808 / XTOOL D7 (~$380) — Provides full-system diagnostics, extensive live data graphing, and bidirectional controls to command modules directly, which is invaluable for testing the park position switch without disassembly.
Professional: Autel MaxiSys MS906Pro / Launch X431 Series (~$1000-1300) — Offers dealership-level diagnostics, including ECU coding and programming functions necessary if a module needs replacement and configuration. Includes advanced features like network topology maps.
Rent vs buy: Most auto parts stores offer a free code reading service. CAUTION: Free loaner scanners are often basic models that cannot read the C2315 chassis code. Buying an entry-level all-system scanner is a better investment.
How to Clear the Code After You Fix It
- Reconnect the 12V battery if disconnected.
- Use an OBD-II scan tool to erase all Diagnostic Trouble Codes (DTCs) from all modules.
- Perform a complete drive cycle to allow the vehicle's readiness monitors to run their self-tests.
Drive cycle (~20 minutes): 1. Cold start and idle for 3 minutes. 2. Drive in stop-and-go traffic for 10 minutes. 3. Drive at a steady 55 mph for 10 minutes. 4. Coast to a lower speed. 5. Allow the vehicle to cool down completely.
Readiness monitors affected: Comprehensive Component Monitor, CAN Bus Communication
Before emissions retest: drive at least 100 miles to fully set monitors.
Watch out for:
- Disconnecting the battery clears the code but resets all readiness monitors to 'Not Ready', causing an automatic emissions failure.
- The code returns immediately if the root cause of the communication failure remains unfixed.
- Failing to drive a complete and varied drive cycle leaves readiness monitors incomplete.
Will This Fail Emissions / State Inspection?
Yes — this code typically fails an OBD-II emissions inspection.
- California: An illuminated warning light results in an automatic Smog Check failure. After repair, all readiness monitors must be 'complete' to pass.
- New York: A vehicle fails the NYVIP3 inspection if a warning light is on. Only one readiness monitor is allowed to be 'Not Ready'.
- Texas: An illuminated check engine light is an automatic failure. The vehicle must complete a drive cycle to set readiness monitors before re-testing.
Most Commonly Affected Vehicles
- Toyota Prius (2010-2015) — Extremely common on the 3rd generation Prius. Almost always related to a failing park position switch or 12V battery issues.
- Toyota Prius V (2012-2017) — Shares the standard Prius powertrain and control systems, making it prone to identical communication faults.
- Lexus CT200h (2011-2017) — Built on the Prius platform, this model experiences C2315 for identical reasons, typically pointing to the park position switch.
- Kia / Hyundai Sorento, Santa Fe, Optima, Elantra (2011-2020) — Communication faults link directly to the Motor Driven Power Steering (MDPS) system. A failing flexible steering coupler disrupts CAN bus signals. Refer to Kia TSB CHA084.
- Chevrolet Silverado / GMC Sierra (2014-2018) — Chassis communication codes stem from wiring harness chafing near the frame, poor ground connections (G218), or faulty battery distribution blocks.
- Chevrolet Tahoe / Suburban / GMC Yukon (2015-2020) — Diagnosis involves checking resistance at the DLC (pins 12 & 13). A reading of 120 ohms points to a break or an offline terminating module.
- Ford Transit (2015-2019) — Communication faults arise from broken or chafed wiring in the front wheel speed sensor harnesses exposed under the vehicle.
- Subaru Outback / Legacy (2015-2019) — Exhibits widespread network faults due to a poor electrical connection at the electronic parking brake (EPB) control module. See TSB WTB-63.
Manufacturer-Specific Notes
- Toyota/Lexus: This code is almost always related to the electronic shift lever system. Disconnecting and reconnecting the P position switch connector while the power is on stores the code, making it crucial to clear codes after inspection.
- General Motors (Chevrolet/GMC): On 2019-2021 trucks, communication codes are caused by the engine wiring harness chafing against brackets (TSB 21-NA-149). The fix involves repairing damaged wires and securing the harness with new clips.
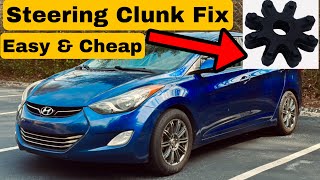
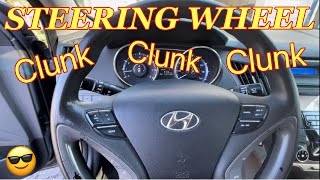
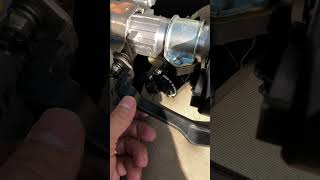
- Kia/Hyundai: A clicking noise from the steering column when turning is a major red flag indicating a failing flexible steering coupler in the MDPS unit. The part (OEM #56315-2K000-FFF) is inexpensive but labor-intensive.
- Ford: On 2018-2020 models, communication issues with the Telematics Control Unit (TCU) cause network codes after a software update. This requires a specific dealer procedure (PMI) to re-synchronize the module (SSM 49803).
Real Owner Stories
2012 Toyota Prius with 125K miles
The 'Check Hybrid System' light came on, with a message 'Park in a Flat Place'. The car refused to shift into Park, storing C2315 and P0852.
What they tried:
- Replaced the 12V battery, but the problem persisted immediately.
- Checked all related fuses in the fuse box.
- A mechanic suggested replacing the Transmission Control Module.
Outcome: While inspecting the park position switch on the transmission, the owner found its electrical connector was not fully seated. Pushing the connector until it clicked resolved all error messages. Total cost: $0.
Lesson: Always check simple physical connections before replacing expensive modules. A code indicating a fault with a part is often caused by the wiring or connector leading to it.
2013 Hyundai Elantra at 110K miles
A distinct clunking noise started coming from the steering column. Eventually, the power steering and traction control warning lights illuminated, storing code C2315.
What they tried:
- A dealership quoted over $400 for the repair.
- The owner researched the symptoms and found the flexible steering coupler is a known failure item.
Outcome: An independent shop replaced the flexible steering coupler (P/N 56315-2K000-FFF). The part cost under $10, and labor was $300. This completely fixed the noise and warning lights.
Lesson: On Kia/Hyundai vehicles, a clicking noise from the steering is a massive clue. This specific, inexpensive part is your primary suspect, saving you from a costly misdiagnosis.
2015 GMC Sierra with 85K miles
Multiple warning lights appeared intermittently on bumpy roads. Codes included C2315 and several U-codes, indicating widespread network communication loss.
What they tried:
- A mechanic suspected a failing ABS module but could not confirm.
- Tested the 12V battery and alternator, finding both in good health.
Outcome: The owner inspected the main wiring harness along the driver's side frame rail. They found the harness chafing against a bracket, damaging the CAN bus wires. Repairing the wires and securing the harness resolved all issues for $250 in labor.
Lesson: Intermittent communication faults that worsen on rough roads point directly to a physical wiring issue like chafing or a bad ground, not a failed module.
How to Prevent This Code From Triggering
- Perform regular 12V battery maintenance (Every 6 months) — Clean battery terminals of corrosion and ensure connections are tight. Low voltage is the leading cause of communication codes.
- Clean and protect major ground connections (Every 1-2 years or when working in the area) — Unbolt and clean the main battery-to-chassis ground points to bare metal. This prevents high resistance and voltage drops.
- Apply dielectric grease to connector seals (When disconnecting any weather-exposed connector) — Applying dielectric grease to rubber seals keeps out moisture and road salt, preventing pin corrosion. Do not pack the pins themselves.
- Avoid frequent short trips (Weekly habit) — Driving the car for 30 minutes weekly ensures the alternator fully recharges the 12V battery. Short trips chronically drain the battery.
Frequently Asked Questions
Can a weak 12V battery really cause code C2315?
Yes. Modern control modules require a stable voltage above 12.2V to communicate properly. A weak 12-volt battery causes voltage drops during startup that interrupt these communications, triggering C2315 even if the modules are perfectly fine.
What should I do if C2315 appears right after replacing the 12V battery?
First, verify both battery terminals and the main chassis ground are clean and tight. If the car is completely dead, check for a blown main fusible link on the positive terminal block. If the car starts but the code persists, clear the codes to ensure you aren't seeing a pre-existing fault masked by the old battery.
What are the most common mistakes when diagnosing C2315?
The biggest mistake is prematurely replacing the module that stored the code (like the TCM) without a full diagnosis. The module is usually just the messenger reporting a network drop. Always verify power, ground, and CAN bus wiring to the module before condemning it.
My mechanic replaced the Transmission Control Module (TCM), but the C2315 code came back. Why?
This happens because the TCM was not the root cause. Code C2315 means the TCM lost communication with another module on the network. The recurring code proves the actual problem—such as a faulty park position switch, broken CAN wire, or failing Hybrid ECU—remains unfixed.
How much does it cost to diagnose this code?
Most repair shops charge a diagnostic fee covering 1 to 1.5 hours of labor. Expect to pay between $120 and $225 for the initial diagnosis. This fee covers scanning all systems, analyzing data, and performing circuit tests to pinpoint the root cause.
My scanner says C2315 is an 'HV System' fault. Does that mean my expensive hybrid battery is bad?
No, this rarely means the high-voltage battery is failing. On Toyota hybrids, the term 'HV System' is used broadly because the message originates from the Hybrid Vehicle Control ECU. The problem almost always lies in the communication line between the HV ECU and the Transmission ECU, or the park position switch.
Can I clear the C2315 code myself?
Yes, you can clear the code with a basic OBD-II scanner. However, if the underlying fault remains, the code returns immediately when the modules attempt to communicate. Clearing the code is a temporary override, not a repair.
I have code C2315 but the car seems to drive fine. Is it urgent?
Do not ignore this code, even if the car drives normally right now. The communication error is often intermittent and escalates without warning. If the fault occurs while driving or parking, you will suddenly lose the ability to shift into Park or start the vehicle, leaving you stranded.
Key Takeaways
- Code C2315 indicates a CAN bus communication failure between control modules, most frequently triggered by a weak 12-volt battery dropping below 12.4 volts.
- On 2010-2015 Toyota Prius models, this code almost always points to a faulty park position switch (OEM part 84540-47010) or its wiring.
- For Kia and Hyundai vehicles, a C2315 code accompanied by a clicking steering column requires replacing a $15 flexible steering coupler (P/N 56315-2K000-FFF).
- Never replace a Transmission Control Module (TCM) for this code until you verify the CAN bus network resistance reads exactly 60 ohms at the OBD-II port.
Helpful Videos


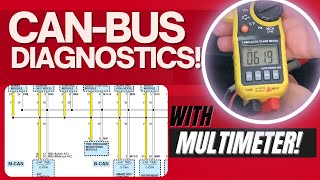
![How To Test CAN BUS With A Multimeter [CAN Bus Resistance Check] Mechanic Mindset](https://img.youtube.com/vi/JPE42HSJxAk/mqdefault.jpg)
Shop the Parts Behind C2315
Below are the parts most often responsible for code C2315, ranked by how frequently each one is the actual culprit (per the diagnosis above). Tap any to see what we have for your vehicle.


The information in this article is provided for general reference and educational purposes only. Vehicle specifications, procedures, and part compatibility can vary by production date, trim level, and region. Always consult your vehicle's factory service manual and verify part numbers before purchasing or performing repairs. Safety-critical components such as airbags, seat belts, and braking systems should be installed by a qualified professional.
- 🧭 Diagnostic Flowchart
- 🎬 Helpful Videos
- 🛍️ Shop This Part
- What Does C2315 Mean?
- Can I Drive With C2315?
- Common Causes
- Symptoms
- Common Fixes & Costs
- DIY vs Professional
- Used vs. New Parts: Buying Guide
- What Happens If You Wait — Timeline
- Cost of Not Fixing It
- Diagnosis Steps
- When This Code Triggers (Freeze-Frame Conditions)
- Related Codes
- Climate & Environmental Factors
- How to Talk to a Mechanic About This Code
- Where to Take It: Dealer vs Independent vs Chain
- When to Walk Away From the Repair
- What Scan Tool You Need for This Code
- How to Clear the Code After You Fix It
- Will This Fail Emissions / State Inspection?
- Most Commonly Affected Vehicles
- Manufacturer-Specific Notes
- Real Owner Stories
- 2012 Toyota Prius with 125K miles
- 2013 Hyundai Elantra at 110K miles
- 2015 GMC Sierra with 85K miles
- How to Prevent This Code From Triggering
- Frequently Asked Questions
- Can a weak 12V battery really cause code C2315?
- What should I do if C2315 appears right after replacing the 12V battery?
- What are the most common mistakes when diagnosing C2315?
- My mechanic replaced the Transmission Control Module (TCM), but the C2315 code came back. Why?
- How much does it cost to diagnose this code?
- My scanner says C2315 is an 'HV System' fault. Does that mean my expensive hybrid battery is bad?
- Can I clear the C2315 code myself?
- I have code C2315 but the car seems to drive fine. Is it urgent?
- Key Takeaways
- 🎟️ Get 5% Off