
OBD-II Code C3711: Ride Level Control Module Internal Failure
The Ultimate Guide to Diagnosing and Fixing C3711 on Your Jaguar or Land Rover
- DTC C3711 indicates a fatal internal failure of the Ride Level Control Module (RLCM), requiring a $1,200+ module replacement in 90% of cases.
- This code is exclusive to Jaguar and Land Rover vehicles; if read on another brand, your scanner is misinterpreting a generic code.
- Water intrusion from clogged sunroof drains and corroded chassis grounds are the top two preventable causes of this module failure.
- Never condemn the RLCM without verifying power (>12V), ground (<1.0 Ohm), and CAN bus resistance (~60 Ohms) at the module connector.
- A new RLCM requires mandatory dealer-level programming (JLR SDD/Pathfinder) and ride height calibration to function; plug-and-play is impossible.
What Does C3711 Mean?
C3711 is a manufacturer-specific Diagnostic Trouble Code (DTC) for Jaguar and Land Rover indicating the Ride Level Control Module (RLCM) suffered a fatal internal electrical failure. The RLCM manages the air suspension system. When this code sets, the module's self-diagnostics have failed, permanently disabling ride height adjustments, air pressure control, and network communication.
Technical definition: Ride Level Control Module (RLCM) - General Electrical Failure. The module's internal microprocessor detected a non-recoverable hardware or software fault, halting all suspension functions.
Can I Drive With C3711?
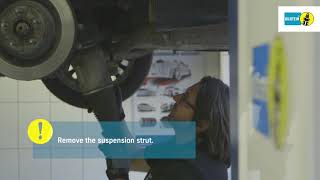
Yes, But With Caution. Yes, but driving must be limited to 50 miles. The air suspension disables, dropping the vehicle to its bump stops. Continued driving destroys tires, conventional shock absorbers, 🎬 See this walkthrough for replacing Jaguar air suspension components. and suspension bushings, easily adding $1,500+ to repair costs.
Common Causes
- Water Intrusion and Corrosion (Very Common) — The RLCM sits in moisture-prone areas (rear quarter panels, undercarriage). Clogged sunroof drains, leaking window seals, or deep water wading allow moisture to short circuit the board and corrode terminals.
- High-Resistance Ground Connection (Common) — The module requires a clean chassis ground. Corrosion at the ground stud creates high resistance, causing erratic voltage that overheats and destroys the RLCM's sensitive internal electronics. This is the most frequently overlooked cause of repeat failures.
- Internal Electronic Component Failure (Common) — A processor, memory chip, or power regulator on the main circuit board fails due to age, heat cycles, or vibration-induced solder joint cracks. This creates a permanent 'hard fault' requiring module replacement.
- Damaged Wiring or Connectors (Common) — Road debris or chafing damages the wiring harness. This interrupts power, ground, or data signals, causing voltage spikes that fry the module internally.
- Sustained Low or High Battery Voltage (Less Common) — A failing battery or alternator supplies unstable voltage. Prolonged low voltage causes software corruption, while alternator spikes permanently damage hardware.
- Software Corruption (Rare) — The module's firmware corrupts during a failed software update attempt or due to a memory chip failure. If the underlying hardware is damaged, re-flashing the software fails.
Symptoms
- Air Suspension Fault Warning Light — An 'Air Suspension Fault' or 'Vehicle Rising Slowly' message illuminates on the instrument cluster, accompanied by an amber or red warning icon.
- Vehicle Dropped to Bump Stops — The suspension cannot raise or lower. It drops to the bump stops or sags heavily on one side, causing an extremely low, harsh, and jarring ride.
- Compressor Fails to Activate (also visible on scanner) — The air suspension compressor no longer hums or activates when starting the car or opening a door, as the dead module cannot command it to turn on.
Diagnostic Flowchart
Tap your situation to follow the diagnostic path that matches what you're seeing on this code.
Common Fixes & Costs
- Replace Ride Level Control Module (RLCM) — Parts: $300-$1,200 (Used/Reman vs. New OEM), Labor: $300-$600 (Includes installation and mandatory programming), ~2.5 hr book time (Intermediate)
- Repair Chassis Ground Connection — Parts: $10-$30, Labor: $100-$200, ~1.0 hr book time (DIY)
- Repair Damaged Wiring or Connector — Parts: $20-$100, Labor: $200-$500, ~2.0 hr book time (Intermediate)
- Update/Re-flash Module Software — Parts: $0, Labor: $150-$300, ~1.0 hr book time (Professional)
- Replace Vehicle Battery — Parts: $250-$450, Labor: $50-$150, ~0.5 hr book time (DIY)
Used vs. New Parts: Buying Guide
When a used part is worth it: Almost never. Due to being VIN-locked to the original vehicle, a used RLCM is extremely difficult to reprogram for a new vehicle.
Donor-vehicle mileage cap: roughly under 20000 miles for the part to have meaningful remaining life.
Donor quality checklist:
- Verify the exact part number matches.
- Avoid modules from flood-damaged vehicles.
- Obtain a guarantee that the module is 'virgin' or unlocked.
Decision logic:
- If The part is a security-critical, VIN-locked electronic module like the RLCM → Buy new OEM or a reputable remanufactured unit guaranteed to be programmable.
- If The vehicle is a high-value, late-model JLR → Buy new OEM to ensure compatibility, warranty, and correct software integration.
Warranty tradeoff: Used parts have a 30-90 day warranty that does not cover labor. New OEM parts installed by a dealer carry a full parts and labor warranty.
Worst-case if a used part fails: $500-$800 if a used module cannot be programmed, requiring repeat labor to install a new part.
What Happens If You Wait — Timeline
- 0-1 week: Code C3711 sets. Suspension disables and drops to the bump stops. Ride becomes extremely harsh. (MPG impact: 0%% · Added cost: $0)
- 1 week - 2 months (100-500 miles): Constant harsh riding on bump stops causes accelerated, uneven tire wear due to poor alignment geometry. (MPG impact: 0-2%% · Added cost: $400-$1200 (New tires))
- 2-6 months (500-2,000 miles): Repeated hard impacts damage rubber air springs (bellows), shock absorbers, ball joints, and suspension bushings. (MPG impact: 2-5%% · Added cost: $1000-$2500 (Air springs, bushings, tires))
- 6+ months (2,000+ miles): Catastrophic secondary failure. A severe pothole impact cracks a wheel, damages the subframe, or breaks a chassis mounting point. (MPG impact: 5-10%% · Added cost: $2500-$5000+ (Subframe repair, struts, control arms))
Cost of Not Fixing It
- Immediate (0-100 miles): Extremely harsh ride on bump stops, poor handling, and reduced braking performance. (Added cost: Negligible)
- Short-Term (1-3 months / 100-1,000 miles): Accelerated and uneven tire wear due to incorrect suspension geometry. (Added cost: $400-$1200 (New tires and alignment))
- Long-Term (6+ months / 1,000+ miles): Catastrophic failure of suspension components. Hard impacts damage air springs, wheel bearings, or crack the subframe. (Added cost: $1500-$5000+ (Air struts, shocks, subframe repair))
Diagnosis Steps
- Confirm All Fault Codes
Use a JLR-specific OBD-II scanner. Confirm C3711 is present. Look specifically for U0132 ('Lost Communication With Ride Level Control Module'). Seeing both codes together strongly confirms the module is dead.
Tools: Advanced OBD-II Scanner (e.g., Autel, iCarsoft for JLR, GAP IID) (Beginner) - Locate and Visually Inspect the RLCM
Find the RLCM (behind the rear seat on X350 Jaguars, under the vehicle on LR3/RRS, or in the trunk on newer models). Inspect for water damage, white/green corrosion on connector pins, or burnt plastic smells.
Tools: Trim removal tools, Flashlight (Intermediate) - Test Power and Ground at the Connector
Disconnect the RLCM connector. Using a multimeter and wiring diagram, check for full battery voltage (>12V) at the power pins with the ignition on. Check the ground pins for continuity to the chassis; resistance must be less than 1.0 Ohm. High resistance confirms a bad ground.
Tools: Multimeter, Vehicle-specific wiring diagram (Advanced) - Check Fuses and Battery System
Test the battery (must read >12.4V at rest) and alternator (13.5V-14.5V running). Check all air suspension fuses in the engine bay and cabin. A blown fuse indicates a short circuit in the wiring or module.
Tools: Multimeter, Fuse Puller (Beginner) - Perform a 'Wiggle Test' on the Harness
With the ignition on, gently wiggle the wiring harness at the RLCM. If the suspension fault message flickers or disappears, you have a broken wire or loose pin connection, not a failed module.
Tools: Hands, Flashlight (Intermediate) - Check CAN Bus Network Integrity
With the battery disconnected, measure resistance between the CAN High and CAN Low pins at the RLCM connector. A healthy network reads ~60 Ohms. A reading of 120 Ohms indicates a broken circuit or a dead terminating module (often the RLCM itself).
Tools: Multimeter, Vehicle-specific wiring diagram (Advanced) - Attempt Module Reprogramming
If power, ground, and CAN bus wiring are perfect, the C3711 code confirms internal module failure. As a last resort, a specialist can attempt to re-flash the module's software. If it fails, replace the module.
Tools: Manufacturer-specific diagnostic tool (JLR SDD/Pathfinder) (Professional)
When This Code Triggers (Freeze-Frame Conditions)
- Module Voltage: 11.5-12.5V (Key On, Engine Off (KOEO) during initial self-test)
- Time Since Ignition On: < 2 seconds (Code sets immediately upon power-up as the module fails its internal integrity check.)
- System Status: Internal Fault Detected (The module's own processor flags a non-recoverable hardware or software error.)
Related Codes
- U0132 — Lost Communication With Ride Level Control Module. C3711 means the module is broken internally; U0132 means other modules cannot hear it. Seeing both together confirms the RLCM is dead.
- C1A20 — Pressure Increases Too Slowly. A pneumatic fault indicating a weak compressor or leak. A failing compressor runs excessively, placing electrical stress on the RLCM and causing its eventual failure.
- C1A36-01 — Exhaust valve - General electrical failure. Appears on Land Rovers if an AMK replacement compressor is installed without updating the RLCM software. It is a software conflict, not a dead module.
Climate & Environmental Factors
- High Humidity / Water Exposure: Direct water intrusion from wading or clogged drains is a primary cause of direct electronic failure of the module itself. Humid air also saturates the air dryer desiccant quickly, sending moisture through the pneumatic system.
- Cold Weather: Cold temperatures stiffen rubber air springs and O-rings, opening up small leaks. This forces the compressor to run constantly, generating excess heat and electrical load that stresses the RLCM.
How to Talk to a Mechanic About This Code
Say this: "I have a C3711 fault code on my Land Rover. Before condemning the Ride Level Control Module, please verify its main power, chassis ground, and look for corrosion on the connector."
This signals you understand the common external causes of this code. It directs the technician to perform a proper diagnosis instead of immediately quoting an expensive module replacement.
Avoid saying:
- 'My suspension is broken.'
- 'The car is riding rough, can you fix it?'
- 'Just do whatever it takes to fix the warning light.'
Questions to ask before authorizing the repair:
- Did you test the power and ground pins at the module connector? What were the exact voltage and resistance readings?
- Did you find any evidence of water intrusion or corrosion on the module or its harness connector?
- Does your estimate include the mandatory programming and ride height calibration required for JLR vehicles?
Where to Take It: Dealer vs Independent vs Chain
- Dealer:
Recommended. The dealer has the proprietary JLR SDD/Pathfinder tools required to reliably program and calibrate a new RLCM.
Best for: Vehicles under factory or extended warranty., Complex software issues, like programming conflicts after an AMK compressor upgrade.
Downsides: Highest labor rates and part costs. (Typical cost: +50% vs. baseline) - Independent Shop:
A strong option ONLY if they are a proven Jaguar Land Rover specialist with JLR-specific diagnostic tools capable of module programming.
Best for: Out-of-warranty vehicles where cost is a major factor.
Downsides: A general mechanic lacks the specific JLR software to program the new module, making the repair impossible to complete. (Typical cost: +0% vs. baseline) - Chain Shop:
AVOID. They are not equipped to diagnose or repair this complex, manufacturer-specific electronic fault.
Best for: Simple, non-specialized repairs like tires and oil changes.
Downsides: Lack of brand-specific diagnostic tools and expertise. (Typical cost: -10% vs. baseline)
When to Walk Away From the Repair
If the estimated repair cost exceeds 50% of the car's current private-party value, seriously consider selling or trading in the vehicle.
- Car worth $6000, fix is $1500: Fix it. The repair cost is 25% of the vehicle's value, typical for an older LR3.
- Car worth $15000, fix is $1800: Fix it. At 12% of the car's value, this repair is a sound investment.
- Car worth $3500, fix is $1600: Walk away. The repair cost is nearly 50% of the car's value.
What Scan Tool You Need for This Code
Minimum: A diagnostic scanner that reads manufacturer-specific Chassis (C) and Communication (U) codes for Jaguar and Land Rover.
A standard $20 OBD-II reader only checks generic engine codes (P-codes). It cannot see C3711, U-codes, or access the RLCM.
Budget: Autel AP200 (~$70) — This Bluetooth dongle pairs with your smartphone. With the JLR software pack, it reads and clears JLR-specific codes from all modules and displays live sensor data.
Mid-range: iCarsoft LR V3.0 (~$190) — A dedicated handheld unit for JLR. It reads/clears all codes, views live data, and performs special functions like suspension calibration.
Professional: GAP IIDTool BT (~$550) — The gold standard for Land Rover. Provides dealer-level access, ECU software updates, and performs the mandatory ride height calibration after module replacement.
Rent vs buy: Buy. Free rental scanners from auto parts stores are basic readers and will not work for this code. A capable scanner pays for itself by avoiding a single incorrect diagnosis.
How to Clear the Code After You Fix It
- Install new Ride Level Control Module.
- Use JLR-specific scan tool (SDD/Pathfinder) to program the new module with vehicle VIN and configuration.
- Perform ride height calibration procedure.
- Clear all fault codes from all vehicle modules.
Drive cycle (~15 minutes): Drive the vehicle for 15 minutes, including turns and varied speeds. Cycle the suspension through its height settings to verify full functionality.
Readiness monitors affected: Not applicable. C3711 is a chassis code and does not affect engine emissions readiness monitors.
Watch out for:
- Attempting to clear the code without replacing the faulty module.
- Installing a new module without performing the mandatory programming and calibration.
- Using a used module that is locked to another vehicle's VIN.
Will This Fail Emissions / State Inspection?
No — by itself this code doesn't fail OBD inspection (but it can keep readiness monitors from setting, which causes a separate fail).
- California: This chassis code will not cause an OBD-II emissions failure. However, an inspector will fail the vehicle on a visual/safety basis if the suspension is collapsed.
- New York: NYS inspection includes a check for chassis integrity. A vehicle sitting on its bump stops fails the safety portion for having a broken suspension.
- Texas: Inspectors have discretion to fail a vehicle for an obvious safety issue like a collapsed suspension, even if annual safety inspections are phased out.
Most Commonly Affected Vehicles
- Jaguar XJ (X350, X358) (2003-2009) — A very common failure. The RLCM is behind the rear seat. Moisture from rear window leaks or clogged sunroof drains channels water inside the cabin structure, destroying the module.
- Jaguar XJ (X351) (2010-2019) — Module relocated to the trunk area, offering better protection, but internal electronic failure remains a known issue on higher-mileage examples.
- Jaguar XF (X250) (2007-2015) — Primarily affects Sportbrake (wagon) models equipped with rear air suspension.
- Land Rover Discovery 3 / LR3 (2005-2009) — A notorious issue. The original Hitachi compressor and integrated control module are located under the vehicle, making them highly susceptible to water, mud, and corrosion.
- Land Rover Discovery 4 / LR4 (2010-2016) — Later models switched to an AMK compressor. Upgrading an older model to the AMK compressor requires a mandatory software update for the RLCM; failure to do so causes system faults.
- Land Rover Range Rover Sport (L320) (2005-2013) — Shares the LR3 platform. Suffers from a high rate of module failure due to its exposed under-vehicle mounting location.
- Land Rover Range Rover (L322) (2002-2012) — The air suspension ECU is a known weak point. Wiring issues are also common and sometimes misdiagnosed as a module fault.
- Bentley Continental GT / Flying Spur (2003-2011) — Shares a similar WABCO-based air suspension architecture. Symptoms and failure modes are nearly identical to Jaguars of the same era.
Manufacturer-Specific Notes
- Jaguar / Land Rover: C3711 is a 'terminal' code. Unlike sensor codes, C3711 points directly at the module's microprocessor. If power and ground are verified, the module is condemned.
- Land Rover: On LR3, LR4, and RRS models, upgrading from the original Hitachi compressor to an AMK unit requires a mandatory software update for the RLCM. Skipping this causes control parameter conflicts and faults.
- General: A generic OBD-II scanner cannot correctly interpret this manufacturer-specific code or retrieve accompanying U-codes. A high-quality scanner with JLR-specific software is mandatory.
Real Owner Stories
2019 Range Rover with headliner stains
Owner noticed staining on the headliner and brought the vehicle to the dealer. The vehicle was under an extended warranty.
What they tried:
- Dealer diagnosed that the sunroof drain nipples had rusted away, causing water intrusion into the cabin and trunk.
- The water shorted out multiple modules, including the RLCM. The dealer quoted $12,000 for a roof replacement and $4,000 for interior remediation.
Outcome: The owner discovered this is a widespread, documented issue with a latent design defect. Water intrusion from this failure is a known cause of electronic module failure.
Lesson: Water damage is a primary cause of C3711. Proactively check and clear sunroof drains to prevent catastrophic electronic failures.
2008 Jaguar XJ with intermittent electrical issues
Car was bought as a non-running project. The initial problem was a no-start condition, traced to a bad engine-to-chassis ground strap.
What they tried:
- After fixing the initial ground, the owner was plagued by a lumpy idle and a temperature gauge that randomly pegged itself.
- The owner removed the ground strap a second time, thoroughly cleaned the terminals and contact points on the chassis to bare metal with a wire wheel, and re-torqued the bolts.
Outcome: Thoroughly cleaning the ground strap connection points completely resolved the electrical faults.
Lesson: A bad ground causes a cascade of bizarre electrical faults and destroys modules. Cleaning a ground connection means removing it and sanding all contact surfaces to shiny metal.
2009 Land Rover Discovery 3 after major service
After a 'body-off' chassis procedure, the vehicle was electrically dead. A scanner could not communicate with most control modules.
What they tried:
- The mechanic checked fuses and had the instrument cluster professionally tested, which were okay.
- They found a large electrical connector in the left rear wheel well was damaged due to brittle plastic during reassembly.
Outcome: The damaged multi-pin connector was part of the CAN bus network. Securing this connection restored communication to the modules.
Lesson: If major faults appear immediately after a repair, focus on disturbed connectors and ground points. A single damaged CAN bus connector takes the entire network down.
How to Prevent This Code From Triggering
- Service Sunroof Drains Annually (Once per year) — Clogged sunroof drains cause water to back up and overflow into the cabin and trunk, shorting out the RLCM. Use compressed air or flexible trimmer line to clear the drain tubes.
- Inspect and Clean Chassis Ground Points (Every 30,000 miles) — Corrosion on ground points creates high resistance, starving modules of a stable ground reference. Unbolt, clean to bare metal, and re-secure key ground straps to prevent module overheating.
- Replace Air Dryer Desiccant or Compressor (Every 50,000 miles) — Saturated desiccant allows moisture into the system, which freezes in cold weather and degrades internal components. Replacing the dryer prevents the compressor from overworking and stressing the RLCM.
Frequently Asked Questions
Can I just clear the C3711 code?
No. C3711 signifies a permanent internal hardware failure, so the code will return immediately upon clearing.
Is the Ride Level Control Module the same as the Air Suspension Compressor?
No. The compressor is a mechanical pump, while the RLCM is the electronic computer that controls it. Though sometimes mounted together, they are distinct parts.
Do I need to program a new Ride Level Control Module?
Yes. A new module is blank and must be configured with your vehicle's VIN and calibrated using a JLR-specific diagnostic tool. The system will not function without this step.
Could a bad ride height sensor cause code C3711?
No. A bad ride height sensor generates its own specific fault codes. It provides bad data, but does not cause the module itself to fail internally.
I replaced the RLCM and the fault is still there. What did I do wrong?
You likely failed to perform the mandatory programming and ride height calibration with a JLR diagnostic tool. Alternatively, you have a high-resistance ground connection destroying the new module.
Can I install a used Ride Level Control Module?
It is highly discouraged. Used modules are VIN-locked to the donor vehicle and are extremely difficult to reprogram. Buying a new, programmable OEM part is the only reliable fix.
Why did my suspension fail right after a tire change?
The vehicle was likely lifted improperly, damaging a height sensor or over-extending the system. Always put the suspension in 'service mode' before lifting the vehicle.
Key Takeaways
- DTC C3711 indicates a fatal internal failure of the Ride Level Control Module (RLCM), requiring a $1,200+ module replacement in 90% of cases.
- This code is exclusive to Jaguar and Land Rover vehicles; if read on another brand, your scanner is misinterpreting a generic code.
- Water intrusion from clogged sunroof drains and corroded chassis grounds are the top two preventable causes of this module failure.
- Never condemn the RLCM without verifying power (>12V), ground (<1.0 Ohm), and CAN bus resistance (~60 Ohms) at the module connector.
- A new RLCM requires mandatory dealer-level programming (JLR SDD/Pathfinder) and ride height calibration to function; plug-and-play is impossible.
Helpful Videos
Shop the Parts Behind C3711
Below are the parts most often responsible for code C3711, ranked by how frequently each one is the actual culprit (per the diagnosis above). Tap any to see what we have for your vehicle.


The information in this article is provided for general reference and educational purposes only. Vehicle specifications, procedures, and part compatibility can vary by production date, trim level, and region. Always consult your vehicle's factory service manual and verify part numbers before purchasing or performing repairs. Safety-critical components such as airbags, seat belts, and braking systems should be installed by a qualified professional.
- 🧭 Diagnostic Flowchart
- 🎬 Helpful Videos
- 🛍️ Shop This Part
- What Does C3711 Mean?
- Can I Drive With C3711?
- Common Causes
- Symptoms
- Common Fixes & Costs
- Used vs. New Parts: Buying Guide
- What Happens If You Wait — Timeline
- Cost of Not Fixing It
- Diagnosis Steps
- When This Code Triggers (Freeze-Frame Conditions)
- Related Codes
- Climate & Environmental Factors
- How to Talk to a Mechanic About This Code
- Where to Take It: Dealer vs Independent vs Chain
- When to Walk Away From the Repair
- What Scan Tool You Need for This Code
- How to Clear the Code After You Fix It
- Will This Fail Emissions / State Inspection?
- Most Commonly Affected Vehicles
- Manufacturer-Specific Notes
- Real Owner Stories
- 2019 Range Rover with headliner stains
- 2008 Jaguar XJ with intermittent electrical issues
- 2009 Land Rover Discovery 3 after major service
- How to Prevent This Code From Triggering
- Frequently Asked Questions
- Can I just clear the C3711 code?
- Is the Ride Level Control Module the same as the Air Suspension Compressor?
- Do I need to program a new Ride Level Control Module?
- Could a bad ride height sensor cause code C3711?
- I replaced the RLCM and the fault is still there. What did I do wrong?
- Can I install a used Ride Level Control Module?
- Why did my suspension fail right after a tire change?
- Key Takeaways
- 🎟️ Get 5% Off