
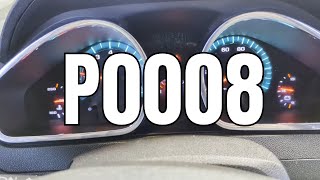
P0008 on 2013-2018 Cadillac ATS: Engine Position System Performance Causes and Fixes
On a 2013-2018 Cadillac ATS with the 3.6L V6 (LFX) engine, code P0008 almost always indicates stretched timing chains. This is a well-documented, serious issue requiring immediate attention. While GM issued a special coverage warranty (#14582) for this problem on earlier engines, it may not apply to all ATS models, making a costly repair likely. Expect a professional repair cost of $1,800 to $4,000 due to the high labor involved in replacing the three chains, guides, and tensioners.
- P0008 on a 3.6L V6 Cadillac ATS is a serious code that almost always points to stretched timing chains.
- Do not ignore this code. Driving with it can lead to catastrophic engine failure.
- This is not a cheap or easy fix. The repair is labor-intensive and should be performed by a professional, with costs often exceeding $2,000.
- Do not waste money replacing sensors first; the problem is almost certainly mechanical.
- Using the correct specification (GM dexos) full synthetic oil and changing it on schedule is the best preventative measure to prolong timing chain life.
What's Unique About the 2013-2018 Cadillac ATS
The Cadillac ATS, particularly models with the 3.6L V6 (LFX) engine, is prone to this code due to a known history of premature timing chain stretching across many GM vehicles using this engine family (High Feature V6). The issue stems from a combination of factors including chain design, the stress of direct injection, and the critical role of oil quality and level for the hydraulic tensioners. While GM made improvements from the earlier LLT engine, the problem was not fully eradicated in the LFX. GM acknowledged the problem on earlier models with Special Coverage Adjustment #11340C and later #14582, extending the warranty to 10 years/120,000 miles for timing chain wear, though applicability to the ATS can vary.
Diagnostic Flowchart
Tap your situation to follow the diagnostic path that matches what you're seeing on this vehicle.
Symptoms You May Notice
- Check Engine Light is on
- Reduced engine power and poor acceleration
- Rough or unstable idle
- Rattling, scraping, or buzzing noise from the front of the engine (timing cover area), especially on a cold start, that may quiet down as oil pressure builds.
- Decreased fuel economy
- Engine surging or hesitation during acceleration.
- Replacing only the camshaft or crankshaft position sensors without verifying the mechanical timing. The code is almost always a mechanical issue, not an electrical sensor failure.
- Replacing only one timing chain or tensioner. The system has three chains, and all wear together. Replacing only the failed component often leads to a repeat failure of another component soon after.
Most Likely Causes
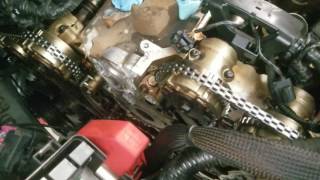
- Stretched Timing Chains 🔴 High Probability → Shop Engine Timing Chain The 3.6L V6 engine family has a well-documented history of premature timing chain wear. This is the most common cause for P0008 on this vehicle. Factors include chain design and the importance of clean oil for the hydraulic tensioners.
How to confirm: A technician will use a scan tool to monitor camshaft deviation angles. Values consistently exceeding +/- 4 degrees at idle or during operation strongly suggest chain stretch. Physical inspection after removing the timing cover is the ultimate confirmation.
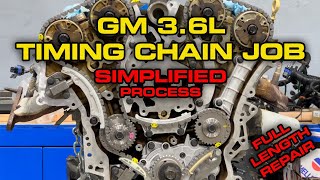
Typical fix: Replace all three timing chains, along with the tensioners, guides, and sprockets. This is typically done as a complete kit. 🎬 See this full-length timing chain removal and installation walkthrough. It is critical to use an updated kit.
Est. part cost: $300-$600 - Worn or Failed Timing Chain Tensioners 🔴 High Probability → Shop Engine Timing Chain The tensioners, which use oil pressure to keep the chains tight, can fail, lose hydraulic pressure, or stick, leading to chain slack. This is almost always addressed during a full timing chain service.
How to confirm: Visual inspection after removing the timing cover. A rattling noise that lessens as the engine warms up and oil pressure builds can be a symptom.
Typical fix: Replace the faulty tensioner(s). It is highly recommended to replace all timing components (chains, guides, sprockets) at the same time.
Est. part cost: $50-$150 - Low Engine Oil Level or Poor Oil Quality 🟡 Medium Probability The timing chain tensioners are hydraulic and rely on clean oil at the correct pressure to function. Extended oil change intervals (sometimes encouraged by the original Oil Life Monitor calibration) and using oil that does not meet GM's dexos specification can accelerate wear on all timing components. GM later issued TSB 12-06-01-009 to update the OLM software for shorter intervals on earlier models.
How to confirm: Check the oil level on the dipstick and review the vehicle's service history. If the oil is low or dirty, this is a likely contributing factor.
Typical fix: Perform an oil and filter change with a high-quality, full synthetic oil meeting GM's dexos specification. This is a critical first step and necessary after repairs, but it will not fix already stretched chains.
Est. part cost: $50-$100
Rare But Worth Checking
- Slipped Crankshaft Reluctor Wheel: → Shop Engine Crankshaft A known, though less common, issue is the crankshaft reluctor wheel (which the crank sensor reads) slipping from its pressed-on position. This causes the ECM to receive incorrect crankshaft position data, triggering timing codes even with perfect chains. TSB PIP3423P and its successors address this. Diagnosis can sometimes be done with a borescope through the crank sensor hole to check alignment marks, but often requires removing the oil pan for visual confirmation.
- Faulty Camshaft or Crankshaft Position Sensor: → Shop Engine Crankshaft Position Sensor While a sensor can fail, it's much less common than mechanical timing issues for this specific code. Owners often replace these sensors first as a cheaper, simpler fix, only to find the problem persists because the root cause is mechanical. A P0008 code without other sensor-specific codes (like P0341, P0342, etc.) makes a sensor-only failure less likely.
- Faulty Camshaft Actuator (Phaser) or Solenoid: → Shop Engine Camshaft The variable valve timing (VVT) system uses oil pressure-driven actuators (phasers) to adjust cam timing. A stuck phaser or a clogged/failed control solenoid can cause correlation errors. However, a single failed actuator or solenoid will typically not set a P0008, which is designed to detect a bank-wide or primary chain issue. It's more likely to set a specific cam actuator code like P0011 or P0014.
Diagnosis Steps
- Confirm the presence of P0008 and any other codes with a quality OBD-II scanner.
- Check the engine oil level and condition. If it is low, dirty, or the wrong type, correct this first and clear codes to see if they return. Note service history.
- Listen for any rattling or metallic noises from the timing cover area, especially during a cold start.
- Using a scan tool with live data, monitor the camshaft position deviation/angle error parameters for Bank 1 (and Bank 2). Consistent readings outside the +/- 4-degree range strongly indicate a mechanical timing issue.
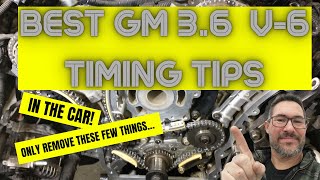
- If scan data is inconclusive, a lab scope can be used to compare the crankshaft and camshaft sensor waveforms against a known-good pattern to visually identify the timing discrepancy. 🎬 Watch: How to test timing chain problems with a labscope.
- If a timing error is confirmed, mechanical diagnosis is required. This involves removing the engine timing cover for a visual inspection of the timing chains, guides, and tensioners for wear, damage, or excessive slack.
- If the timing chains appear tight and in good condition, the next step is to inspect the crankshaft reluctor wheel for slippage, as per TSB PIP3423P and its successors. This can sometimes be done with a borescope through the crankshaft position sensor port, or by removing the oil pan.
Parts You'll Likely Need
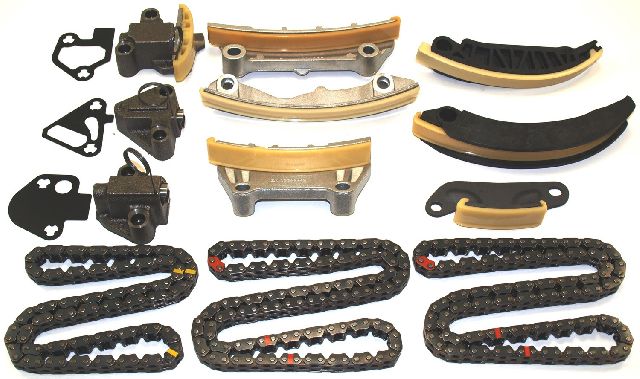
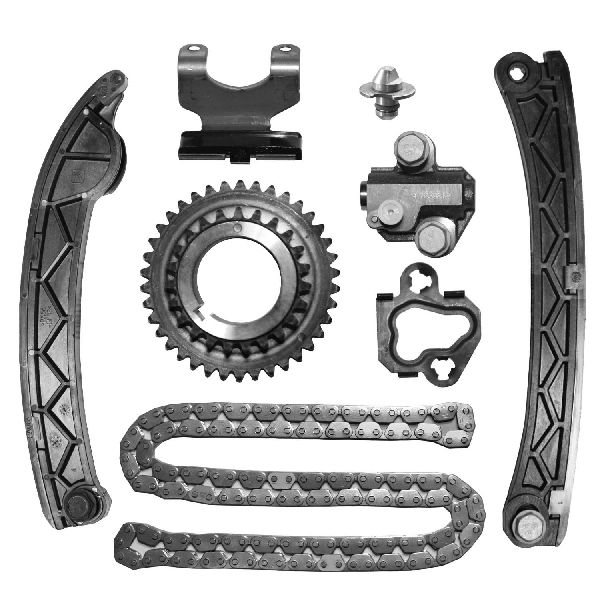
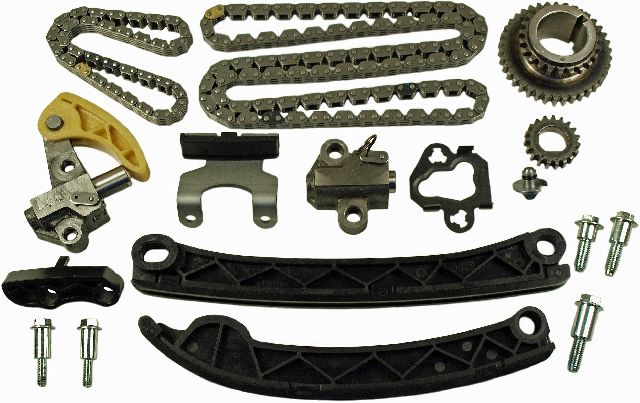
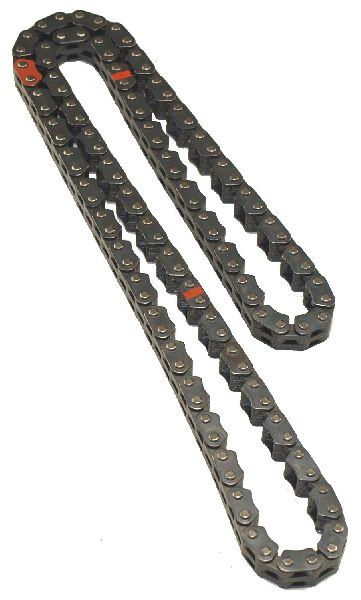
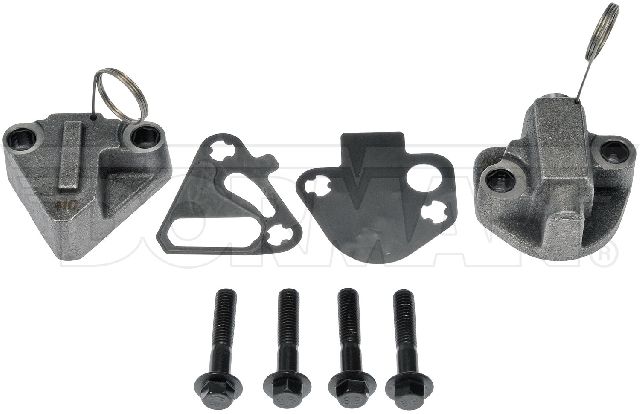
- Timing Chain Kit
(OEM #12700437)— This is the definitive fix. A complete kit ensures all worn components (3 chains, 3 tensioners, all guides, and sometimes sprockets) are replaced at once. Using the latest GM-specified part is crucial for durability.
Trusted brands: ACDelco (GM Genuine), Cloyes
OEM price range: $450-$700
Aftermarket price range: $300-$500 - Engine Oil and Filter — Fresh, correct-spec oil (full synthetic meeting dexos1) is critical for the new hydraulic tensioners and overall system longevity.
Trusted brands: ACDelco, Mobil 1
OEM price range: $60-$90
Aftermarket price range: $40-$70 - Sealant and Gaskets — The timing cover, valve covers, and other components that are removed will require new gaskets and/or RTV sealant (like GM P/N 12378521) for reassembly to prevent oil leaks.
Trusted brands: ACDelco, Fel-Pro
OEM price range: $100-$200
Aftermarket price range: $50-$120
Related Codes That Often Appear With This One
- P0009 — This is the identical code but for Bank 2 (the front/radiator side of the engine). Seeing both P0008 and P0009 together strongly indicates a problem common to both banks, like a stretched primary timing chain or a slipped crank reluctor wheel.
- P0016, P0017, P0018, P0019 — These are all specific crank-to-cam correlation codes for different camshafts (intake/exhaust) and banks (1/2). They are often set along with P0008 and point to the same root cause of a systemic timing issue. Their presence reinforces the diagnosis of a stretched chain or slipped reluctor wheel.
Technical Service Bulletins (TSBs) & Recalls
- PIP3423P (and successors like PIP5163G): Mentions that codes P0008, P0009, P0016-P0019 can be caused by loose timing chains, tensioners, or a moved crankshaft reluctor wheel on 2013-2019 Cadillac ATS models with the 3.6L engine.
- 12-06-01-009 (and its revisions): Provides information on updated timing chain kits and guides, and advises against replacing components that are not worn. It also recommends reprogramming the ECM to shorten the oil life monitor interval to encourage more frequent oil changes.
Platform-Specific Known Issues
- The 3.6L LFX V6 engine used in the ATS is known for premature timing chain stretching. This issue was also present in the prior generation (LLT) V6 and, while improved, was not fully resolved in the LFX.
Mechanic-Grade Diagnostic Values
- Camshaft Position Actuator (VVT) Solenoid Resistance — expected: 8 to 12 Ohms. Failure: A reading of 0 Ohms (short) or infinite/OL (open circuit) indicates a failed solenoid.
- Camshaft Position Sensor (3-wire Hall Effect) - Power Supply — expected: ~5V or ~12V DC (vehicle dependent). Failure: Significantly lower or no voltage indicates a wiring or ECM problem, not a sensor failure.
- Camshaft Position Sensor (3-wire Hall Effect) - Ground Connection — expected: Close to 0V. Failure: Voltage reading significantly above 0V indicates a poor ground connection.
- Camshaft Position Sensor (3-wire Hall Effect) - Signal Voltage — expected: Switches between a low voltage (near 0V) and a high voltage (near the reference voltage, e.g., 5V). Failure: A signal that is stuck high, stuck low, or does not switch cleanly indicates a faulty sensor.
Wiring & Ground Locations
- Main Engine-to-Body Ground Strap — Typically a thick, braided copper wire connecting the engine block or transmission housing to the vehicle's chassis/firewall.. A poor engine ground can cause electrical noise and voltage drops, potentially affecting the accuracy of sensor readings and ECM operation. On vehicles with rear-mounted batteries like the ATS, this ground is critical for the entire engine's electrical system.
- Secondary Engine Ground — On some similar GM models, a ground cable is located on the block behind the passenger-side engine mount bracket.. Provides an additional ground path for the engine block, where the crankshaft position sensor is located.
- G202 — A wiring diagram for a 2015 ATS shows a ground point G202 located on the left (driver's side) instrument panel brace.. While not a primary engine ground, poor interior grounds can sometimes cause unpredictable behavior in modules like the ECM, which processes the sensor signals.
Real Owner Repair Stories
- Reddit user on r/MechanicAdvice (2009 Pontiac G8 with 3.6L V6 (LLT engine, direct predecessor to LFX) at 164,000 miles.) — Intermittent P0008 code that would set on cold mornings and clear by the end of the day. The car struggled to accelerate when the light was on but ran fine otherwise. No loud chain rattle was heard on cold starts.
❌ Tried (didn't work) Observing the issue, checking oil level (which was full and clean).
✅ What actually fixed it The owner performed a full timing chain replacement job. The fix was successful, resulting in a 'definite difference in torque and idle' and resolving the code.
OEM Part Supersession History
12659672, 12679118, 12691204, 12693217, 92507190, 92507902 (and others)→12700437— GM has released multiple revisions of the timing chain kit for the High Feature V6 family to improve durability and address premature stretching issues.
Heads up: Using an older, superseded kit may lead to a repeat failure. It is critical to install the latest available part number, currently 12700437, to get the most durable components.
Model Year Variations Within This Range
- 2013-2018: The 3.6L LFX engine was used in the ATS for this entire period. While it was an update over the previous LLT engine with known timing chain issues, the problem was not entirely eliminated. The LFX engine itself was replaced by the LGX V6 starting in the 2016 Cadillac CTS, but the ATS retained the LFX through 2018. It is crucial to ensure the timing kit used is the latest revision, as improvements were made throughout the engine's production life.
Helpful Videos

We Have This Part in Stock


The information in this article is provided for general reference and educational purposes only. Vehicle specifications, procedures, and part compatibility can vary by production date, trim level, and region. Always consult your vehicle's factory service manual and verify part numbers before purchasing or performing repairs. Safety-critical components such as airbags, seat belts, and braking systems should be installed by a qualified professional.
- Cadillac ATS:
- 🧭 Diagnostic Flowchart
- 🎬 Helpful Videos
- 🛍️ Shop This Part
- What's Unique About the 2013-2018 Cadillac ATS
- Symptoms You May Notice
- Most Likely Causes
- Rare But Worth Checking
- Diagnosis Steps
- Parts You'll Likely Need
- Related Codes That Often Appear With This One
- Technical Service Bulletins (TSBs) & Recalls
- Platform-Specific Known Issues
- Mechanic-Grade Diagnostic Values
- Wiring & Ground Locations
- Real Owner Repair Stories
- OEM Part Supersession History
- Model Year Variations Within This Range
- 🎟️ Get 5% Off