
P0009 on 2008-2009 Pontiac G8 3.6L: Stretched Timing Chain Causes & Fixes
Code P0009 on a Pontiac G8 with the 3.6L V6 almost always means the timing chains have stretched. This is a major, labor-intensive repair involving replacing the chains, tensioners, and guides, often costing between $1,800 and $2,500 or more at a repair shop. This was a widespread, known issue on early GM 3.6L engines.
- P0009 on a 2008-2009 Pontiac G8 almost exclusively points to a stretched timing chain on the 3.6L V6 engine.
- This is a serious, labor-intensive, and expensive repair. It is not recommended for a DIY beginner.
- The correct fix is to replace all timing chains, tensioners, and guides with a modern, updated kit.
- Simply replacing sensors will not fix this code.
- After repair, using high-quality full synthetic oil and adhering to shorter oil change intervals is crucial to prevent a recurrence.
What's Unique About the 2008-2009 Pontiac G8
The 3.6L LY7 V6 engine in the Pontiac G8 is infamous for premature timing chain failure. This widespread issue, affecting many GM vehicles, is often attributed to the original timing chain design and oil life monitor calibrations that allowed for excessively long oil change intervals. Degraded oil accelerates wear on the chains and their hydraulic tensioners, leading to the slack that triggers codes like P0009. GM later issued updated parts to address this, as noted in TSB #12-06-01-009F, and also created a Special Coverage Adjustment (11340C) extending the warranty to 10 years/120,000 miles for this specific issue on certain vehicles, though the G8 was not always explicitly included.
Diagnostic Flowchart
Tap your situation to follow the diagnostic path that matches what you're seeing on this vehicle.
Symptoms You May Notice
- Check Engine Light is on
- Rattling or chain-slap noise from the engine, especially on a cold start
- Rough or unstable idle
- Reduced engine power and sluggish acceleration
- Difficulty starting the engine
- Poor fuel economy
- Replacing only the camshaft or crankshaft position sensors without verifying the mechanical timing. The sensors are usually doing their job correctly by reporting the fault.
- Replacing only one or two of the three timing chains. All chains, guides, and tensioners should be replaced as a complete kit.
- Ignoring the root cause of oil degradation. After repair, adhering to shorter oil change intervals (e.g., 3,000-5,000 miles) with full synthetic oil is crucial for the new chains' longevity.
Most Likely Causes
- Stretched Timing Chains 🔴 High Probability → Shop Engine Timing Chain The original timing chains on the 3.6L LY7 engine were susceptible to premature wear and stretching, a well-documented issue across many GM models. This was exacerbated by long oil change intervals recommended by the factory Oil Life Monitor.
How to confirm: The definitive method is physical inspection, which requires removing the front engine cover to check for slack. An advanced scan tool can also show camshaft deviation angles; a deviation greater than 4-5 degrees will typically set the code.
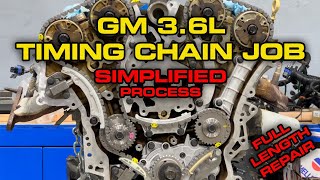
Typical fix: Replace all three timing chains, along with the tensioners and guides, with an updated kit. Using an OEM kit like ACDelco is highly recommended.
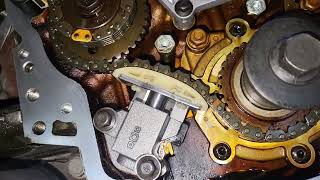
Est. part cost: $200-$500 - Failed Timing Chain Tensioners or Worn Guides 🔴 High Probability → Shop Engine Timing Chain The hydraulic tensioners can fail or weaken due to dirty oil or age, allowing the chains to become loose. The plastic guides can also wear down or break, contributing to the slack.
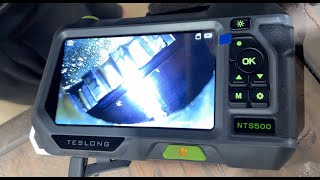
How to confirm: Visual inspection during a timing chain service will reveal worn guides or fully extended tensioners. A rattling noise on startup is a strong indicator. 🎬 See a demonstration of the clattering noise caused by loose chains.
Typical fix: These components are always replaced as part of a complete timing chain service. TSB #PIP3423P specifically calls for inspecting for loose chains or tensioners.
Est. part cost: $424 (Included in most timing chain kits) - Low Engine Oil Level or Poor Oil Quality 🟡 Medium Probability The hydraulic tensioners that keep the timing chains tight rely on clean oil at the proper pressure. The original GM Oil Life Monitor often recommended intervals that were too long (e.g., 7,500+ miles), leading to oil breakdown, sludge, and accelerated wear on timing components.
How to confirm: Check the oil dipstick for level and inspect the oil for color and consistency. Review vehicle service records for oil change frequency. Sludge buildup visible under the oil cap is a major red flag.
Typical fix: Perform an oil and filter change using a high-quality full synthetic 5W-30 oil meeting Dexos specifications. This is a critical maintenance step but will not fix already stretched chains.
Est. part cost: $50-$100
Rare But Worth Checking
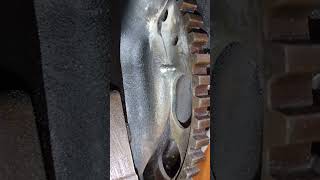
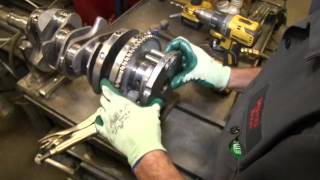
- Shifted Crankshaft Reluctor Wheel: → Shop Engine Crankshaft A known but less common issue where the toothed wheel on the crankshaft that the position sensor reads can move slightly. This will cause timing codes even with new chains. TSBs PIP3423P and its successors mention this possibility, which requires crankshaft replacement to fix. 🎬 Watch how to address a shifted crankshaft reluctor wheel. It can sometimes be inspected with a borescope through the crank sensor hole.
- Faulty Camshaft or Crankshaft Position Sensor: → Shop Engine Crankshaft Position Sensor While possible, it's much more likely that the sensors are correctly reporting a mechanical timing issue. Replacing sensors alone rarely fixes a P0009 code on this engine and is a common misdiagnosis.
- Malfunctioning VVT Solenoid or Cam Phaser: A stuck VVT solenoid (oil control valve) or a failed cam phaser can cause a correlation error, but this is less common than the primary chains stretching. These are often replaced during the timing chain job as a preventative measure.
Diagnosis Steps
- Confirm the code with an OBD-II scanner and check for any other related codes (P0008, P0016-P0019).
- Check the engine oil level and condition. If low or dirty, perform an oil and filter change, clear the codes, and see if they return. Note if the code appears mainly on cold starts.
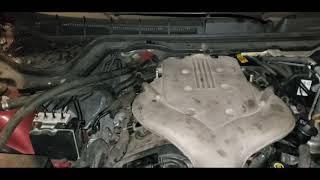
- Listen for a rattling noise from the front of the engine upon cold startup, which is a classic sign of a loose timing chain.
- Use an advanced scan tool to monitor live data for the camshaft and crankshaft position sensors. Deviations between requested and actual cam positions greater than 4-5 degrees can confirm a timing issue.
- Test the VVT solenoids for proper resistance (typically 8-12 Ohms) and function using a scan tool's bidirectional controls.
- If the cause is still not clear, perform a physical inspection. This is the definitive step and involves removing the front timing cover to visually inspect the chains for slack and the guides for wear.
- If chains have been replaced and codes return, investigate the crankshaft reluctor wheel for movement, as per TSB PIP3423P.
Parts You'll Likely Need
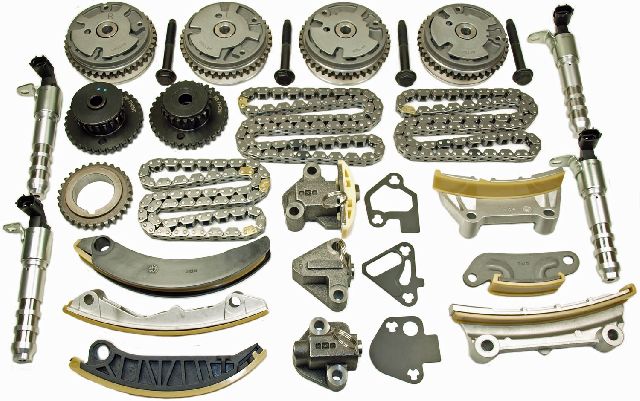
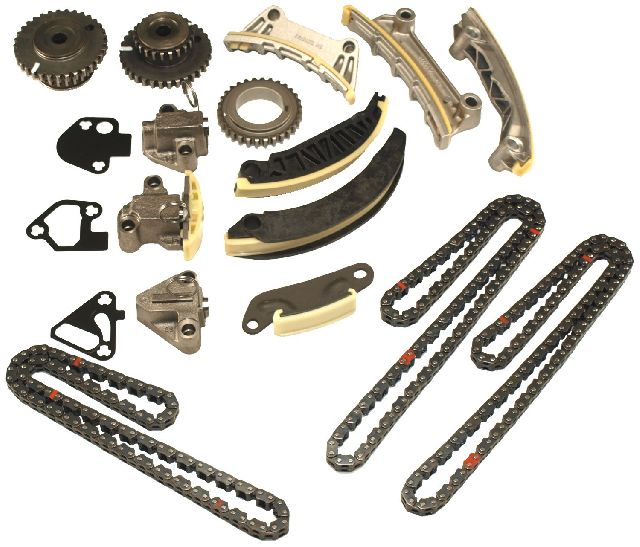
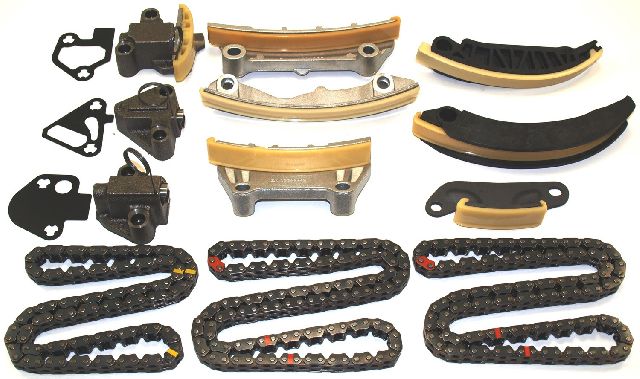
- Engine Timing Chain Kit
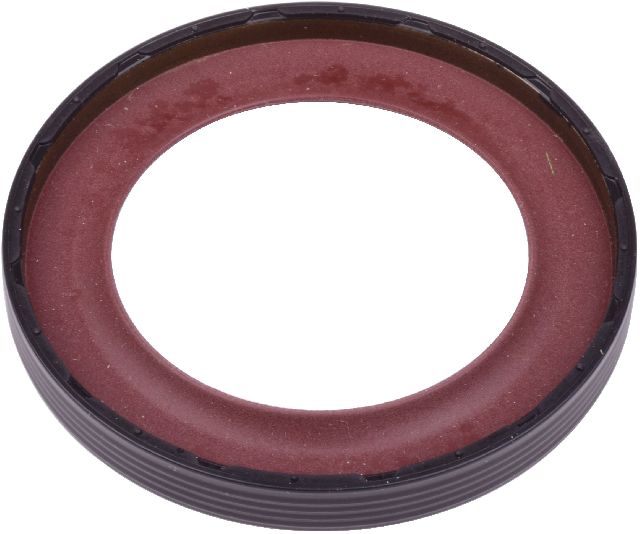
(OEM #12651450 (superseded by 12700436, 12693218))— This is the definitive fix. A complete kit includes all three chains, all tensioners, and all guides needed to restore proper engine timing. TSB #12-06-01-009F announced the availability of these updated kits. The kit should contain all necessary gaskets and seals for the job.
Trusted brands: ACDelco, Cloyes
OEM price range: $300-$450
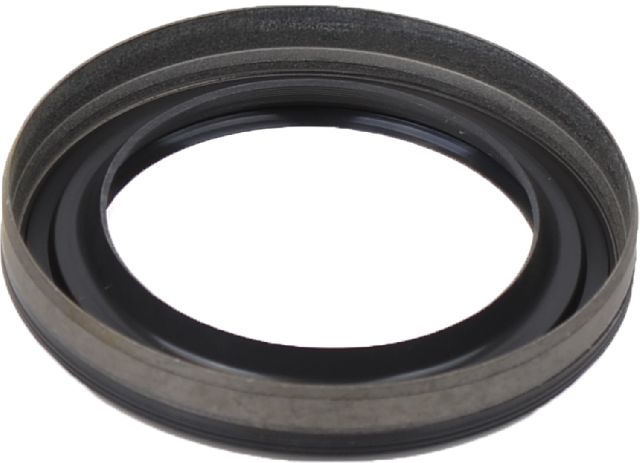
Aftermarket price range: $200-$350 - Front Timing Cover Gasket and Seals — These are required for reassembly after accessing the timing components to prevent oil leaks. They are typically included in a quality OEM timing kit.
Trusted brands: Fel-Pro, ACDelco
OEM price range: $50-$80
Aftermarket price range: $30-$60 - Full Synthetic 5W-30 Engine Oil and Filter — Fresh, high-quality oil is critical for the proper function of the new hydraulic tensioners and for the longevity of the new chains. Using oil that meets GM's Dexos specification is recommended.
Trusted brands: Mobil 1, ACDelco Dexos
OEM price range: $60-$90
Aftermarket price range: $40-$70
Related Codes That Often Appear With This One
- P0008 — This is the identical code but for Bank 1 (the firewall side). Seeing P0008 and P0009 together strongly indicates a stretched primary timing chain affecting both banks, which is a very common scenario.
- P0016, P0017, P0018, P0019 — These are more specific crankshaft-to-camshaft correlation codes for both banks. GM groups all these codes together with P0008/P0009 as being caused by stretched timing chains in TSB #12-06-01-009F.
Technical Service Bulletins (TSBs) & Recalls
- PIP3423P: Instructs technicians to inspect for loose timing chains or tensioners for P0009 and related codes. Also mentions the possibility of a shifted crankshaft reluctor wheel.
- 12-06-01-009F: Announces the availability of updated timing chain kits for repairing stretched timing chains that cause codes like P0009.
- 11340C: Special Coverage Adjustment - Extends warranty on timing chain for premature wear to 10 years/120,000 miles for certain models.
Platform-Specific Known Issues
- The 3.6L LY7 V6 in the G8 is known for premature timing chain stretch, a problem confirmed by multiple GM Technical Service Bulletins (TSBs).
- TSB #12-06-01-009F specifically mentions the availability of updated timing chain kits to repair this issue.
- TSB #PIP3423P instructs technicians to inspect for loose timing chains or tensioners when codes P0008/P0009 are present and also notes that a shifted crankshaft reluctor wheel can be a rare cause.
- GM issued Special Coverage Adjustment #11340C, extending the warranty for this specific timing chain issue to 10 years or 120,000 miles on many affected vehicles, including the 2009 G8.
Mechanic-Grade Diagnostic Values
- Camshaft Position (CMP) Actuator Solenoid Resistance — expected: 8 to 12 Ohms. Failure: A reading outside this range indicates a faulty solenoid.
- Crankshaft Position Sensor (CKP) Resistance — expected: Approximately 920 Ohms. Failure: A significantly different resistance value may indicate a faulty sensor.
- Camshaft Position Sensor (CMP) Power Supply Voltage — expected: 4.8 to 5.2 Volts (Key On, Engine Off). Failure: No voltage or voltage outside this range points to a wiring or ECM issue, not the sensor itself.
- Engine Oil Pressure — expected: Minimum 20 psi at 2,000 RPM. Failure: Pressure below this specification can cause issues with the hydraulic timing chain tensioners and VVT system.
- Crankshaft Reluctor Wheel Position — expected: 25 to 26 mm from the machined surface of the crankshaft throw to the edge of the open space in the reluctor wheel.. Failure: A different measurement indicates the wheel has slipped, which will cause timing codes even with good chains. This requires crankshaft replacement.
Scan Tool Commands That Help
- GDS2 / Tech2: Camshaft Position Actuator Solenoid Control — This is a bidirectional test to command each VVT solenoid on and off. A technician can listen for a click and watch for a change in camshaft angle data to confirm the solenoid is mechanically responding, helping to rule it out as the cause before performing major mechanical work.
- GDS2 / Tech2: Crankshaft Position Variation Learn (CASE Learn) — This procedure is mandatory after replacing the crankshaft, crankshaft position sensor, or ECM. It allows the ECM to learn the minor variations in the crankshaft reluctor wheel to ensure accurate timing and misfire detection. Failure to perform this can lead to false correlation codes after a repair.
Wiring & Ground Locations
- G103 — From the right front cylinder head to the ABS bracket.. This is a primary engine block ground. A poor connection here can cause erratic signals from engine-mounted sensors, including the cam and crank sensors, potentially leading to false codes.
- G107 (3.6L) — On the right front of the engine block.. This is a key ground point for the Engine Control Module (ECM) and Transmission Control Module (TCM). A loose or corroded connection can cause a wide range of phantom codes and drivability issues.
- G112 — From the left rear cylinder head to the engine harness.. Another critical engine-to-harness ground point that ensures a stable reference for the sensors on Bank 2 (driver's side).
- Crankshaft Position (CKP) Sensor — Lower right rear of the engine block.. Knowing the physical location is necessary for inspection, testing, and for performing a borescope inspection of the reluctor wheel through the sensor's mounting hole.
Real Owner Repair Stories
- Camaro5 Forums user 'secrethero89' (2011 Chevrolet Camaro 3.6L V6 (LTT engine, similar architecture to LY7)) — Check engine light with P0008 and P0009, sluggish performance, and extreme power loss.
❌ Tried (didn't work) Replaced all timing chains with a Cloyes kit., Replaced all four VVT sprockets (cam phasers).
✅ What actually fixed it The crankshaft reluctor wheel had slipped by 1.5 teeth. A mechanic was able to carefully force the wheel back into its correct position without removing the crankshaft and applied a small tack weld to prevent future movement. This completely resolved the codes and restored engine power.
"I Checked Everything" — The Actual Cause
- For code P0009 on this engine, the equivalent of a 'smoke test clean' scenario is when diagnostic tests confirm the camshaft and crankshaft sensors and their wiring are functioning correctly. In over 90% of these cases, the fault is still mechanical. If the timing chains are then replaced and the code persists, the actual root cause is almost certainly a slipped crankshaft reluctor wheel, an issue that standard sensor tests cannot detect.
OEM Part Supersession History
Various early-design timing chain kits→ACDelco 12651450 (and its subsequent revisions like 12700436, 12693218)— The original chains were prone to premature stretching. Updated kits with more durable chains were released to address the widespread issue.
Model Year Variations Within This Range
- 2008-2009: There are no significant mechanical differences between the 2008 and 2009 Pontiac G8 models equipped with the 3.6L LY7 V6 that would alter the cause, diagnosis, or repair of a P0009 fault. Both model years are equally susceptible to the timing chain issue.
Helpful Videos

We Have This Part in Stock


The information in this article is provided for general reference and educational purposes only. Vehicle specifications, procedures, and part compatibility can vary by production date, trim level, and region. Always consult your vehicle's factory service manual and verify part numbers before purchasing or performing repairs. Safety-critical components such as airbags, seat belts, and braking systems should be installed by a qualified professional.
- Pontiac G8:
- 🧭 Diagnostic Flowchart
- 🎬 Helpful Videos
- 🛍️ Shop This Part
- What's Unique About the 2008-2009 Pontiac G8
- Symptoms You May Notice
- Most Likely Causes
- Rare But Worth Checking
- Diagnosis Steps
- Parts You'll Likely Need
- Related Codes That Often Appear With This One
- Technical Service Bulletins (TSBs) & Recalls
- Platform-Specific Known Issues
- Mechanic-Grade Diagnostic Values
- Scan Tool Commands That Help
- Wiring & Ground Locations
- Real Owner Repair Stories
- "I Checked Everything" — The Actual Cause
- OEM Part Supersession History
- Model Year Variations Within This Range
- 🎟️ Get 5% Off