
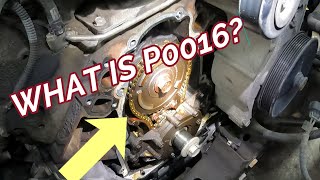
P0016 on 2006-2010 Hummer H3: Crank/Cam Correlation Causes and Fixes
P0016 on a Hummer H3 often points to a mechanical timing issue, not a bad sensor. The most common causes are a stretched timing chain or a loose crankshaft balancer bolt, a known issue covered by a Technical Service Bulletin. Expect a significant repair cost if the timing chain needs replacement.
- P0016 on an H3 is a serious code that points to a mechanical timing problem.
- Before suspecting a major repair, check the engine oil level and condition.
- A very likely and specific cause for the H3 is a loose crankshaft balancer bolt, as noted in TSB #PIP4581B.
- Do not replace the cam or crank sensors without first investigating the more probable mechanical causes like the timing chain or balancer bolt.
- Due to the complexity of a timing chain job, professional diagnosis and repair are strongly recommended.
What's Unique About the 2006-2010 Hummer H3
The Hummer H3, particularly with the inline-five engines (3.5L and 3.7L), has two well-documented vulnerabilities that lead to code P0016. First, the timing chains are known to stretch over time, causing the cam and crank to go out of sync. Second, and more specific to this platform, is an issue where the crankshaft balancer bolt can loosen, causing the harmonic balancer (and the reluctor wheel the crank sensor reads) to wobble or shift, triggering the correlation fault. This specific bolt issue is addressed in GM Technical Service Bulletin #PIP4581B, which applies to the I4, I5, and I6 Atlas engines.
Diagnostic Flowchart
Tap your situation to follow the diagnostic path that matches what you're seeing on this vehicle.
Symptoms You May Notice
- Check Engine Light is on
- Engine is hard to start or has a long crank time
- Rough, unstable idle, sometimes causing stalling when coming to a stop
- Reduced engine power and poor acceleration
- Rattling, clattering, or chattering noise from the front of the engine, especially on startup or at idle
- Increased fuel consumption
- In severe cases with the 5.3L V8, a broken timing chain guide can cause the chain to jump time, leading to a crank-no-start condition.
- Replacing the camshaft position sensor (CMP) or crankshaft position sensor (CKP) without verifying the mechanical timing. The sensors are often correctly reporting a mechanical problem.
- Condemning the timing chain immediately without first checking the VVT solenoid and the torque on the crankshaft balancer bolt, both of which are easier and cheaper to fix.
Most Likely Causes
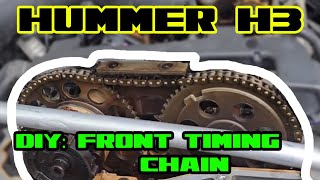
- Stretched Timing Chain 🔴 High Probability → Shop Engine Timing Chain The Atlas family of inline engines used in the H3 is known for timing chain stretch, particularly at higher mileage (over 100,000 miles). This is often accelerated by extended oil change intervals.
How to confirm: A technician can use a scan tool to view camshaft deviation data. Physical inspection for chain slack by removing the valve cover or timing cover is the definitive confirmation. A rattle at idle that goes away with RPM can be an indicator.
Typical fix: Replacement of the timing chain, tensioners, and guides. This is a labor-intensive job, often requiring engine removal or dropping the front differential. 🎬 See this video for a full timing chain replacement guide.
Est. part cost: $200-$400 for a full kit - Loose Crankshaft Balancer Bolt 🔴 High Probability → Shop Engine Crankshaft As documented in TSB #PIP4581B, the crankshaft balancer bolt can lose its torque, especially after a previous repair where it was removed. This causes the balancer and the crankshaft position sensor reluctor wheel to move out of sync, generating P0016.
How to confirm: Physically check the torque of the crankshaft balancer bolt. The TSB specifies re-torquing the bolt as a primary diagnostic step when P0016 is present with a rattle noise. Access requires removing the fan shroud.
Typical fix: Re-torquing the existing bolt to specification or, ideally, replacing it with a new one and torquing it correctly. The torque spec is high and requires a torque-plus-angle procedure. 🎬 Watch: How one owner solved the P0016 code on their H3.
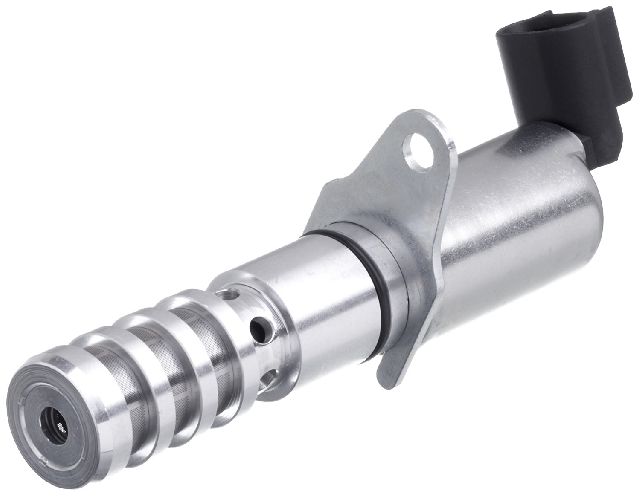
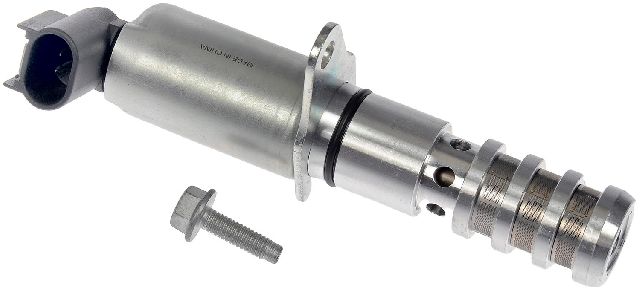
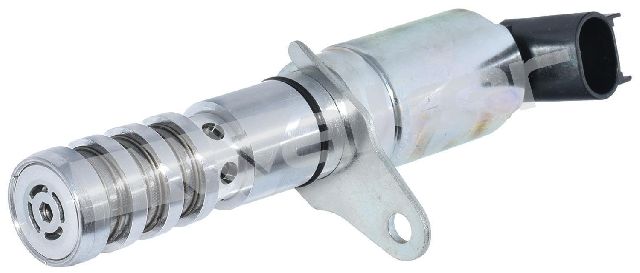
Est. part cost: $10-$25 for a new bolt (e.g., Dorman 926-886). - Faulty Camshaft Actuator Solenoid (VVT Solenoid) 🟡 Medium Probability → Shop Engine Camshaft These solenoids control oil flow to the cam phasers. They can become clogged with sludge or fail electrically. The filter screens on the original design are known to break off, potentially circulating debris in the engine oil. It is a very common failure point across the entire Atlas engine family.
How to confirm: Can be tested by commanding it with a scan tool and watching for a change in cam timing. It can also be removed (one 10mm bolt) and inspected for clogged or missing screens. Swapping the intake and exhaust solenoids (if identical) and seeing if the code changes to P0017 is a common diagnostic trick.
Typical fix: Replacement of the solenoid. It is easily accessible on top of the engine. 🎬 Watch: This walkthrough shows how to replace the VVT solenoid.
Est. part cost: $30-$70 (e.g., Dorman 917-010). - Low or Dirty Engine Oil 🟡 Medium Probability The variable valve timing (VVT) system is hydraulically operated by engine oil. Low oil level, incorrect viscosity, or sludge from infrequent oil changes can impede the function of the cam phasers and actuator solenoids, causing them to stick.
How to confirm: Check the oil level on the dipstick and review vehicle service history for regular oil changes. A retired GM mechanic noted that sludge or the wrong oil weight is a primary cause of VVT-related trouble codes.
Typical fix: Perform an oil and filter change using the correct specification oil (typically 5W-30 for the H3). An engine flush may be recommended if significant sludge is present.
Est. part cost: $40-$80 - Broken Timing Chain Tensioner/Guide (5.3L V8) 🟡 Medium Probability → Shop Engine Timing Chain On the 5.3L LH8 V8 engine, while less common than on the I5, P0016 can be triggered when the plastic timing chain tensioner or guide breaks. The broken pieces can get caught in the chain, causing it to jump one or more teeth.
How to confirm: Requires removing the front timing cover for visual inspection. Often accompanied by a rattling noise and may result in a no-start condition if the chain has jumped significantly.
Typical fix: Replacement of the timing chain, gears, and tensioner. This is a significant labor-intensive repair.
Est. part cost: $150-$300 for a timing set.
Rare But Worth Checking
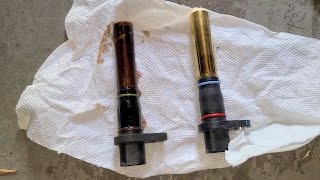
- Faulty Camshaft or Crankshaft Position Sensor: → Shop Engine Crankshaft Position Sensor While often replaced first, the sensors themselves are less likely to be the root cause than the mechanical issues they are reporting. They can fail, but it's a lower probability cause for this specific code. A failing sensor would typically set a sensor-specific circuit code as well.
- Failed Camshaft Phaser: → Shop Engine Camshaft The phaser unit itself, located on the end of the camshaft, can fail mechanically or get stuck. This is a more involved and expensive repair than the solenoid and is usually diagnosed after all other VVT-related possibilities are eliminated.
- Excessive Crankshaft End Play: → Shop Engine Crankshaft A related TSB (PIP3694F) notes that excessive axial movement of the crankshaft (more than .050 inch) due to worn thrust bearings can trigger correlation codes. This is a severe issue indicating a need for major engine work or replacement.
Diagnosis Steps
- Check the engine oil level and condition. Ensure it is full, clean, and of the correct viscosity. An oil change is a cheap first step.
- Scan for any other trouble codes. P0017 appearing with P0016 strongly suggests a base timing mechanical fault.
- Using a capable scan tool, monitor the desired vs. actual camshaft position angles for Bank 1. A significant, lagging deviation points to a mechanical or hydraulic issue.
- Inspect the wiring and connectors for the camshaft position sensor, crankshaft position sensor, and camshaft actuator solenoid.
- Test the Camshaft Actuator Solenoid. Command it with a scan tool or swap the intake and exhaust solenoids to see if the code follows to P0017. Remove and inspect for clogged or broken screens.
- Following TSB #PIP4581B, inspect and re-torque the crankshaft balancer bolt to the manufacturer's specification. This is a crucial step for this platform before assuming a timing chain failure.
- If the bolt is tight and the solenoid is working, the next step is to remove the valve cover and/or timing cover to physically inspect the timing chain for slack and verify the timing marks are aligned.
- Check for excessive crankshaft end play by attempting to move the crankshaft pulley forward and backward with a pry bar; any significant movement could indicate worn thrust bearings.
Parts You'll Likely Need
- Camshaft Position Actuator Solenoid (VVT Solenoid)
(OEM #12615873)— A common failure point that is relatively inexpensive and easy to replace. Often a first step in diagnosis after checking oil. The screens are known to break.
Trusted brands: ACDelco, Dorman (917-010)
OEM price range: $45-$70
Aftermarket price range: $25-$50 - Crankshaft Balancer Bolt
(OEM #11570163)— Required if the original is removed for inspection or is found to be loose, as it is a torque-to-yield bolt and should not be reused.
Related Codes That Often Appear With This One
- P0017 — Crankshaft Position - Camshaft Position Correlation (Bank 1, Sensor 'B' - Exhaust). If the timing chain has stretched or jumped, or the crank bolt is loose, it will affect both the intake (P0016) and exhaust (P0017) camshafts. Seeing both codes together strongly points to a base timing issue.
- P0300 — Random/Multiple Cylinder Misfire Detected. Incorrect cam timing can lead to poor combustion, causing misfires across multiple cylinders.
Technical Service Bulletins (TSBs) & Recalls
- PIP4581B - Addresses an engine rattle with DTC P0016 or P0017, pointing to the crankshaft balancer bolt torque as a potential cause.
Platform-Specific Known Issues
- TSB #PIP4581B: Crankshaft Balancer Bolt Torque: → Shop Engine Crankshaft This bulletin specifically addresses P0016 or P0017 accompanied by an engine rattle, particularly after a repair that involved removing the balancer. It instructs technicians to re-torque the crankshaft balancer bolt as a primary diagnostic step before condemning the timing chain or other components.
- Incorrect Engine Swaps: A documented case involved an owner experiencing a persistent crank-no-start issue after a 2008 3.7L engine was swapped into a 2006 H3. The fix required physically relocating the camshaft position sensor hole on the cylinder head to match the 2006 factory position, as the sensor alignment is different between years.
Mechanic-Grade Diagnostic Values
- Camshaft Actuator Solenoid (VVT Solenoid) Resistance — expected: 8 to 12 Ohms. Failure: A reading outside this range, or one that is unstable when wiggling the connector, indicates a faulty solenoid coil.
- Engine Oil Pressure (at operating temperature) — expected: Minimum 21 psi (145 kPa) at 2,000 RPM. Failure: Pressure below this specification indicates an oil delivery problem that will starve the VVT system and can trigger correlation codes.
- Scan Tool Camshaft Position Variance — expected: Near 0 degrees at idle. Failure: A consistent deviation of more than 9-12 degrees retarded or advanced indicates a mechanical timing issue (stretched chain) or a stuck phaser.
Scan Tool Commands That Help
- Tech2 / GDS2 or equivalent: Camshaft Position Actuator Solenoid Control — This bidirectional test allows a technician to command the VVT solenoid on and off (or vary its duty cycle) while the engine is running. A change in engine idle quality or RPM when the solenoid is commanded confirms the solenoid is mechanically working and that oil pressure is present. No change suggests a clogged solenoid, faulty wiring, or low oil pressure.
- Tech2 / GDS2 or equivalent: Crankshaft Position (CKP) Variation Relearn — This procedure is required after replacing the crankshaft position sensor, harmonic balancer, or making major engine repairs. It is NOT a fix for P0016, but a necessary step after certain repairs. A common misdiagnosis is to perform this relearn hoping it will fix a mechanical timing issue.
Wiring & Ground Locations
- G102 — On the lower left side of the engine block, rearward of G103.. This is a primary engine block ground. A poor connection here can cause erratic behavior from various engine sensors, including the crankshaft position sensor which is grounded through the engine block.
- G103 — On the lower left side of the engine block, forward of G102.. Another critical engine block ground point. Both G102 and G103 are essential for a stable ground reference for the ECM and its sensors.
- G104 — Left side of the engine block, in front of the starter.. This ground is shared by the starter and also provides a ground path for the engine block. A loose or corroded connection here could introduce electrical noise during cranking, potentially affecting sensor readings.
- ECM/PCM Connector C1, Pin 20 (OG wire) — At the Powertrain Control Module (PCM).. This is the Battery Positive Voltage feed to the PCM. Verifying stable voltage here is a key step in diagnosing any electronic engine control issue.
- ECM/PCM Connector C2, Pin 50 (D-GN wire) — At the Powertrain Control Module (PCM).. This is the signal wire for the Intake Camshaft Position (CMP) Sensor. Technicians may need to test for continuity or voltage on this pin when diagnosing a sensor or wiring fault.
Real Owner Repair Stories
- RepairPal Q&A (2006 Hummer H3 3.5L I5) — Check engine light with codes P0016, P0017, and P0300 after replacing the crankshaft position sensor.
❌ Tried (didn't work) Replacing the crankshaft position sensor., Attempting to clear codes without a proper relearn procedure.
✅ What actually fixed it An ASE Master Technician advised that the root cause is often sludge in the oil passages from lack of service. The recommended fix was to completely flush the oil system and replace the camshaft actuator solenoid.
OEM Part Supersession History
12568078, 12576768, 12597025, 12602516→12615873— Part consolidation and potential design updates for reliability over the years for the Camshaft Position Actuator Solenoid.
Model Year Variations Within This Range
- 2006: The 2006 Hummer H3 used the 3.5L L52 inline-5 engine.
- 2007-2010: From 2007 onwards, the H3 was upgraded to the 3.7L LLR inline-5 engine. The LLR featured a larger bore, a revised cylinder head design that corrected some valve seat issues from the earlier 3.5L, and different power/torque ratings. While the VVT system is conceptually the same, some internal timing components may differ. The 5.3L LH8 V8 was also available.
Helpful Videos


We Have This Part in Stock


The information in this article is provided for general reference and educational purposes only. Vehicle specifications, procedures, and part compatibility can vary by production date, trim level, and region. Always consult your vehicle's factory service manual and verify part numbers before purchasing or performing repairs. Safety-critical components such as airbags, seat belts, and braking systems should be installed by a qualified professional.
- Hummer H3:
- 🧭 Diagnostic Flowchart
- 🎬 Helpful Videos
- 🛍️ Shop This Part
- What's Unique About the 2006-2010 Hummer H3
- Symptoms You May Notice
- Most Likely Causes
- Rare But Worth Checking
- Diagnosis Steps
- Parts You'll Likely Need
- Related Codes That Often Appear With This One
- Technical Service Bulletins (TSBs) & Recalls
- Platform-Specific Known Issues
- Mechanic-Grade Diagnostic Values
- Scan Tool Commands That Help
- Wiring & Ground Locations
- Real Owner Repair Stories
- OEM Part Supersession History
- Model Year Variations Within This Range
- 🎟️ Get 5% Off