
P0017 on 2015-2017 GMC Acadia: Stretched Timing Chain Causes & Fixes
On a 2015-2017 GMC Acadia with the 3.6L V6, code P0017 almost always indicates a stretched timing chain or failed tensioner. This is a serious, labor-intensive repair costing $2,000-$3,500+. Low or dirty oil is a major contributing factor, and in some lucky cases, an engine flush and oil change can resolve the code.
- P0017 on a 2015-2017 Acadia is a serious code that very strongly points to a stretched timing chain.
- Always check the engine oil level and condition first. A simple oil change with an engine flush might resolve the issue if it's caused by sludge, but this is often a temporary fix.
- Do not ignore a rattling engine noise, especially at startup; it's a critical warning of a loose timing chain.
- This is not a DIY-friendly repair. Replacing timing chains is a major, expensive job that requires professional service to avoid engine damage.
- Do not waste money replacing sensors first; the problem is almost always mechanical.
What's Unique About the 2015-2017 Gmc ACADIA
The GM 3.6L V6 engine family (including the LFX in these Acadias) has a well-documented history of premature timing chain stretch. While GM made improvements over the earlier LLT engine, the problem persists, particularly when oil change intervals are extended or incorrect oil is used. The issue became so known that GM issued multiple Technical Service Bulletins (TSBs), like #PIP3423P, directly linking P0017 to inspecting for loose timing chains and even a slipped crankshaft reluctor wheel. The LGX engine, introduced in the redesigned 2017 Acadia, features a more durable rear-mounted timing chain system to address these issues.
Diagnostic Flowchart
Tap your situation to follow the diagnostic path that matches what you're seeing on this vehicle.
Generation note: The 2015-2017 year range covers two generations. The 2015-2016 models and the 2017 'Acadia Limited' are part of the first generation on the Lambda platform, using the 3.6L LFX V6. The all-new, smaller second generation also launched in 2017 on the C1 platform with the redesigned 3.6L LGX V6. While both are 3.6L engines, they are substantially different and parts are not interchangeable. The timing chain issues are most famously associated with the LFX engine and its predecessors, while the LGX has an improved design making the problem less common.
Symptoms You May Notice
- Check Engine Light is on
- Engine running rough or poor idle
- Rattling or chain-like noise from the engine, especially on a cold start, that may go away as the engine warms up.
- Reduced engine power or sluggish acceleration
- Stalling, especially at idle or low speeds
- Poor fuel economy
- Replacing only the camshaft or crankshaft position sensors. The P0017 code on this vehicle is most often a mechanical problem (the timing chain), not an electrical sensor failure.
- Replacing only the VVT solenoids without checking the timing chains. While easier and cheaper, this rarely solves the problem if the chains are stretched. It may temporarily fix the issue if the problem is minor sludge, but the code often returns.
Most Likely Causes
- Stretched Timing Chain(s) 🔴 High Probability → Shop Engine Timing Chain The 3.6L V6 engine has a known history of premature timing chain wear. The issue is exacerbated by extended oil change intervals, which were encouraged by the factory oil life monitor in earlier years, leading to oil breakdown and poor lubrication of timing components. The direct injection design can also contribute to oil contamination, accelerating wear.
How to confirm: A mechanic can use a scan tool to observe camshaft deviation data (camshaft position error). A consistent deviation greater than 10-13 degrees for the Bank 1 exhaust cam is a strong indicator of a mechanical timing problem. Physical inspection, which requires significant engine disassembly, is the ultimate confirmation.
Typical fix: Replace all three timing chains, all tensioners, and all guides. This is typically done as a complete kit. It is highly recommended to use the latest revised OEM parts to prevent a repeat failure.
Est. part cost: $250-$600 - Failed Timing Chain Tensioner(s) 🔴 High Probability → Shop Engine Timing Chain The hydraulic tensioners rely on clean oil at the proper pressure. Oil sludge or low oil levels can cause them to fail or become weak, allowing the chain to become slack, which causes rattling and can lead to the chain jumping a tooth.
How to confirm: Often diagnosed during a timing chain inspection. A rattling noise on startup that goes away is a classic symptom of a failing tensioner that is losing its prime.
Typical fix: Replace the tensioners, usually as part of a complete timing chain kit replacement. It is considered best practice to replace all timing components at the same time.
Est. part cost: $50-$150 (if bought separately) - Low or Dirty Engine Oil 🟡 Medium Probability The entire variable valve timing (VVT) system, including cam phasers and tensioners, is hydraulically operated by engine oil. Low or sludgy oil can impede their function, clog solenoid screens, and starve the chains of lubrication, triggering correlation codes.
How to confirm: Check the oil level on the dipstick and inspect its condition. This should always be the first step. If the oil is low, black, or gritty, this is a likely contributor.
Typical fix: Perform an engine oil and filter change with the correct specification oil (GM dexos1). Some owners and technicians report success with an engine flush product before the oil change if sludge is suspected, as this can sometimes free up sticking VVT components.
Est. part cost: $50-$100 - Faulty Camshaft Actuator Solenoid (VVT Solenoid) ⚪ Low Probability → Shop Engine Camshaft These solenoids have fine mesh screens that can get clogged with debris from dirty oil, causing them to stick or respond slowly. While they can fail, it's much less common for them to be the root cause of P0017 on this engine compared to the chains themselves, and is often a symptom of a larger oil contamination issue.
How to confirm: Can be tested by swapping the Bank 1 exhaust solenoid with another one (e.g., the intake solenoid on the same bank) and seeing if the code changes (e.g., to P0016). They can also be removed and inspected for sludge on the screens. Resistance should be between 8 and 12 Ohms.
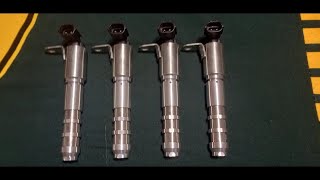
Typical fix: Replace the faulty solenoid. 🎬 See how to replace the VVT solenoid yourself This is a relatively inexpensive part to try before committing to a timing chain job, but it is often not the ultimate solution.
Est. part cost: $25-$75
Rare But Worth Checking
- Slipped Crankshaft Reluctor Wheel: → Shop Engine Crankshaft The toothed wheel on the crankshaft that the position sensor reads can become loose or shift on the crank. This is mentioned in multiple versions of GM TSB #PIP3423 and can mimic the symptoms of a stretched chain exactly. Diagnosis can be done with a borescope through the crank sensor hole or by analyzing the crankshaft sensor's active counter on an advanced scan tool; an erratic, inconsistent count points to a moving reluctor wheel. The fix requires crankshaft replacement, as the reluctor wheel is press-fit from the factory.
- Faulty Camshaft or Crankshaft Position Sensor: → Shop Engine Crankshaft Position Sensor While possible, a sensor failure is much less likely than a mechanical timing issue on this platform. A sensor fault will typically set other codes related to the sensor circuit itself (e.g., P0340, P0365) rather than a correlation code.
- Worn Camshaft Phaser/Actuator: → Shop Engine Camshaft The phaser itself, which is responsible for physically advancing or retarding the cam timing, can fail. This is less common than chain stretch but can also be caused by oil contamination or sludge blocking its internal passages. It is typically replaced during a full timing chain service.
Diagnosis Steps
- Check Engine Oil: Verify the oil level is full and the oil is clean and of the correct viscosity (GM dexos1 certified). If low or dirty, perform an oil and filter change. Consider an engine flush if sludge is suspected. Clear codes and re-test.
- Scan for Other Codes: Use an OBD-II scanner to check for other related codes (P0008, P0016, P0018, P0019) which can help pinpoint the problem's scope.
- Inspect and Test VVT Solenoids: Remove and inspect the Bank 1 exhaust VVT solenoid for clogged screens or debris. Test its resistance (should be 8-12 Ohms). Consider swapping it with the intake solenoid to see if the code follows (e.g., changes to P0016). This is a low-cost diagnostic step. 🎬 Watch: A simple diagnostic trick before replacing timing chains
- Monitor Cam/Crank Data: Use an advanced scan tool (like a GM GDS2) to view live data for 'Camshaft Position Variance'. A consistent variance of over 10 degrees on the Bank 1 exhaust camshaft indicates a mechanical timing problem.
- Check for Slipped Reluctor Wheel: If tools are available, use a borescope through the crankshaft position sensor opening to inspect the reluctor wheel for movement, as detailed in TSB PIP3423. Alternatively, monitor the 'Crankshaft Sensor Active Counter' on a scan tool; erratic jumps indicate a loose wheel.
- Perform Physical Inspection: If the above steps confirm a mechanical fault, the next step is to physically inspect the timing chains, guides, and tensioners. This is a labor-intensive process that involves significant engine disassembly and is often when the final diagnosis is made.
Parts You'll Likely Need
- Engine Timing Chain Kit
(OEM #12651420 (Superseded by newer numbers, verify with VIN))— This is the most common fix. A complete kit ensures all worn components (chains, guides, tensioners) are replaced with updated parts to prevent a recurrence.
Related Codes That Often Appear With This One
- P0008 — This is a general engine position system performance code for Bank 1. It is very commonly seen with P0017 and is another strong indicator of a stretched primary timing chain affecting the entire bank.
- P0016 — This is the correlation code for the Bank 1 *intake* camshaft. If P0016 and P0017 appear together, it strongly points to a timing issue affecting the entire Bank 1 cylinder head, almost certainly a stretched secondary chain for that bank or a primary chain issue.
- P0018 / P0019 — These are the equivalent correlation codes for Bank 2 (the cylinder head near the radiator). If all four codes (P0016, P0017, P0018, P0019) are present, it indicates a major timing problem affecting the entire engine, likely the primary chain or a slipped crankshaft reluctor wheel.
Technical Service Bulletins (TSBs) & Recalls
- PIP3423P: This bulletin, updated many times, is the primary document from GM addressing P0016, P0017, P0018, P0019, P0008, and P0009. It instructs technicians to check for loose timing chains and, if none are found, to inspect for a slipped crankshaft reluctor wheel.
- 12-06-01-009F: A related TSB for other GM vehicles with the 3.6L engine, also discussing timing chain wear.
Platform-Specific Known Issues
- The GM 3.6L V6 has a known design issue with premature timing chain stretching, particularly on earlier models but still possible on this year range.
- The original oil life monitoring system calibration may have encouraged overly long oil change intervals, contributing to oil breakdown and accelerated wear of timing components.
- The press-fit crankshaft reluctor wheel has been known to slip, causing timing codes that perfectly mimic a stretched chain, as documented in GM TSB PIP3423P.
Mechanic-Grade Diagnostic Values
- Camshaft Position Actuator Solenoid (VVT Solenoid) Resistance — expected: 8 to 12 Ohms at 68°F (20°C). Failure: A reading outside this range, or in the kilo-ohm/mega-ohm range, indicates a failed solenoid.
- Camshaft Position Sensor Signal Voltage (3-wire Hall effect) — expected: The sensor is supplied with a 5V reference. The signal wire fluctuates between approximately 0V and 5V as the engine runs.. Failure: No voltage fluctuation, a steady voltage, or voltage outside the 0-5V range suggests a faulty sensor or wiring issue.
- Camshaft Position Correlation Angle (Scan Tool) — expected: Near 0 degrees of variance at idle.. Failure: The ECM will set P0017 when the Bank 1 exhaust camshaft is greater than 10° retarded or 13° advanced relative to the crankshaft.
Scan Tool Commands That Help
- GM GDS2 / Tech2: Camshaft Position Actuator Control — This bidirectional command allows a technician to manually command the VVT solenoids to advance or retard timing while monitoring the cam/crank sensor data. If the timing angle doesn't change as commanded, it helps isolate whether the problem is the solenoid, the phaser, or an oil pressure issue before engine disassembly.
- Advanced Scan Tool: Crankshaft Sensor Active Counter — This data PID is used to diagnose a suspected slipped crankshaft reluctor wheel. On a healthy engine, the counter will increment in a steady, predictable pattern. If the counter is erratic, jumping inconsistently, it strongly suggests the reluctor wheel is loose on the crankshaft.
Wiring & Ground Locations
- G104 — Mounted on the left (firewall side) cylinder head.. This is a primary engine ground. A poor connection here can cause incorrect or unstable readings from engine-mounted sensors, including the camshaft and crankshaft position sensors, as they may lack a stable reference to ground.
- G103 — Located at the left rear of the engine compartment on the cowl, sometimes near the brake booster or on the cylinder head itself.. This is a primary ground for the Engine Control Module (ECM) on many GM platforms. A loose or corroded G103 can cause a wide range of erratic sensor readings and false codes as the ECM's own ground reference is compromised.
- Camshaft Position Sensor Connector (Bank 1) — On the firewall side of the engine, on the valve cover. The exhaust sensor (Sensor B) is typically the outer one on the cylinder head.. The 3-wire connector provides the sensor with power, ground, and a path for the signal. Pin 1 is typically ground, Pin 2 is the signal wire, and Pin 3 is the 5V reference from the ECM. The pigtail harness is exposed to significant heat and can become brittle, causing intermittent connections.
Real Owner Repair Stories
- YouTube user 'procom performance' (2010 Chevrolet Camaro 3.6L V6 (LFX Engine, same family)) — Persistent P0008 and P0017 codes, car drives fine with no rattling noise, but check engine light returns within one mile of clearing.
❌ Tried (didn't work) Swapping cam sensors from one bank to the other., Swapping VVT solenoids from one bank to the other., Performing an engine oil flush and oil change.
✅ What actually fixed it Physical inspection revealed a stretched timing chain on Bank 1. Replacing the entire timing chain kit resolved the codes. - 2CarPros Forum User (2007 Cadillac SRX 3.6L V6, 189,000 miles) — Check engine light with codes P0008 and P0017, rough idle.
❌ Tried (didn't work) Replacing the camshaft position sensor.
✅ What actually fixed it The accepted answer from the site mechanic pointed to clogged VVT oil control solenoids or, more likely, a stretched timing chain, which is the common cause when sensor replacement fails.
OEM Part Supersession History
Cloyes 9-0753S→Various newer kits from GM (e.g., 12651420) and aftermarket suppliers.— The original timing chain designs on the 3.6L V6 were prone to premature stretching. Newer kits feature improved chain link design and materials to increase durability.
Heads up: It is critical to use a kit specified for the LFX engine (2015-2017 Acadia/Limited) and not confuse it with kits for the earlier LLT or later LGX engines, as the components are not interchangeable.
Model Year Variations Within This Range
- 2017: In 2017, GMC sold both the first-generation 'Acadia Limited' (LFX engine) and the new second-generation 'Acadia' (LGX engine). The LGX is a significant redesign with a different, more robust timing chain system, oil pump, and VVT components. They are not interchangeable, and diagnosis/repair procedures differ.
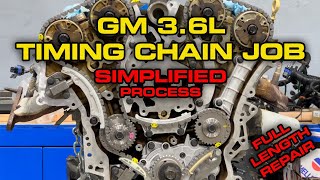
Helpful Videos

We Have This Part in Stock


The information in this article is provided for general reference and educational purposes only. Vehicle specifications, procedures, and part compatibility can vary by production date, trim level, and region. Always consult your vehicle's factory service manual and verify part numbers before purchasing or performing repairs. Safety-critical components such as airbags, seat belts, and braking systems should be installed by a qualified professional.
- Gmc ACADIA:
- 🧭 Diagnostic Flowchart
- 🎬 Helpful Videos
- 🛍️ Shop This Part
- What's Unique About the 2015-2017 Gmc ACADIA
- Symptoms You May Notice
- Most Likely Causes
- Rare But Worth Checking
- Diagnosis Steps
- Parts You'll Likely Need
- Related Codes That Often Appear With This One
- Technical Service Bulletins (TSBs) & Recalls
- Platform-Specific Known Issues
- Mechanic-Grade Diagnostic Values
- Scan Tool Commands That Help
- Wiring & Ground Locations
- Real Owner Repair Stories
- OEM Part Supersession History
- Model Year Variations Within This Range
- 🎟️ Get 5% Off