
P0030 on 2009-2014 Acura TSX: A/F Sensor Heater Circuit Causes and Fixes
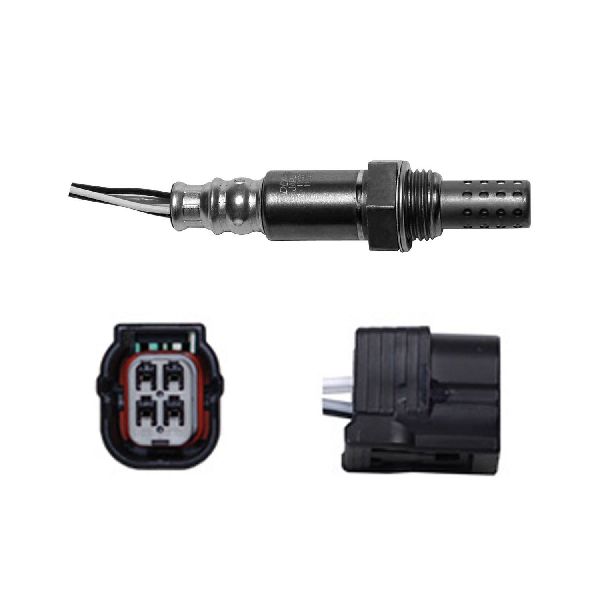
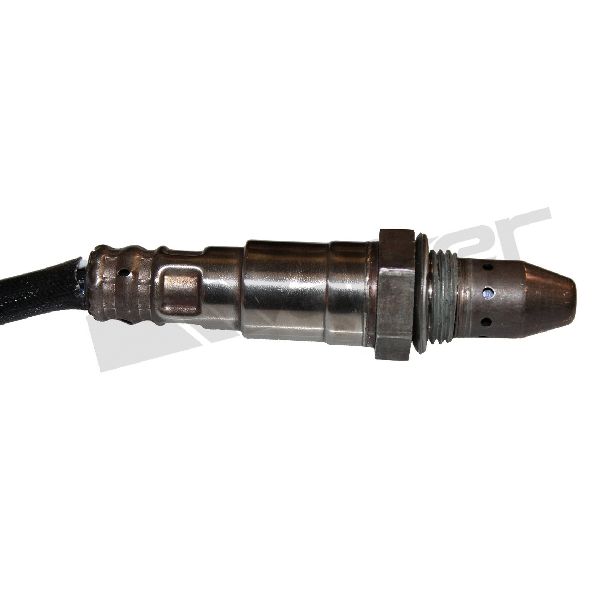
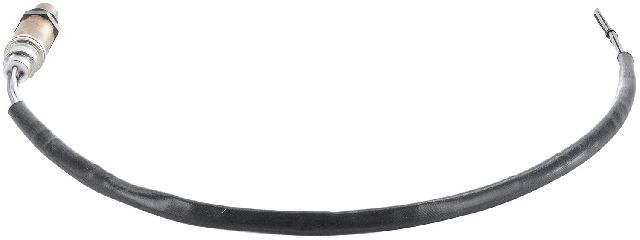
This code almost always means the internal heater in the upstream Air/Fuel Ratio sensor has failed. Replacing the sensor, located on the exhaust manifold, is the most common fix. Before replacing, check the A/F sensor fuse (typically a 15A fuse in the under-hood fuse box). Expect to pay $70-$150 for a quality aftermarket sensor (Denso 234-9091 or NTK 25680) or around $230 for an OEM part (36531-R40-A01). It's a straightforward DIY job for most home mechanics with an O2 sensor socket.
- P0030 on a 2009-2014 TSX points directly to a failure in the heater circuit of the upstream Air/Fuel Ratio sensor.
- The most probable cause is a burned-out heater element inside the sensor itself.
- Before buying a new sensor, always check the related fuse first—it's a quick and inexpensive check that could save you money.
- For best results and to avoid compatibility issues, use a high-quality replacement sensor from an OEM brand like Denso (234-9091) or NGK/NTK (25680).
- This is a very manageable DIY repair with basic hand tools and a 22mm (7/8") O2 sensor socket.
What's Unique About the 2009-2014 Acura TSX
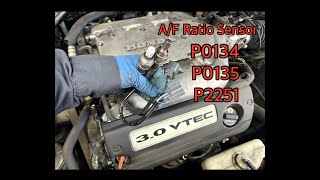
The 2009-2014 Acura TSX belongs to the second generation (CU2 chassis). For the 4-cylinder K24Z3 engine, the Bank 1 Sensor 1 (A/F Sensor) is located in a relatively accessible position on the exhaust manifold, high up against the firewall. 🎬 Watch: Locate the sensors on your TSX This is a common failure point due to extreme heat cycles, but the repair is straightforward. Honda/Acura vehicles are known to be sensitive to the brand of electronic parts used, so it is highly recommended to use an OEM-equivalent sensor from brands like Denso or NGK (also known as NTK) to avoid compatibility issues and ensure a lasting repair.
Symptoms You May Notice
- Check Engine Light is on
- Decreased fuel economy by 5-10%
- Rough or erratic idle, especially on cold starts
- Vehicle may feel sluggish for the first few minutes of driving
- Guaranteed failure of an emissions test
- Slightly richer smell from the exhaust on a cold start
- Replacing the downstream (Bank 1, Sensor 2) oxygen sensor instead of the upstream (Bank 1, Sensor 1) Air/Fuel Ratio sensor.
- Replacing the sensor without first checking for a simple blown fuse.
- Using a cheap, universal-fit sensor that requires splicing wires, which often have incorrect resistance values and lead to repeat failures.
Most Likely Causes
- Failed Air/Fuel Ratio Sensor (Bank 1, Sensor 1) 🔴 High Probability → Shop Oxygen Sensor The internal heater element is a common failure point due to constant and extreme heat cycles, similar to a light bulb filament burning out. This is the most frequent cause of P0030.
How to confirm: Using a multimeter, disconnect the sensor and measure the resistance between the two heater circuit pins (typically the two same-colored wires). A reading of 'OL' (open loop) or infinite resistance indicates a broken heater element. A normal reading for this sensor is typically between 2-5 ohms when cold. 🎬 Watch: How to test and replace the sensor
Typical fix: Replace the upstream Air/Fuel Ratio sensor. An oxygen sensor socket is highly recommended for removal.
Est. part cost: $70-$150 - Blown Fuse or Faulty Relay 🟡 Medium Probability A short circuit in the sensor's heater element or its wiring can cause the corresponding fuse to blow as a protective measure.
How to confirm: Locate the under-hood fuse box. Check the fuse labeled for the A/F Sensor or O2 Heater (often a 15A fuse). Visually inspect the fuse to see if it is blown. Test for 12V power at the sensor's harness connector with the key on, engine off.
Typical fix: Replace the blown fuse. If the fuse blows again immediately, there is a short circuit in the wiring or the new sensor itself that must be found and repaired.
Est. part cost: $1-$5 - Damaged Wiring or Connector ⚪ Low Probability The wiring harness is located in a high-heat area near the exhaust manifold and can become brittle, melted, or frayed over time. Rodent damage is also a possibility.
How to confirm: Visually inspect the entire wiring harness from the sensor to its connection point. Look for any signs of melting, chafing, or corrosion on the connector pins. Check for continuity on the power and ground wires from the PCM connector to the sensor connector.
Typical fix: Repair the damaged section of wire or replace the connector pigtail.
Est. part cost: $10-$30
Rare But Worth Checking
- Faulty Powertrain Control Module (PCM): → Shop Engine Control Module (ECM) This is extremely rare. The PCM's internal driver for the heater circuit can fail, but this should only be considered after all other possibilities (sensor, fuse, and wiring) have been definitively ruled out with proper testing.
Diagnosis Steps
- Retrieve the trouble code using an OBD-II scanner to confirm P0030 is the primary or only code present.
- Locate the under-hood fuse box and check the fuse for the A/F sensor heater circuit. Replace if blown and re-test.
- If the fuse is good, locate the upstream A/F sensor on the exhaust manifold. Visually inspect the sensor's connector and wiring for any signs of damage, melting, or corrosion.
- Disconnect the sensor's electrical connector.
- With the ignition on (engine off), use a multimeter to verify that there is battery voltage (approx. 12V) on one of the heater circuit pins in the vehicle's harness connector.
- Using a multimeter set to Ohms, measure the resistance of the heater circuit within the sensor itself (between the two same-colored wires). A reading between 2-5 Ohms is typical. An open circuit (OL) or zero resistance (short) confirms the sensor has failed.
- If power is present at the harness and the sensor's resistance is within spec, there may be an issue with the ground side of the circuit or the wiring back to the PCM, which would require a wiring diagram for further diagnosis.
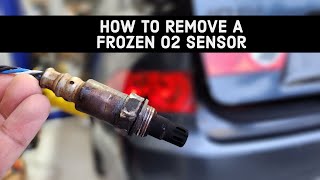
- If the sensor's heater circuit is confirmed to be faulty, replace the Air/Fuel Ratio sensor. Use a 22mm (or 7/8") oxygen sensor socket for removal and installation. Applying penetrating oil beforehand can help loosen a seized sensor. 🎬 Watch: How to remove a frozen TSX sensor
Parts You'll Likely Need
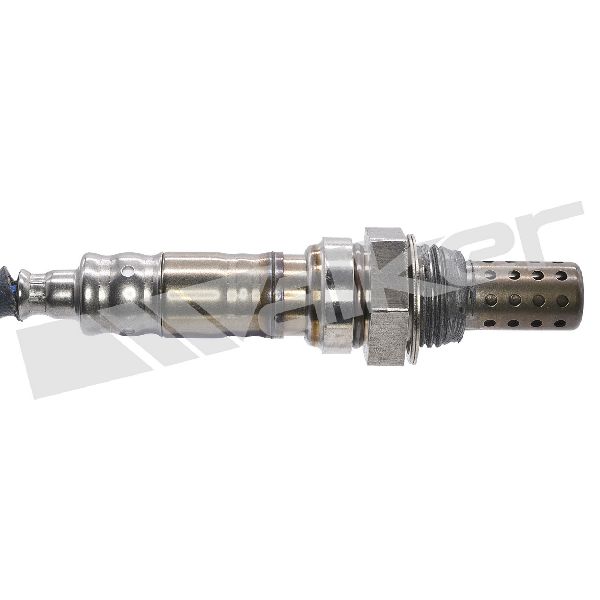
- Air/Fuel Ratio Sensor (Upstream Oxygen Sensor)
(OEM #36531-R40-A01)— The internal heater element is the most common point of failure for the P0030 code.
Trusted brands: Denso (OEM supplier) - Part #234-9091, NGK/NTK - Part #25680
OEM price range: $230-$250
Aftermarket price range: $70-$150
Platform-Specific Known Issues
- Owner Repair Experience: An owner on Acurazine reported getting a P0030 code on their 2010 TSX. After confirming the fuse was good, they replaced the upstream A/F sensor (Denso 234-9091) and cleared the code, which resolved the issue. They noted the sensor was located at the top front of the engine bay and was relatively easy to access with an O2 sensor socket.
Mechanic-Grade Diagnostic Values
- A/F Sensor Heater Element Resistance — expected: 2.0 - 5.0 Ohms when measured across the two heater pins (same-colored wires) on a cold sensor.. Failure: A reading of OL (open circuit/infinite resistance) or near 0 Ohms (short circuit) confirms a failed heater element.
- A/F Sensor Heater Circuit Voltage (at vehicle harness) — expected: Battery voltage (~12V) with the ignition on, engine off (KOEO).. Failure: 0V or significantly less than battery voltage points to a problem with the fuse, relay, or wiring from the power source.
- PCM Malfunction Threshold (Internal Resistance) — expected: The PCM expects the sensor's internal resistance to drop below a certain threshold after the heater is activated.. Failure: The PCM will set a code if the sensor's internal resistance remains high (e.g., 200 Ω or more) for a set duration (e.g., 40-90 seconds) after a cold start.
Scan Tool Commands That Help
- Honda HDS (Honda Diagnostic System): A/F Sensor Heater Test or Live Data PID: HO2S HEATER DUTY — This command in a professional scan tool can actively turn the heater circuit on and off to verify the entire circuit's integrity, including the PCM driver. Monitoring the 'HO2S HEATER DUTY' PID in live data should show a percentage value indicating the PCM is commanding the heater on during a cold start. A steady 0% when cold suggests a command issue.
Wiring & Ground Locations
- PCM Connector C, Pin C09 — At the Powertrain Control Module (PCM), which is typically located in the engine bay or behind the dashboard/center console.. This is the specific pin on the PCM that provides the ground-side control for the primary A/F sensor heater (AFS HTC). A poor connection or backed-out pin here would prevent the heater from activating, even with a good sensor and fuse.
- G101 — This is a primary engine bay ground point, often located on the chassis near the transmission mount, under and behind the battery tray.. While the heater circuit is directly controlled by the PCM, all sensors rely on a clean and solid engine-to-chassis ground reference. A corroded or loose G101 ground can cause a variety of electrical issues and erratic sensor behavior, although it's a less direct cause for a specific heater circuit code.
OEM Part Supersession History
36531-R40-A01→36531-R40-A01— No supersession found. The original part number is still the current and correct part for the entire 2009-2014 model year range.
Diagnostic Flowchart
Other Known Issues on This Vehicle
Issues unrelated to this code that are worth knowing about as an owner of this generation:
- VTC Actuator Rattle at Cold Startup 🟠 Medium — Common issue, especially on 2009-2010 models. A brief, 1-2 second grinding or rattling noise from the passenger side of the engine immediately after a cold start. (Ref: Acura TSB 10-024)
- Excessive Oil Consumption 🔴 High — Affects some 2009-2011 models, leading to consumption as high as 1 quart per 1,000-1,500 miles. Caused by sticking piston rings. (Ref: Acura TSB 13-006 (Warranty Extension))
- Premature Rear Brake Pad Wear 🟡 Low — Owners frequently report that rear brake pads wear out faster than the front pads, sometimes in as little as 20,000-30,000 miles.
- Power Steering Hose Leaks/Whine 🟠 Medium — The high-pressure power steering hose can develop leaks over time, and the system can become noisy, especially in cold weather, often due to air entering the system via failing O-rings.
Used vs. New Parts: Buying Guide for This Vehicle
When a used part is the smart pick: For this repair, sourcing used parts is generally not recommended for the sensor itself. However, a used connector pigtail from a junkyard is a viable option if only the connector is damaged. A used fuse box could also be considered if the issue is traced back to a faulty relay or internal corrosion within the box, which is a rare scenario.
Donor-vehicle mileage cap: roughly under 100000 miles for the part to have meaningful remaining life.
What to inspect on the donor part:
- For a connector pigtail, ensure the plastic is not brittle or cracked and the locking tab is intact.
- Check for any signs of corrosion (green or white powder) on the metal pins inside the connector.
- Ensure at least 6-8 inches of wire is left on the pigtail for easier splicing.
OEM-only on this vehicle (don't cheap out):
- Air/Fuel Ratio Sensor - While not strictly 'OEM-only', using the OEM supplier (Denso) or another high-quality brand like NTK is critical. Cheap, unbranded sensors are notorious for failing quickly or having incorrect resistance values, leading to the code returning.
Aftermarket brands forum-validated for this vehicle:
- Denso (Part #234-9091)
- NGK / NTK (Part #25680)
Brands owners have reported issues with on this vehicle:
- Generic or 'universal' sensors that require splicing wires. These often lack the precise calibration needed for Honda/Acura engine management systems.
Real Owner Stories
Aggregated from forums and TSBs cited above. Mileages and costs reflect what owners reported in those sources.
2010 Acura TSX 2.4L I4
Symptoms: Check engine light on with code P0030.
What fixed it: Confirmed the fuse was good, then replaced the upstream A/F sensor with a Denso 234-9091 unit using an O2 sensor socket.
Source hint: Acurazine.com: Provided user context on the location and replacement process for oxygen sensors on the second-generation TSX.
Related OBD-II Codes
Frequently Asked Questions
Which specific replacement sensor is recommended for the 2009-2014 Acura TSX to fix P0030?
Where is the A/F sensor located on my K24Z3 engine?
Could my P0030 code be related to the excessive oil consumption TSB 13-006?
Is there a specific fuse I should check before replacing the sensor on my TSX?
What resistance should I see when testing the TSX A/F sensor heater circuit?
Helpful Videos


We Have This Part in Stock


The information in this article is provided for general reference and educational purposes only. Vehicle specifications, procedures, and part compatibility can vary by production date, trim level, and region. Always consult your vehicle's factory service manual and verify part numbers before purchasing or performing repairs. Safety-critical components such as airbags, seat belts, and braking systems should be installed by a qualified professional.
- Acura TSX:
- 🧭 Diagnostic Flowchart
- 🎬 Helpful Videos
- 🛍️ Shop This Part
- What's Unique About the 2009-2014 Acura TSX
- Symptoms You May Notice
- Most Likely Causes
- Rare But Worth Checking
- Diagnosis Steps
- Parts You'll Likely Need
- Platform-Specific Known Issues
- Mechanic-Grade Diagnostic Values
- Scan Tool Commands That Help
- Wiring & Ground Locations
- OEM Part Supersession History
- Other Known Issues on This Vehicle
- Used vs. New Parts: Buying Guide for This Vehicle
- Real Owner Stories
- 2010 Acura TSX 2.4L I4
- Related OBD-II Codes
- Frequently Asked Questions
- 🎟️ Get 5% Off