
P0030 on 2011-2019 Ford Explorer 3.5L V6: HO2S Heater Circuit Causes and Fixes
On a 2011-2019 Explorer with the 3.5L V6, P0030 almost always means the upstream oxygen sensor on the firewall side (Bank 1) has failed. Before replacing it, check the O2 sensor fuse first. For 2011-2015 models, it's fuse #67 (20A); for 2016-2019, it's fuse #92 (15A). The part costs $50-$150, but access is notoriously difficult, making DIY challenging and increasing labor costs at a shop.
- P0030 on your Explorer points to a failure in the heater circuit of the upstream O2 sensor on the firewall side of the engine.
- Before replacing any parts, always check the fuse first: Fuse #67 (20A) for 2011-2015 models or Fuse #92 (15A) for 2016-2019 models.
- The most likely fix is replacing the Bank 1, Sensor 1 O2 sensor (Motorcraft part DY-1178 or equivalent).
- Be aware that this repair is difficult due to the sensor's tight location against the firewall; what would be a simple job on another vehicle requires more time and specialized tools like an offset O2 sensor socket on the Explorer.
What's Unique About the 2011-2019 Ford Explorer
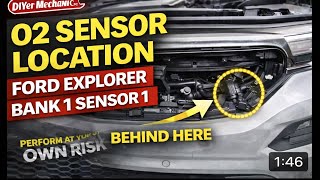
For the 3.5L V6 in the fifth-generation Explorer, the key challenge with code P0030 is not the diagnosis, but the repair. 'Bank 1' is the cylinder bank positioned against the firewall, making the 'Sensor 1' (upstream) oxygen sensor notoriously difficult to access. While the cause is almost always a simple sensor failure, the labor involved is significantly more than for the easily accessible Bank 2 sensor at the front of the engine. This difficult access is the primary complaint from owners and technicians dealing with this specific code on this vehicle, with many resorting to specialized tools like offset or crow's foot O2 sensor sockets to complete the job from below the vehicle.
Generation note: The 2011-2019 year range covers the entire fifth-generation Ford Explorer (U502). A facelift occurred in 2016, which changed the fuse number for the O2 sensor heater circuit. For 2011-2015 models, check fuse #67 (20A) in the under-hood Power Distribution Box. For 2016-2019 models, check fuse #92 (15A) in the same under-hood fuse box. The sensor location and replacement procedure are otherwise identical.
Symptoms You May Notice
- Check Engine Light illuminated
- Decreased fuel economy, especially during short trips or cold operation
- Possible rotten egg or sulfur smell from the exhaust.
- Failure to pass an emissions inspection.
- Rough idle or hesitation on a cold start before the engine warms up.
- Replacing the wrong oxygen sensor. P0030 is for Bank 1 (firewall side), Sensor 1 (upstream). It is easy to mistakenly replace the more accessible Bank 2 sensor at the front of the engine.
- Replacing the sensor without checking the fuse first. If the fuse is blown, a new sensor will not fix the code and the fuse may blow again.
- Assuming the sensor is bad without testing the circuit. While the sensor is the most likely culprit, a wiring or fuse issue will produce the same code.
Most Likely Causes
- Failed Oxygen Sensor Heater Element 🔴 High Probability → Shop Oxygen Sensor The internal heating element is a common failure point on all O2 sensors due to constant, extreme heat cycles. It is a standard wear-and-tear component and the most frequent cause of P0030.
How to confirm: After confirming the fuse is good, disconnect the sensor and measure the resistance between the two heater circuit pins on the sensor connector (usually the two wires of the same color). A reading of infinite resistance ('OL') on a multimeter confirms a broken heater element. A good sensor typically reads between 2-10 ohms for this Ford application.
Typical fix: Replace the Bank 1, Sensor 1 oxygen sensor. This is the upstream sensor on the rear (firewall side) exhaust manifold. Access is typically gained from underneath the vehicle or through the passenger side wheel well.
Est. part cost: $50-$150 - Blown Fuse 🟡 Medium Probability A short circuit in the sensor's internal heater element can cause the fuse to blow as a protective measure. If multiple O2 heater codes are present (e.g., P0030 and P0050), a blown shared fuse is the most likely cause.
How to confirm: Visually inspect the fuse for the O2 heater circuit in the under-hood fuse box. For 2011-2015 models, this is fuse #67 (20A). For 2016-2019 models, it is fuse #92 (15A).
Typical fix: Replace the blown fuse. If the fuse blows again immediately, it indicates a persistent short circuit in the wiring or the new sensor that must be diagnosed.
Est. part cost: $1-$5 - Damaged Wiring or Connector ⚪ Low Probability The wiring harness for the Bank 1 sensor is routed in a tight, high-heat area near the firewall and exhaust manifold, making it susceptible to melting, chafing, or corrosion over time. On AWD models, it is also near the PTU, another source of high heat.
How to confirm: Visually inspect the entire wiring harness leading to the sensor for any signs of melting on the exhaust, rubbing against other components, or corrosion in the connector pins. Check for continuity on the heater circuit wires between the PCM and the sensor connector.
Typical fix: Repair the damaged section of the wire or replace the connector pigtail. Ensure the repaired harness is properly secured away from high-temperature wire loom and zip ties.
Est. part cost: $10-$40
Rare But Worth Checking
- Faulty Powertrain Control Module (PCM): → Shop Engine Control Module (ECM) This is very rare. The PCM's internal driver for the heater circuit can fail. This should only be considered after all other possibilities (sensor, fuse, wiring) have been definitively ruled out.
Diagnosis Steps
- Read the codes with an OBD-II scanner and confirm P0030 is present. Note any other codes, as multiple heater codes (like P0050) strongly point to a fuse.
- Check the fuse for the O2 sensor heater circuit in the under-hood fuse box. For 2011-2015, check fuse #67 (20A). For 2016-2019, check fuse #92 (15A). If blown, replace it and re-test.
- If the fuse is good, locate the Bank 1, Sensor 1 oxygen sensor on the rear exhaust manifold, near the firewall. Access is difficult and may require raising the vehicle.
- Visually inspect the sensor's wiring harness and connector for any obvious signs of damage, such as melting, chafing, or corrosion.
- Disconnect the sensor. Use a multimeter to measure the resistance across the two heater pins on the sensor itself (typically the two wires of the same color). A reading of infinite resistance (OL) indicates a failed sensor. A good sensor should have a low resistance, typically between 2-10 ohms.
- If the sensor resistance is good, the problem is likely in the vehicle's wiring. With the key on and engine off, carefully test the harness-side connector for 12V power on one pin and a good ground on another. Lack of power or ground points to a wiring issue between the fuse box/PCM and the sensor.
Parts You'll Likely Need
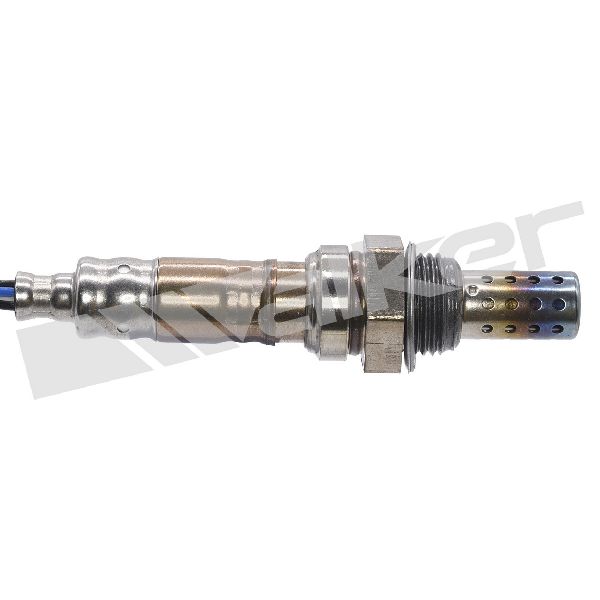
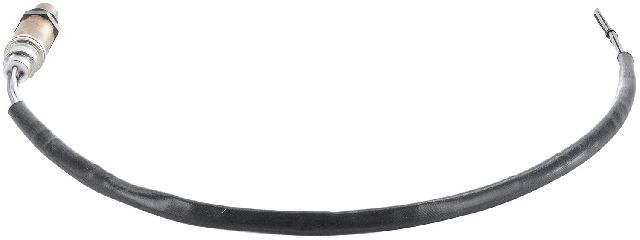
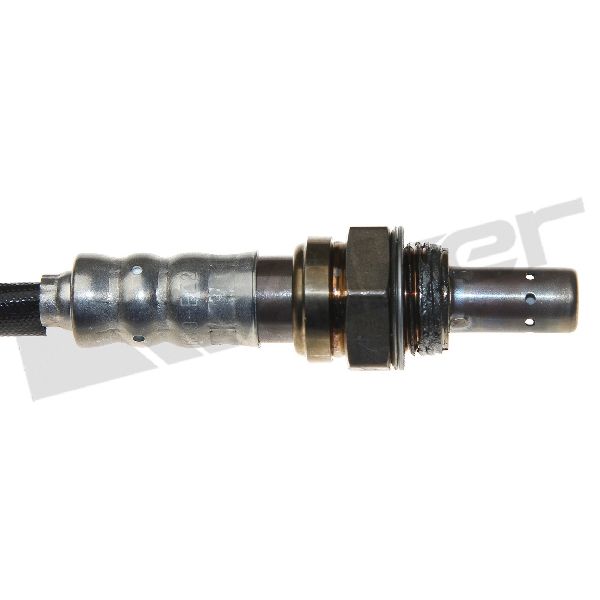
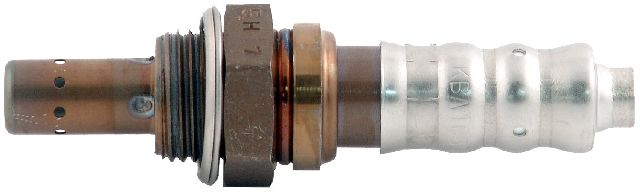
- Upstream Oxygen Sensor (Bank 1, Sensor 1)
(OEM #BL3Z-9F472-A)— This is the most common failure point for code P0030. The internal heater element burns out from age and heat cycles. For 2016+ models, an alternate part number may be FB5Z-9F472-A. Always verify with VIN.
Trusted brands: Motorcraft (DY-1178), NTK (often the OE supplier), Denso, Bosch
OEM price range: $90-$150
Aftermarket price range: $50-$100
Platform-Specific Known Issues
- The primary issue for this repair is the difficult location of the Bank 1, Sensor 1 oxygen sensor. It is tucked between the 3.5L V6 engine and the firewall, making access extremely tight.
- Mechanics and DIYers often must access it from below the vehicle after removing splash shields. Some find success by removing the passenger-side front wheel and wheel well liner.
- Specialized tools are highly recommended, such as a 22mm (or 7/8") offset oxygen sensor socket or a crow's foot socket on a long extension with a swivel joint to gain the necessary leverage. Applying penetrating oil to the sensor threads well before attempting removal is also crucial.
Technical Service Bulletins (TSBs) & Recalls
- TSB Bulletin #TSB-14-0129: A manufacturer service bulletin notes that DTC P0030, along with P0132 and P0135, may be stored in the Powertrain Control Module (PCM) memory and causes the Malfunction Indicator Lamp (MIL) to illuminate.
- TSB Bulletin #TSB 16-0143: This bulletin describes conditions where vehicles may exhibit an illuminated MIL with diagnostic trouble codes P0030 and/or P0130, requiring specific service procedure steps to correct the condition.
Mechanic-Grade Diagnostic Values
- O2 Sensor Heater Element Resistance — expected: 2-10 Ohms at room temperature. Some sources for similar Ford engines state 2.8-6.0 Ohms.. Failure: A reading of 'OL' (infinite resistance) indicates an open circuit. A reading near 0 Ohms indicates a short circuit.
- Heater Circuit Power Supply Voltage — expected: Battery voltage (~12V) at the harness-side connector with Key On, Engine Off.. Failure: 0V or significantly low voltage points to a blown fuse or an open in the power feed wire.
- FORScan Live Data PID: O2S11_CUR (Bank 1, Sensor 1 Current) — expected: Should show a current draw in milliamps (mA) when the PCM commands the heater on (e.g., during a cold start or via an active test).. Failure: A reading of 0 mA when the heater is commanded on suggests an open circuit (bad sensor, blown fuse, or broken wire).
- PCM Fault-Detection Impedance Threshold — expected: The PCM expects to see heater circuit impedance below 44 Ohms.. Failure: The PCM will trigger P0030 if it detects an impedance of more than 44 Ohms in the heater circuit.
Hidden / Shadow Codes Worth Checking
- Mode $06, Test ID $81: On many Ford vehicles, this specific Mode $06 test monitors the oxygen sensor heater circuit performance. A failing value here can indicate a borderline sensor before it consistently sets a P0030 code. (see via A professional scan tool or advanced DIY tool like FORScan that can access Mode $06 data.)
Scan Tool Commands That Help
- FORScan / Ford IDS: On-Demand Self-Test (ODST) or KOEO/KOER tests — These functions can command the O2 heater circuit on and off, allowing a technician to actively monitor voltage (PID: O2S11HTV) and current (PID: O2S11_CUR) to confirm if the sensor, wiring, or PCM driver is at fault without waiting for a full drive cycle. This is useful for verifying a repair or diagnosing an intermittent fault.
Wiring & Ground Locations
- C175B — This is one of the main multi-pin connectors at the Powertrain Control Module (PCM). The PCM is located in the engine bay, typically on the passenger side firewall.. The control wire (ground side) for the Bank 1 Sensor 1 heater circuit runs from the sensor to a specific pin in this connector. A pinout diagram is required to test for continuity or voltage directly at the PCM, which is the final step before condemning the PCM itself.
- G104 — Right side of the engine compartment.. This is a major chassis ground point for various engine components. While the O2 heater is typically grounded through the PCM, a poor main engine or chassis ground can cause floating voltages and erratic behavior in many sensors, including O2 sensors. It should be checked for corrosion and tightness if other electrical issues are present.
Real Owner Repair Stories
- Explorerforum.com user (2014 Ford Explorer AWD 3.5L) — P0030 code, Check Engine Light
❌ Tried (didn't work) Replaced Bank 1 Sensor 1 oxygen sensor, Checked fuse #67, it was good
✅ What actually fixed it The wiring harness for the O2 sensor had sagged and was making intermittent contact with the hot housing of the Power Transfer Unit (PTU). The insulation melted, causing a short in the heater circuit. The fix was to repair the damaged wires and secure the harness away from the PTU with high-temperature zip ties. - NHTSA ODI #11404251 — An owner reported that their vehicle would not start and a diagnostic scan revealed numerous codes including P0030, P0300, and P0141. The owner inspected for loose wires and checked fuses and plugs to address the issue.
OEM Part Supersession History
BL3Z-9F472-A→Motorcraft DY-1178— Standard update from a Ford engineering number to a Motorcraft service part number.
Heads up: DY-1178 is the correct service part for the upstream sensor on both Bank 1 and Bank 2 for the 2011-2019 3.5L V6 Explorer, ensuring compatibility.
Model Year Variations Within This Range
- 2011-2015: Uses fuse #67 (20A) in the under-hood Power Distribution Box for the O2 sensor heater circuit.
- 2016-2019: Following the 2016 facelift, the O2 sensor heater circuit is protected by fuse #92 (15A) in the under-hood Power Distribution Box.
Diagnostic Flowchart
Other Known Issues on This Vehicle
Issues unrelated to this code that are worth knowing about as an owner of this generation:
- Internal Water Pump Failure 🔴 High — Commonly occurs after 75,000-100,000 miles. Failure allows coolant to leak directly into the engine oil, leading to catastrophic engine damage if not caught immediately.
- Power Transfer Unit (PTU) Failure (AWD Models) 🔴 High — The PTU fluid is often cooked by the nearby exhaust, leading to breakdown and failure. Ford specified it as 'lifetime' fluid, so it is often neglected. Symptoms include grinding/shuttering noises and a burnt/propane smell. Failure can damage the transmission case.
- Exhaust Odor / Fumes in Cabin 🟠 Medium — Affects 2011-2017 models. A sulfur or exhaust smell may enter the cabin, especially during hard acceleration or with the A/C in recirculation mode. Multiple TSBs were issued to seal body seams and address the issue. (Ref: TSB 16-0166, TSB 17-0044, TSB 12-12-4)
- Electronic Throttle Body Malfunction 🟠 Medium — Can cause the vehicle to unexpectedly enter 'limp mode' with a wrench light illuminated, resulting in sudden loss of power. More common on earlier 2011-2016 models.
- Electronic Power Steering Rack Failure 🔴 High — Owners report a sudden loss of power steering assist. A recall was issued for 2011-2013 models, but failures are reported on other years as well. (Ref: Recall 14S06)
- Suspension Component Wear 🟡 Low — Premature wear of components like rear toe links, ball joints, and control arm bushings can lead to alignment issues, uneven tire wear, and clunking noises. (Ref: Recall 19S17 (Rear Toe Links))
Used vs. New Parts: Buying Guide for This Vehicle
When a used part is the smart pick: For this repair, a used part is almost never a smart choice. The only exception might be sourcing a used, undamaged wiring connector pigtail from a junkyard harness if the original is melted or broken.
Donor-vehicle mileage cap: roughly under 150000 miles for the part to have meaningful remaining life.
What to inspect on the donor part:
- For a pigtail, ensure the plastic is not brittle.
- Check that the locking tab is intact.
- Verify there is no corrosion on the pins.
- Ensure there are several inches of clean, un-scorched wire attached.
OEM-only on this vehicle (don't cheap out):
- While not strictly OEM-only, using a Motorcraft sensor is highly recommended for guaranteed compatibility and performance. Some aftermarket sensors can have slightly different heater resistances or response times, potentially causing issues.
Aftermarket brands forum-validated for this vehicle:
- NTK (often the original equipment manufacturer for Ford)
- Denso
- Bosch
Brands owners have reported issues with on this vehicle:
- Unbranded, no-name sensors from online marketplaces often have high failure rates, incorrect heater resistance, and may not last long, leading to repeat repairs.
Real Owner Stories
Aggregated from forums and TSBs cited above. Mileages and costs reflect what owners reported in those sources.
2011-2019 Ford Explorer 5th Gen
Symptoms: Owners on explorerforum.com discuss the difficulty of accessing the rear (Bank 1) sensor and confirm that replacement is the common fix for P0030.
What fixed it: Replacement of the Bank 1, Sensor 1 oxygen sensor using a crow's foot socket from below the vehicle.
Source hint: explorerforum.com - General Discussion on P0030/P0135
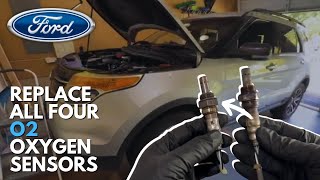
2011-2019 Ford Explorer 3.5L V6
Symptoms: The B1S1 sensor is identified as the rear (firewall side) bank, and the owner demonstrates the extreme difficulty of reaching it.
What fixed it: Replacing the sensor by accessing it from underneath the car.
Source hint: YouTube: The Car Care Nut - How to Replace All 4 Oxygen Sensors
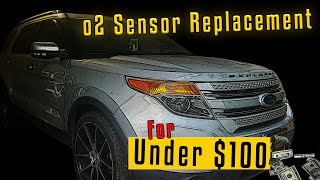
2011-2019 Ford Explorer 3.5L V6
Symptoms: Community members highlight the challenge of accessing Bank 1 compared to the easier Bank 2 sensor.
What fixed it: Using a specific O2 sensor socket with a swivel to remove the upstream sensor.
Source hint: YouTube: mastertech6049 - How to replace upstream O2 sensors
Related OBD-II Codes
Frequently Asked Questions
Where is the Bank 1, Sensor 1 oxygen sensor located on my 3.5L Explorer?
Which fuse should I check for a P0030 code on my 2013 Ford Explorer?
I have a 2017 Explorer with P0030; is the fuse the same as the older models?
What tools do I need to replace the rear O2 sensor on the 3.5L Cyclone V6?
Can I access the Bank 1 sensor without removing the engine?
Why is my AWD Explorer more prone to wiring damage for this code?
Helpful Videos
We Have This Part in Stock

The information in this article is provided for general reference and educational purposes only. Vehicle specifications, procedures, and part compatibility can vary by production date, trim level, and region. Always consult your vehicle's factory service manual and verify part numbers before purchasing or performing repairs. Safety-critical components such as airbags, seat belts, and braking systems should be installed by a qualified professional.
- Ford Explorer:
- 🧭 Diagnostic Flowchart
- 🎬 Helpful Videos
- 🛍️ Shop This Part
- What's Unique About the 2011-2019 Ford Explorer
- Symptoms You May Notice
- Most Likely Causes
- Rare But Worth Checking
- Diagnosis Steps
- Parts You'll Likely Need
- Platform-Specific Known Issues
- Technical Service Bulletins (TSBs) & Recalls
- Mechanic-Grade Diagnostic Values
- Hidden / Shadow Codes Worth Checking
- Scan Tool Commands That Help
- Wiring & Ground Locations
- Real Owner Repair Stories
- OEM Part Supersession History
- Model Year Variations Within This Range
- Other Known Issues on This Vehicle
- Used vs. New Parts: Buying Guide for This Vehicle
- Real Owner Stories
- 2011-2019 Ford Explorer 5th Gen
- 2011-2019 Ford Explorer 3.5L V6
- 2011-2019 Ford Explorer 3.5L V6
- Related OBD-II Codes
- Frequently Asked Questions
- 🎟️ Get 5% Off