
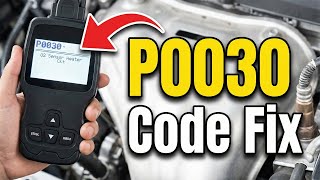
P0030 on 2008-2009 Pontiac G8 6.0L: O2 Sensor Heater Circuit Causes and Fixes
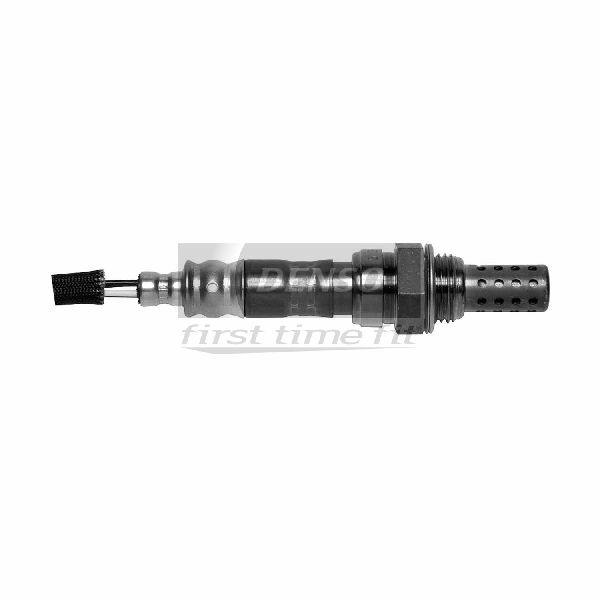
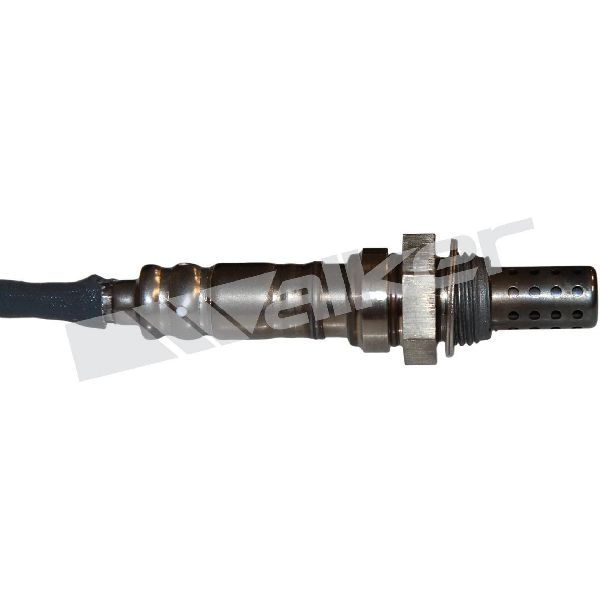
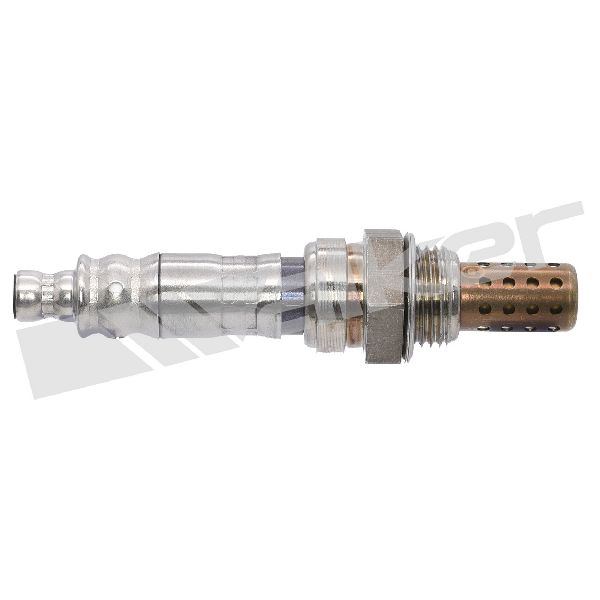
For a 2008-2009 Pontiac G8 with the 6.0L V8, code P0030 is almost always caused by a failed upstream oxygen sensor on the driver's side. The internal heater element burns out, which is a common wear item. Before replacing the sensor, check the 15A fuse in position F33 (marked 'Emission 1') in the underhood fuse box, as a shorted wire can blow it. Expect to pay $60-$120 for a quality aftermarket sensor (like Denso or NTK) and around $150 for an OEM ACDelco part. It's a DIY-friendly fix with a dif
- P0030 points to a fault in the heater circuit for the upstream oxygen sensor on the driver's side.
What's Unique About the 2008-2009 Pontiac G8
The Pontiac G8, an Australian-import Holden Commodore, uses standard GM V8 engine architecture, so this fault is very similar to what's seen on other LS-powered vehicles of the era like the Chevrolet Caprice PPV or GTO. Bank 1 is consistently the driver's side on these V8 engines. A noteworthy issue for this platform, especially if modified with aftermarket long-tube headers, is the potential for the O2 sensor wiring to be improperly secured, leading to contact with hot exhaust pipes, melting the wires, and causing this code. Forum users have documented this exact failure mode.
Symptoms You May Notice
- Check Engine Light is on
- Decreased fuel economy
- Possible rough idle on a cold start
- Failure to pass an emissions inspection
- Slight hesitation or rough running before the engine is fully warmed up
- Replacing the wrong oxygen sensor. P0030 is specifically for Bank 1 (driver's side) and Sensor 1 (upstream, before the catalytic converter). It is easy to mistakenly replace the passenger side sensor (Bank 2) or the downstream sensor (Sensor 2).
- Replacing the sensor without checking the fuse first. If the fuse is blown due to a short, the new sensor will not work and the code will return immediately.
Most Likely Causes
- Failed Bank 1, Sensor 1 Oxygen Sensor 🔴 High Probability → Shop Oxygen Sensor The internal heater element of the oxygen sensor is a common wear-and-tear item that fails over time due to thousands of heating and cooling cycles.
How to confirm: Disconnect the sensor and test the resistance between the two heater circuit pins (typically the two wires of the same color) with a multimeter. A reading of 'OL' (Open Loop) or infinite resistance indicates a broken heater element. A healthy heater circuit typically has a resistance of 2-15 ohms depending on the brand.
Typical fix: Replace the Bank 1, Sensor 1 (upstream, driver's side) oxygen sensor. A 22mm or 7/8" offset oxygen sensor socket is highly recommended for this job. 🎬 Watch this step-by-step guide to replacing the Bank 1 sensor.
Est. part cost: $60-$150 - Damaged Wiring or Connector 🟡 Medium Probability The wiring harness for the O2 sensor can easily fall from its retaining clips and make contact with the hot exhaust manifold or aftermarket headers. This will melt the wire insulation, causing a short circuit that blows the fuse and triggers code P0030. Connectors can also become corroded or filled with debris.
How to confirm: Visually inspect the entire wiring harness for the driver's side upstream O2 sensor from the connector down to the sensor. Look for melted plastic, chafed insulation, or broken wires. Check the connector for corrosion, bent pins, or signs of water intrusion.
Typical fix: Repair the damaged section of wiring using solder and heat shrink tubing. Replace the connector pigtail if it is damaged. Secure the harness away from any heat sources with high-temperature zip ties.
Est. part cost: $10-$30 - Blown Fuse ⚪ Low Probability A short circuit in the heater element of any of the O2 sensors or in the wiring can cause the shared fuse to blow. This is often a symptom of melted wiring rather than the root cause.
How to confirm: Locate the underhood fuse box. 🎬 Watch this video to quickly find your G8 fuse box locations. Inspect the 15A fuse in position F33, labeled "Emission 1". If it is blown, a short circuit exists somewhere in the O2 sensor heater circuits.
Typical fix: Replace the fuse. If the new fuse blows immediately, you must find and fix the short circuit in the wiring or one of the O2 sensors before replacing the fuse again. Do not install a larger fuse.
Est. part cost: $1-$5
Rare But Worth Checking
- Faulty Powertrain Control Module (PCM): → Shop Engine Control Module (ECM) This is very rare. The PCM's internal driver for the heater circuit can fail. All other possibilities, including the sensor, wiring, and fuse, should be exhaustively tested before considering PCM replacement.
Diagnosis Steps
- Verify the code P0030 is present using an OBD-II scanner.
- Check the 15A fuse at position F33 ('Emission 1') in the underhood fuse box. If it's blown, replace it and see if the code returns. If it blows again, a short circuit is present and must be found.
- Raise the vehicle safely. Locate the Bank 1, Sensor 1 oxygen sensor. It is on the driver's side exhaust manifold, before the catalytic converter.
- Carefully inspect the sensor's wiring harness and connector for any signs of melting, chafing, or physical damage. Pay close attention to the area near the exhaust manifold/headers.
- If the wiring appears intact, disconnect the sensor. Test the resistance of the heater element across the two corresponding pins on the sensor side of the connector. A good sensor will have low resistance (typically 2-15 ohms). An infinite resistance reading ('OL') means the sensor's heater is bad and the sensor must be replaced.
- With the key on and engine off, use a multimeter to check for 12V power on the heater power wire in the harness-side connector. Also, check for a good ground on the ground wire.
- If power and ground are present and the sensor's heater element has correct resistance, there may be an issue in the signal wire back to the PCM. If power is missing and the F33 fuse is good, there is a wiring problem between the fuse box and the sensor. 🎬 See a breakdown of common causes and fixes for P0030.
- If all wiring and the sensor check out, the issue may be a faulty PCM, but this is extremely unlikely.
Parts You'll Likely Need
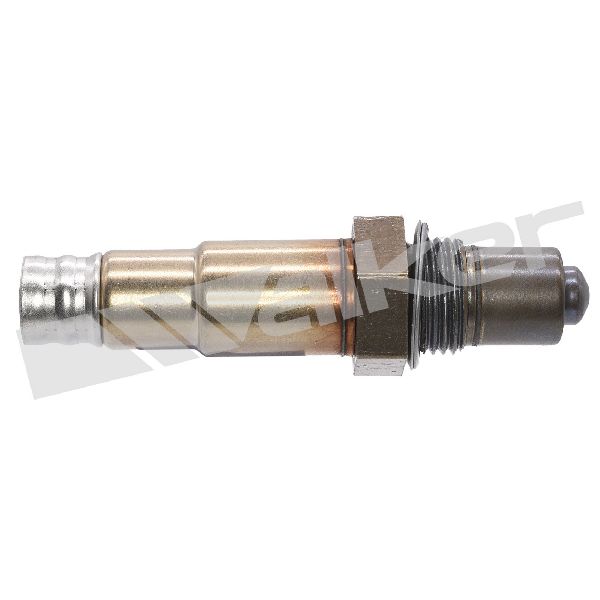
- Upstream Oxygen Sensor (Bank 1, Sensor 1)
(OEM #92068775)— This is the component identified by the code. The internal heater element is the most common point of failure for this code. While Denso is the Original Equipment supplier, many owners report better long-term performance and fuel economy by using the official ACDelco-branded part.
Trusted brands: ACDelco (GM OE, Part #213-1568), Denso (OE Supplier, Part #234-4668), NGK/NTK, Bosch
OEM price range: $110-$150
Aftermarket price range: $60-$120
Related Codes That Often Appear With This One
- P0050 — P0050 is the heater circuit fault for Bank 2, Sensor 1 (passenger side). If both codes appear together, it strongly points to a common cause like a blown F33 'Emission 1' fuse that supplies power to both upstream sensors, or a wiring harness issue affecting both sides.
Platform-Specific Known Issues
- Melted Wiring from Aftermarket Headers: A common story on owner forums involves installing long-tube headers and failing to properly secure the O2 sensor wiring away from the new, hotter pipes. The harness droops, melts on the header, and shorts out, blowing the F33 fuse and causing P0030 and/or P0050.
Mechanic-Grade Diagnostic Values
- O2 Sensor Heater Element Resistance — expected: 3 to 15 Ohms when cold. Some sources state as low as 2.8 Ohms on a new sensor.. Failure: Infinite resistance ('OL' on a multimeter) indicates a burned-out open circuit. Very low resistance (under 1 Ohm) indicates an internal short.
- O2 Sensor Heater Circuit Current Draw — expected: 0.5 - 1.5 Amps when active.. Failure: 0 Amps indicates an open circuit (blown fuse, bad wiring, or bad heater). Current significantly higher than 1.5 Amps indicates a short circuit.
- Heater Circuit Power Supply — expected: Battery Voltage (~12V) at the harness connector with Key On, Engine Off.. Failure: 0V indicates a blown F33 fuse, a bad relay, or an open in the power wire from the fuse box.
- Heater Circuit Ground Control (Advanced) — expected: The ECM provides a pulse-width modulated (PWM) ground. With a multimeter, the voltage may appear to fluctuate or read lower than battery voltage when active. A lab scope is required to see the actual PWM signal.. Failure: A constant ground or no ground when the ECM should be commanding the heater on indicates a wiring or PCM driver issue.
Scan Tool Commands That Help
- Tech2 or equivalent professional scanner: Heater Circuit Actuation Test / Bidirectional Control — This command allows the technician to manually turn the O2 sensor heater on and off from the scan tool. It is used to verify that the ECM driver, wiring, and heater element are all capable of completing the circuit without having to wait for a cold start. You can monitor current draw or use a test light while activating the circuit to confirm functionality.
Wiring & Ground Locations
- E38 ECM Connector X1 — The E38 ECM is located on the driver's side of the engine bay, near the fender.. This connector contains the signal and control wires for the oxygen sensors. For Bank 1 Sensor 1, the signal wires are typically Pin 56 (Low Signal, Tan) and Pin 57 (High Signal, Purple/White). The heater circuit receives 12V power from the F33 fuse (Pink wire at sensor) and the ground is controlled by the ECM via a separate pin on this connector.
- G103 — On the passenger side (RH) of the engine bay, grounding the cylinder head to the ABS bracket/body.. This is a primary engine block ground. A poor connection here can create electrical noise and voltage offsets, potentially causing the ECM to misinterpret sensor readings or trigger false circuit faults.
- G112 — On the driver's side (LH) rear cylinder head, connecting the engine harness to the head.. This ground is critical for the engine harness on the driver's side. A loose or corroded G112 could directly impact the ground reference for the Bank 1 O2 sensor circuits.
OEM Part Supersession History
92068775→ACDelco 213-1568— Standard GM/ACDelco part numbering and branding update.
Heads up: No known incompatibilities. Denso 234-4668 is the direct OE supplier equivalent and is fully compatible.
Model Year Variations Within This Range
- 2008-2009: There are no significant variations in the L76 V8 engine, wiring, or ECM that would affect the diagnosis or repair of code P0030 between the 2008 and 2009 model years.
Diagnostic Flowchart
Other Known Issues on This Vehicle
Issues unrelated to this code that are worth knowing about as an owner of this generation:
- Front Radius Rod / Strut Mount Bushing Failure 🔴 High — Extremely common. Often occurs after 50,000 miles. Causes clunking noises from the front suspension over bumps, poor steering feel, and premature tire wear.
- AFM/DOD Lifter Failure (L76 Engine) 🔴 High — A well-documented and frequent problem, typically occurring between 60,000 and 120,000 miles. A lifter (often on an AFM cylinder 1, 4, 6, or 7) can become stuck or collapse, causing a persistent ticking noise, engine misfires (P0300), and requiring replacement of all lifters and often the camshaft. (Ref: PIP4568P (superseded), 15-06-01-002K)
- 6L80E Torque Converter Shudder 🟠 Medium — Common issue where the vehicle vibrates or shudders during light acceleration at cruising speeds (typically 35-55 mph), often feeling like driving over rumble strips. It's caused by issues with the torque converter lock-up clutch, often exacerbated by degraded or moisture-contaminated transmission fluid. (Ref: Multiple TSBs exist for GM trucks with this transmission, like 18-NA-355, advising a fluid flush with updated Mobil 1 Synthetic LV ATF HP fluid.)
Used vs. New Parts: Buying Guide for This Vehicle
When a used part is the smart pick: Never. Oxygen sensors are a wear-and-tear component with a finite lifespan, similar to spark plugs or brake pads. Installing a used sensor is unreliable, as its remaining service life is unknown. The labor involved in replacement makes it impractical to use a part that may fail again shortly.
What to inspect on the donor part:
- Not applicable. Do not purchase used oxygen sensors.
OEM-only on this vehicle (don't cheap out):
- While not strictly required, using an OEM (ACDelco) or the original equipment supplier (Denso) sensor is highly recommended. These parts are calibrated specifically for the GM E38 engine management system.
Aftermarket brands forum-validated for this vehicle:
- ACDelco (OEM)
- Denso (Original Equipment Supplier)
- NTK
Brands owners have reported issues with on this vehicle:
- Generic 'white-box' or unbranded sensors should be avoided. Some forum users across various GM platforms report mixed results or shorter lifespans with Bosch sensors compared to Denso/NTK on LS-family engines, although Bosch is generally a reputable brand.
Real Owner Stories
Aggregated from forums and TSBs cited above. Mileages and costs reflect what owners reported in those sources.
Pontiac G8 GT (V8)
Symptoms: Check Engine Light with codes P0030 and P0050 for both front O2 heater circuits after long tube header and cam installation.
What fixed it: The user discovered the O2 sensor wires had sagged and melted on the new headers. The fix was to repair the melted wires and secure them away from the exhaust.
Source hint: GRRRR8.net - Pontiac G8 Forum thread title: O2 heater circuit CEL's
2008-2009 Pontiac G8 6.0L L76 V8
Symptoms: P0030 and P0050 codes appearing simultaneously after a header install; suspected both sensors were bad.
What fixed it: Found a melted O2 wire that had popped the F33 'Emission 1' fuse.
Source hint: g8board.com Thread 'O2 heater circuit CEL's'
Related OBD-II Codes
Frequently Asked Questions
Where is the fuse for the O2 sensor heater circuit on my 2008-2009 Pontiac G8?
I just installed long-tube headers on my G8 and now I have a P0030 code. What happened?
Which oxygen sensor do I need to replace for code P0030 on my 6.0L V8?
Should I use aftermarket O2 sensors or stick with GM original equipment?
What size socket do I need to remove the O2 sensor on my G8?
Can a P0030 code cause my G8 to run roughly when I first start it?
Helpful Videos


We Have This Part in Stock


The information in this article is provided for general reference and educational purposes only. Vehicle specifications, procedures, and part compatibility can vary by production date, trim level, and region. Always consult your vehicle's factory service manual and verify part numbers before purchasing or performing repairs. Safety-critical components such as airbags, seat belts, and braking systems should be installed by a qualified professional.
- Pontiac G8:
- 🧭 Diagnostic Flowchart
- 🎬 Helpful Videos
- 🛍️ Shop This Part
- What's Unique About the 2008-2009 Pontiac G8
- Symptoms You May Notice
- Most Likely Causes
- Rare But Worth Checking
- Diagnosis Steps
- Parts You'll Likely Need
- Related Codes That Often Appear With This One
- Platform-Specific Known Issues
- Mechanic-Grade Diagnostic Values
- Scan Tool Commands That Help
- Wiring & Ground Locations
- OEM Part Supersession History
- Model Year Variations Within This Range
- Other Known Issues on This Vehicle
- Used vs. New Parts: Buying Guide for This Vehicle
- Real Owner Stories
- Pontiac G8 GT (V8)
- 2008-2009 Pontiac G8 6.0L L76 V8
- Related OBD-II Codes
- Frequently Asked Questions
- 🎟️ Get 5% Off