
P0030 on 2010-2015 Toyota Prius: Air/Fuel Sensor Heater Circuit Fault Causes and Fixes
On a 2010-2015 Prius, code P0030 almost always means the heater inside the upstream Air/Fuel Ratio (A/F) sensor has failed. Replacing the sensor (Bank 1, Sensor 1) is the fix. Before replacing, check the 'A/F HEATER' or 'EFI MAIN' fuse. Expect to pay ~$100-$150 for an OEM-quality aftermarket sensor (Denso) or ~$200+ for a Toyota-branded part. This is a common DIY repair.
- P0030 on a Gen 3 Prius points directly to a fault in the heater circuit for the upstream Air/Fuel sensor.
- Before buying any parts, check the 'A/F HEATER' or 'EFI MAIN' fuse in the engine bay fuse box.
- The most likely fix is replacing the upstream Air/Fuel Ratio sensor (Bank 1, Sensor 1).
- Denso is the Original Equipment Manufacturer; using a Denso aftermarket sensor (like part #234-9301) is a cost-effective and reliable alternative to the dealer part.
- This repair is considered DIY-friendly and typically requires an O2 sensor socket (22mm or 7/8").
What's Unique About the 2010-2015 Toyota Prius
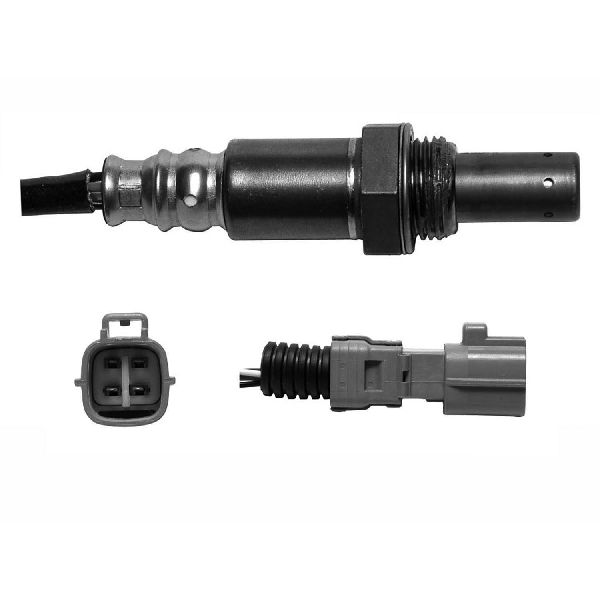
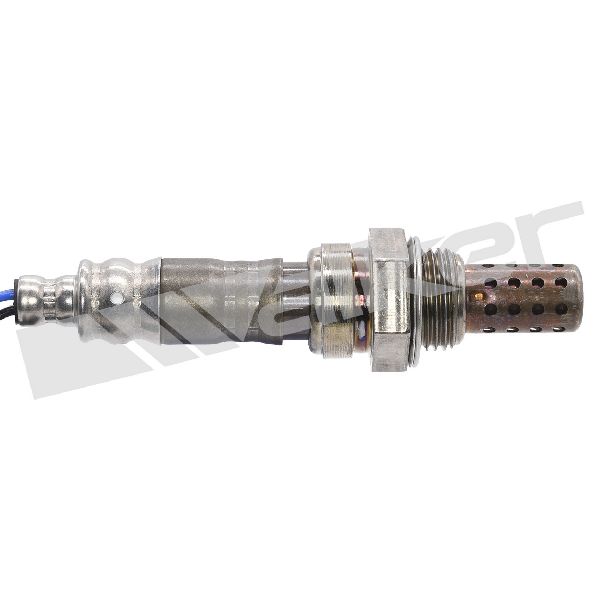
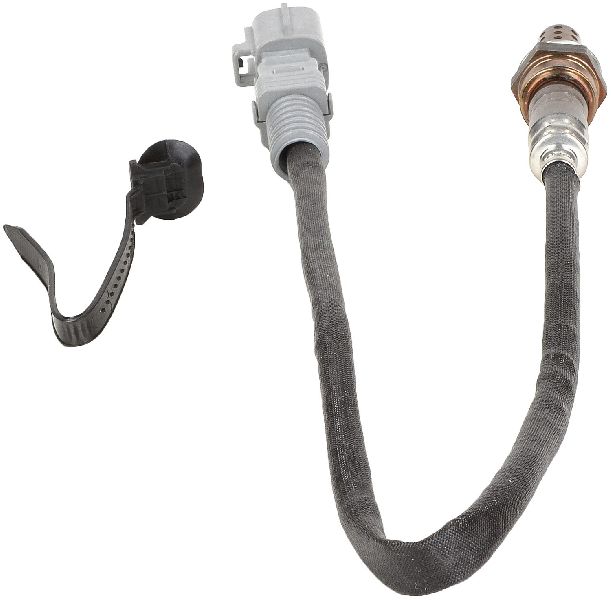
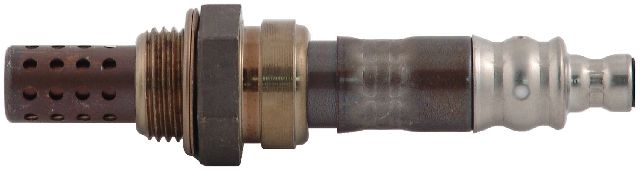
The 2010-2015 (Gen 3) Prius uses a wideband Air/Fuel Ratio sensor in the upstream position, not a traditional narrowband oxygen sensor. While the failure mode—a burned-out heater element—is extremely common across many vehicles, it is a known wear-and-tear item on this platform. The original equipment manufacturer for these sensors is Denso, so choosing a Denso aftermarket part (p/n 234-9301) is often identical to the OEM part (p/n 89467-52060) without the dealership markup.
Symptoms You May Notice
- Check Engine Light is on
- Vehicle will fail an emissions/smog test
- Potentially a slight decrease in fuel economy
- Engine may take longer to enter 'closed-loop' operation, affecting fuel trim adjustments during the first few minutes of driving.
- Replacing the downstream oxygen sensor (Bank 1, Sensor 2). P0030 specifically refers to the upstream sensor (Sensor 1) located before the catalytic converter.
- Assuming the catalytic converter is bad. This code is for an electrical fault in the sensor's heater, not the converter's efficiency.
Most Likely Causes
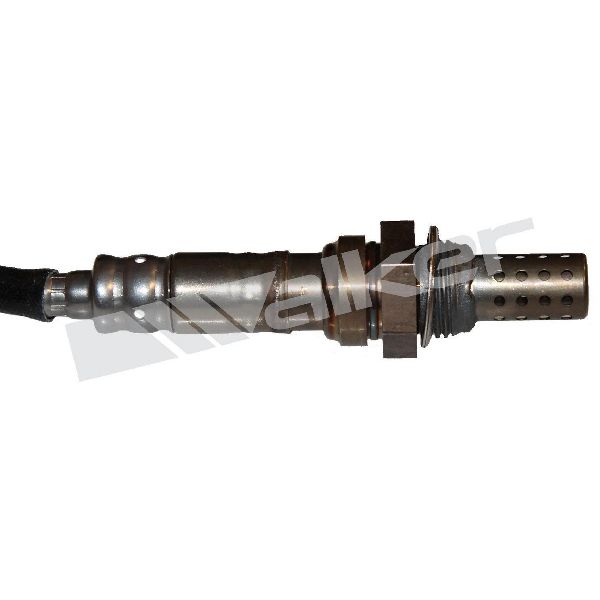
- Failed Air/Fuel Ratio Sensor (Bank 1 Sensor 1) 🔴 High Probability → Shop Oxygen Sensor The internal heater element is a common point of failure due to constant heat cycles over many miles. This is a normal wear-and-tear part.
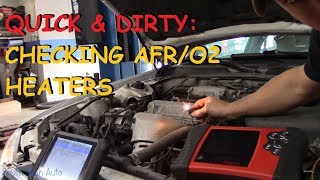
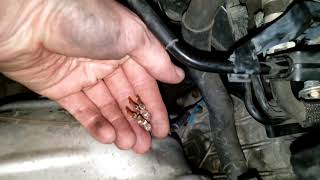
How to confirm: Disconnect the sensor and measure the resistance between the two heater pins 🎬 Watch: How to test the heater circuit with a multimeter. (terminals +B and HT, usually the two same-colored wires). A reading of infinite resistance (an open circuit) confirms the heater has failed. A good sensor should have a low resistance, specifically between 1.8 and 3.4 ohms at 68°F (20°C).
Typical fix: Replace the upstream Air/Fuel Ratio sensor located on the exhaust manifold before the catalytic converter.
Est. part cost: $100-$220 - Blown A/F Heater Fuse 🟡 Medium Probability
How to confirm: Check the fuse box in the engine compartment for a blown fuse labeled 'A/F HEATER' or 'EFI MAIN'. On a Gen 3 Prius, this is typically a 15A or 20A fuse. If the fuse is blown, replace it. If it blows again immediately, a wiring short or a shorted sensor heater is likely.
Typical fix: Replace the blown fuse. If the fuse blows repeatedly, inspect the A/F sensor wiring harness for shorts to ground before replacing the sensor.
Est. part cost: $1-$5 - Damaged Wiring or Connector ⚪ Low Probability The wiring harness is close to the hot exhaust and can become brittle, melted, or damaged over time. Rodents can also chew on the wires.
How to confirm: Visually inspect the wiring harness leading to the A/F sensor for any signs of melting, chafing, or corrosion at the connector. With the key on and engine off, use a multimeter to confirm battery voltage (approx. 12V) is reaching the power pin (+B) on the harness side. Check for damage to the metal tabs inside the connector itself.
Typical fix: Repair the damaged section of the wiring harness or clean/replace the connector.
Est. part cost: $10-$50
Rare But Worth Checking
- Faulty Engine Control Module (ECM): → Shop Engine Control Module (ECM) This is very rare. The ECM is the last thing to suspect after all other possibilities (sensor, fuse, wiring) have been definitively ruled out.
Diagnosis Steps
- Read the code with an OBD-II scanner to confirm P0030 is the primary code.
- Visually inspect the upstream A/F sensor's wiring harness and connector for obvious damage like burns, melting, or frayed wires.
- Locate the fuse box in the engine bay and check the fuse for the 'A/F HEATER' or 'EFI MAIN' circuit. It is often a 15A or 20A fuse. Replace it if it's blown.
- If the fuse is good, disconnect the sensor's electrical connector.
- With the ignition key in the 'ON' position (engine off), use a multimeter to verify there are ~12 volts at the power pin (+B) on the harness-side connector. Lack of voltage points to a wiring issue or a failed EFI MAIN relay.
- Using the multimeter, measure the resistance across the two heater pins (+B and HT) on the sensor itself. A good sensor will have a resistance between 1.8 and 3.4 ohms at room temperature. An infinite resistance reading (OL) means the heater element is broken and the sensor must be replaced.
- If the sensor's resistance is good and the wiring has power, there may be an issue with the ground side of the circuit (controlled by the ECM) or, rarely, the ECM driver itself.
Parts You'll Likely Need
- Air/Fuel Ratio Sensor (Bank 1 Sensor 1)
(OEM #89467-52060)— This is the component that contains the heater element that fails, which is the most common cause of code P0030.
Trusted brands: Denso (OEM) - Part #234-9301, NGK/NTK, Bosch
OEM price range: $200-$250
Aftermarket price range: $100-$160
Related Codes That Often Appear With This One
- P0031 — This code indicates 'Heater Control Circuit Low,' which points to a short to ground or low current draw (less than 0.8 A) in the same circuit.
- P0032 — This code indicates 'Heater Control Circuit High,' which points to an open or short to power, or excessive current draw (more than 10 A) in the same circuit.
Mechanic-Grade Diagnostic Values
- A/F Sensor Heater Element Resistance — expected: 1.8 to 3.4 Ω at 68°F (20°C). Failure: Infinite resistance (OL) indicates an open circuit; near-zero resistance indicates a short. Either requires sensor replacement.
- A/F Sensor Heater Circuit Current Draw — expected: 0.8 to 10.0 Amps. Failure: Current outside this range will trigger a fault. P0030 is a general circuit fault; P0031 may be set for current <0.8A, and P0032 for current >10A.
- Voltage at Harness Connector (Pin +B to Ground) — expected: Battery Voltage (~12V) with Key On, Engine Off. Failure: 0V indicates a problem upstream, such as a blown EFI MAIN fuse, a bad EFI MAIN relay, or a wiring break.
- Techstream Live Data: AFS Voltage B1S1 — expected: Fluctuates around a 3.3V baseline. Should drop below 2.8V on acceleration and rise above 4.0V on deceleration.. Failure: A stuck or unresponsive voltage reading indicates a faulty sensor element, separate from the heater circuit fault.
Scan Tool Commands That Help
- Toyota Techstream: Active Test: 'Control the A/F Sensor Heater (Bank 1 Sensor 1)' — This allows manual activation of the heater circuit. If the heater works during this test, it confirms the integrity of the wiring, fuse, relay, and ECM driver. A code that returns only during normal driving would then point to an intermittent connection or a sensor that fails only when hot.
- Toyota Techstream: Data List PIDs: 'A/F Heater Duty (B1S1)' and 'A/F Heater Current (B1S1)' — Monitor these values during a cold start. You should see a high duty cycle command and a corresponding current draw between 0.8A and 10A. If the duty cycle is high but current is low, it indicates high resistance (bad sensor). If duty cycle is 0%, the ECM is not commanding the heater on, pointing to an ECM logic issue or an immediate fault detection.
Wiring & Ground Locations
- EFI MAIN Relay — Located in the main engine room relay/fuse block, on the driver's side of the engine compartment.. This relay supplies the ~12V power to the A/F sensor's heater circuit. A failure of this relay will cause P0030 even if the fuse and sensor are good.
- EFI MAIN Fuse — Located in the main engine room relay/fuse block, typically a 15A or 20A fuse.. This is the primary fuse protecting the heater circuit. It should be the first component checked.
- EA, EB, EC — These are the primary ground points for the engine wiring harness, located on the engine block and chassis in the engine bay.. While the A/F heater circuit is typically ground-controlled by the ECM, a poor main engine ground can cause floating voltages and erratic behavior in multiple sensor circuits, including this one. A visual inspection for corrosion or looseness at these points is a wise step in any electrical diagnosis.
- A/F Sensor Connector Pins — On the sensor and harness-side connectors.. The heater circuit pins are specifically designated +B (Battery Power) and HT (Heater Control). Knowing these pin names is critical for accurate resistance and voltage testing.
Real Owner Repair Stories
- PriusChat Forums (General Consensus) (Multiple 2010-2015 Toyota Prius, various mileages.) — Check Engine Light with code P0030.
❌ Tried (didn't work) Clearing the code (it returns immediately or on the next drive cycle)., Replacing the sensor with a non-Denso, 'value' brand part (often leads to the code returning or new performance issues).
✅ What actually fixed it In the vast majority of documented cases, the issue was resolved by checking the A/F Heater fuse and, finding it intact, replacing the upstream Air/Fuel Ratio sensor (Bank 1, Sensor 1) with a new Denso (OEM) part (p/n 234-9301).
OEM Part Supersession History
89467-52060→89467-52060— No supersession found. This part number remains the current OEM designation for the entire 2010-2015 model year range.
Model Year Variations Within This Range
- 2010-2015: No significant variations related to the P0030 code, A/F sensor, or its wiring have been documented across the 2010-2015 generation. Engine updates for oil consumption in 2014-2015 did not affect this system.
Diagnostic Flowchart
Other Known Issues on This Vehicle
Issues unrelated to this code that are worth knowing about as an owner of this generation:
- Head Gasket Failure 🔴 High — Commonly reported between 100,000 and 200,000 miles. Symptoms include engine shaking/rattling on startup, coolant loss, and misfire codes (P0300-P0304).
- Excessive Oil Consumption 🟠 Medium — Widespread issue, particularly in higher-mileage vehicles, attributed to low-tension piston rings. Toyota issued TSBs 0168-16 and 0169-16 for inspection and repair procedures. (Ref: T-SB-0168-16, T-SB-0169-16)
- Clogged EGR (Exhaust Gas Recirculation) System 🟠 Medium — Carbon buildup in the EGR valve, cooler, and intake manifold is very common and is a leading contributor to head gasket failure. Cleaning is recommended as preventative maintenance every 50k-75k miles.
- Brake Booster / Actuator Failure 🔴 High — Affects the regenerative braking system, can cause inconsistent or failed braking. Subject to multiple recalls and warranty extension programs (e.g., Customer Support Program ZJB). (Ref: Recalls for 2010 models (e.g., NHTSA 13V235000) and warranty extensions.)
- Hybrid Inverter Failure 🔴 High — Can cause the vehicle to stall while driving. Symptoms include hybrid system warning lights and codes like P0A94. Subject to recalls (e.g., NHTSA 18V684000) and warranty extensions for certain years. (Ref: Recalls 14V053000, 18V684000, 20V012000)
Used vs. New Parts: Buying Guide for This Vehicle
When a used part is the smart pick: For this specific repair, a used part is almost never a smart choice. The A/F sensor's heater element is a wear-and-tear component with a finite lifespan. Installing a used sensor from a junkyard is very likely to result in another failure in the near future.
Donor-vehicle mileage cap: roughly under 25000 miles for the part to have meaningful remaining life.
What to inspect on the donor part:
- If forced to use a used part, source it from the lowest-mileage vehicle possible.
- Visually inspect the sensor tip for heavy carbon fouling or white, ashy deposits, which indicate engine health issues on the donor car.
- Avoid sensors with any visible corrosion on the body or connector.
OEM-only on this vehicle (don't cheap out):
- Air/Fuel Ratio Sensor
Aftermarket brands forum-validated for this vehicle:
- Denso (is the Original Equipment Manufacturer)
Brands owners have reported issues with on this vehicle:
- Generic, unbranded, or 'value-line' sensors are widely reported on forums like PriusChat to fail prematurely, not work correctly out of the box, or cause other performance issues. The cost savings are not worth the risk of having to do the job twice.
Real Owner Stories
Aggregated from forums and TSBs cited above. Mileages and costs reflect what owners reported in those sources.
2011 Toyota Prius 1.8L Hybrid
Symptoms: Heater circuit fault; owner noted that non-Denso parts can be problematic for this specific repair.
What fixed it: Replacement of the upstream Air/Fuel Ratio sensor.
Source hint: PriusChat Forum thread titled 'P0032 - 2011 Prius'
2011 Toyota Prius 1.8L Hybrid — 185000 miles
Symptoms: Deep technical summary of engine health, including head gasket failure and general 2ZR-FXE maintenance.
What fixed it: Complex DIY repairs including head gasket replacement (context for engine durability).
Source hint: BobIsTheOilGuy Forums thread titled '2011 Prius Head Gasket Failure at 185k - Summary'
Related OBD-II Codes
Frequently Asked Questions
Which specific brand of Air/Fuel Ratio sensor should I use for my 2010-2015 Prius?
Can I use a sensor from a 2012 Lexus CT200h to fix my P0030 code?
Where is the fuse for the A/F sensor heater located on a Gen 3 Prius?
Is it worth buying a used A/F sensor from a salvage yard to save money?
Could my Prius's head gasket issue be related to the P0030 code?
What are the specific resistance specs I should look for when testing the sensor?
Helpful Videos


We Have This Part in Stock


The information in this article is provided for general reference and educational purposes only. Vehicle specifications, procedures, and part compatibility can vary by production date, trim level, and region. Always consult your vehicle's factory service manual and verify part numbers before purchasing or performing repairs. Safety-critical components such as airbags, seat belts, and braking systems should be installed by a qualified professional.
- Toyota Prius:
- 🧭 Diagnostic Flowchart
- 🎬 Helpful Videos
- 🛍️ Shop This Part
- What's Unique About the 2010-2015 Toyota Prius
- Symptoms You May Notice
- Most Likely Causes
- Rare But Worth Checking
- Diagnosis Steps
- Parts You'll Likely Need
- Related Codes That Often Appear With This One
- Mechanic-Grade Diagnostic Values
- Scan Tool Commands That Help
- Wiring & Ground Locations
- Real Owner Repair Stories
- OEM Part Supersession History
- Model Year Variations Within This Range
- Other Known Issues on This Vehicle
- Used vs. New Parts: Buying Guide for This Vehicle
- Real Owner Stories
- 2011 Toyota Prius 1.8L Hybrid
- 2011 Toyota Prius 1.8L Hybrid — 185000 miles
- Related OBD-II Codes
- Frequently Asked Questions
- 🎟️ Get 5% Off