
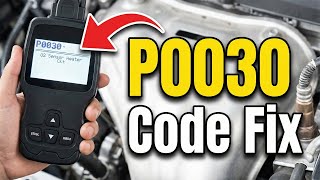
P0030 on 2006-2012 Toyota RAV4 3.5L V6: A/F Sensor Heater Circuit Causes and Fixes
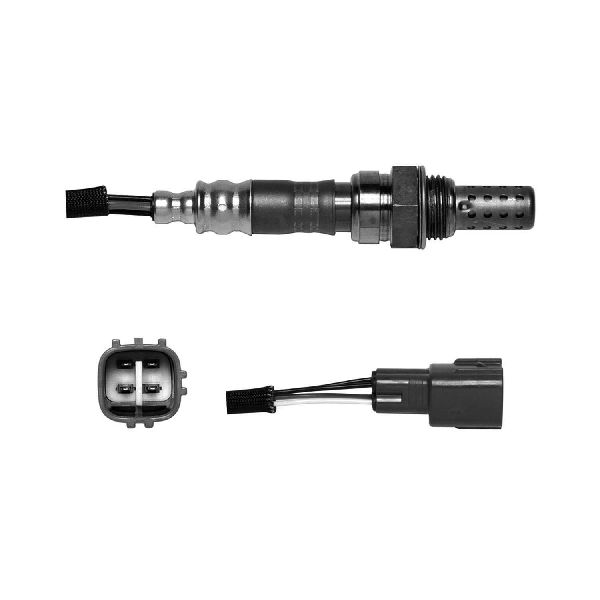
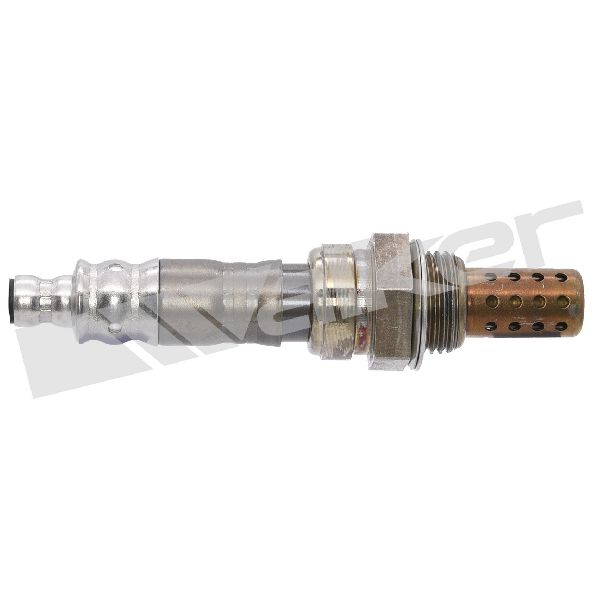
P0030 on a RAV4 V6 almost always means the Bank 1, Sensor 1 Air/Fuel (A/F) sensor has failed. This is the sensor on the rear exhaust manifold against the firewall. The part is around $70-$150, but replacement is notoriously difficult due to tight access, making labor a significant cost.
- P0030 on this RAV4 points to the A/F sensor on the REAR exhaust manifold, near the firewall.
- The most likely cause is a failed sensor; however, always check the 'A/F HEATER' fuse first.
- Due to the sensor's difficult location, this is a challenging DIY repair that may be best left to a professional if you are not experienced.
- Using a high-quality replacement sensor, such as the OEM-supplier Denso (part 234-9052), is highly recommended for longevity.
What's Unique About the 2006-2012 Toyota RAV4
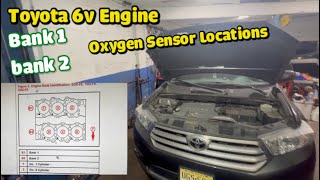
On the 2GR-FE V6 engine, Bank 1 is the cylinder bank located against the firewall. This makes accessing the Bank 1, Sensor 1 A/F sensor notoriously difficult compared to the easily accessible Bank 2 sensor at the front of the vehicle. Many DIY mechanics and even some shops misdiagnose this, replacing the wrong sensor. 🎬 Watch: Identify the correct sensor locations for Toyota V6 engines The repair requires removing the plastic engine covers, the air filter housing, and the windshield cowl to gain the necessary clearance from above. Specialized tools like a 22mm offset or crow's foot oxygen sensor socket are highly recommended to navigate the tight space.
Symptoms You May Notice
- Check Engine Light is on.
- Decreased fuel economy.
- Vehicle may fail an emissions test.
- Rough or erratic idle on a cold start.
- Abnormal acceleration or poor engine performance.
- Replacing the wrong sensor (e.g., Bank 2, Sensor 1 at the front of the engine, or the downstream Sensor 2 after the catalytic converter). P0030 is specifically for the upstream sensor on the rear bank, near the firewall.
Most Likely Causes
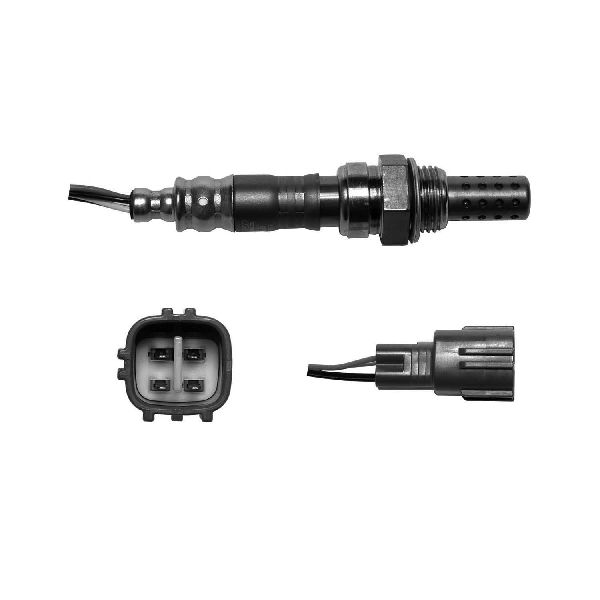
- Failed Air/Fuel Ratio Sensor (Bank 1, Sensor 1) 🔴 High Probability → Shop Oxygen Sensor The internal heater element is a common failure point on high-mileage vehicles due to constant, extreme heat cycles. This is the most frequent cause for P0030.
How to confirm: Disconnect the sensor and use a multimeter to measure the resistance between the two heater pins (usually the two same-colored wires, often black). A healthy sensor for a 2GR-FE should read between 1.8 and 3.4 ohms at 20°C (68°F). An open circuit (infinite resistance, or 'OL' on the meter) or a reading far outside the spec confirms a failed heater element.
Typical fix: Replace the Bank 1, Sensor 1 Air/Fuel Ratio Sensor. This sensor is located on the rear exhaust manifold, against the firewall. Access is from the top of the engine bay after removing the cowl and air intake assembly.
Est. part cost: $70-$180 - Blown Fuse or Relay ⚪ Low Probability
How to confirm: Check the fuse box in the engine compartment for a blown fuse labeled 'A/F HEATER' or 'AF'. On a 2008 RAV4, this is a 20A fuse in the main engine bay fuse box. Consult the owner's manual or fuse box lid for the exact location and rating.
Typical fix: Replace the blown fuse. If the fuse blows again immediately, a short circuit exists in the wiring that must be traced.
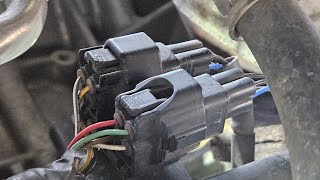
Est. part cost: $1-$5 - Damaged Wiring or Connector ⚪ Low Probability The wiring harness is close to hot exhaust components and can become brittle, melt, or corrode over time. Rodent damage is also a possibility.
How to confirm: Visually inspect the wiring harness and connector for the Bank 1, Sensor 1 A/F sensor. Look for any signs of melting, chafing, corrosion, or rodent damage.
Typical fix: Repair or replace the damaged section of the wiring harness or the connector.
Est. part cost: $10-$50
Rare But Worth Checking
- Faulty Engine Control Module (ECM): → Shop Engine Control Module (ECM) This is extremely rare. The ECM should only be considered after all other possibilities, including the sensor, fuse, and wiring, have been thoroughly ruled out.
Diagnosis Steps
- Scan for codes: Confirm P0030 is the only code present. If other codes exist, address them first.
- Check the fuse: Locate and inspect the 'A/F HEATER' fuse (20A) in the engine bay fuse box. Replace if blown.
- Visually inspect: Carefully inspect the wiring and connector for the Bank 1, Sensor 1 A/F sensor (on the rear exhaust manifold) for any signs of melting, corrosion, or damage.
- Test the heater circuit resistance: Disconnect the sensor. Use a multimeter set to Ohms to measure the resistance across the two heater pins on the sensor side (typically the two wires of the same color). A reading of infinity (OL) or very high resistance indicates a failed heater element. A correct reading is between 1.8 and 3.4 ohms.
- Test for power: With the sensor disconnected and the ignition ON (engine OFF), use a multimeter to check for 12V power at the corresponding pin on the harness-side connector.
- If power is present and the sensor's resistance is bad, replace the sensor. If power is not present and the fuse is good, there is a wiring issue between the fuse box and the sensor that needs to be traced.
Parts You'll Likely Need
- Air/Fuel Ratio Sensor (Bank 1, Sensor 1)
(OEM #89467-42080)— This is the upstream sensor on the rear cylinder bank. Its internal heater element is the most common failure point that triggers code P0030.
Trusted brands: Denso (OEM supplier)
OEM price range: $150-$220
Aftermarket price range: $70-$150
Technical Service Bulletins (TSBs) & Recalls
- TSB-ST001-07: Addresses clunking noise from the intermediate steering shaft, a common unrelated issue on this platform.
Platform-Specific Known Issues
- Extreme Difficulty Accessing Bank 1 Sensor 1: Owners consistently report that replacing the Bank 1, Sensor 1 A/F sensor is a very challenging DIY job. Unlike the front sensor (Bank 2), the rear sensor is buried against the firewall, underneath the windshield cowl and intake plenum. A significant amount of disassembly is required to even see the sensor, let alone get a tool on it. 🎬 Watch: A mechanic's guide to accessing the rear bank sensors Many owners recommend using a combination of extensions and a specialized 22mm crow's foot or flexible-head O2 sensor socket.
Mechanic-Grade Diagnostic Values
- A/F Sensor Heater Element Resistance — expected: 1.8 to 3.4 Ω at 20°C (68°F). Failure: A reading of 'OL' (Open Loop/infinite resistance) or a value significantly outside the specified range indicates a failed heater element.
- A/F Sensor Heater Circuit Voltage — expected: Approximately 12V (Battery Voltage) at the harness-side connector with Key On, Engine Off.. Failure: A reading of 0V indicates an open in the power supply side of the circuit (e.g., blown A/F HEATER fuse, bad relay, or broken wire).
- A/F Sensor Heater Circuit Current Draw — expected: The ECM expects the current to be between 0.8 A and 10 A.. Failure: A current draw below 0.8 A or above 10 A will trigger a fault code. This requires a clamp-on ammeter and is typically performed during an advanced diagnostic test.
Hidden / Shadow Codes Worth Checking
- Mode $06, TID $01, CID $01: This refers to the diagnostic test data for the Bank 1, Sensor 1 Heater Circuit Monitor. A technician can view the raw test values from the ECM's last self-test to see if the circuit passed or failed, and by how much. This is useful for diagnosing intermittent faults that may not set a hard code immediately. (see via Professional scan tool with Mode $06 capability, such as Toyota Techstream.)
Scan Tool Commands That Help
- Toyota Techstream: Active Test -> "Control the A/F Sensor Heater (Bank 1 Sensor 1)" — This command allows a technician to manually turn the sensor's heater ON and OFF. It is the definitive way to test the entire circuit. If the heater can be commanded on, you can then verify voltage at the sensor connector and check for current draw, confirming the integrity of the wiring, fuse, relay, and ECM driver.
Wiring & Ground Locations
- A/F HEATER Fuse — In the main engine compartment fuse/relay box. For a 2008 model, it is a 20A fuse.. This fuse provides the 12V power to the A/F sensor's heater element. It is the first electrical component to check after scanning the codes.
- Engine Harness Grounds — The 2GR-FE engine harness has key ground points on the valve covers that connect to the chassis frame near the strut towers.. A poor engine ground can cause a variety of electrical issues and incorrect sensor readings. While unlikely to be the sole cause of P0030 without other symptoms, ensuring these grounds are clean and tight is a critical step in any electrical diagnosis.
- ECM Connector E5, Pins 1 (HA1A) and 2 (E1) — At the Engine Control Module (ECM), located on the left side of the engine compartment.. Pin 1 (HA1A) is the heater control signal wire from the ECM to the Bank 1 Sensor 1. Pin 2 (E1) is the sensor ground. Advanced diagnostics would involve back-probing these pins to check for the pulse-width modulated ground signal from the ECM, confirming the ECM driver is functioning.
OEM Part Supersession History
89467-42080→89467-0R010— Part consolidation and potential design updates by Toyota.
Heads up: Some parts catalogs incorrectly list 89467-42080 as a front/Bank 2 sensor. However, it is widely cross-referenced as the correct part for the rear Bank 1 sensor on this vehicle. Always confirm fitment with a VIN, but be aware that 89467-0R010 is the current OEM replacement for the original part number.
Model Year Variations Within This Range
- 2006-2012: No significant variations have been documented for the 2GR-FE engine's A/F sensor system within this model year range that would alter the diagnosis or repair of a P0030 code.
Diagnostic Flowchart
Other Known Issues on This Vehicle
Issues unrelated to this code that are worth knowing about as an owner of this generation:
- VVT-i Oil Line Rupture 🔴 High — Common on 2006-2008 models with the original rubber hose. Failure can lead to rapid oil loss and catastrophic engine damage. An updated all-metal line was later issued. (Ref: While not a formal recall, an updated part was released. Some owners mention TSB 0094-11, but that is for 2AZ engine oil consumption.)
- Water Pump Failure 🟠 Medium — A known weak point on the 2GR-FE, often failing prematurely (e.g., before 100k miles). Replacement is labor-intensive and costly, sometimes exceeding $1,000.
- Intermediate Steering Shaft Clunk 🟡 Low — A clunking or knocking noise may be heard when turning the steering wheel. This is due to a worn intermediate steering shaft. (Ref: TSB-ST001-07 was released to address diagnosis and repair, especially in high-salt areas.)
- Ignition Coil Failure 🟡 Low — Failure of one or more ignition coils is fairly common, causing a misfire (shaking/rough running) and a flashing check engine light.
Used vs. New Parts: Buying Guide for This Vehicle
When a used part is the smart pick: For this specific repair, a used part is almost never a smart choice. The labor to access the Bank 1 sensor is significant, so installing a part with an unknown and limited lifespan creates a high risk of having to repeat the difficult job soon.
Donor-vehicle mileage cap: roughly under 50000 miles for the part to have meaningful remaining life.
What to inspect on the donor part:
- If forced to use a used part, source it from a vehicle with the lowest possible mileage.
- Visually inspect the part for any physical damage, corrosion on the connector, or heavy carbon fouling on the sensor tip.
- Ask for the VIN of the donor vehicle to verify its history if possible.
Aftermarket brands forum-validated for this vehicle:
- Denso: Denso is the original equipment manufacturer (OEM) for Toyota. The Denso-branded aftermarket part (e.g., 234-9052) is identical to the Toyota-branded part from the dealer but is significantly less expensive. This is the most highly recommended replacement.
- NTK/NGK: Also a reputable OEM supplier for many manufacturers and considered a reliable alternative if Denso is unavailable.
Brands owners have reported issues with on this vehicle:
- Unbranded/generic parts from online marketplaces like Amazon or eBay. Forum users report a high failure rate and incorrect readings from these parts, often leading to the code returning shortly after installation.
- While Bosch is a major sensor manufacturer, for Toyota A/F sensors, Denso or NTK are consistently reported by mechanics to be the most compatible and reliable choices.
Real Owner Stories
Aggregated from forums and TSBs cited above. Mileages and costs reflect what owners reported in those sources.
2012 Toyota RAV4 v6
Symptoms: Check engine light and warning lights were on.
What fixed it: Replaced the oxygen sensor with an NTK Oxygen (O2) Sensor.
Source hint: Partsource Reviews - '25685 NTK Oxygen (O2) Sensor'
2007 Toyota RAV4 V6
Symptoms: Check engine light with code for bank 1 sensor 2 malfunction.
What fixed it: Replacement of the oxygen sensor (B1S2), though the B1S1 sensor is noted as significantly more difficult to access.
Source hint: RAV4World - 'RAV4 Replace Bank1 Sensor2 (B1 S2) Oxygen Sensor Toyota 2007 V6'
2008 Toyota RAV4 V6 — ~125000 miles
Symptoms: The internal heater element failed due to constant, extreme heat cycles on a high-mileage vehicle.
What fixed it: Replacement of the Bank 1, Sensor 1 Air/Fuel Ratio Sensor located on the rear exhaust manifold.
Source hint: Article Context - Common Causes (Failed Air/Fuel Ratio Sensor)
Related OBD-II Codes
Frequently Asked Questions
Where is the Bank 1 Sensor 1 located on my RAV4 V6, and is it easy to replace?
What is the correct resistance for a new A/F sensor on the 2GR-FE engine?
Which fuse should I check for a P0030 code on my 2008 RAV4?
Does TSB-ST001-07 relate to my P0030 check engine light?
Are there any other major engine issues I should watch for on my 2006-2012 RAV4 V6?
Can I use an aftermarket sensor to fix P0030?
Helpful Videos

We Have This Part in Stock


The information in this article is provided for general reference and educational purposes only. Vehicle specifications, procedures, and part compatibility can vary by production date, trim level, and region. Always consult your vehicle's factory service manual and verify part numbers before purchasing or performing repairs. Safety-critical components such as airbags, seat belts, and braking systems should be installed by a qualified professional.
- Toyota RAV4:
- 🧭 Diagnostic Flowchart
- 🎬 Helpful Videos
- 🛍️ Shop This Part
- What's Unique About the 2006-2012 Toyota RAV4
- Symptoms You May Notice
- Most Likely Causes
- Rare But Worth Checking
- Diagnosis Steps
- Parts You'll Likely Need
- Technical Service Bulletins (TSBs) & Recalls
- Platform-Specific Known Issues
- Mechanic-Grade Diagnostic Values
- Hidden / Shadow Codes Worth Checking
- Scan Tool Commands That Help
- Wiring & Ground Locations
- OEM Part Supersession History
- Model Year Variations Within This Range
- Other Known Issues on This Vehicle
- Used vs. New Parts: Buying Guide for This Vehicle
- Real Owner Stories
- 2012 Toyota RAV4 v6
- 2007 Toyota RAV4 V6
- 2008 Toyota RAV4 V6 — ~125000 miles
- Related OBD-II Codes
- Frequently Asked Questions
- 🎟️ Get 5% Off